Discover how to streamline your document management using Windows Fax and Scan to create PDFs. This guide explores efficient alternatives and detailed steps to enhance your productivity. Keep reading to master everything about Windows Fax and Scan PDF.
Part 1. Can I Create a PDF with Windows Fax and Scan?
While Windows Fax and Scan is a utility designed primarily for scanning documents and sending faxes, it does not natively support creating PDF files directly from scans. Typically, it saves scanned documents in image formats such as JPEG or TIFF. Users looking to create PDFs from scanned documents would need to use additional software to convert these images into PDF format.
For a more streamlined and efficient alternative, consider using UPDF for Windows. UPDF not only allows for direct scanning to PDF but also offers a suite of editing tools that enhance your productivity. With UPDF, you can easily convert scanned images into searchable and editable PDF documents, manage pages, and even annotate or sign your PDFs. To experience a more advanced way of managing your documents, try UPDF for Windows today and see how it simplifies your workflow.
Windows • macOS • iOS • Android 100% secure
Part 2. How to Scan Documents Using Windows Fax and Scan to PDF
Scanning documents into PDF format using Windows Fax and Scan is a straightforward process, albeit with a few steps involved. Below is a detailed guide on how to convert your scanned documents into PDF files using this built-in Windows utility:
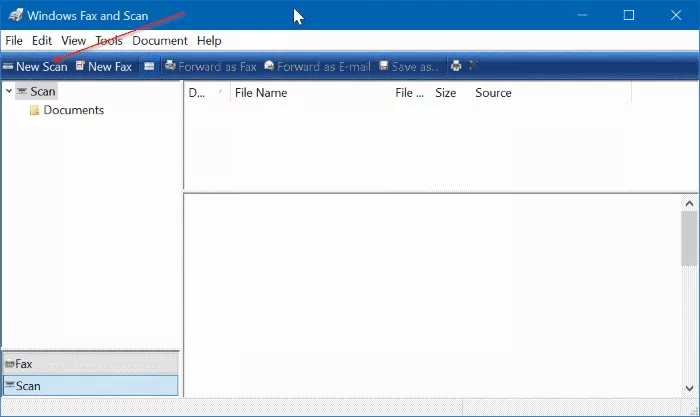
Step 1: Launch the Program
Open the Windows Fax and Scan program. Once opened, locate and click on the "New Scan" button found in the toolbar. If the Windows Fax and Scan app is not available on your PC, you might need to use the official Scan app as an alternative.
Step 2: Configure Your Scanner
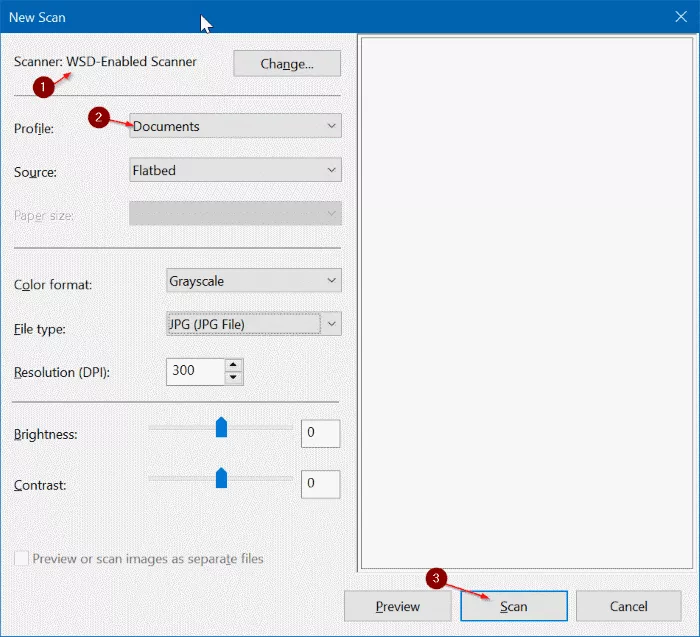
Before scanning, make sure your scanner is correctly configured. Click the "Change" button in the Scanner section to view or select a different scanner if multiple devices are connected.
Step 3: Set Scan Preferences
In the Profile section, choose whether you are scanning a photo or a document. At this point, you can also adjust other default settings to fit your specific scanning needs.
Step 4: Start Scanning
Click the "Scan" icon to initiate the scanning of your hard copy document placed in the scanner.
Step 5: Print to PDF
Once the scanning completes, navigate to the "File" menu and select the "Print" option. This step is crucial as it is where you will convert your scan into a PDF. In the Print dialog, choose "Microsoft Print to PDF" from the printer drop-down box, then click the "Print" button.
Step 6: Save Your PDF
A "Save Print Output As" dialog will appear, prompting you to name your scanned file and choose a save location. After entering the information, click the "Save" icon to finalize the PDF file.
While Windows Fax and Scan provides a viable method to scan to PDF, a more efficient alternative is using UPDF for Windows. UPDF allows for seamless scanning to PDF, complete with extensive editing and file management capabilities. For a streamlined document scanning and management experience, try UPDF for Windows today.
Part 3. How to Scan Paper Documents to Multi-page PDFs without Fax and Scan on Windows
Transitioning from the traditional Windows Fax and Scan, those needing to handle multi-page documents might find UPDF for Windows a more tailored solution. This tool is especially valuable for users seeking efficiency and functionality that extends beyond what conventional methods offer.
Step-by-Step Guide to Creating PDFs from a Scanner with UPDF
UPDF for Windows stands out by enabling direct PDF creation from scanners. This feature is helpful for users who require streamlined workflows and enhanced control over document management. Before beginning, ensure your scanner is connected to your computer.
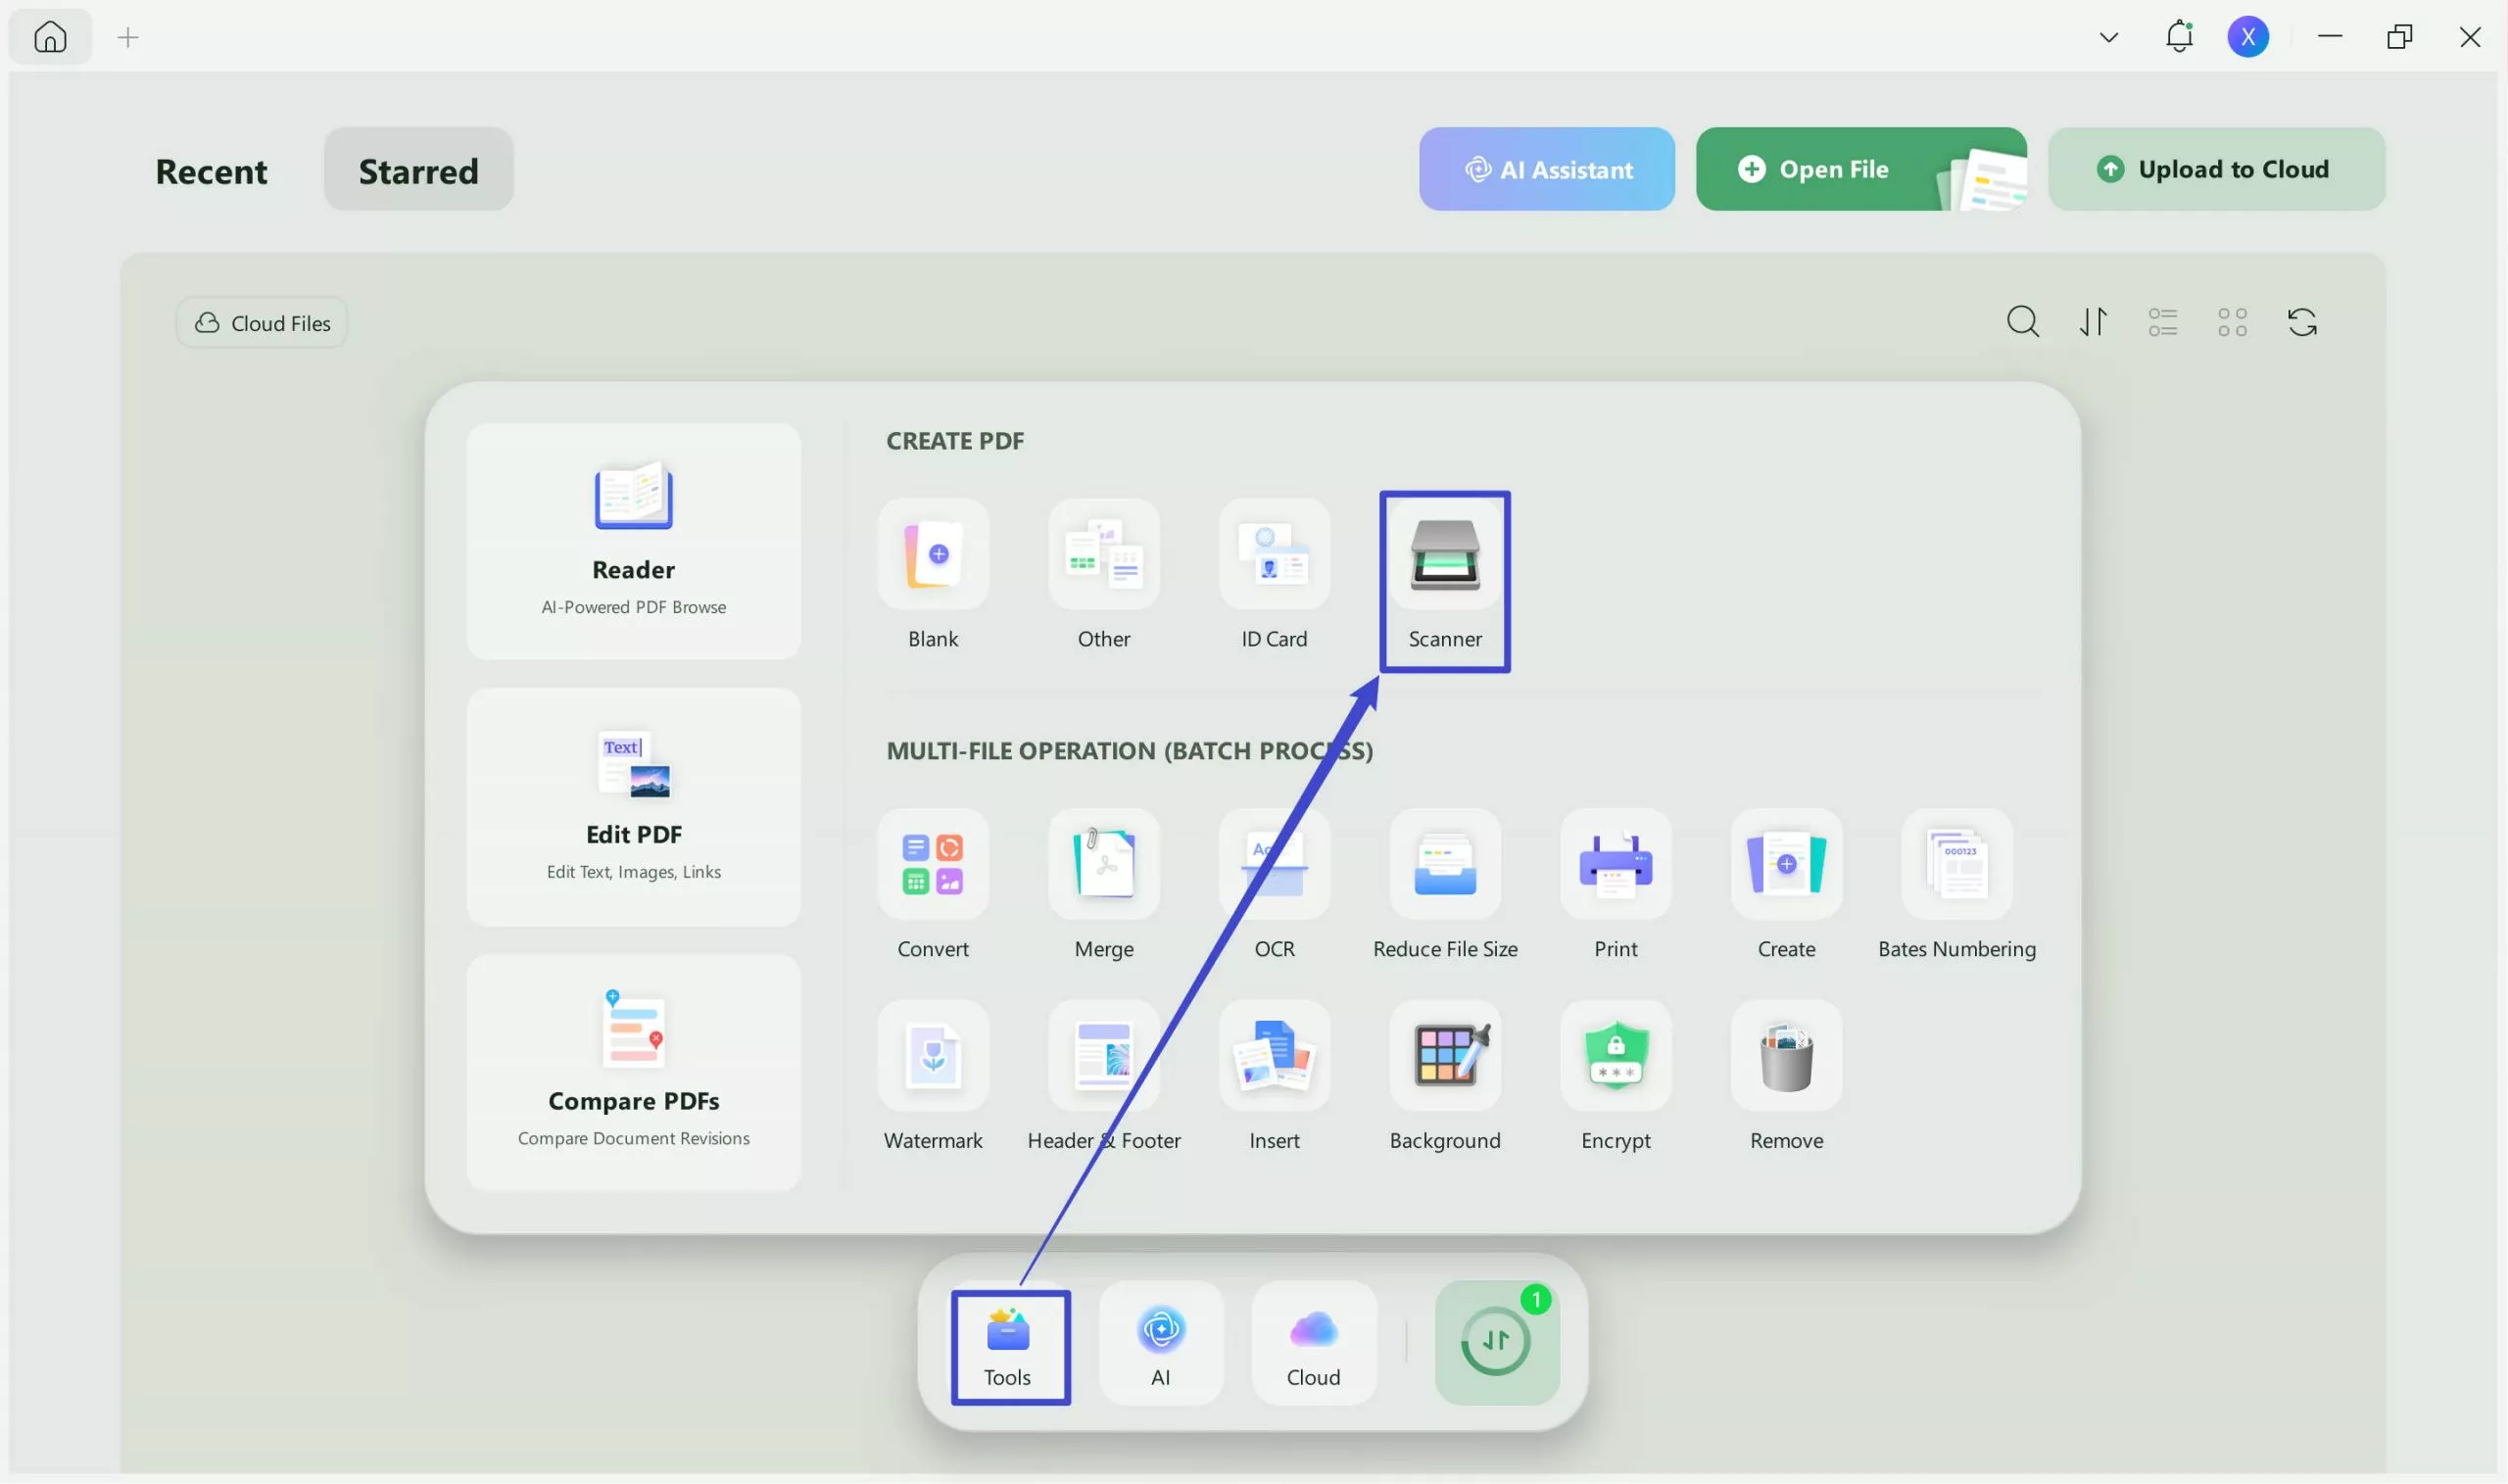
Step 1: Download and launch UPDF for Windows and go to the "Tools" tab. Select "Scanner" to start the process.
Windows • macOS • iOS • Android 100% secure
Note:
Step 2: Select your scanner from the list provided, ensuring it's already connected to your computer.
Step 3: Adjust the scanning settings. You can choose between "Flatbed" or "Document Feeder" modes, each suitable for different document types:
- Flatbed Mode: Open the scanner lid, place your document or file face down on the glass, align it properly, and close the lid. Adjust settings for color (full color or grayscale) and paper size, using either preset options or custom dimensions.
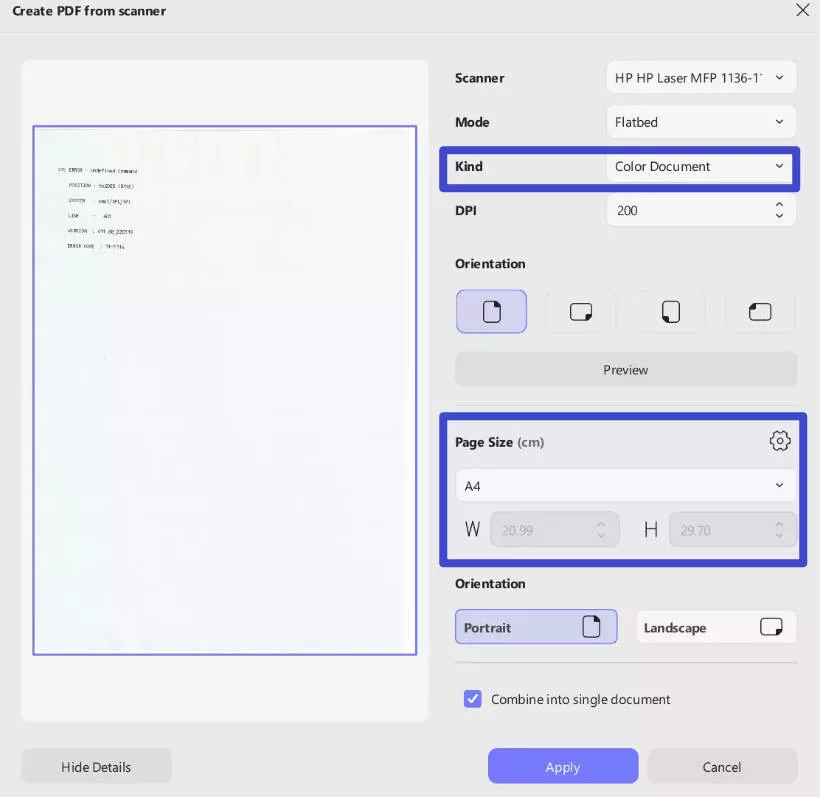
- Document Feeder Mode: Load your documents into the feeder tray, ensuring they're aligned and unattached by staples or clips. Choose settings like paper size, color mode, and orientation, with options to set documents as double-sided if needed.
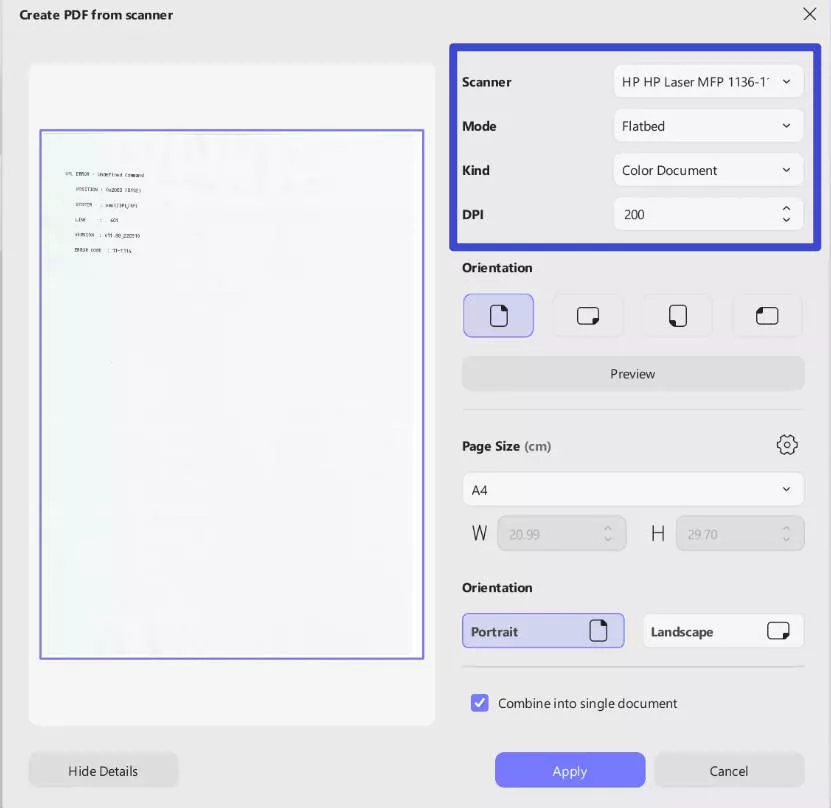
Step 4: Click "Preview" to see a sample of how your scanned document will appear. Adjust settings if necessary.
Step 5: Decide if you want to merge your scanned pages into a single document and whether to perform OCR (Optical Character Recognition) to make the PDF searchable and editable.
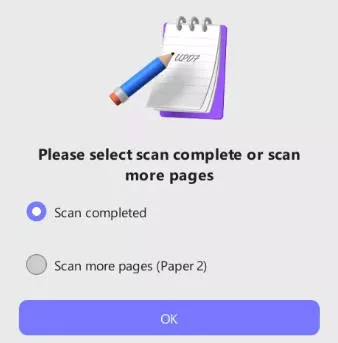
Step 6: Complete the scanning process. UPDF will automatically compile and open the newly created PDF.
This streamlined process offered by UPDF not only simplifies the creation of multi-page PDFs but also enhances productivity by integrating advanced features like OCR and various document handling options. For a more efficient scanning experience on Windows, UPDF is an excellent choice.
Part 4. Bonus: What Additional Features Does UPDF Offer Beyond PDF Scanning?
While UPDF offers a scanning feature, it also has nearly a dozen other features to help with reading and document management. This includes the following:
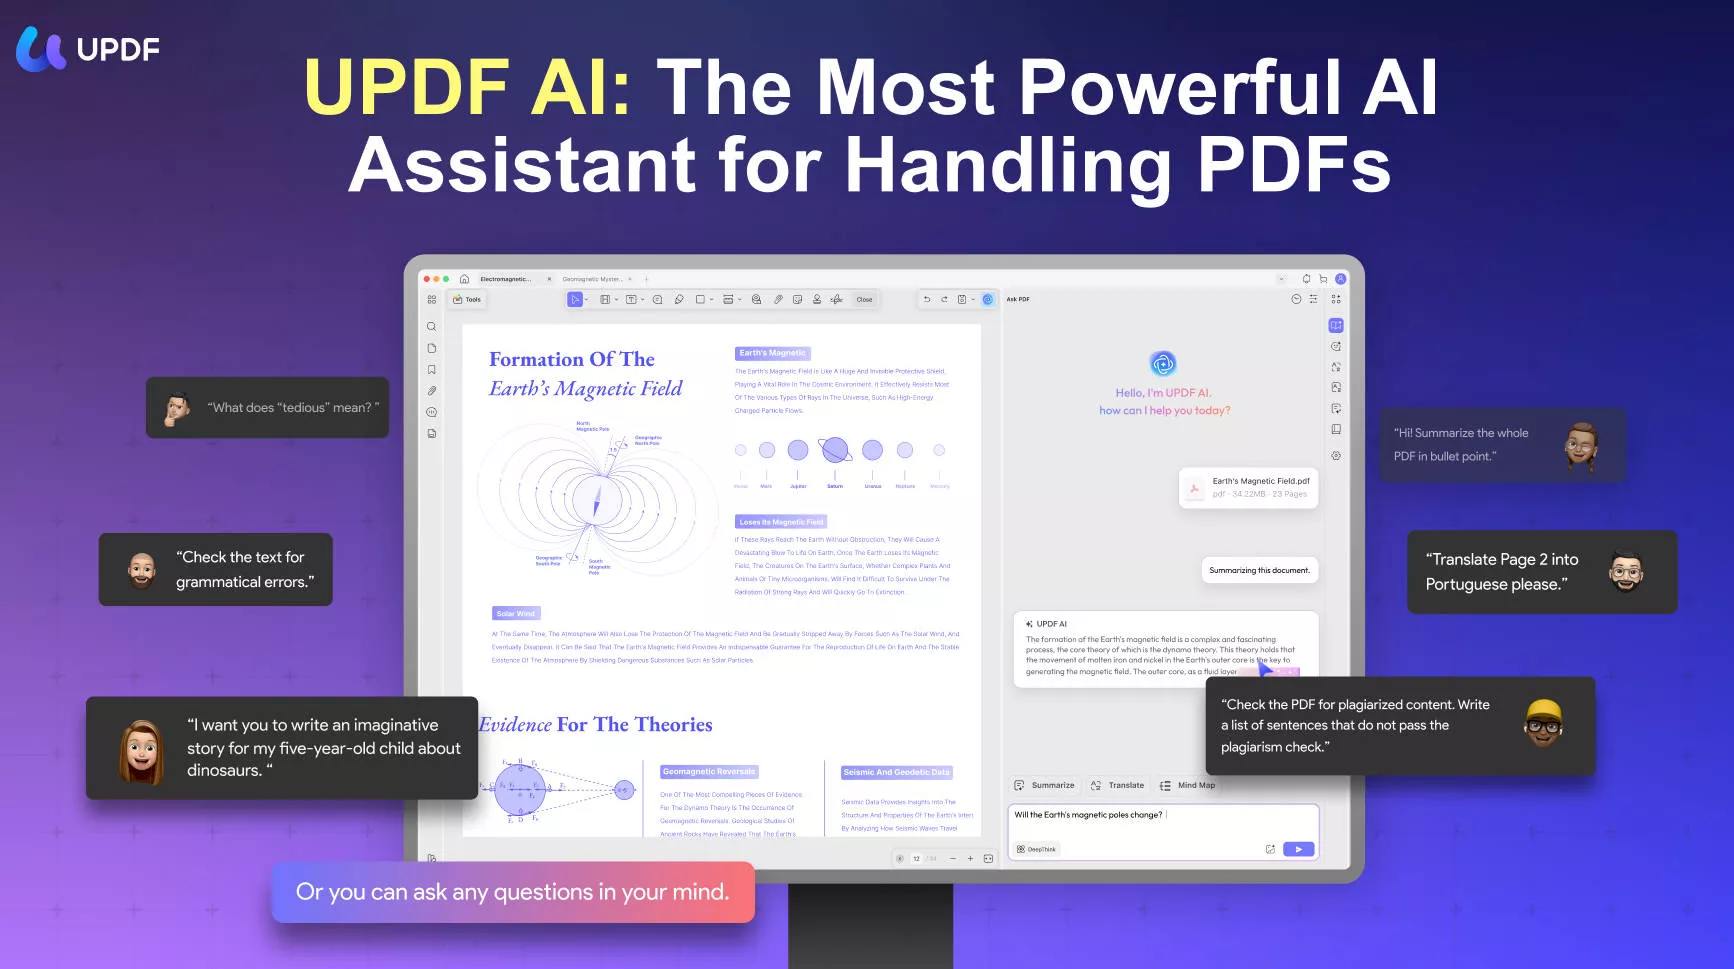
- UPDF AI: UPDF's AI capabilities enable you to summarize long PDF contents, translate them into different languages, and provide explanations for better understanding.
- Convert PDFs: Quickly and accurately convert PDFs to and from various formats like Word, Excel, and more, maintaining the original layout and format integrity.
- OCR PDF: The advanced OCR feature in UPDF can recognize text in scanned PDFs across 38 languages, making your documents editable and searchable.
- Batch PDF: Insert a single PDF into multiple files collectively without quality loss.
- Edit PDF: UPDF allows you to edit text and images in your PDFs as easily as you would in a Word document.
- Organize PDF: Efficiently manage your PDF pages by extracting, splitting, rotating, reordering, or adding new pages.
- Compress PDFs: Decrease the file size of your PDFs without compromising quality.
- View PDF: Improve your PDF readability with multiple layouts, including single-page view, two-page view, scrolling, or two-page scrolling.
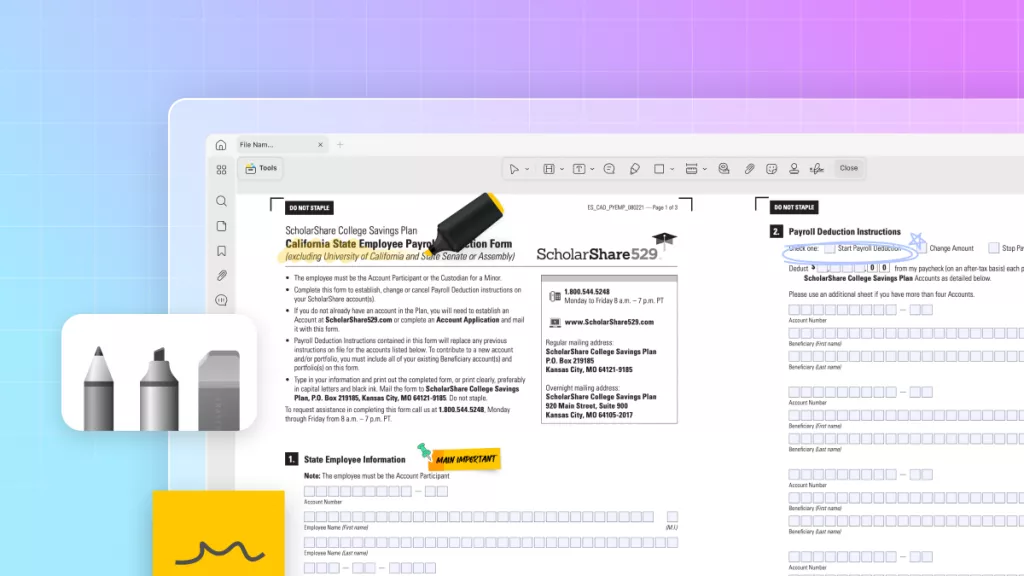
- Annotate PDFs: UPDF offers extensive annotation tools, including highlights, text boxes, attachments, and shapes, for an intuitive reading and editing experience.
- Fill and Sign: Design and add electronic signatures to your PDFs.
- UPDF Cloud: With the power of cloud computing, you can view your PDF from any device.
Conclusion
Throughout this guide, we've explored how to effectively use Windows Fax and Scan for PDF creation. For those seeking even more powerful and versatile document management tools, consider switching to UPDF, which offers comprehensive features that go beyond basic scanning.
Windows • macOS • iOS • Android 100% secure
 UPDF
UPDF
 UPDF for Windows
 UPDF for Mac
 UPDF for iPhone/iPad
 UPDF for Android
 UPDF AI Online
 UPDF Sign
 Edit PDF
 Annotate PDF
 Create PDF
 PDF Form
 Edit links
 Convert PDF
 OCR
OCR PDF to Word
 PDF to Image
 PDF to Excel
 Organize PDF
 Merge PDF
 Split PDF
 Crop PDF
 Rotate PDF
 Protect PDF
 Sign PDF
 Redact PDF
 Sanitize PDF
 Remove Security
 Read PDF
 UPDF Cloud
 Compress PDF
 Print PDF
 Batch Process
 About UPDF AI
 UPDF AI Solutions
 AI User Guide
 FAQ about UPDF AI
 Summarize PDF
 Translate PDF
 Chat with PDF
 Chat with AI
 Chat with image
 PDF to Mind Map
 Explain PDF
 Scholar Research
 Paper Search
 AI Proofreader
 AI Writer
 AI Homework Helper
 AI Quiz Generator
 AI Math Solver
 PDF to Word
 PDF to Excel
 PDF to PowerPoint
 User Guide
 UPDF Tricks
 FAQs
FAQs UPDF Reviews
 Download Center
 Blog
Blog Newsroom
 Tech Spec
 Updates
 UPDF vs. Adobe Acrobat
 UPDF vs. Foxit
 UPDF vs. PDF Expert





 Delia Meyer

 Enid Brown
 Enrica Taylor