 UPDF for Windows
 UPDF for Mac
 UPDF for iPhone/iPad
 UPDF for Android
 UPDF AI Online
 UPDF Sign
 Edit PDF
 Annotate PDF
 Create PDF
 PDF Form
 Edit links
 Convert PDF
 OCR
OCR PDF to Word
 PDF to Image
 PDF to Excel
 Organize PDF
 Merge PDF
 Split PDF
 Crop PDF
 Rotate PDF
 Protect PDF
 Sign PDF
 Redact PDF
 Sanitize PDF
 Remove Security
 Read PDF
 UPDF Cloud
 Compress PDF
 Print PDF
 Batch Process
 About UPDF AI
 UPDF AI Solutions
 AI User Guide
 FAQ about UPDF AI
 Summarize PDF
 Translate PDF
 Chat with PDF
 Chat with AI
 Chat with image
 PDF to Mind Map
 Explain PDF
 PDF AI Tools
 Image AI Tools
 AI Chat Tools
 AI Writing Tools
 AI Study Tools
 AI Working Tools
 Other AI Tools
 PDF to Word
 PDF to Excel
 PDF to PowerPoint
 User Guide
 UPDF Tricks
 FAQs
FAQs UPDF Reviews
 Download Center
 Blog
Blog Newsroom
 Tech Spec
 Updates
 UPDF vs. Adobe Acrobat
 UPDF vs. Foxit
 UPDF vs. PDF Expert
Working with spreadsheets regularly showed me how much time gets wasted when dates are typed manually. I used to enter them one by one and often ended up with formatting issues or small mistakes. After switching to automatic date methods, my workflow became faster and far more reliable.
In this guide, I will show how to insert dates in Excel automatically using methods I personally use. As a bonus, I will also share how UPDF makes it easy to insert dates into PDF files. You can click the button below to download it first.
Windows • macOS • iOS • Android 100% secure
Part 1. How To Insert Dates In Excel Automatically?
I often need to keep my Excel sheets up to date, so I learned how to automatically insert date in Excel. Now, I’ll share some practical methods I learned to fill dates in Excel without manually entering each date.
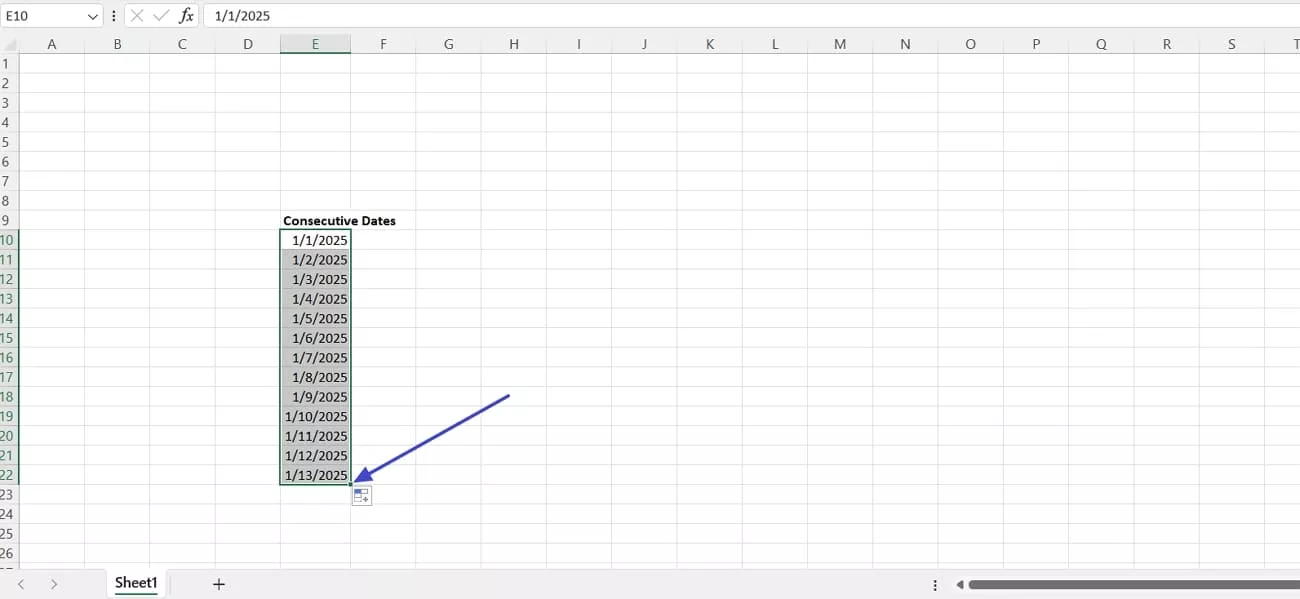
Method 1. Inserting Consecutive or Specific Dates
Now, follow the steps below to see how I enter a list of consecutive or specific dates in Excel without manual effort:
Step 1. First, enter a date from where you want to start, hold the “Fill Handle”, and drag the handle to the cell where you want to end the date.
Step 2. Next, press the “Auto Fill Options” icon and choose the “Fill Weekdays” or “Fill Months” option to fill specific dates.
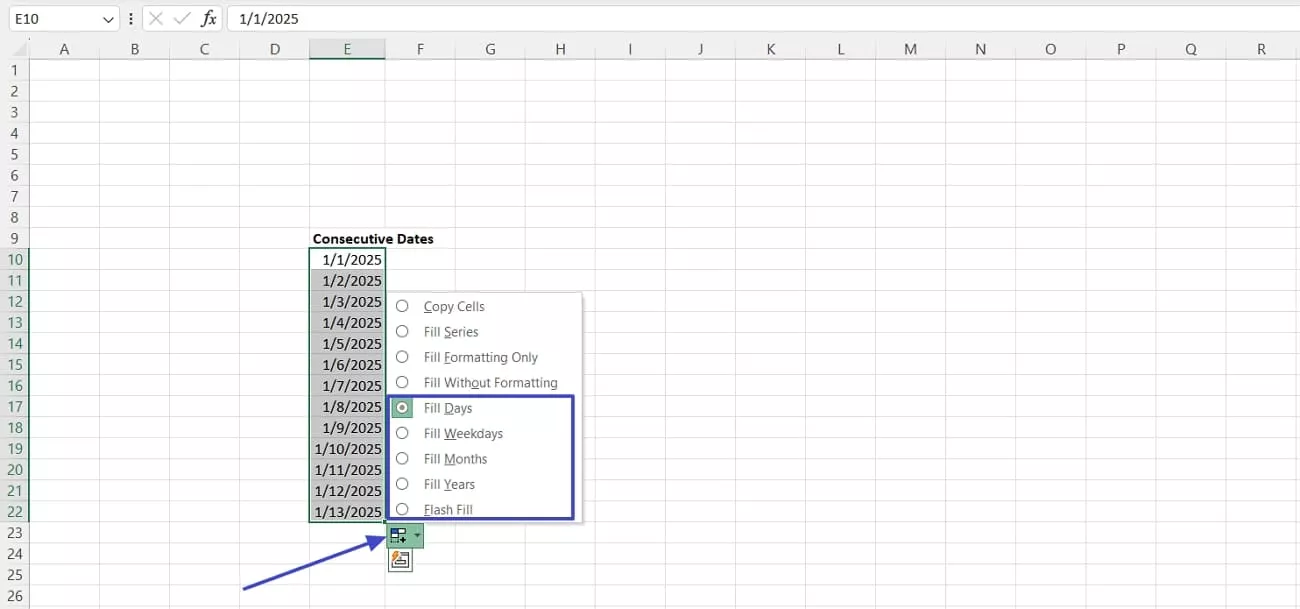
Step 3. If you want to avoid repeatedly copying the same date, simply type the first date, hold the “Ctrl” key, and drag the “Fill Handle” to get the same date repeated.

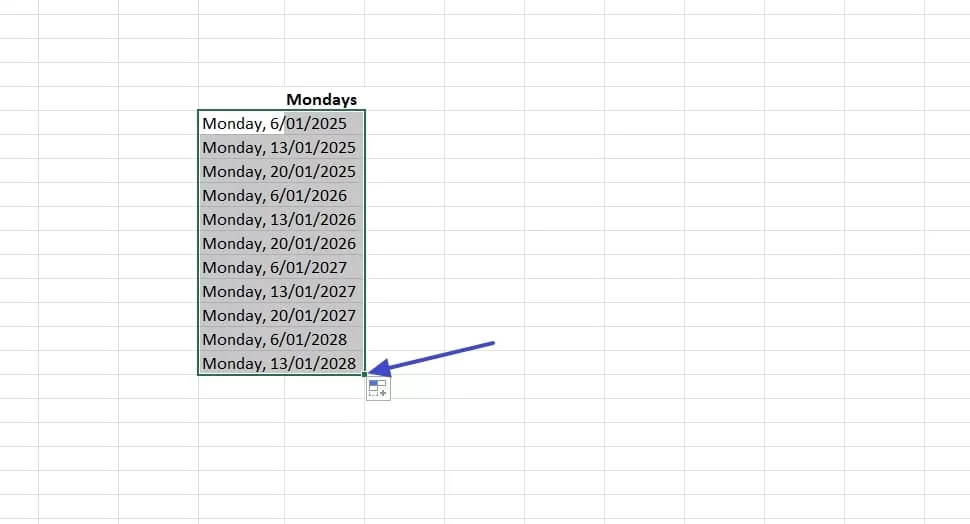
Method 2. Creating Pattern-Based Date List
Once I learned how to put automatic date in Excel for consecutive days, I discovered I could also insert dates of specific days each week or each month. So, follow the steps below to learn how you can insert a pattern-based date list:
Step 1. First, enter the first dates with days to let Excel understand the pattern of the dates to be filled. Next, hold the “Fill Handle” and drag it to the cell where you want to end the date.
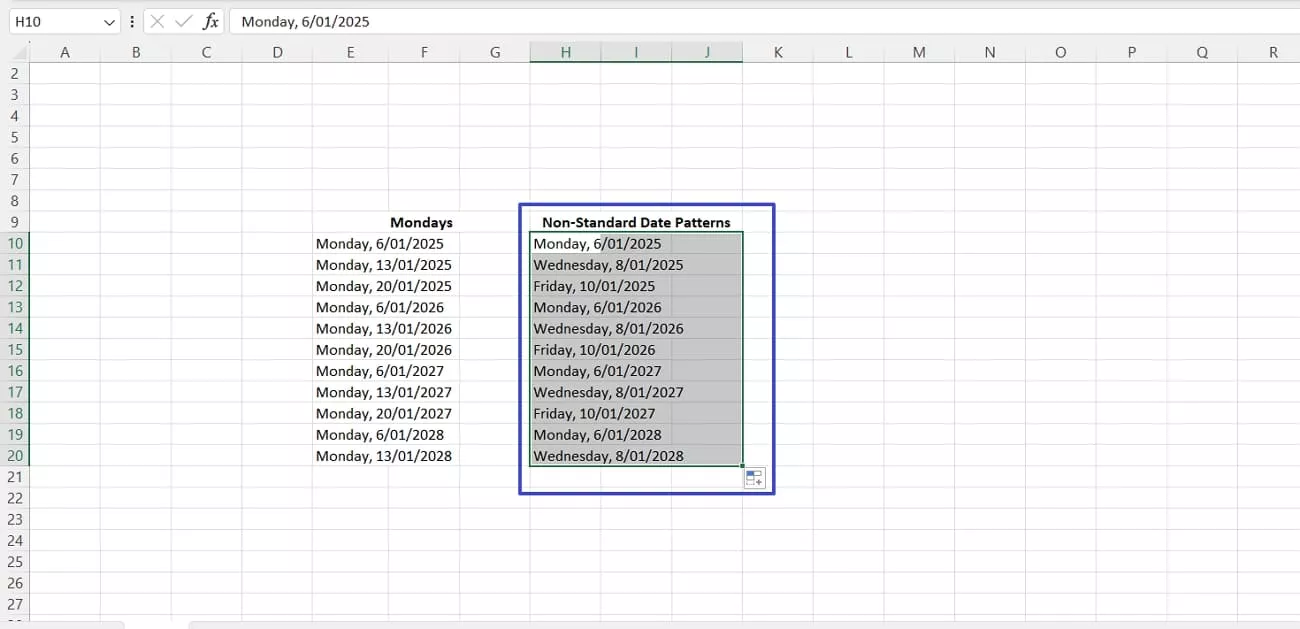
Step 2. If you want to add a non-standard date pattern, enter non-standard pattern dates and drag the “Fill Handle” to fill the dates in a non-standard pattern.
Method 3. Automating Date Lists With Formulas
I often use formulas to create dynamic date lists in Excel that update automatically. This method saves me time and ensures my spreadsheet always reflects the correct dates. Follow the steps below to learn how to insert dates in Excel automatically using formulas:
Step 1. First, enter a date and write a formula “=Column + X (Number of Days You Want to Add)” in the next cell.
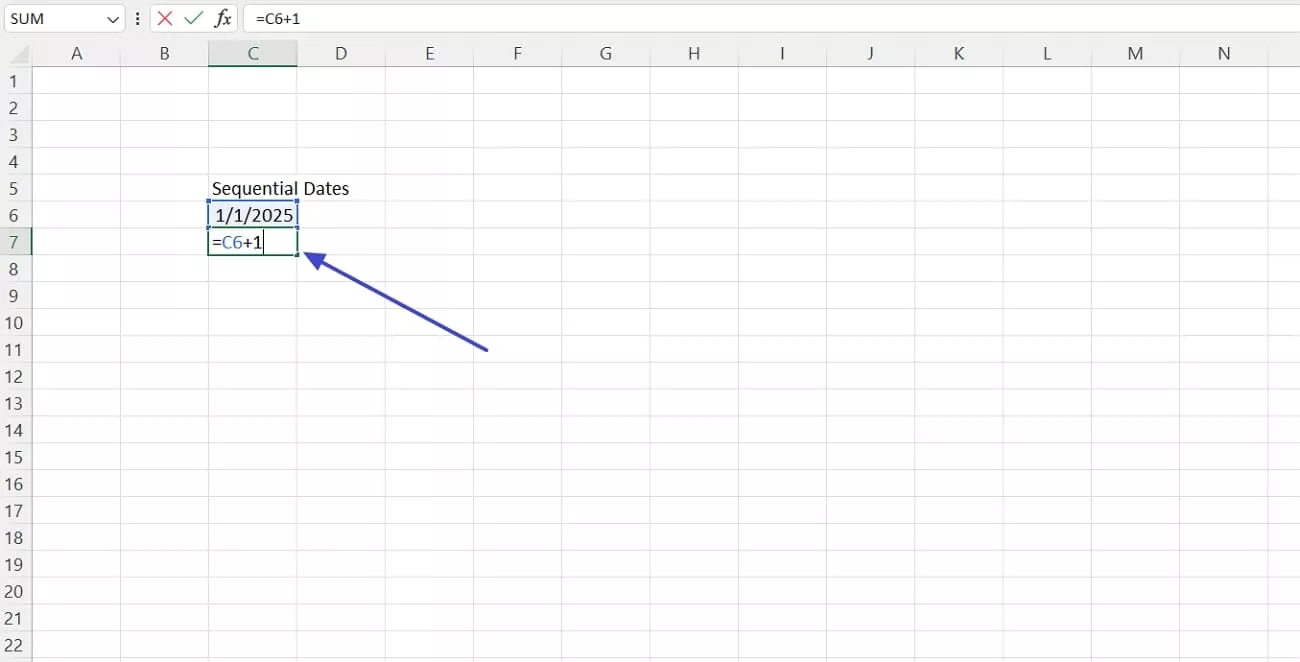
Step 2. Next, hold the “Fill Handle” icon and drag it to the cell where you want the dates to end.
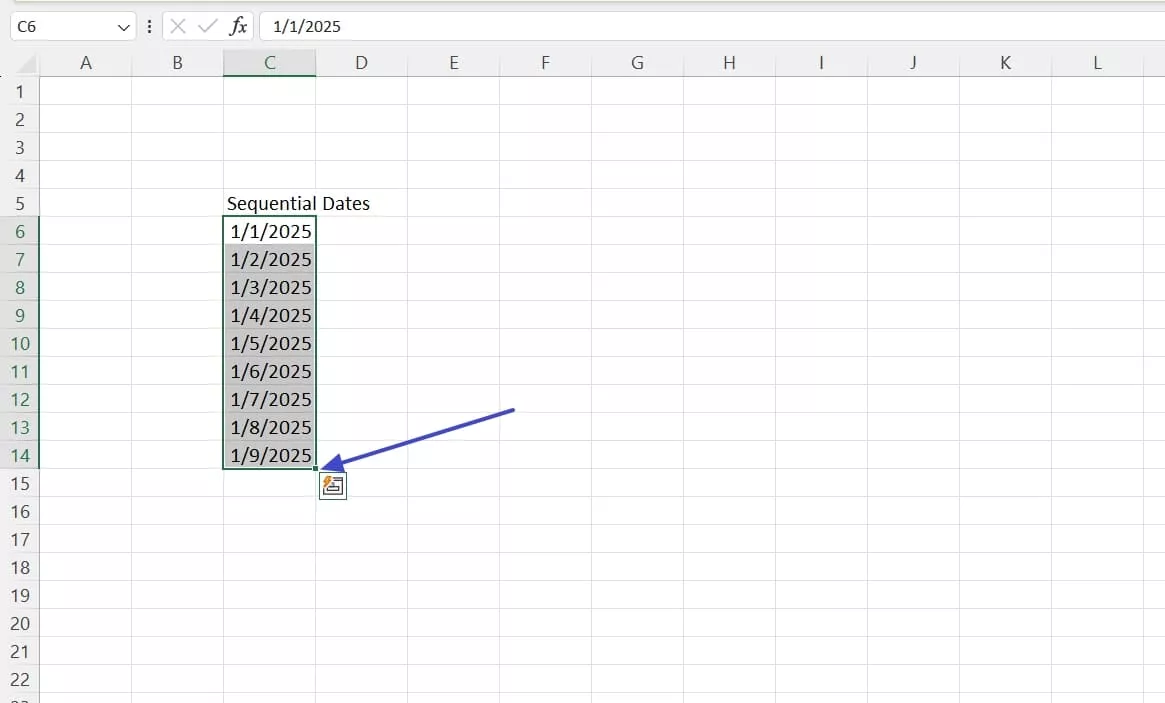
Step 3. If you change the first date, all the dates will be automatically updated.
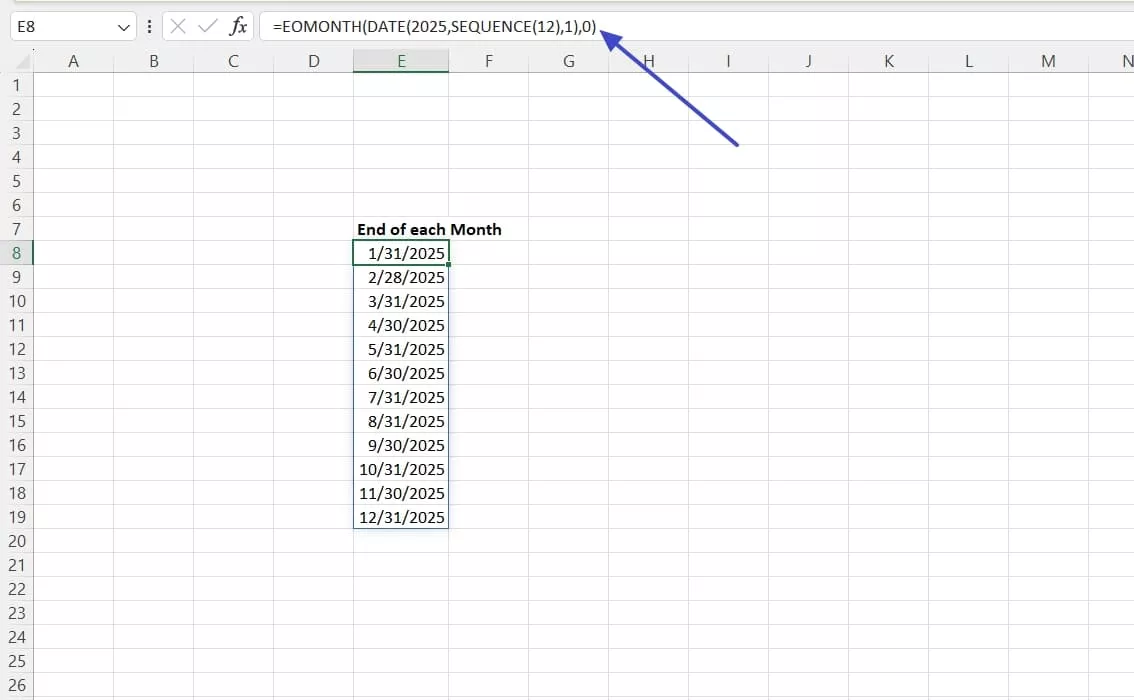
Step 4. For the end of each month, use the function “=EOMONTH(DATE(Year,SEQUENCE(X Months),X Dates),X Increment Months), and press the “Enter” key to auto-fill cells with the end date of each month.
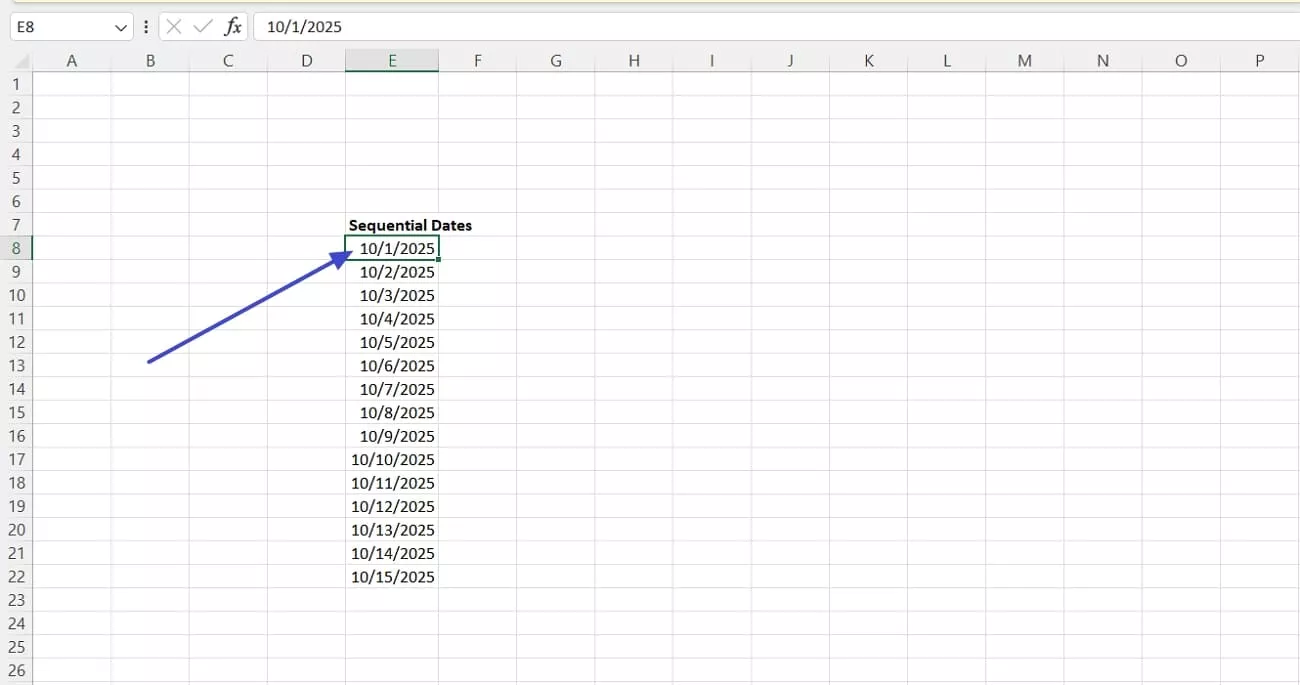
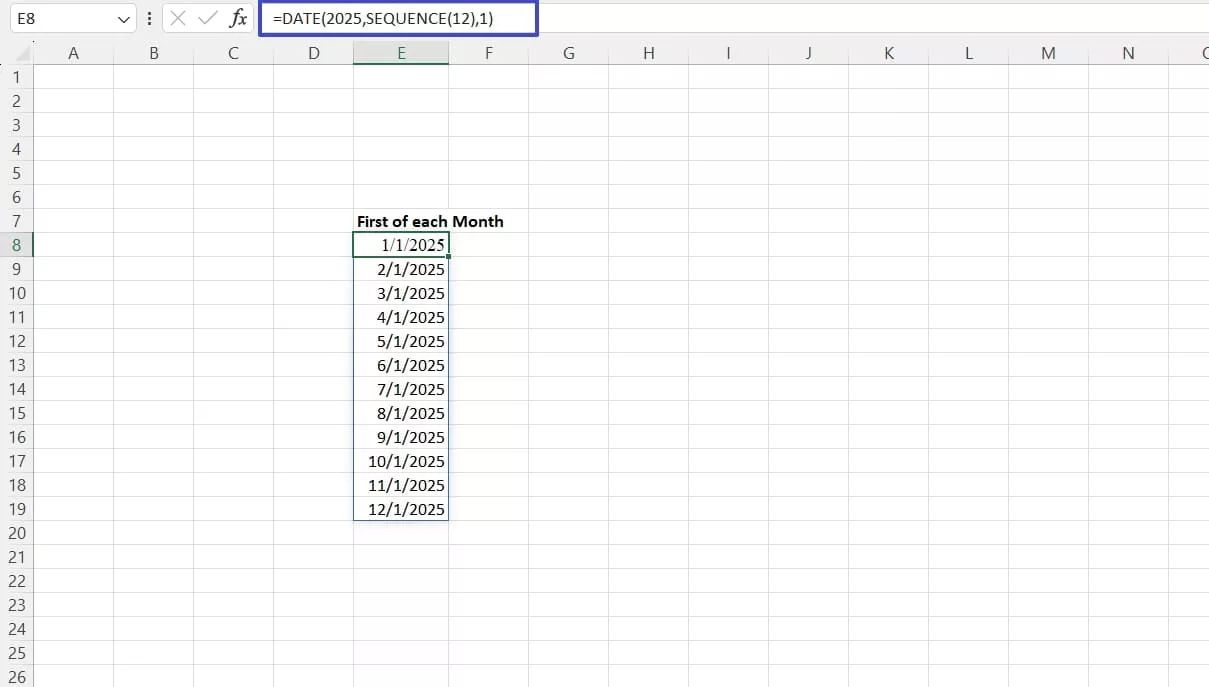
Step 5. If you want the first of each month, type the function “=Date(Year,SEQUENCE(X Months),X Date), and press the “Enter” key to fill cells with the first date of every month.
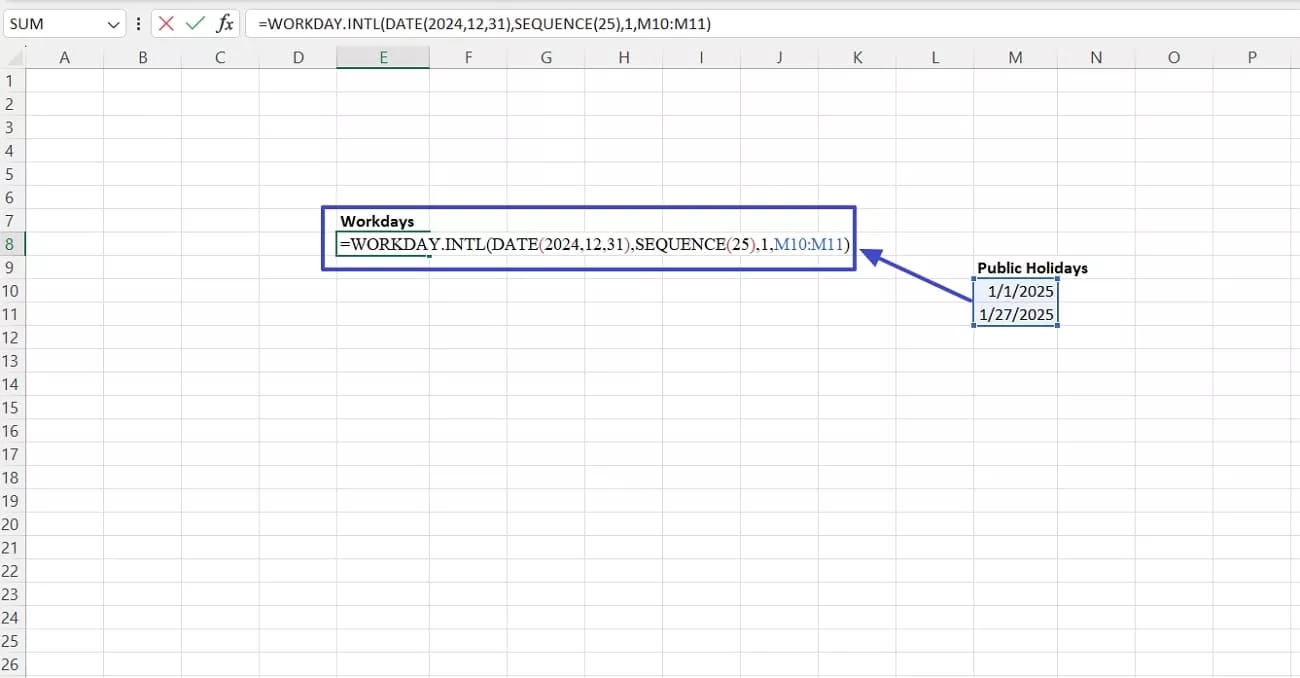
Step 6. To insert all workdays without weekends, use the function “=WORKDAY.INTL(DATE(Year,Month,Date),SEQUENCE(X Number of Days), Weekends, Public Holiday Cells.”
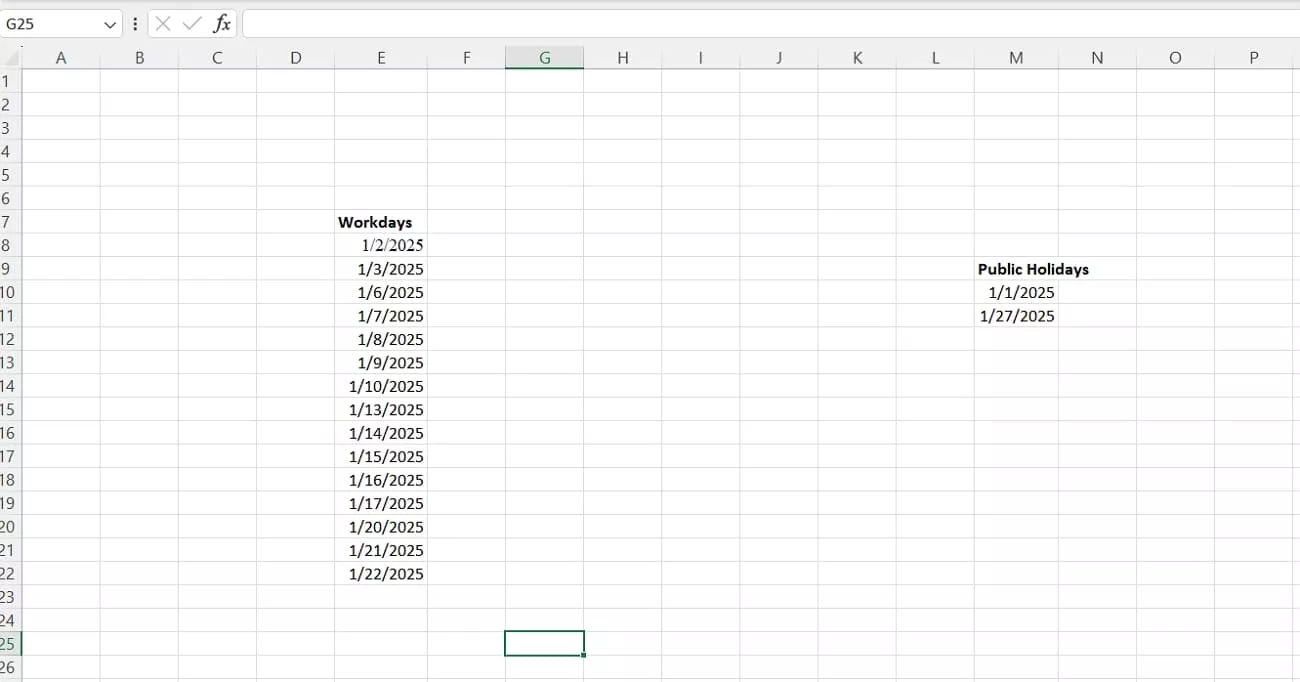
Step 7. Next, press the “Enter” key to auto-fill the dates with workdays without weekends and public holidays.
Bonus Tip. Insert Dates in PDF with UPDF
Once I learned how to automatically insert date in Excel, I often needed to work with PDF documents and add dates to them. This is where I started searching for PDF management tools and found UPDF as the most suitable option. It helped bridge the gap between spreadsheet automation and document editing tasks.
UPDF provides a reliable way to edit PDFs, insert dates, and update content without disrupting the original layout. Its straightforward interface makes date insertion in PDF practical when handling documents that require frequent updates. This versatile PDF editor is compatible with iOS, Android, Windows, and Mac devices, ensuring accessibility across various platforms.
Windows • macOS • iOS • Android 100% secure
How to Insert Dates in PDF With UPDF
After learning how to put automatic date in Excel, adhere to the steps below to see how you can insert dates in PDF using UPDF:
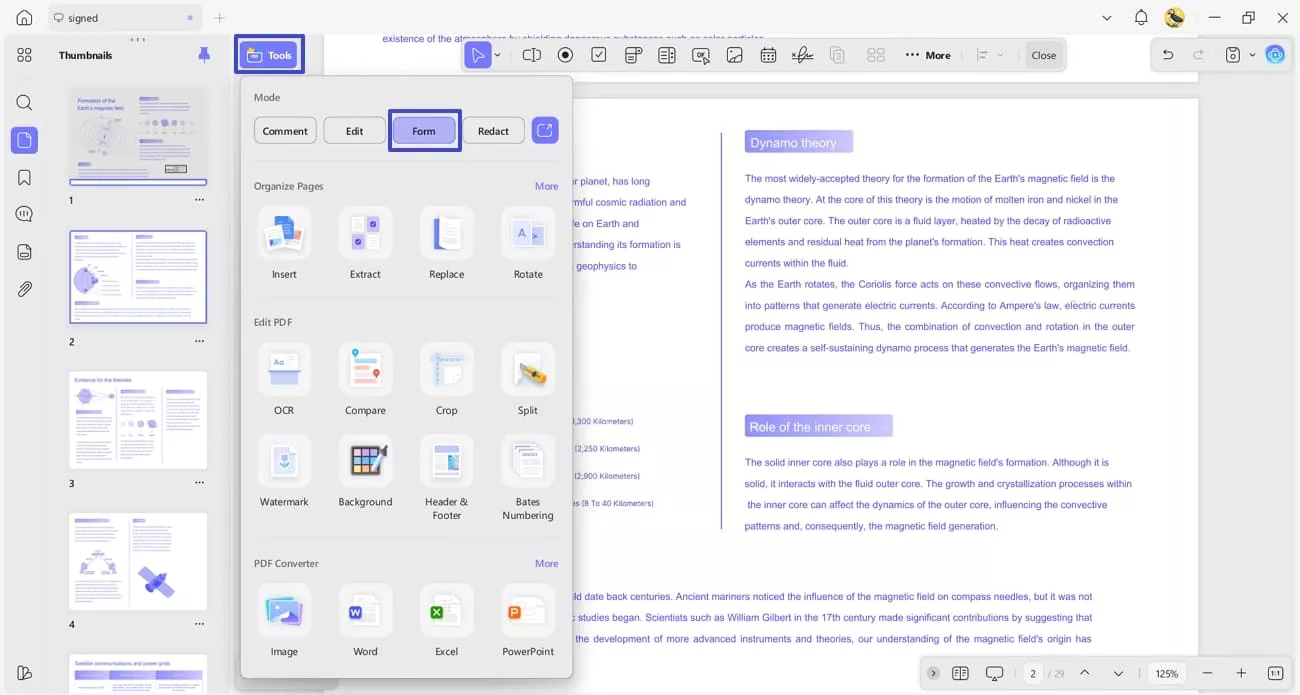
Step 1. Access Forms Tool in UPDF
Once you open a PDF, press the “Tools” option and click the “Forms” option to enter the interface.
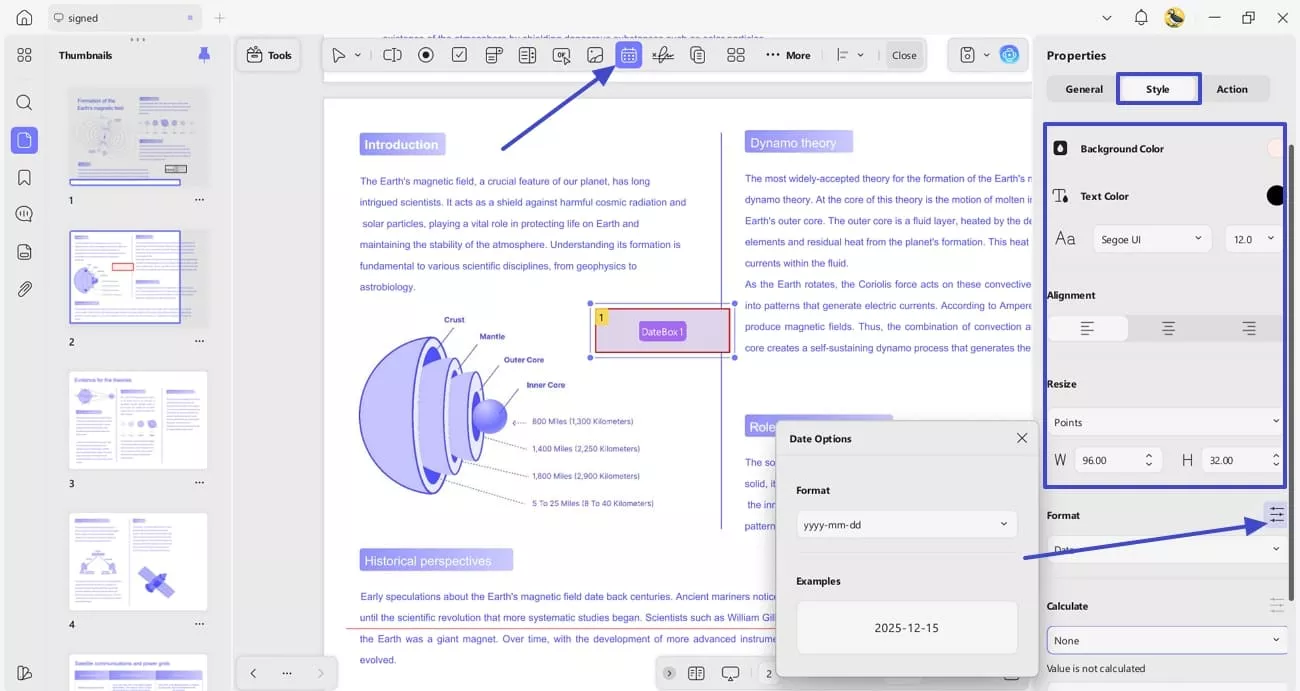
Step 2. Create and Customize the Data Field
Next, press the “Date Field” on the top and click anywhere on the PDF to create a new date field. Afterwards, double-click the date field, use the “Style” tab, and customize the color of the field border, background, and text. You can also change the font, alignment, and format of date you want.
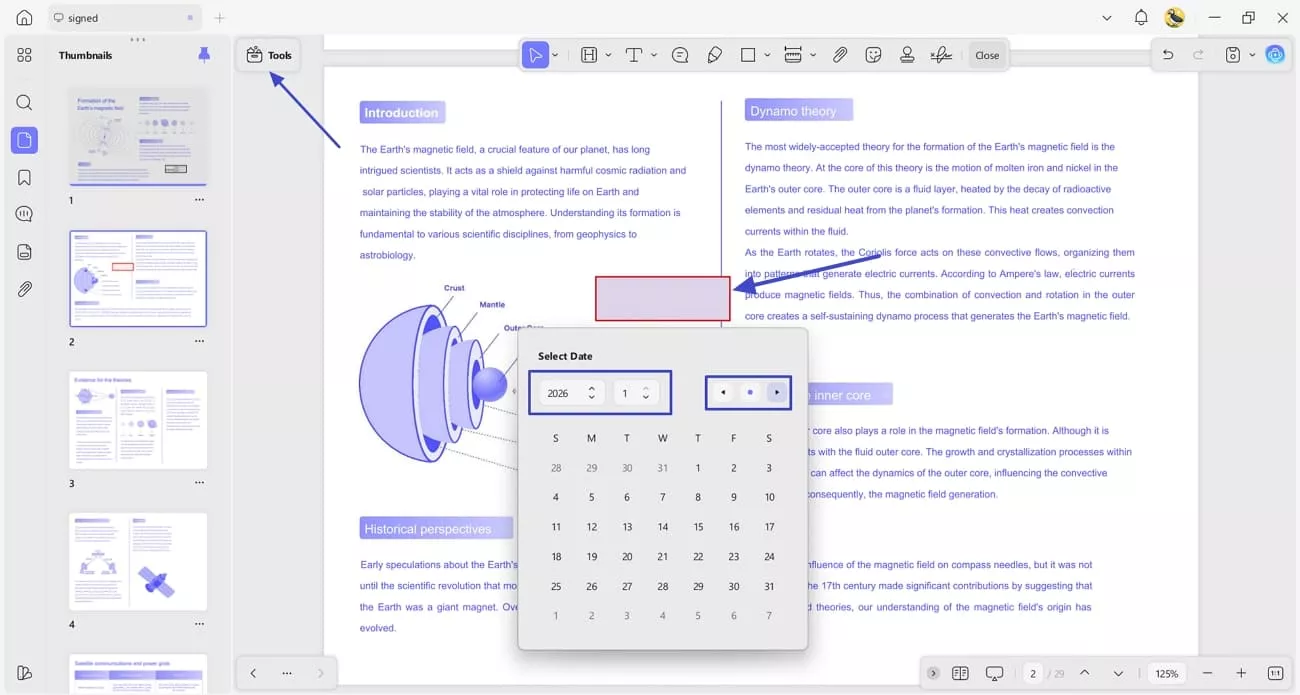
Step 3. Access Comment Mode and Enter Date
Now, press the “Comment” option in the “Tools” section and click on the Date Field to enter the date. Press the “Arrow” icons to move to a specific date or click the “Dot” icon to access and enter the current date. You can also enter a custom date by entering day and year.
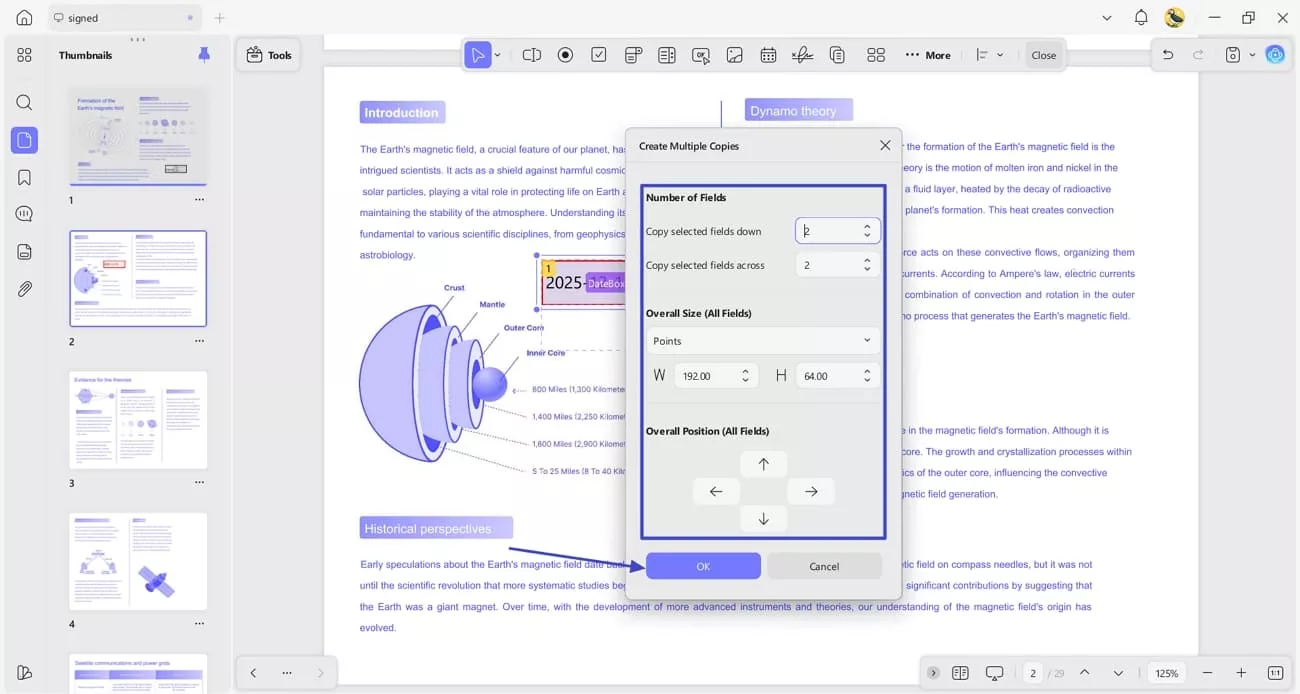
Step 4. Copy or Delete Date Field
If you want to copy or delete the Date Field, switch to the Forms mode and right-click the field. Next, press the “Delete” option to delete the field or click the “Create Multiple Copies” display a pop-up window.

Step 5. Create Multiple Copies of Date Field
Afterwards, choose the number of copies, size, and position “Date Fields” and press the “OK” button to create multiple copies.
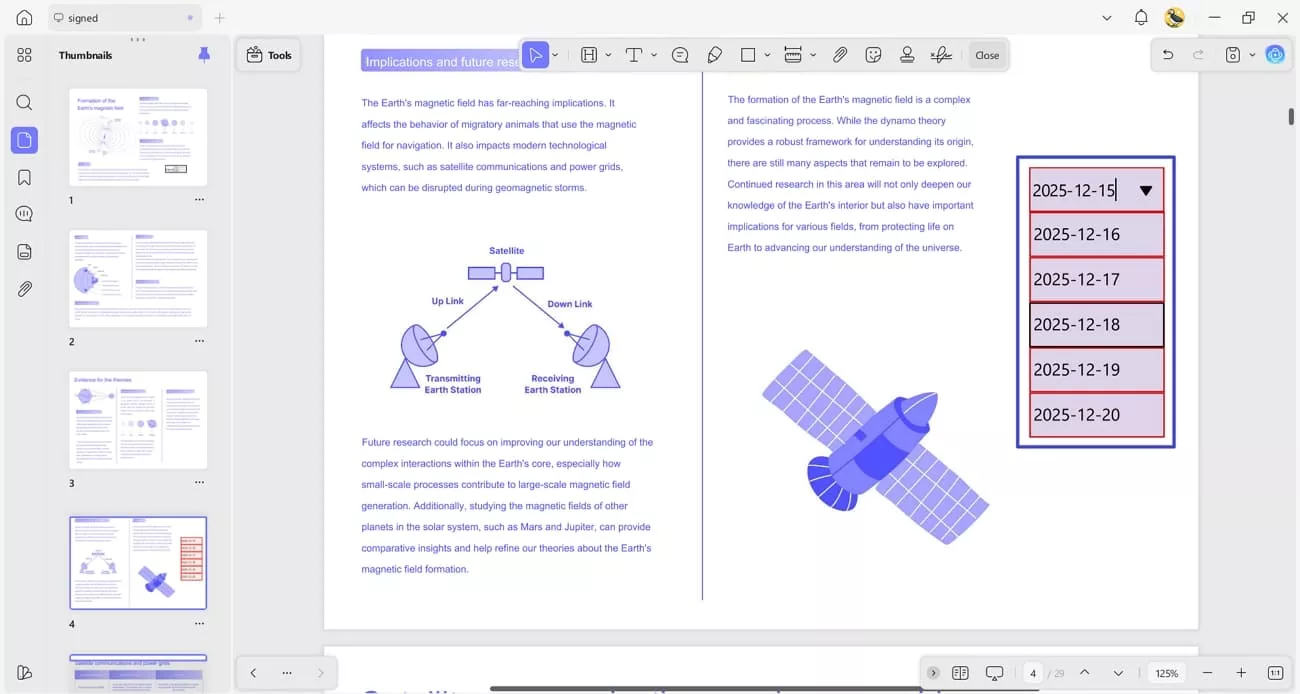
Step 6. Enter Dates in All Copies
Switch to the “Comment” mode again and enter the date in each field. If you don’t want to select the field, click the field and enter the date directly within the field.
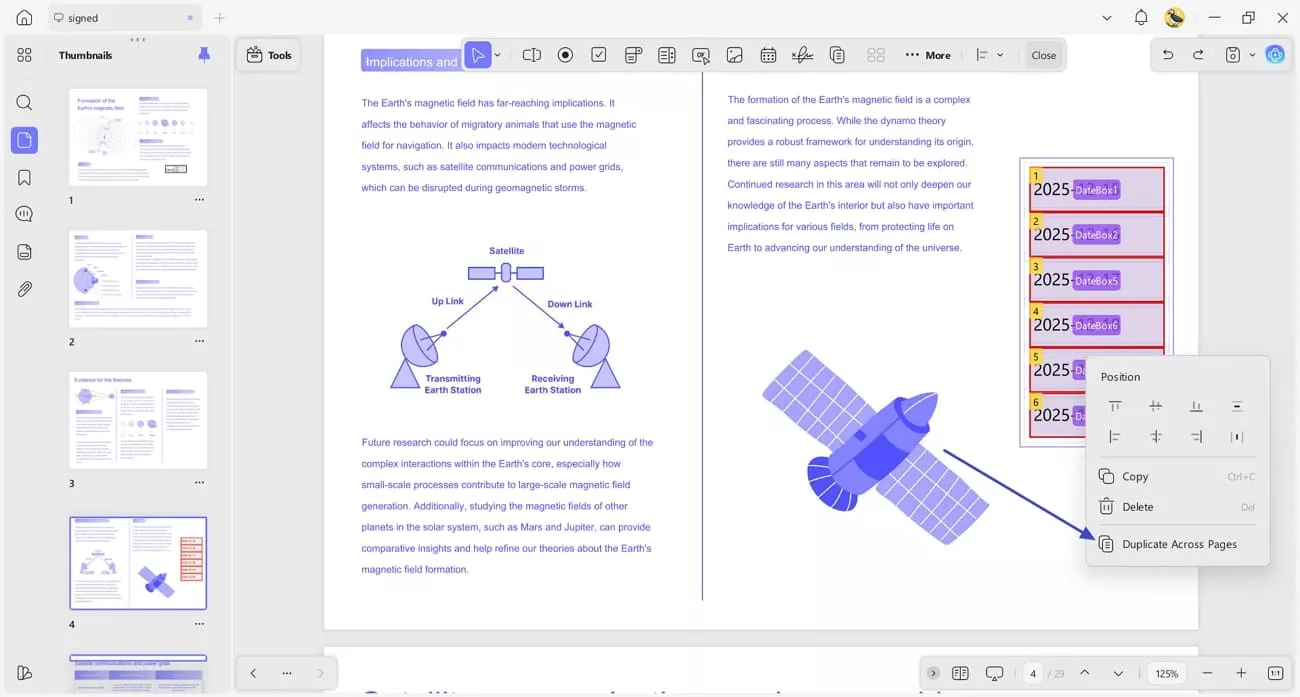
Step 7. Duplicate Fields Across Multiple Pages
Lastly, access the “Forms” mode and press “Ctrl+A” or “Command+A” to select the fields and right-click on them. Next, press the “Duplicate Across Pages” option and choose a page range to copy the date fields on multiple pages.
Pro Tip. Creating Date Stamps With UPDF
If I want to create or import a dynamic stamp with date and time, UPDF can also help me there. Follow the steps below to see how I create a custom stamp using UPDF:
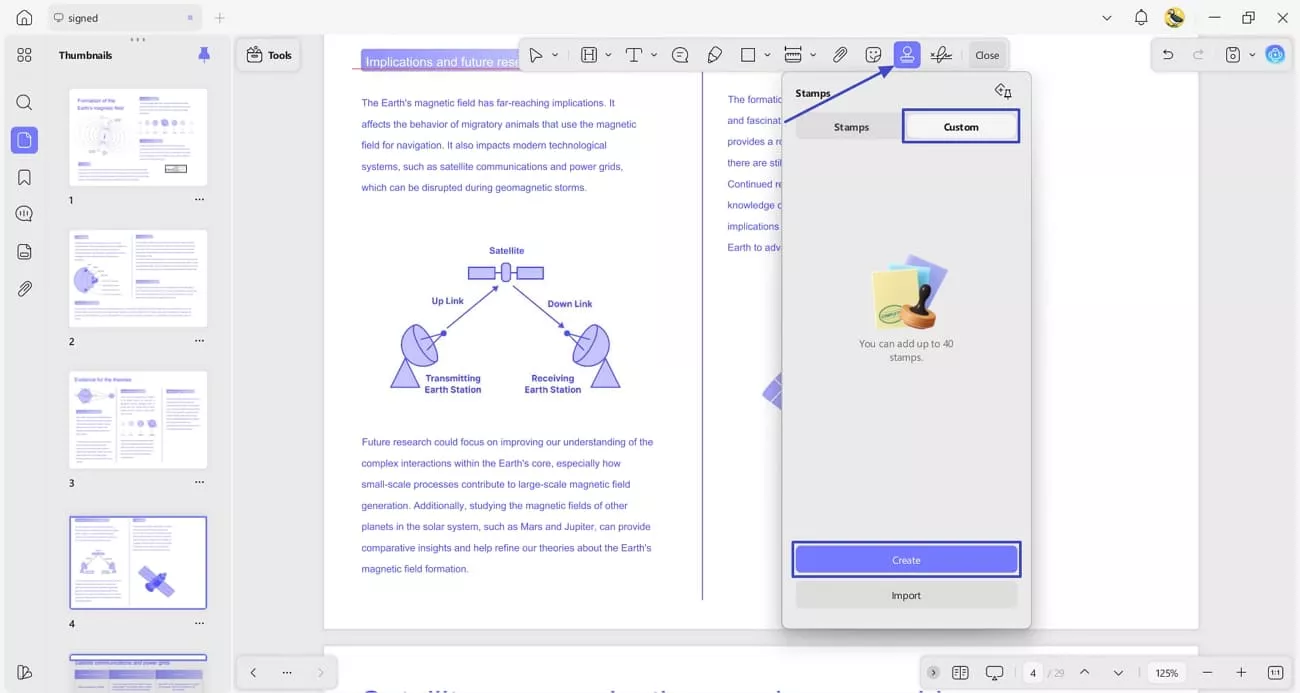
Step 1. Create New Stamp With Date
First, access the “Comment” mode and press the “Stamps” option. Next, click the “Custom” tab and press the “Create” button to proceed further.
Windows • macOS • iOS • Android 100% secure
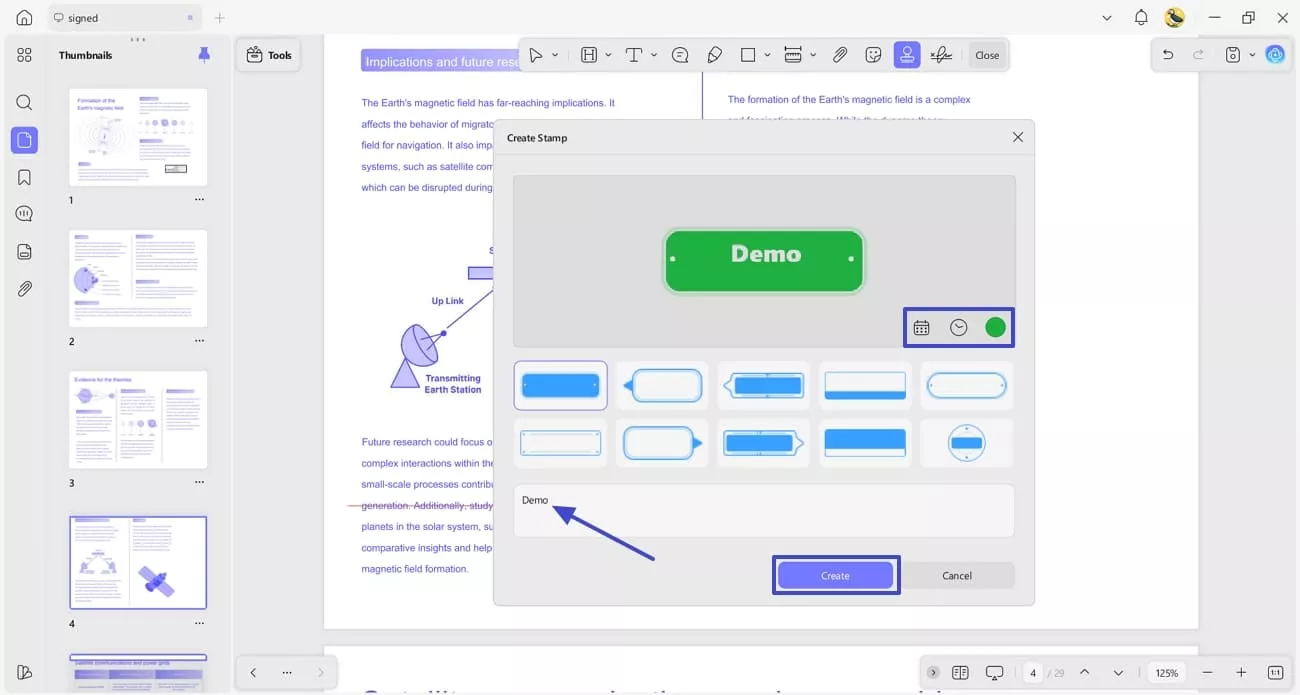
Step 2. Customize Date Stamp
Afterwards, choose the color and formats for time and date, and the style of the stamp. Type text in the designated field and press the “Create” button to create the date stamp.
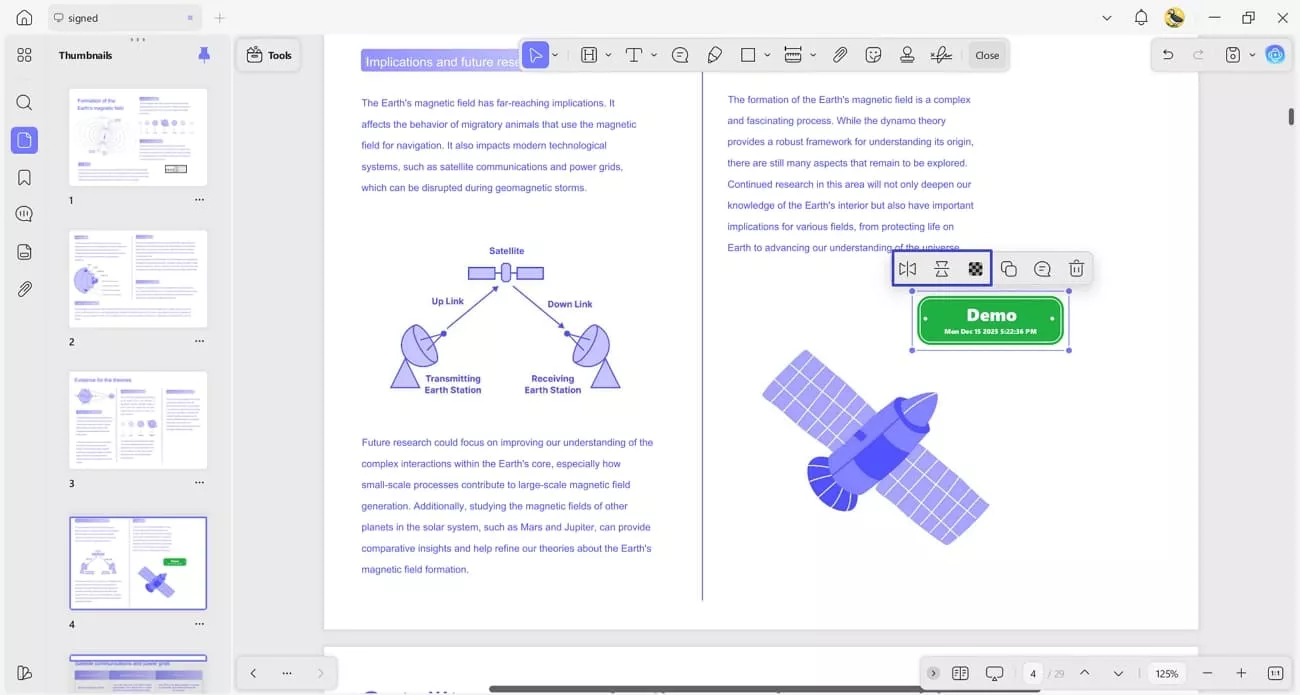
Step 3. Place Stamp on PDF
Lastly, click anywhere on the PDF to place the stamp and use the controls in the floating pop-up to adjust the opacity and flip the stamp.
Windows • macOS • iOS • Android 100% secure
Having learned how you can insert dates in PDF using UPDF, let’s explore some other features UPDF offers other than just inserting dates.
Other Key Features
- Edit PDF: Other than inserting dates in PDF files, it also allows me to edit PDF documents easily. I can change text, adjust font size and color, and fix spacing to keep documents clean and readable.
Cropping or resizing images and tables is also straightforward, so everything looks properly aligned on each page.
- Annotate PDF: When reviewing documents, I use highlights, comments, and sticky notes to mark important points or add reminders.
Shapes, markups, and signatures help me organize feedback and approvals directly in the PDF without using extra tools.
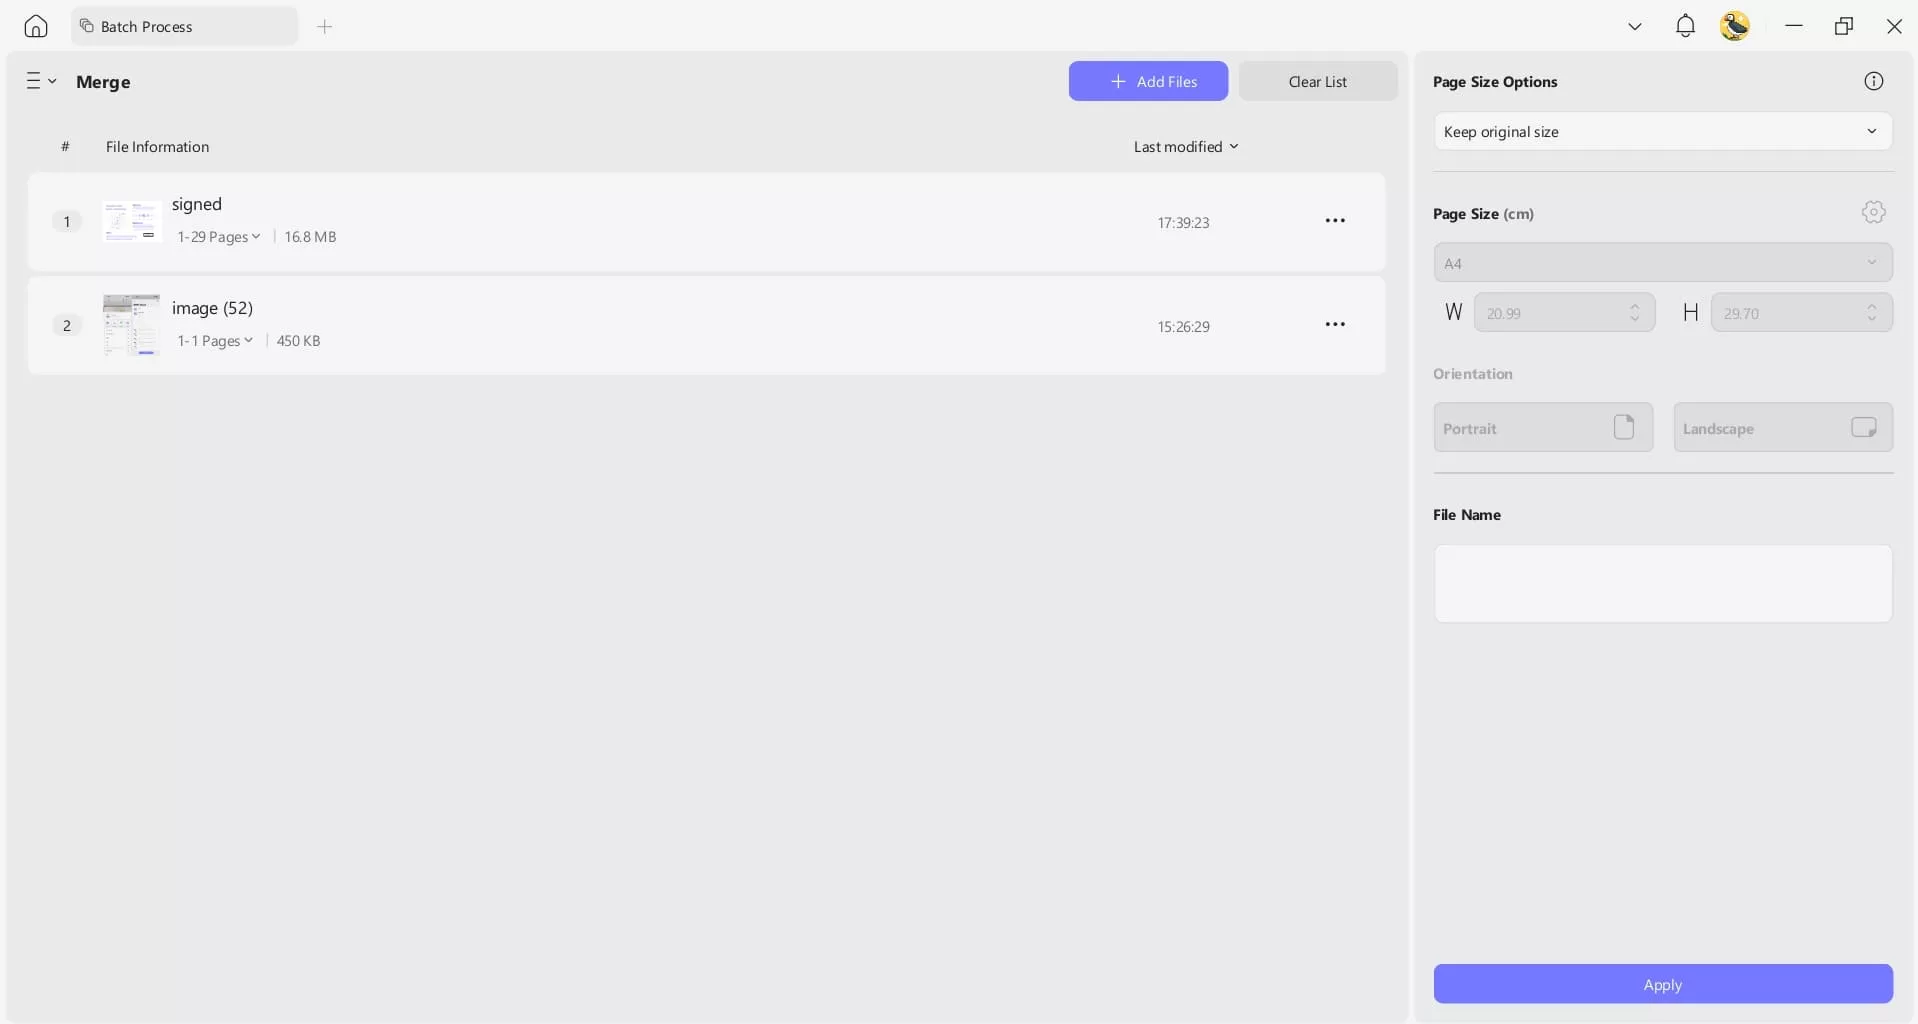
- Batch Merge: To keep files organized, I merge multiple PDFs into a single document using the batch merge feature. Adjusting page size and orientation helps ensure the final PDF looks consistent and professional from start to finish.
Once I get introduced to UPDF, I no longer need to switch between multiple software applications to get my documents organized and polished. If you want to experience the same convenience, you can get the premium license here after downloading UPDF. Do not forget to use the coupon code “ENARTICLE” to get an exclusive 10% discount on your purchase.
Windows • macOS • iOS • Android 100% secure
Conclusion
In conclusion, I’ve shared practical methods for how to insert dates in Excel automatically. These steps have made managing spreadsheets and documents much faster and more organized. For anyone looking for a reliable tool to edit, annotate, and manage PDFs efficiently, I highly recommend downloading UPDF and getting the premium license.
Windows • macOS • iOS • Android 100% secure


 Enid Brown


 Engelbert White
