 UPDF for Windows
 UPDF for Mac
 UPDF for iPhone/iPad
 UPDF for Android
 Nomostar
 UPDF AI Online
 UPDF Sign
 IvyCraft
 Edit PDF
 Annotate PDF
 Create PDF
 PDF Form
 Edit links
 Convert PDF
 OCR
OCR PDF to Word
 PDF to Image
 PDF to Excel
 Organize PDF
 Merge PDF
 Split PDF
 Crop PDF
 Rotate PDF
 Protect PDF
 Sign PDF
 Redact PDF
 Sanitize PDF
 Remove Security
 Read PDF
 UPDF Cloud
 Compress PDF
 Print PDF
 Batch Process
 About UPDF AI
 UPDF AI Solutions
 AI User Guide
 FAQ about UPDF AI
 Summarize PDF
 Translate PDF
 Chat with PDF
 Chat with AI
 Chat with image
 PDF to Mind Map
 Explain PDF
 PDF AI Tools
 Image AI Tools
 AI Chat Tools
 AI Writing Tools
 AI Study Tools
 AI Working Tools
 Other AI Tools
 AI Bookmark Generation
 AI Bookmark Summary
 AI Watermark Generation
 AI Background Generation
 AI Sticker Generation
 AI Stamp Generation
 AI Editing Suite
 UPDF Copilot
 AI Page Management
 AI Semantic Search
 PDF to Word
 PDF to Excel
 PDF to PowerPoint
 User Guide
 UPDF Tricks
 FAQs
FAQs UPDF Reviews
 Download Center
 Blog
Blog Newsroom
 Tech Spec
 Updates
 UPDF vs. Adobe Acrobat
 UPDF vs. Foxit
 UPDF vs. PDF Expert
When I come across a corrupted file, a “file in use” error was very frustrating for, and so will it be for you. This always made me wonder how to delete a file when it refuses to vanish. If you are also stuck in the same situation, keep reading because I'll walk you through some simple ways to get it done.
After deleting unwanted files from the PC, it becomes way easier to manage the documents. If your management requires other operations like editing or annotating a file, using UPDF helps you keeps your digital workspace clean and efficient.
Windows • macOS • iOS • Android 100% secure
Part 1. How Do You Delete a File?
Deleting a file on Windows is simple and can be done in just a few steps, depending on whether you want to remove it temporarily or permanently. Let's explore the detailed guide on how do you delete a file that won't delete from both Windows and Mac:
Deleting Files From Windows
If you are a Windows user, the process is quite straightforward, so let's explore the most efficient methods I discovered for deleting files:
Method 1. Open the File Manager app, navigate to the desired file, and right-click it. Afterwards, hit the “Delete” button to get the file moved to the Recycle Bin.
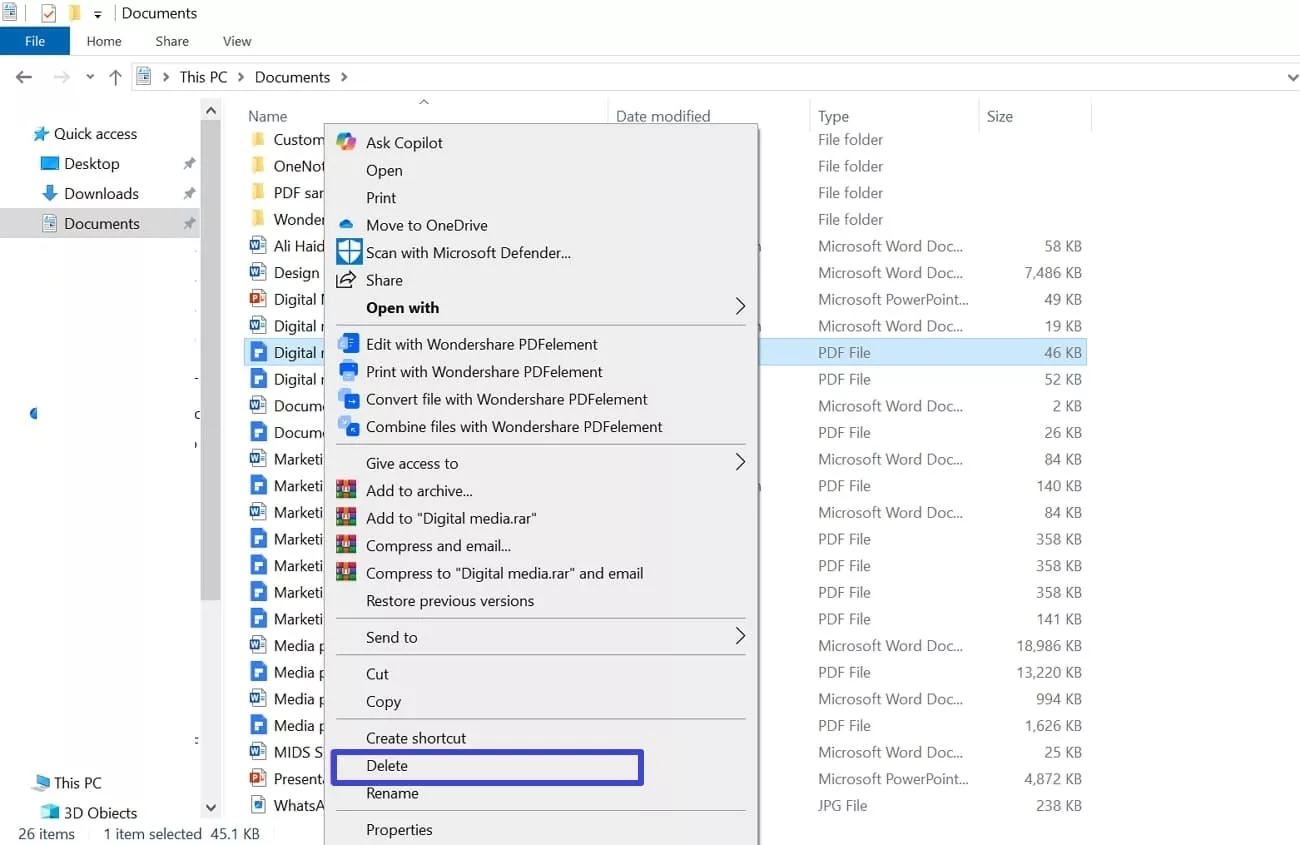
Method 2. Choose the required file and press the “Shift + Delete” keys on the keyboard. This permanently deletes the targeted file from your device and cannot be restored later.

Tip:
Deleting Files From Mac
I have also provided reliable methods to delete files safely from your Mac devices. Go through the content below to know the answer to how to delete a file that won't delete across Mac:
Method 1. Press the “Command + Delete” key to send the selected file to the Trash folder. However, to permanently delete the file, press the “Option + Command + Delete” keys on the keyboard.
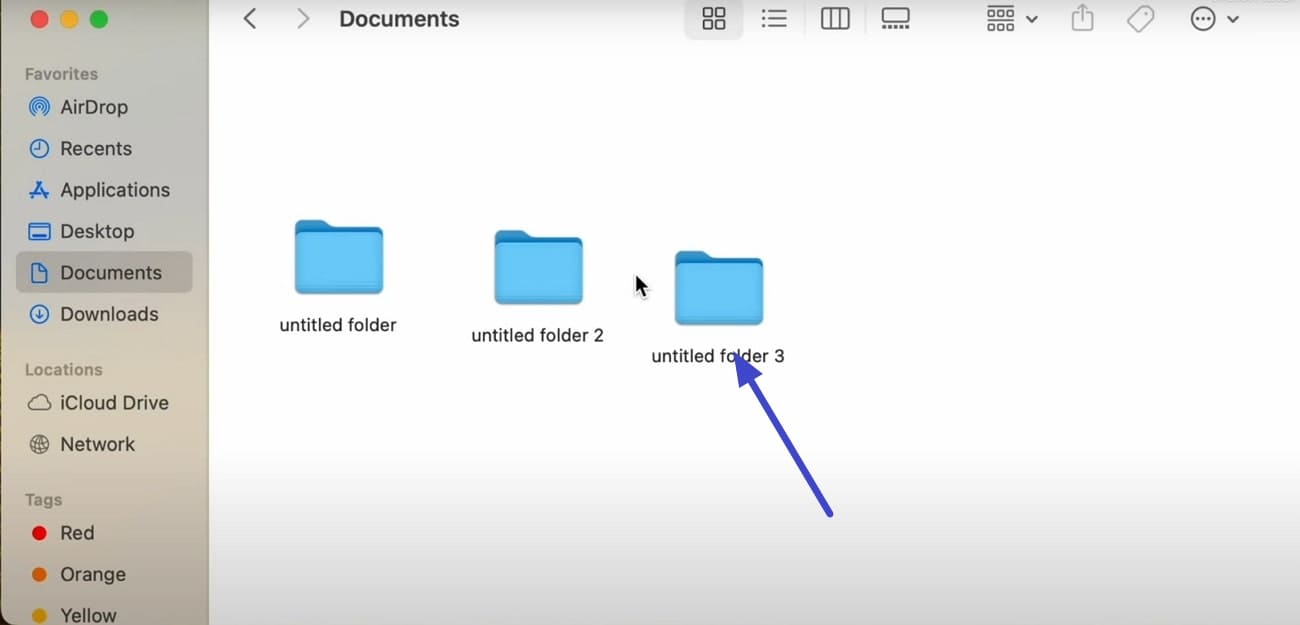
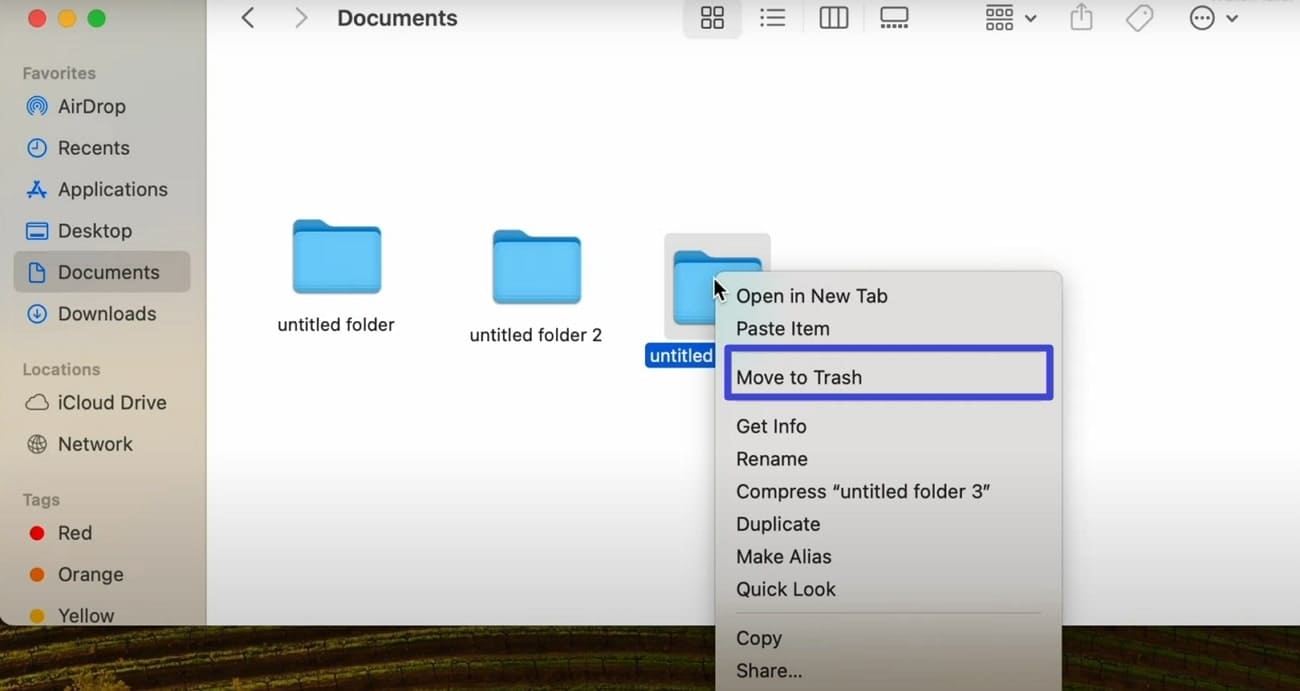
Method 2. Other than that, right-click the targeted file and select the “Move to Trash” option in the pop-up to delete it.
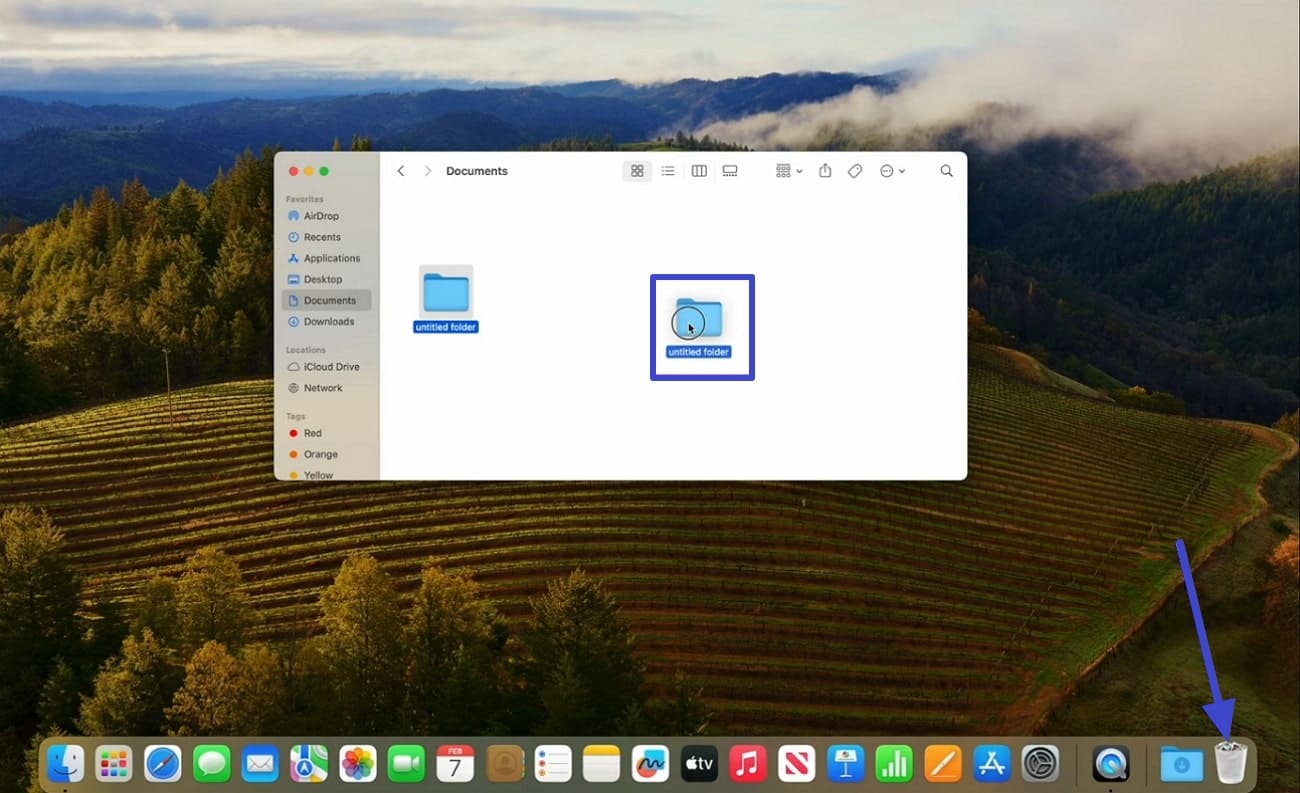
Method 3. Select the file and drag it to the “Trash” icon across the Dock at the bottom of your screen.
Part 2. How Do You Delete a Corrupted File?
Deleting a corrupted file isn't always as simple as hitting "Delete." Before I show you the steps for how to delete a corrupted file, I'll first explain the possible reasons why these files get corrupted:
- Hardware Failures: If a drive is aging or physically damaged, it may render data inaccessible or cause the files to be corrupted.
- Power Interruptions: Sudden shutdowns or unexpected power surges can interrupt the writing or saving process, leading to corruption.
- Malware or Virus Attacks: Malicious software may modify, overwrite, or delete file data, making these files unreadable or unusable.
- Software Crashes: Bugs in the operating system or software applications, especially during saving, updating, or installing programs, can cause files to be stored incorrectly.
Delete a Corrupted File On Windows
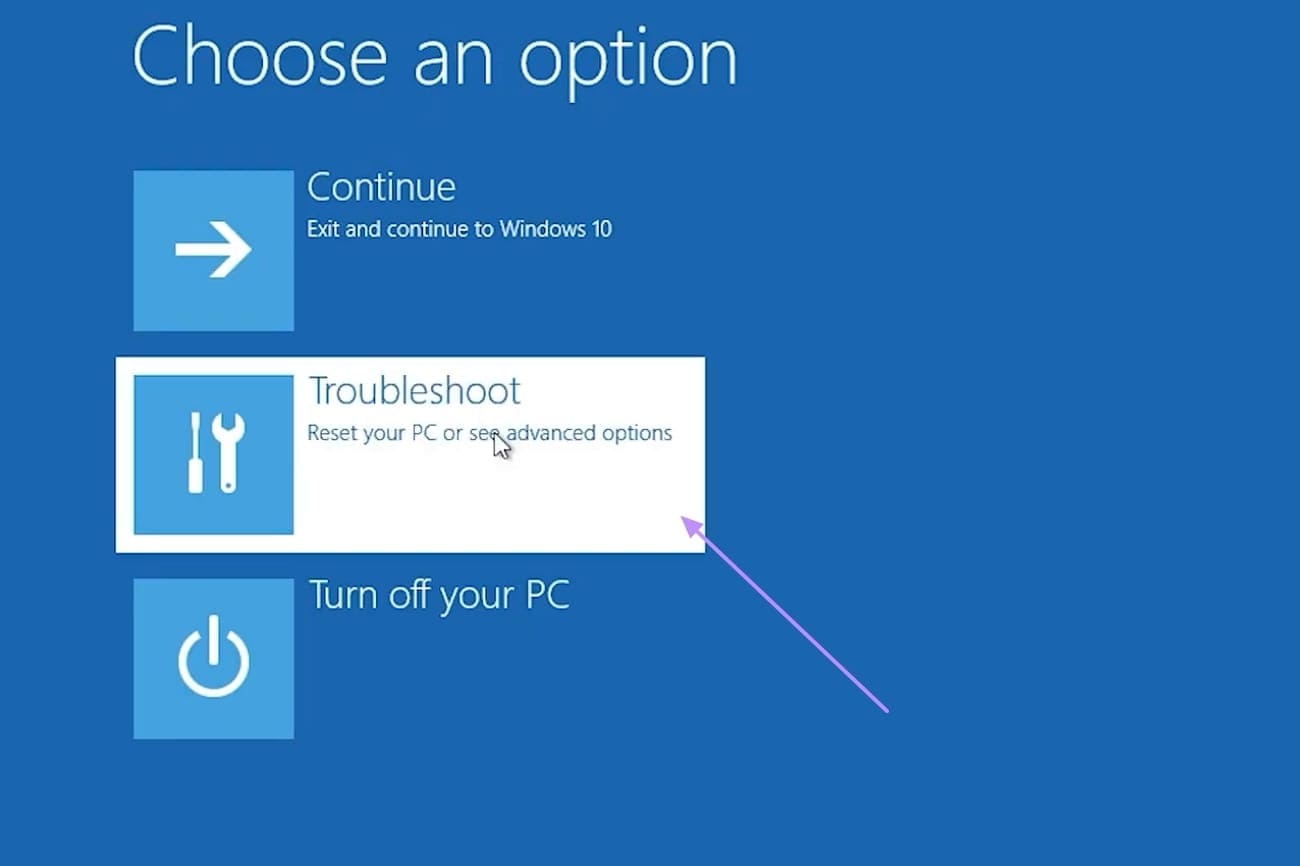
Step 1. Begin by shutting down your PC, then pressing the F8 key. Afterwards, choose the “Troubleshoot” option here.
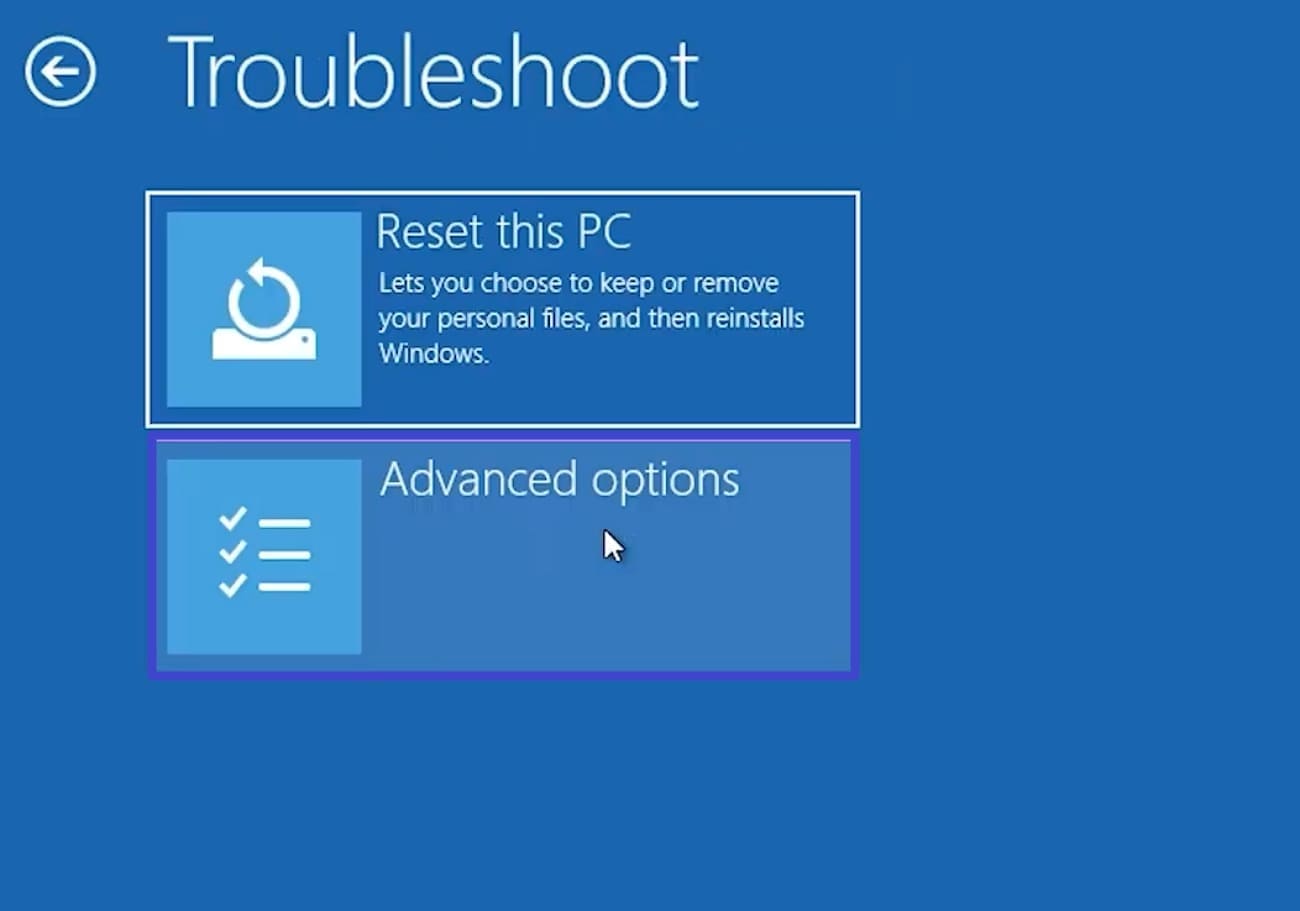
Step 2. Here, click on the “Advanced Options” button to access further settings.
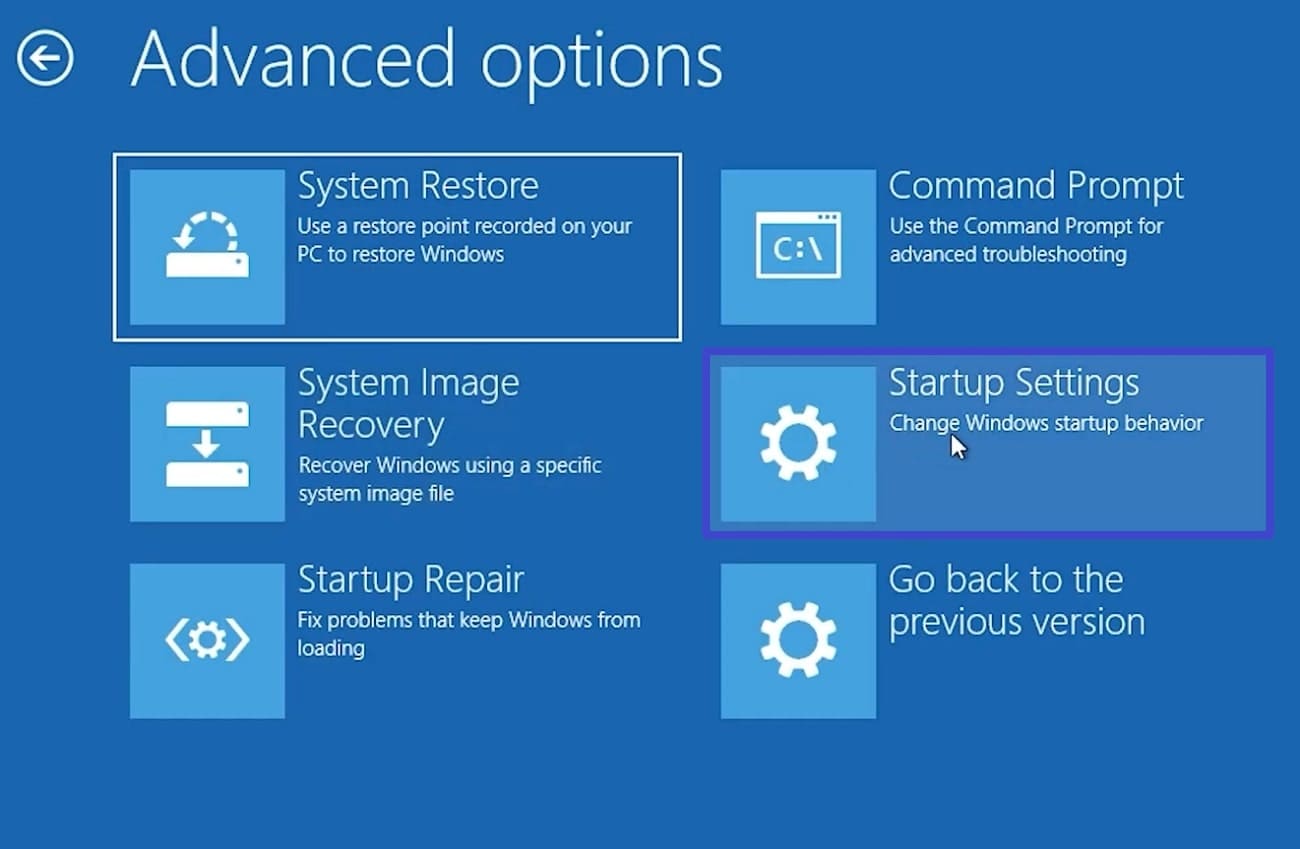
Step 3. Now, choose the "Startup Settings" option from the available options.
Step 4. Afterwards, choose “Enable Safe Mode” to enter the safe mode interface.
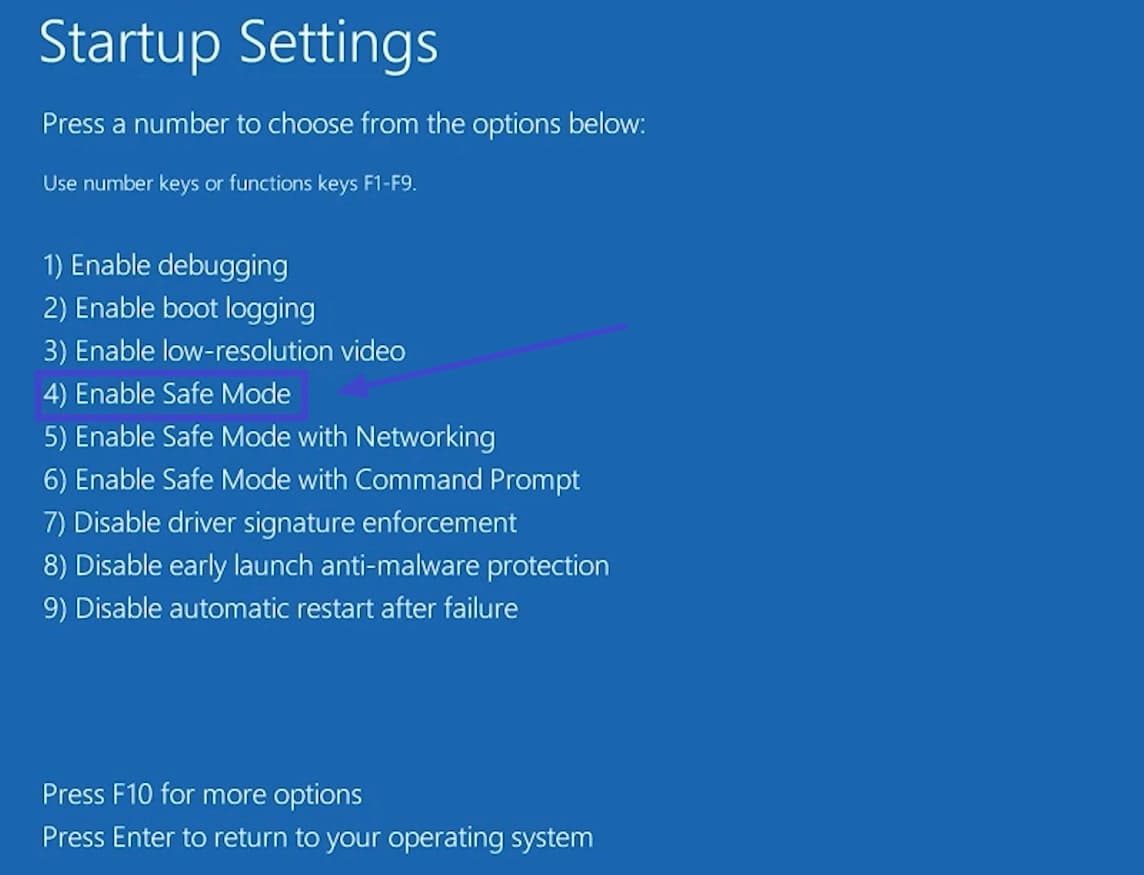
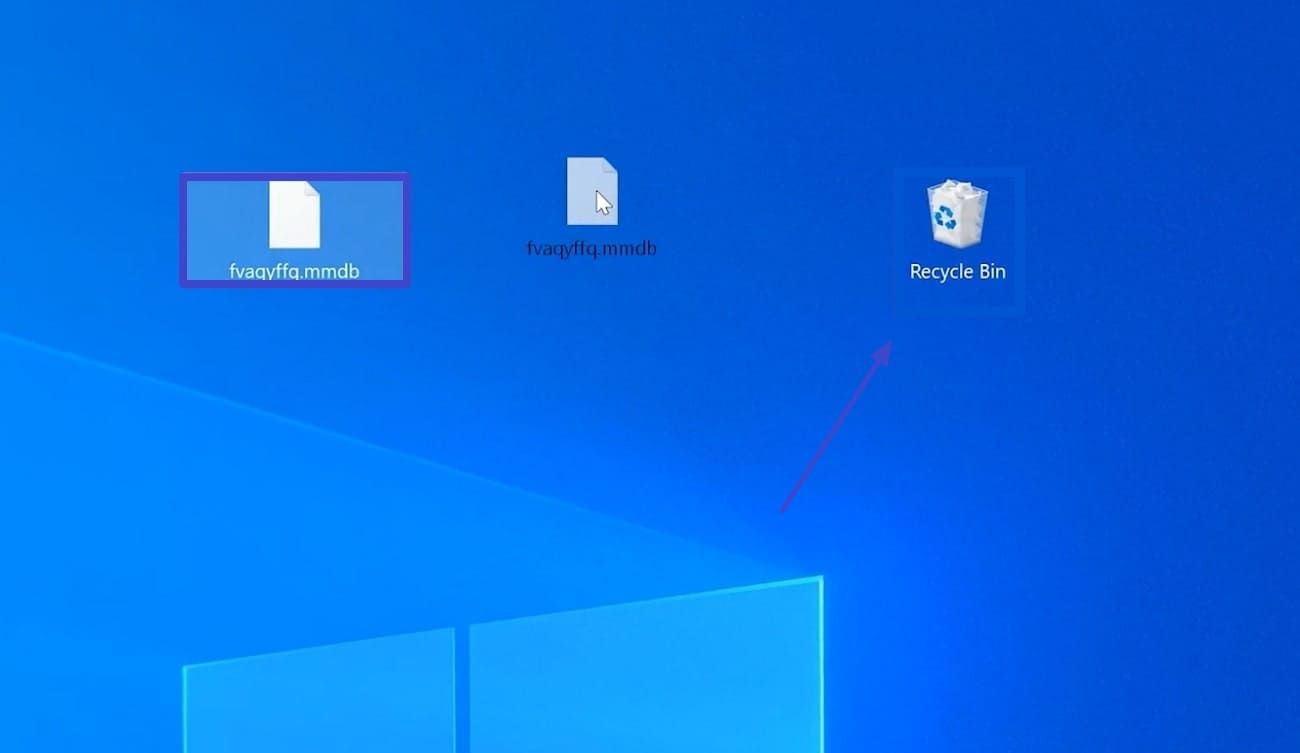
Step 5. Drag the desired file to the Recycle Bin to get it deleted from the main memory.
Delete a Corrupted File On Mac
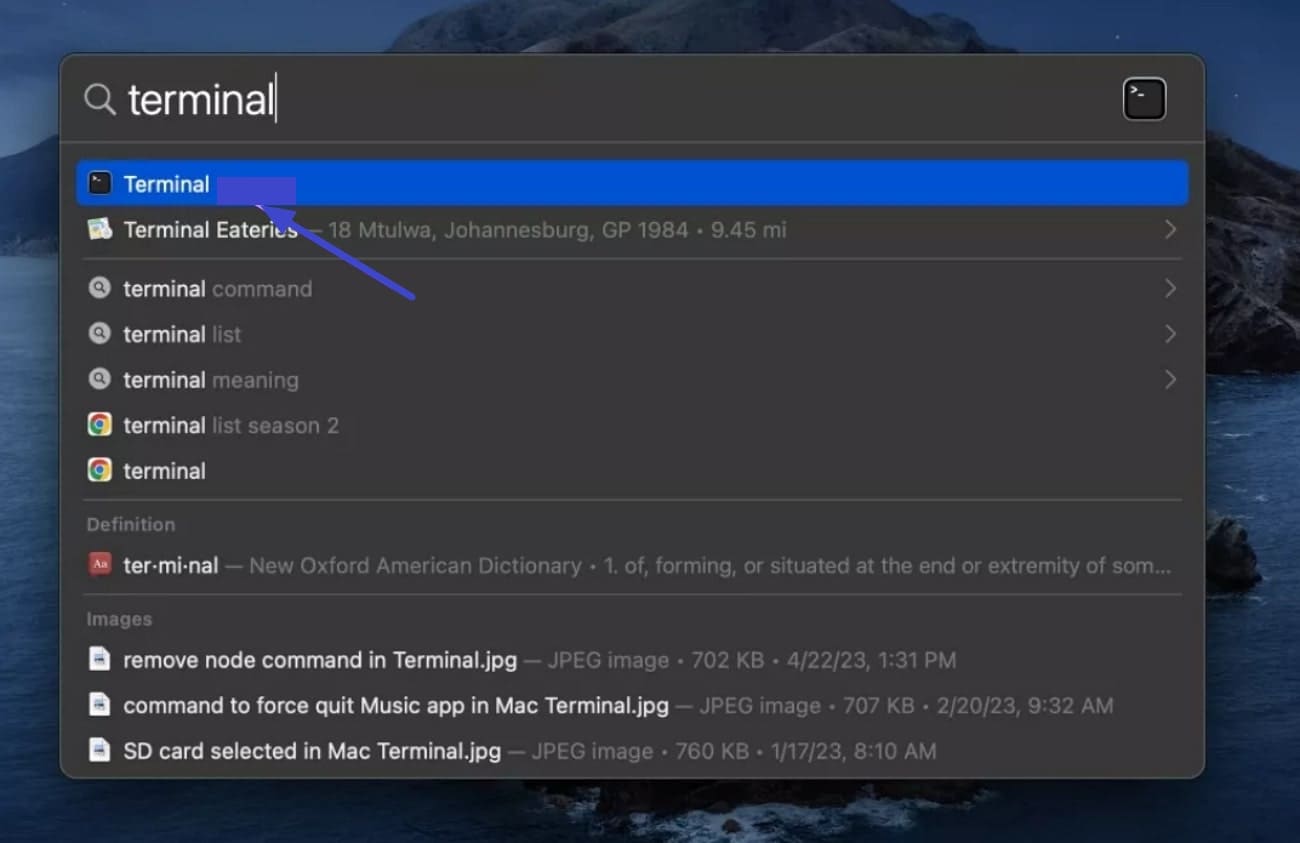
Step 1. Open the “Terminal” app using the “Search” bar available on the top of your Mac.
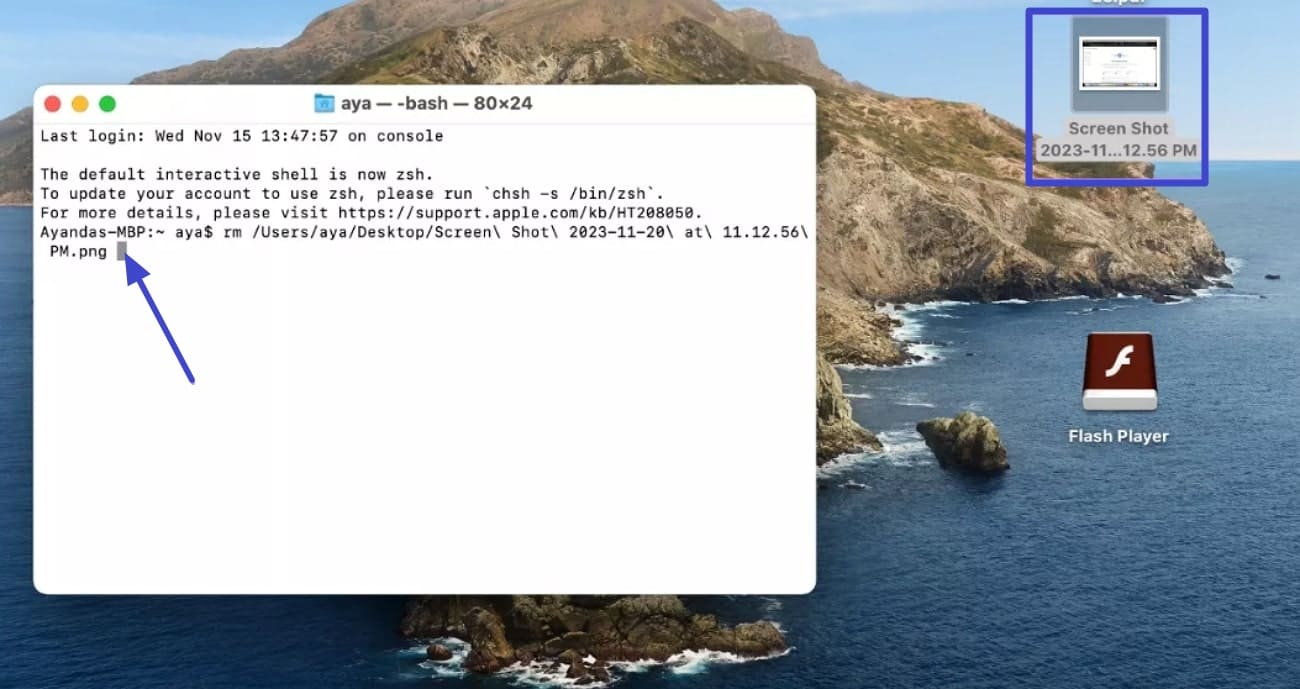
Step 2. Use the command “rm” and drop the file you wish to eliminate across the Terminal window, before pressing “Enter.”
Part 3. How Do You Force Delete a File That Won't Delete?
Sometimes I am not able to delete a file normally using the above method; that's because something in settings is stopping it. It can be due to the background system and software that keep running, and it will eventually stop the process. With this method, you can instantly compare the files without using any third-party software. So, if you want to explore how do you force delete a file in both Windows and Mac, go through the following:
Force Delete a File in Windows
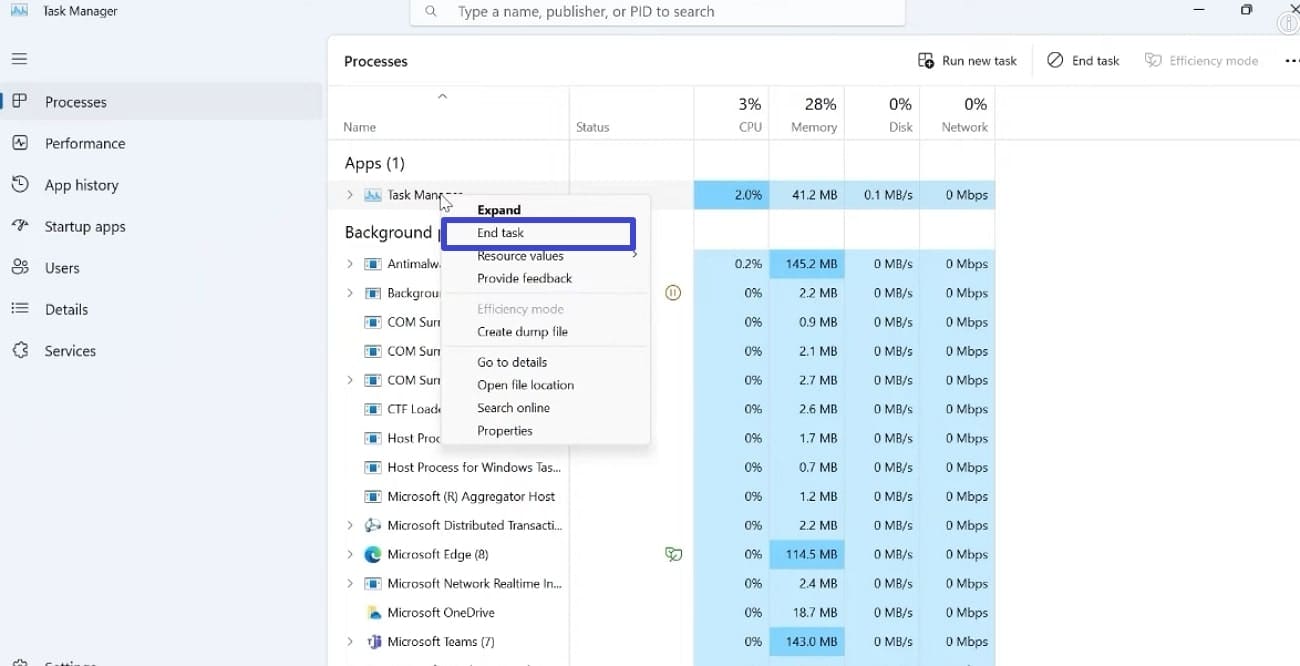
Method 1. Type the “Ctrl+Alt+Delete” keys and navigate to the desired file folder. Right-click the desired file and click on the End Task button from the pop-up.
Method 2. Select the targeted file and click the “Shift+Delete” button to permanently delete the folder.

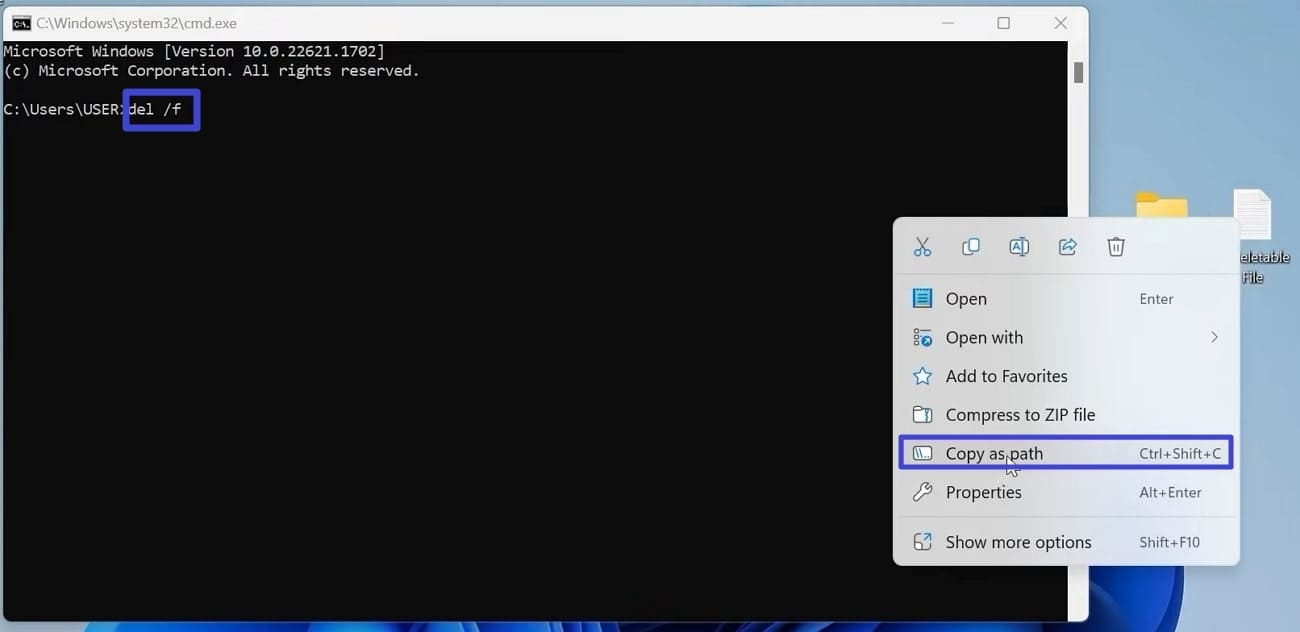
Method 3. Press the “Windows+R” keys and type “cmd” within the opened pop-up interface.
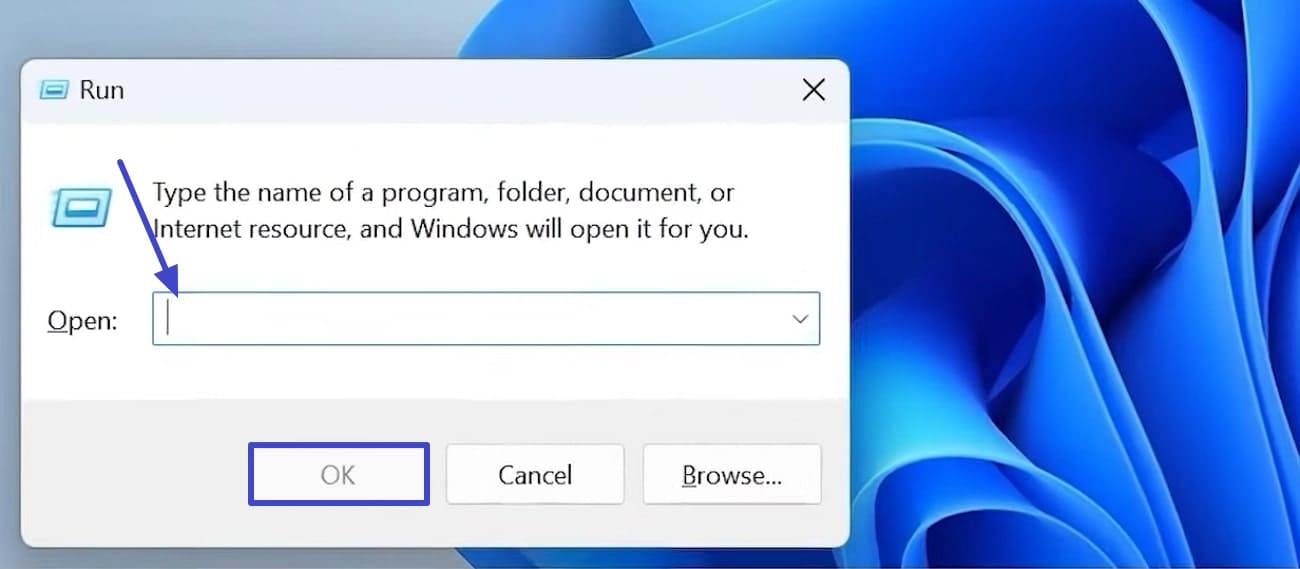
Here, type the “del/f” command and navigate to the desired folder. Right-click the file, choose “Copy as Path,” then paste its destination into the command to permanently delete it.
Force Delete a File in Mac
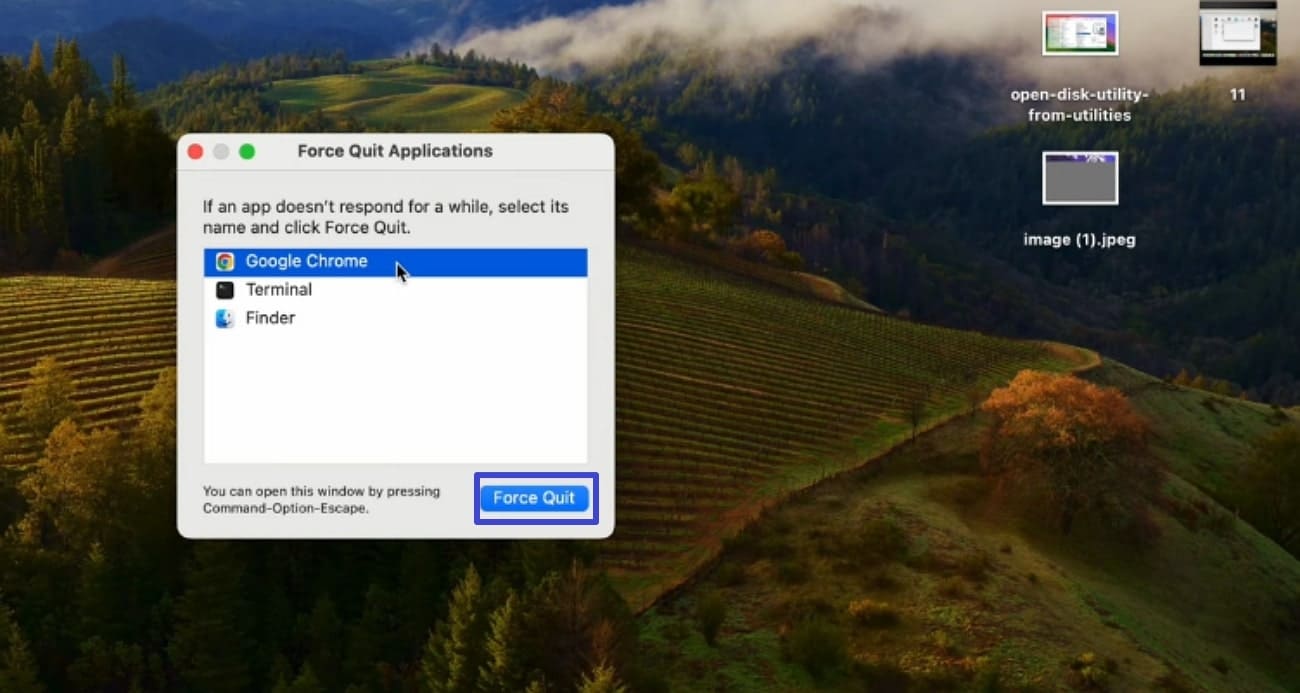
Method 1. Press “ESC + Option + Command” keys altogether to open the force quit pop-up menu.
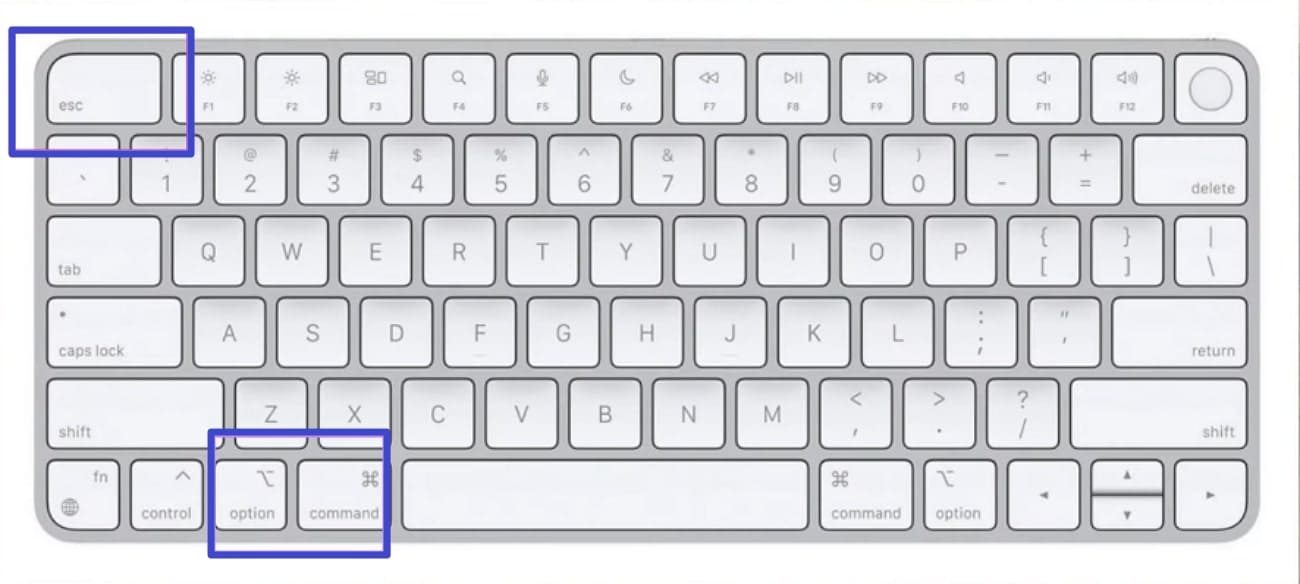
Here, choose the desired app that is running in the background, hit the “Force Quit” button, and then delete the desired file.
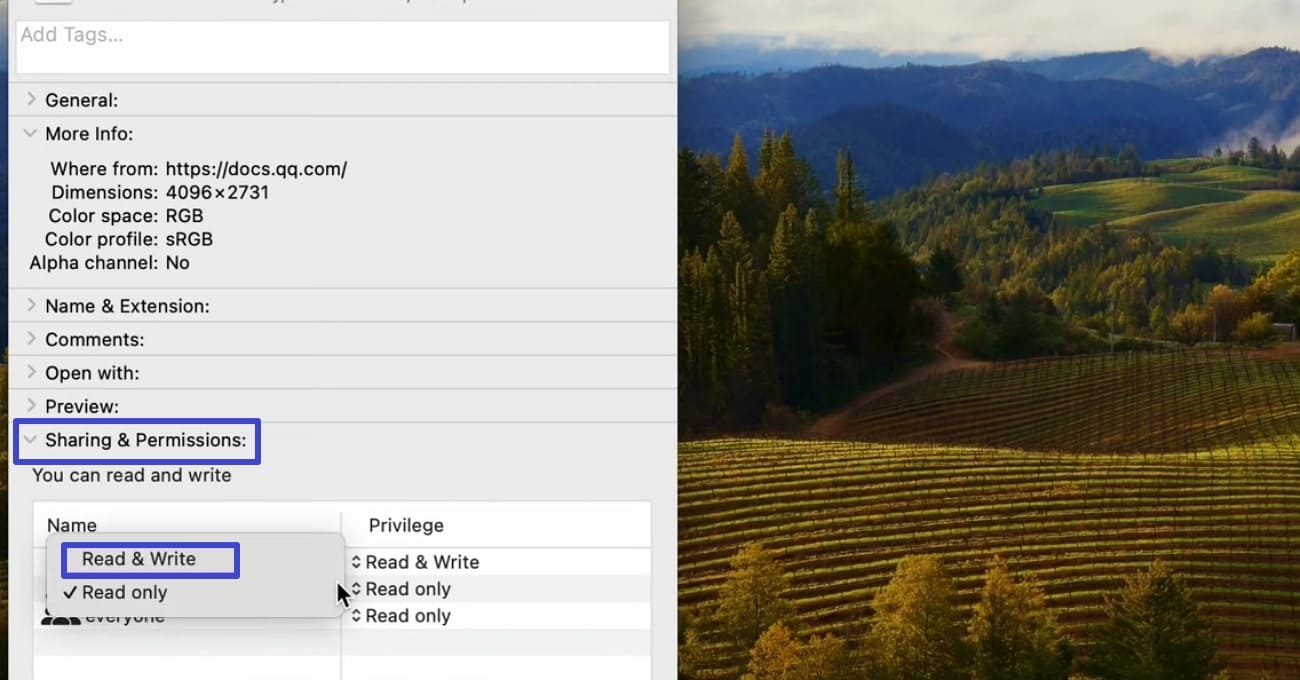
Method 2. Right-click the desired file folder and choose the “Get Info” option from the pop-up menu.

Here, navigate to the “Sharing & Permissions” option and turn the “Read Only” option to “Read & Write” to give the system full access to delete the file.
Part 4. Bonus Tip. Use UPDF to Manage Your Files
Deleting unnecessary files is vital for keeping your system organized, but proper file management involves a lot more than just removing clutter. After knowing how do you delete a file, my next step is to manage the document by editing text, converting it, adding comments, and reorganizing pages. That’s where UPDF comes in, transforming file handling into a streamlined procedure.
It provides an intuitive interface that lets me edit PDFs easily, annotate with highlights or notes, and organize pages. The foremost feature that I love about UPDF is that it provides advanced OCR, which lets you manage the scanned PDF more accurately.
Windows • macOS • iOS • Android 100% secure
Coherent Features Offered By UPDF
- Edit: UPDF allows me to edit the desired documents without disturbing their actual formatting. I can add new lines, change the font color, and font size of the text according to need.
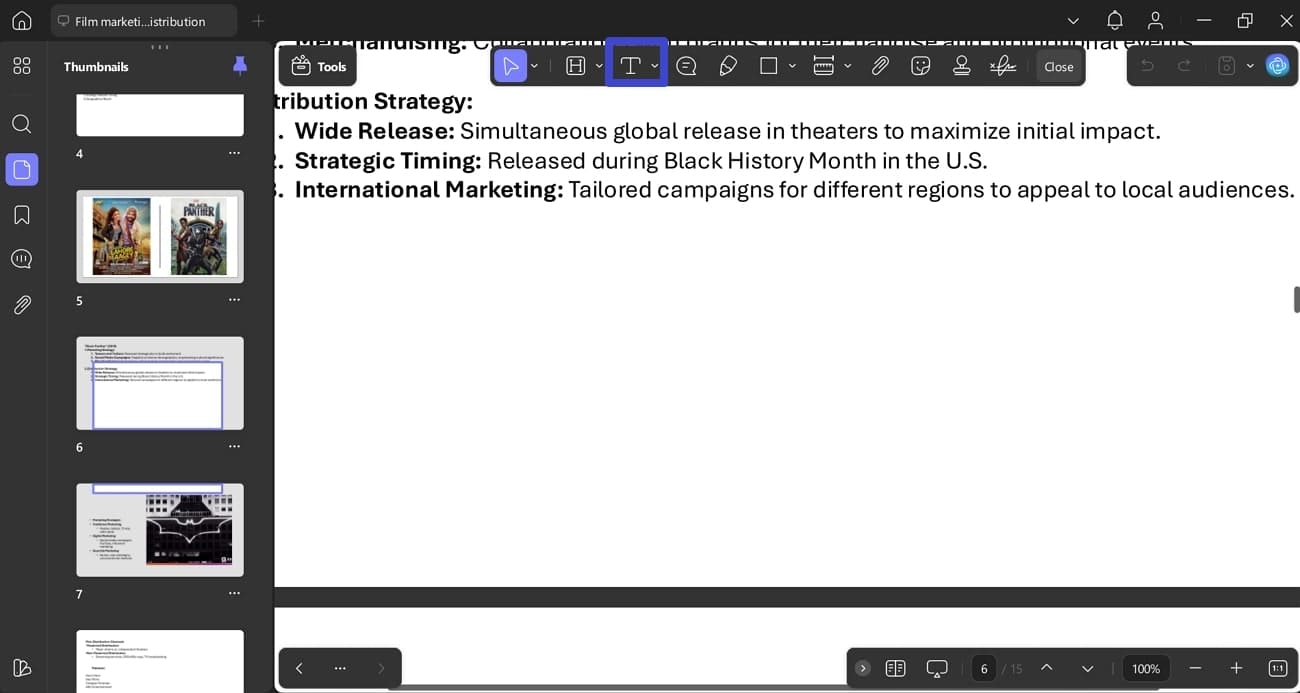
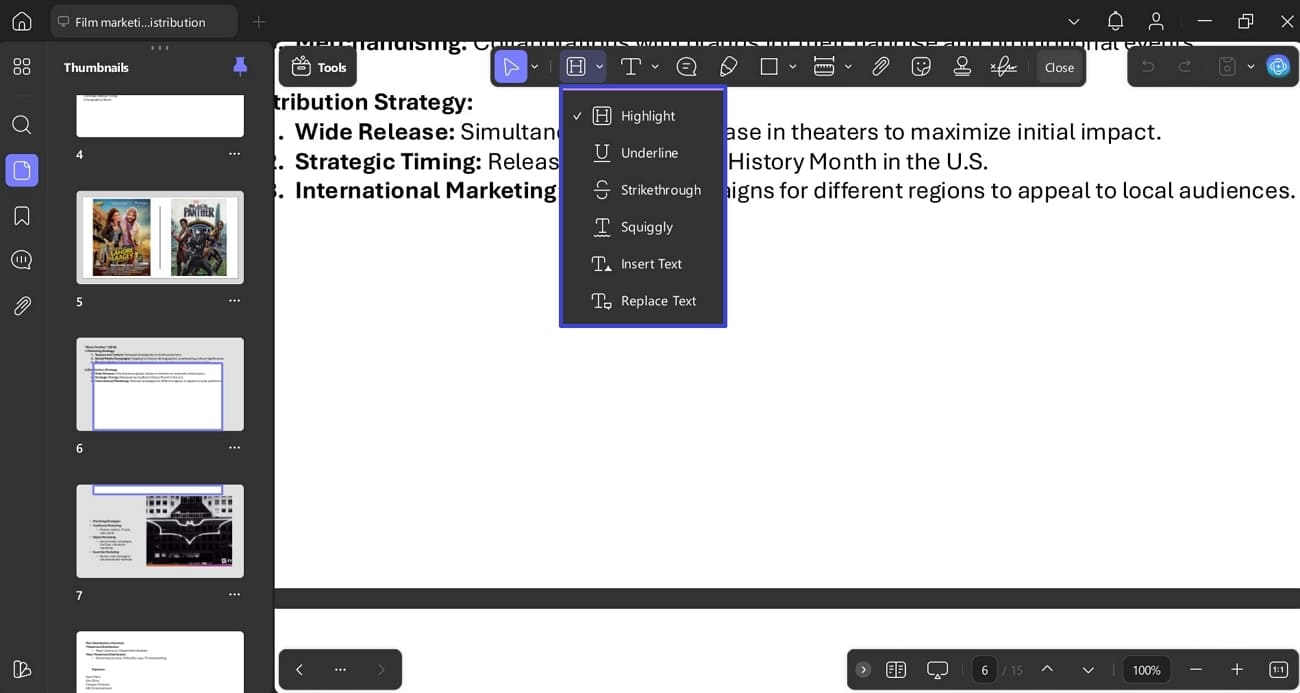
- Annotate: This feature lets me review the PDF easily by highlighting the main key points. Moreover, I can even underline and strike through the text, making it visually appealing.
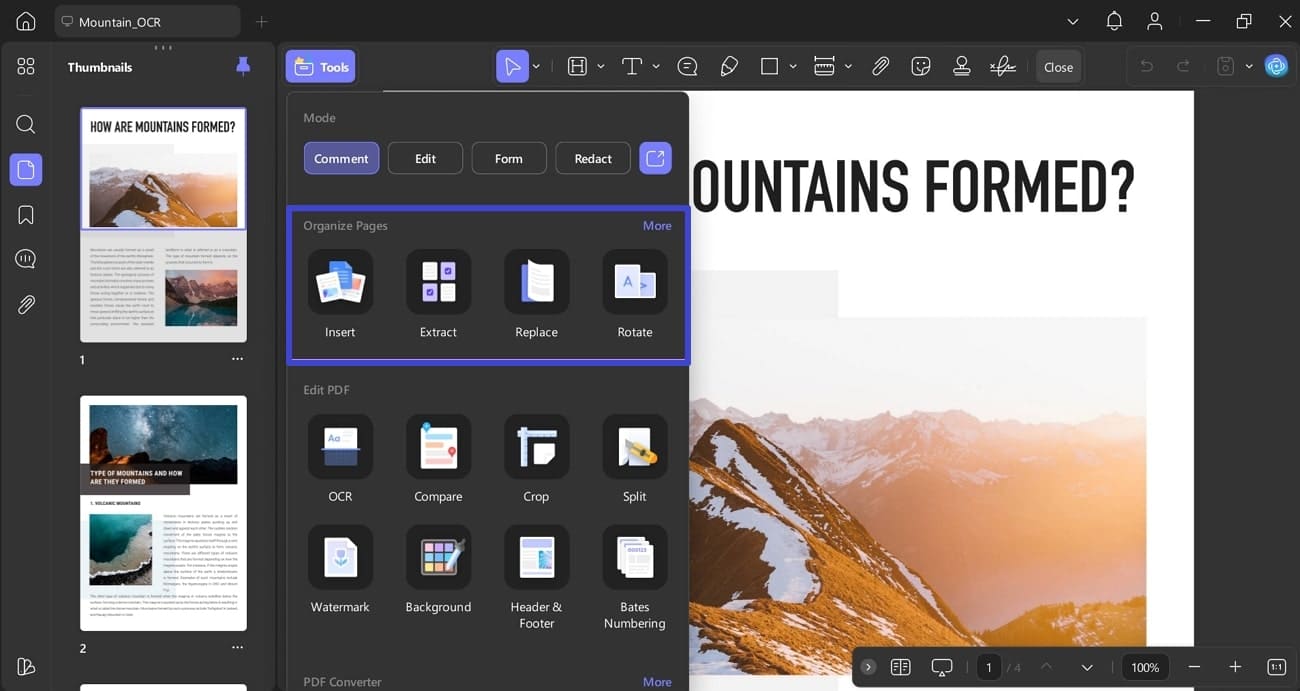
- Organize PDF: Using this specific feature, you can insert the elements and extract the desired parts of the file. I am also capable of rotating and replacing the file for a more streamlined procedure.
Windows • macOS • iOS • Android 100% secure
- Compress: To save extra space on the PC, UPDF provides me with a compressor that compresses the whole document, making it easy to handle. It is one of the main advantages of UPDF, due to which I like it.
- UPDF Cloud: It provides a built-in cloud service that lets you access the desired saved files from any device connected to this account.

Conclusion
Summing up, people don’t have to worry while exploring the answer to how do you delete a file? In this article, we have provided the most efficient ways to delete your files from both Windows and Mac devices. Furthermore, after deleting it, I prefer using UPDF, which provides various advanced features to manage the PDF workflow.
Windows • macOS • iOS • Android 100% secure


 Enya Moore

 Enid Brown
 Enrica Taylor
- r/MacOS