 UPDF for Windows
 UPDF for Mac
 UPDF for iPhone/iPad
 UPDF for Android
 Nomostar
 UPDF AI Online
 UPDF Sign
 IvyCraft
 Edit PDF
 Annotate PDF
 Create PDF
 PDF Form
 Edit links
 Convert PDF
 OCR
OCR PDF to Word
 PDF to Image
 PDF to Excel
 Organize PDF
 Merge PDF
 Split PDF
 Crop PDF
 Rotate PDF
 Protect PDF
 Sign PDF
 Redact PDF
 Sanitize PDF
 Remove Security
 Read PDF
 UPDF Cloud
 Compress PDF
 Print PDF
 Batch Process
 About UPDF AI
 UPDF AI Solutions
 AI User Guide
 FAQ about UPDF AI
 Summarize PDF
 Translate PDF
 Chat with PDF
 Chat with AI
 Chat with image
 PDF to Mind Map
 Explain PDF
 PDF AI Tools
 Image AI Tools
 AI Chat Tools
 AI Writing Tools
 AI Study Tools
 AI Working Tools
 Other AI Tools
 AI Bookmark Generation
 AI Bookmark Summary
 AI Watermark Generation
 AI Background Generation
 AI Sticker Generation
 AI Stamp Generation
 AI Editing Suite
 UPDF Copilot
 AI Page Management
 AI Semantic Search
 PDF to Word
 PDF to Excel
 PDF to PowerPoint
 User Guide
 UPDF Tricks
 FAQs
FAQs UPDF Reviews
 Download Center
 Blog
Blog Newsroom
 Tech Spec
 Updates
 UPDF vs. Adobe Acrobat
 UPDF vs. Foxit
 UPDF vs. PDF Expert
Switching to a new iPhone is always exciting, but it also comes with a few challenges. One of the most important steps is learning how to transfer eSIM to new iPhone correctly so that you don’t lose your mobile connectivity. I recently went through this process myself, and I realized how critical it is to do it right.
In this article, I’ll guide you step by step on how to transfer your eSIM from one phone to another, whether you’re moving from iPhone to iPhone or from Android to iPhone. I’ll also share a bonus tip on how I keep my files organized across devices with UPDF, a powerful PDF tool.
Windows • macOS • iOS • Android 100% secure
Part 1. What Is an eSIM and Why Use It?
An eSIM (embedded SIM) is a digital version of the traditional physical SIM card. Instead of inserting a small plastic card, your mobile carrier can activate your line directly on your phone using eSIM technology.
Here’s why I prefer eSIM over physical SIM cards:
- Convenience: No need to handle or swap tiny cards.
- Multiple profiles: You can store more than one carrier plan on your device.
- Durability: There’s no risk of losing or damaging a card.
- Future-ready: Many new iPhones, including those sold in the US, now come with eSIM only.
It’s clear why Apple and other manufacturers are embracing eSIM. It makes managing connectivity faster, easier, and more secure.
Part 2. How to Transfer eSIM to a New iPhone
If you want to transfer eSIM from an old iPhone to your new iPhone, let me walk you through the process. It only takes a few minutes, and once it’s done, your calls, texts, and mobile data will all move seamlessly to your new device without interruptions.
Prerequisites to transfer eSIM from old iPhone to new iPhone
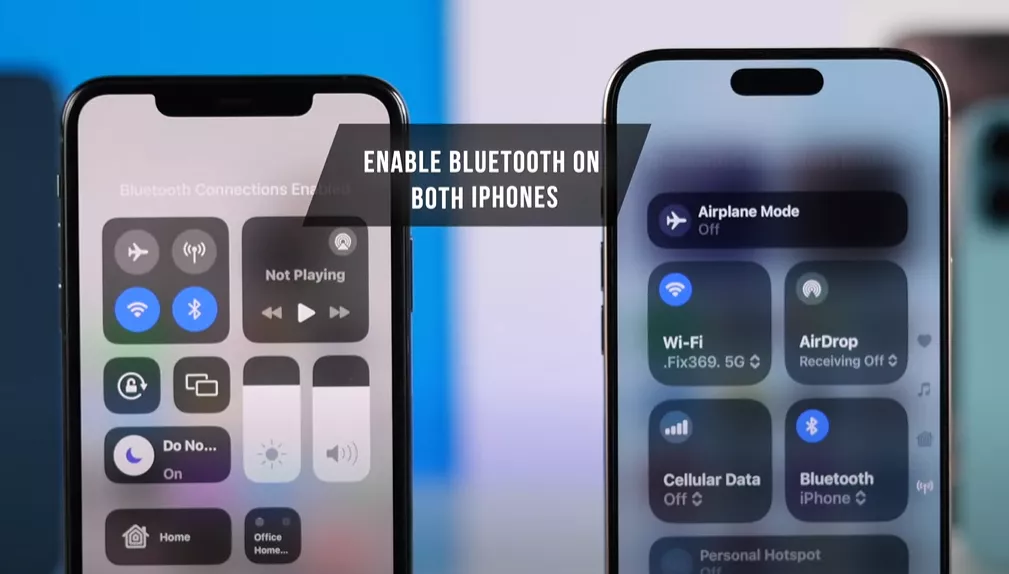
Before you begin, make sure both iPhones are charged, unlocked, and connected to Wi-Fi. Bluetooth must also be enabled on both devices, as the phones need to communicate with each other during the transfer. It’s also a good idea to keep them close together, preferably side by side, to avoid connection issues.
Step 1: Start on your new iPhone
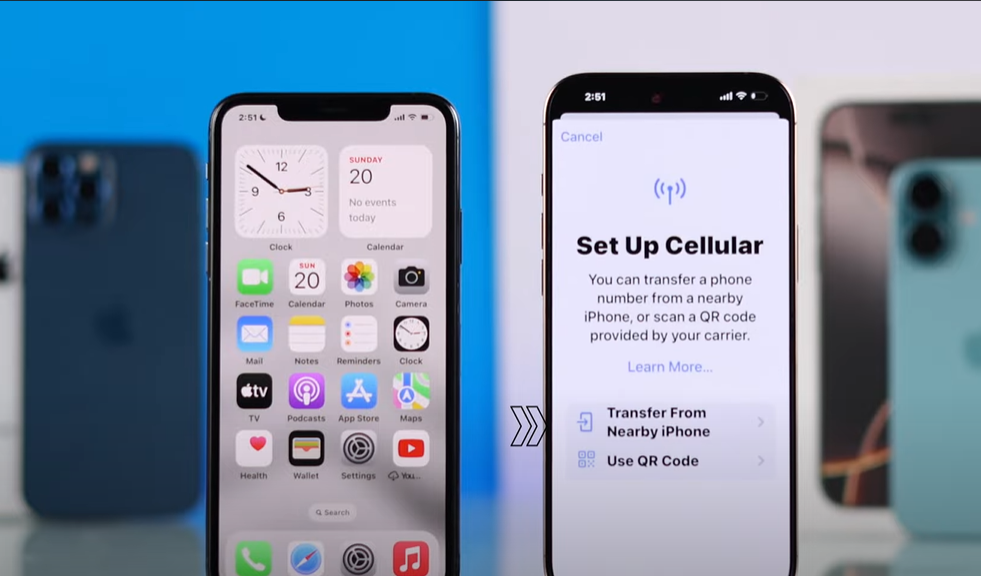
On your new iPhone, go to Settings > Cellular, then scroll down and tap on Add eSIM.
Step 2: Choose transfer method
Select Transfer from Nearby iPhone. At this point, your old iPhone will detect that you’re trying to move your eSIM and prompt you with instructions.
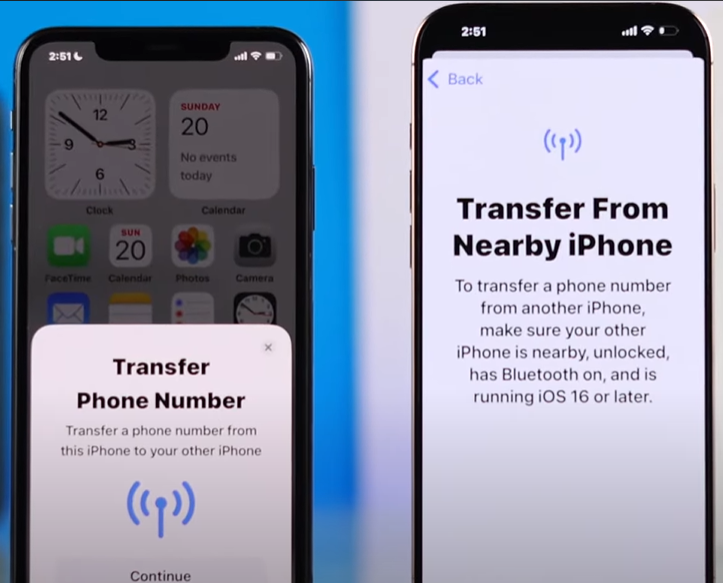
Step 3: Confirm on your old iPhone
A popup will appear on your old device. Simply press Continue and wait for the system to link both phones.
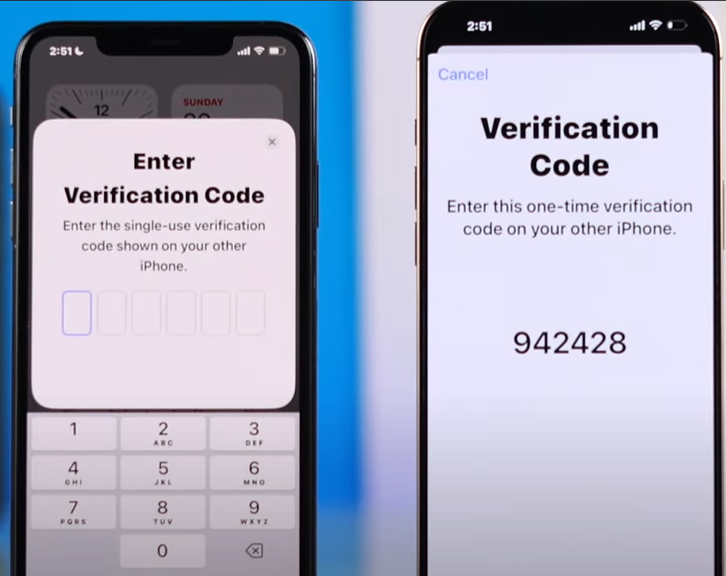
Step 4: Enter the verification code
A code will appear on one of the devices. Enter it when prompted to confirm that you are the owner and want to move the number securely.
Step 5: Complete the transfer
Once verified, your old iPhone will release the eSIM and your new iPhone will activate it. You’ll see a confirmation message saying that your eSIM has been added successfully.
That’s it! I’ve used this method myself, and it worked smoothly without needing to contact my carrier. To double-check, make a quick call or use mobile data.
How to Transfer Your eSIM from Android to iPhone
If you’re switching from Android to iPhone, the process is slightly different but still manageable. Let me show you how to do it step by step.
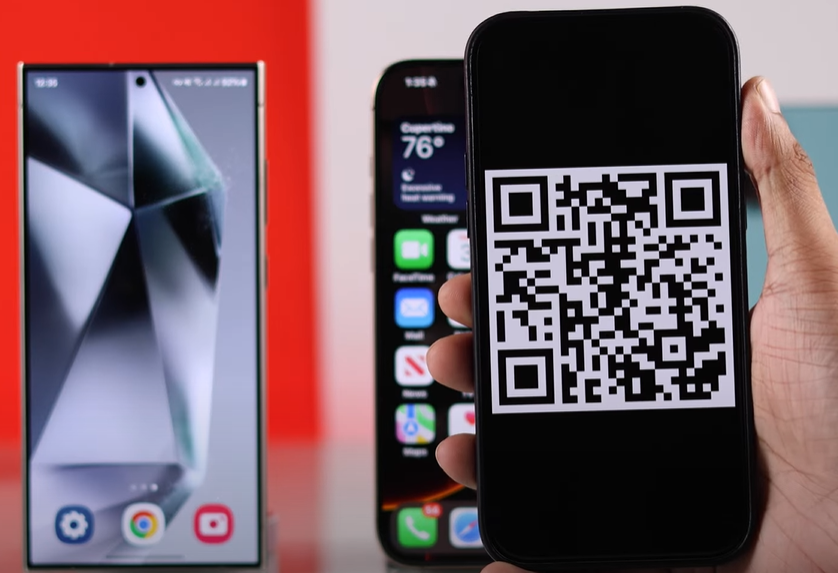
Step 1: Get your eSIM activation code or QR code
The first thing you need is your eSIM activation code (usually provided as a QR code) from your carrier. If you don’t already have it, contact your SIM provider and request it in advance. Without this code, you won’t be able to complete the transfer.
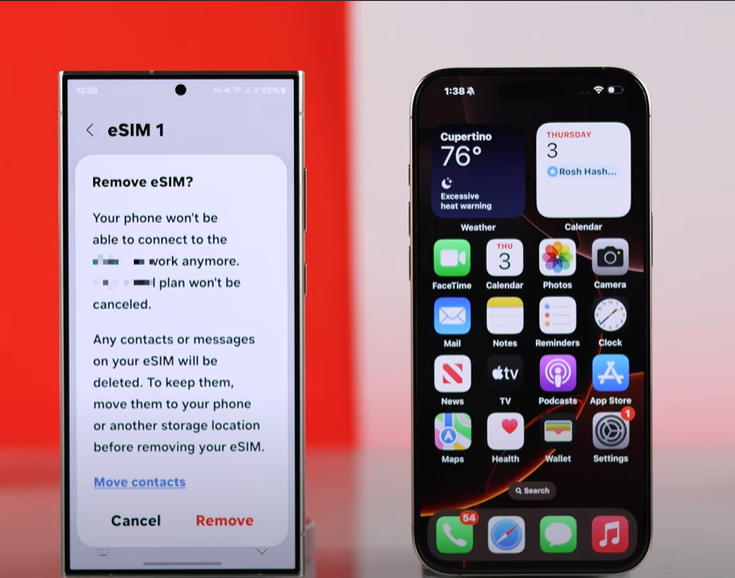
Step 2: Remove the eSIM from your Android device
On your Android phone, go to Settings and search for SIM or SIM Manager. From there, find the eSIM you want to move and remove or deactivate it. This step frees up the eSIM so it can be activated on your iPhone.
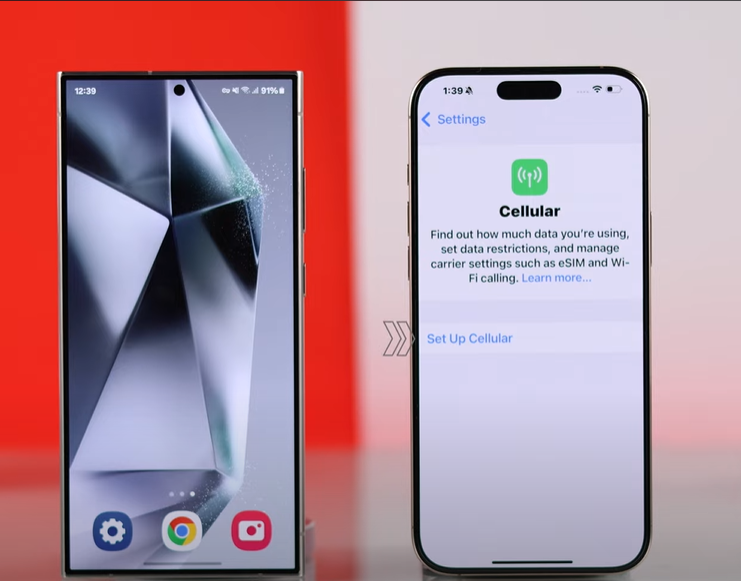
Step 3: Add the eSIM on your iPhone
Now switch to your new iPhone. Go to Settings > Cellular, and either tap Set Up Cellular (if you are still in the initial setup process) or Add eSIM (if your phone is already set up).
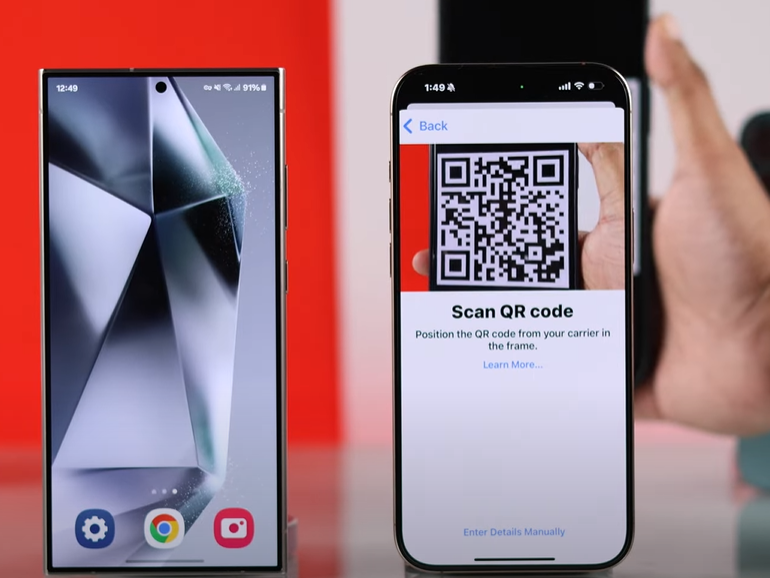
Step 4: Scan the QR code or enter details manually
Tap on Use QR Code and point your iPhone’s camera at the QR code provided by your carrier. If you only have an activation code, select Enter Details Manually and type in the information. You can also scan the QR code directly using the Camera app.
Step 5: Wait for activation
After scanning or entering the details, wait a few moments while your iPhone activates the plan. Once complete, you’ll see your carrier’s name in the status bar, confirming that the eSIM has been added successfully.
And that’s it. With these steps, you can transfer your eSIM from an Android device to your new iPhone and start using your number right away.
Bonus Tip | Stay Organized Across Devices with UPDF
While transferring your eSIM ensures uninterrupted connectivity, I also think about how I manage my digital files across devices. For that, I rely on UPDF. Just like eSIM removes the hassle of swapping cards, UPDF removes the frustration of managing PDFs on different platforms.
Here are the UPDF features I use daily:
Windows • macOS • iOS • Android 100% secure
- Edit, Annotate, and Organize PDFs
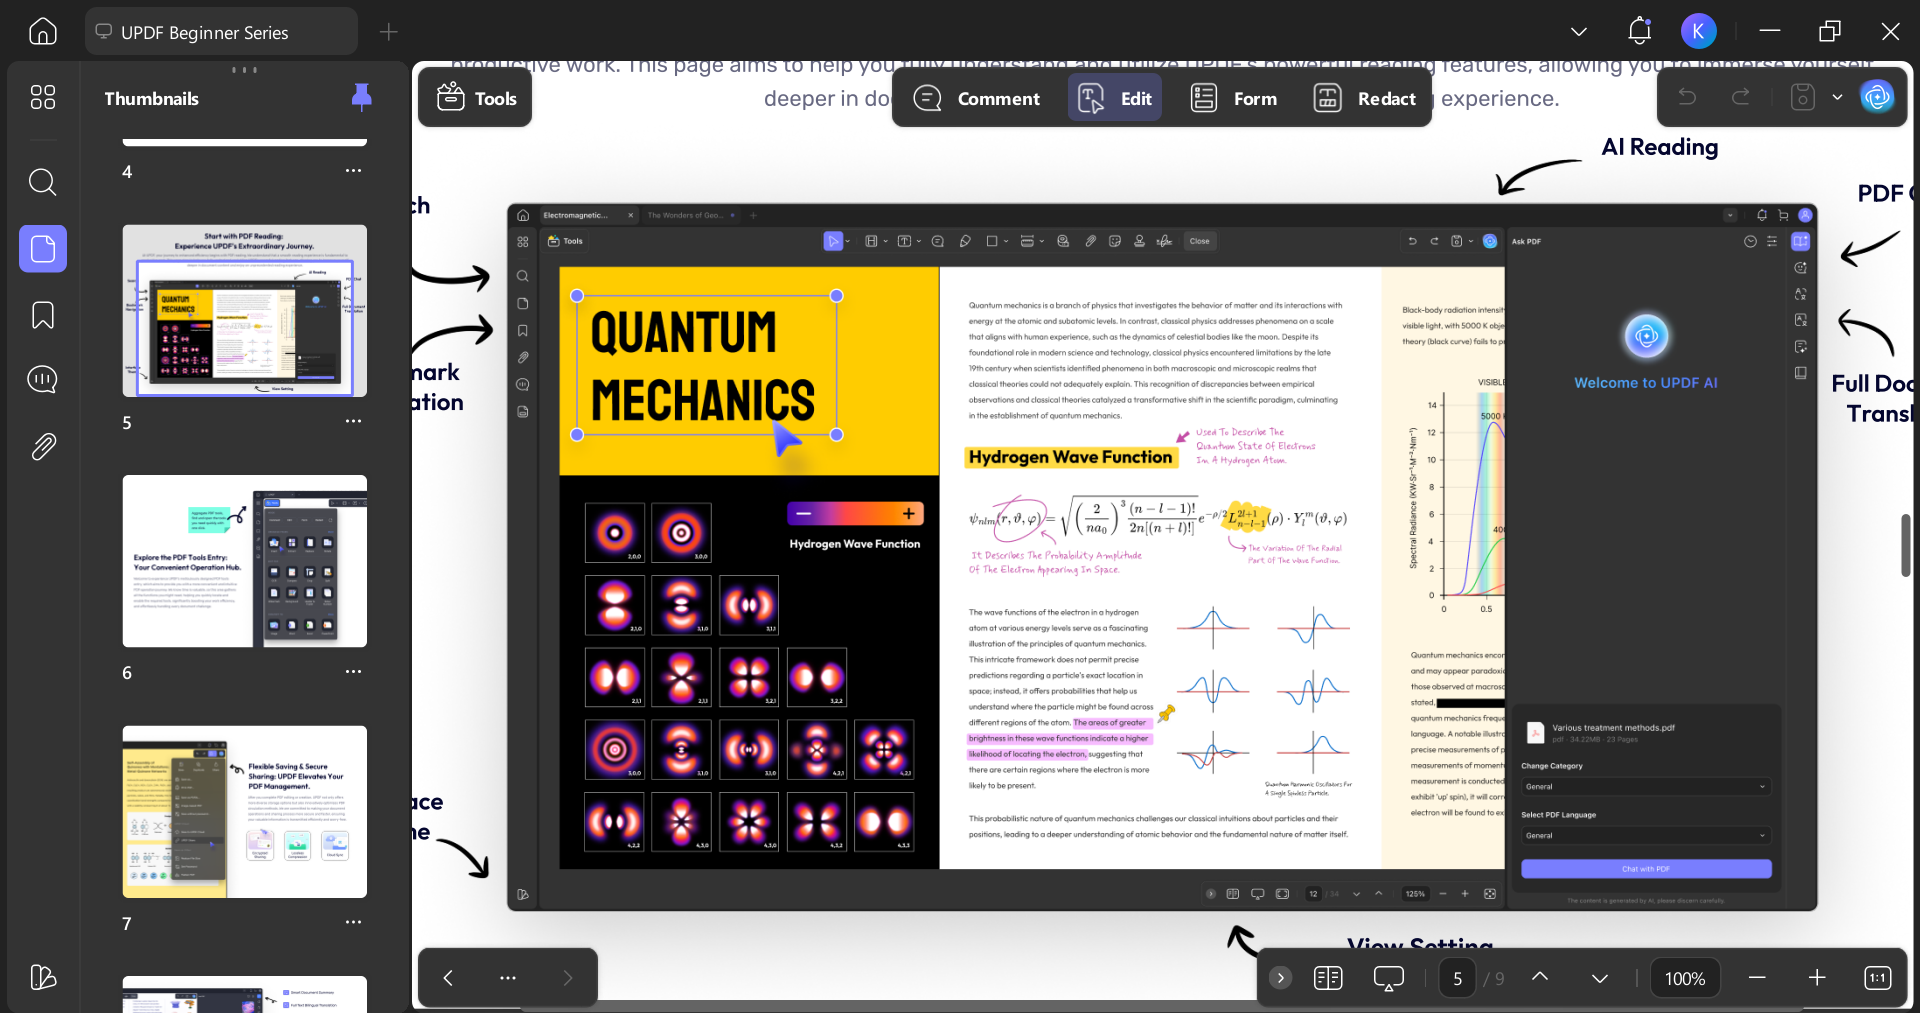
I can merge, split, reorder, insert, delete, or extract pages. When I need to highlight important sections or add notes, the annotation tools are super handy.
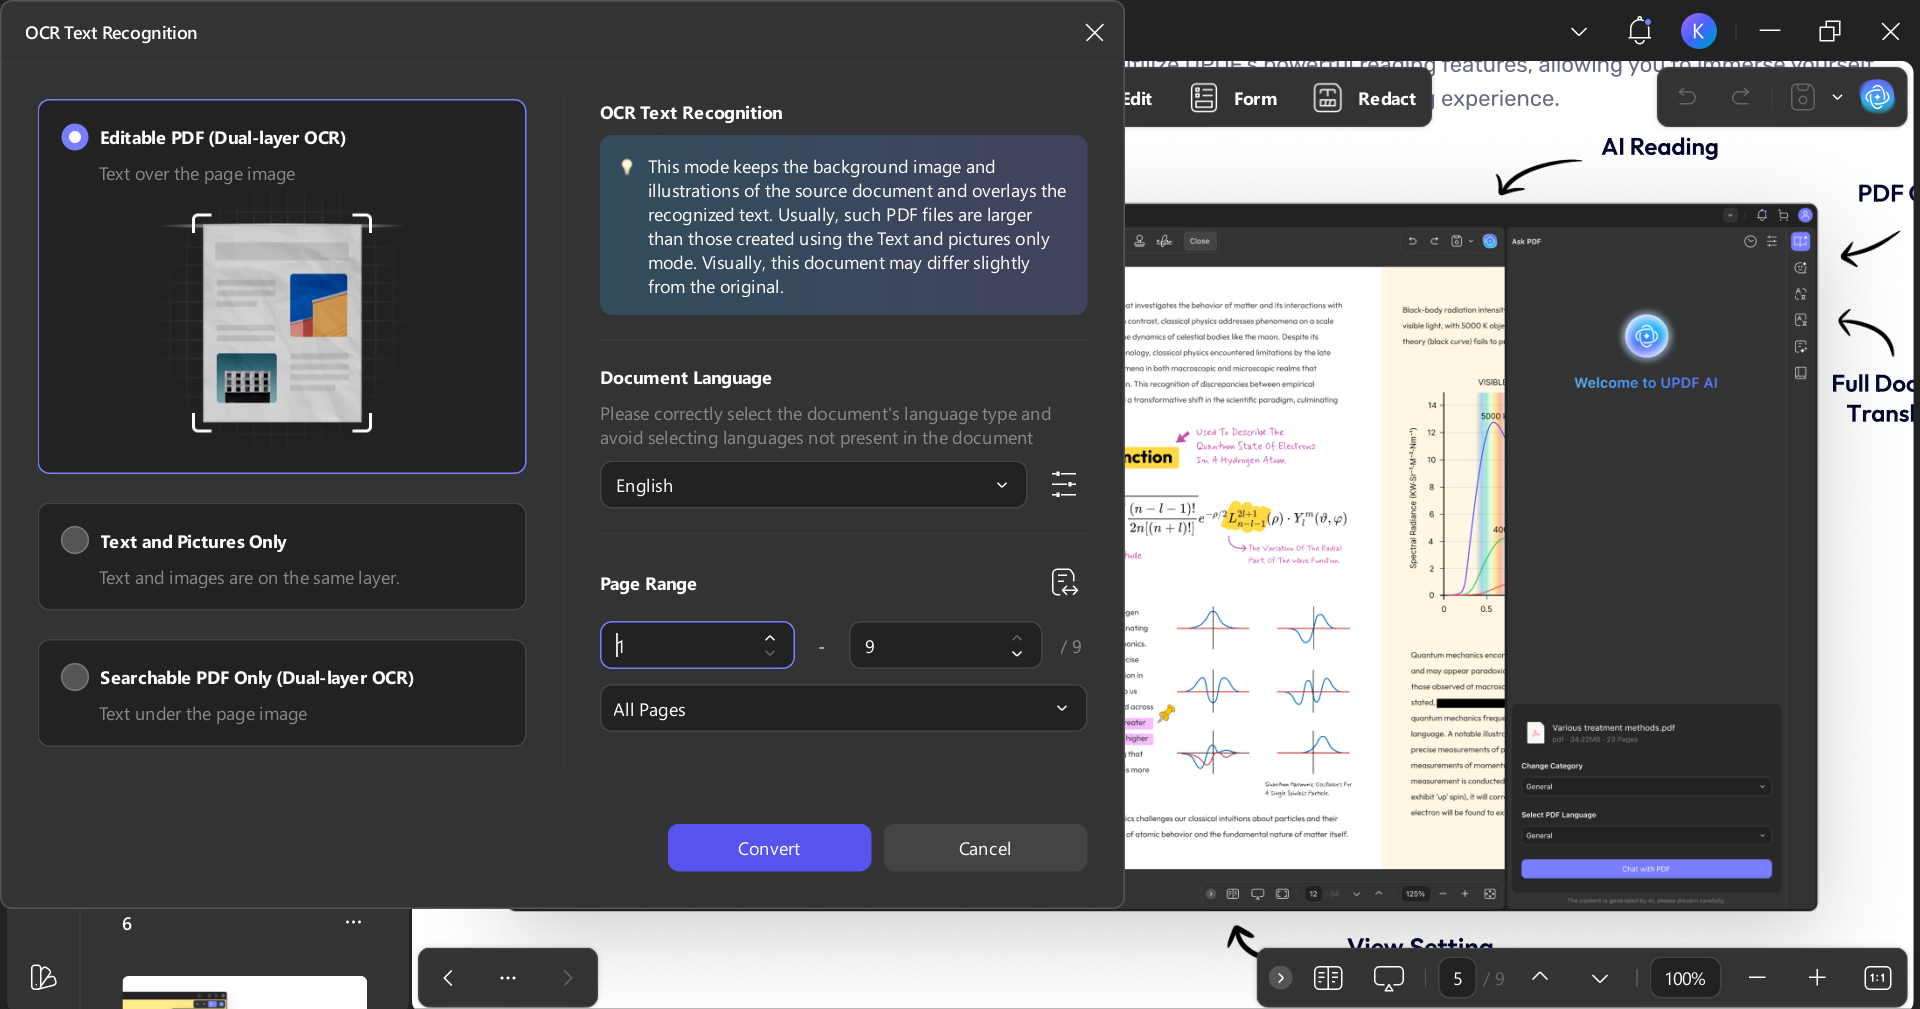
- OCR (Optical Character Recognition)
This is a game-changer. UPDF can turn scanned PDFs and images into searchable, editable text in over 38 languages. I once scanned a printed contract and turned it into editable text in minutes.
- Cross-Platform Support (UPDF Cloud)
I use both Windows and iPhone. UPDF syncs my files across devices seamlessly, so I never worry about transferring documents manually. - File Conversion
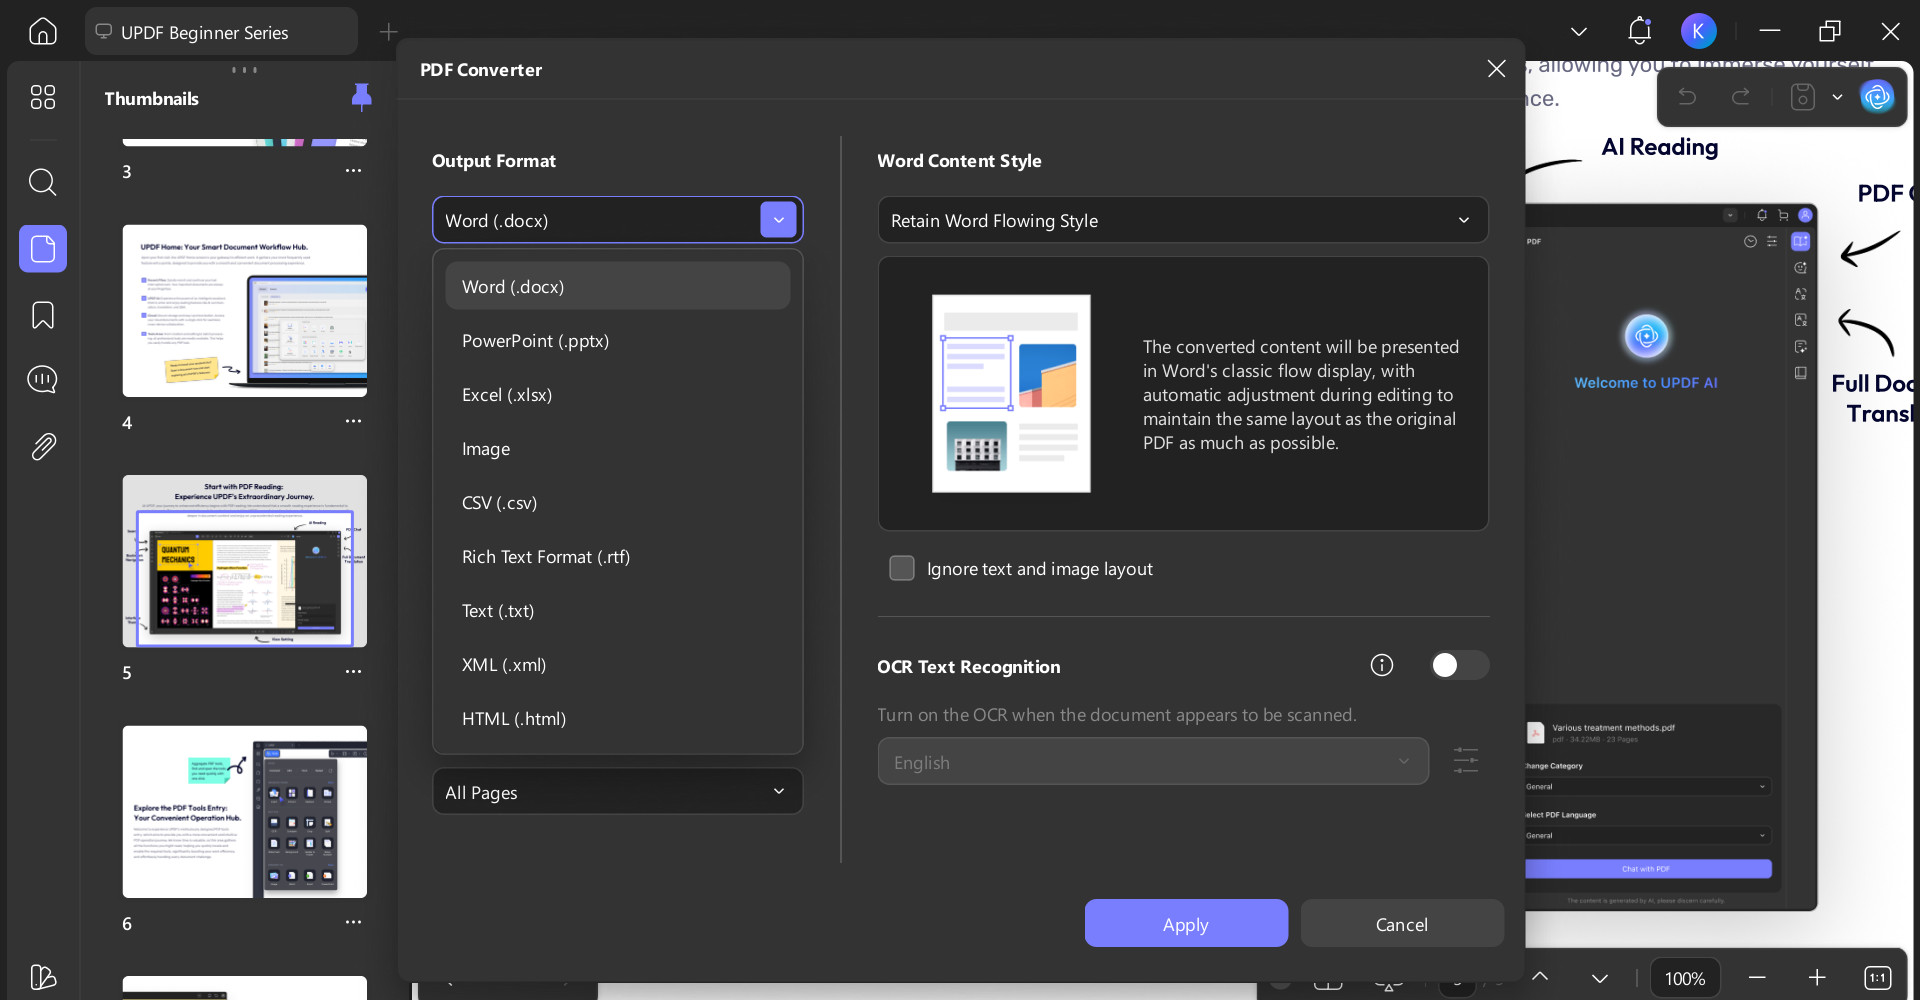
UPDF isn’t just for PDFs. I can convert PDFs into Word, Excel, PowerPoint, or images, and I can also turn other file formats into PDFs.
- AI Integration (UPDF AI)
UPDF AI saves me so much time. It can summarize long documents, translate text, and even explain complex sections of a file.
For anyone who wants to manage files more efficiently, I highly recommend checking out the UPDF User Guide to see what’s possible.
Windows • macOS • iOS • Android 100% secure
Conclusion
Learning how to transfer eSIM to new iPhone or even how to transfer eSIM from one phone to another is easier than it seems. With the right steps, you’ll be connected in no time. And while you’re upgrading your phone, don’t forget to upgrade how you handle your files too. UPDF has made my digital life much easier, and I think it will do the same for you.
Download UPDF below and experience a smarter way to work with PDFsacross all your devices.
Windows • macOS • iOS • Android 100% secure


 Enrica Taylor
 Lizzy Lozano
 Enola Miller
