UPDF for Windows
 UPDF for Mac
 UPDF for iPhone/iPad
 UPDF for Android
 UPDF AI Online
 UPDF Sign
 IvyCraft
 Edit PDF
 Annotate PDF
 Create PDF
 PDF Form
 Edit links
 Convert PDF
 OCR
OCR PDF to Word
 PDF to Image
 PDF to Excel
 Organize PDF
 Merge PDF
 Split PDF
 Crop PDF
 Rotate PDF
 Protect PDF
 Sign PDF
 Redact PDF
 Sanitize PDF
 Remove Security
 Read PDF
 UPDF Cloud
 Compress PDF
 Print PDF
 Batch Process
 About UPDF AI
 UPDF AI Solutions
 AI User Guide
 FAQ about UPDF AI
 Summarize PDF
 Translate PDF
 Chat with PDF
 Chat with AI
 Chat with image
 PDF to Mind Map
 Explain PDF
 PDF AI Tools
 Image AI Tools
 AI Chat Tools
 AI Writing Tools
 AI Study Tools
 AI Working Tools
 Other AI Tools
 AI Bookmark Generation
 AI Bookmark Summary
 AI Watermark Generation
 AI Background Generation
 AI Sticker Generation
 AI Stamp Generation
 AI Editing Suite
 UPDF Copilot
 AI Page Management
 AI Semantic Search
 PDF to Word
 PDF to Excel
 PDF to PowerPoint
 User Guide
 UPDF Tricks
 FAQs
FAQs UPDF Reviews
 Download Center
 Blog
Blog Newsroom
 Tech Spec
 Updates
 UPDF vs. Adobe Acrobat
 UPDF vs. Foxit
 UPDF vs. PDF Expert
There is nothing better than Microsoft Word when it comes to writing, reading, editing, and managing your documents. It gets even better when you know how to use every function properly.
One of the common tasks in Word is to highlight or circle specific text or images for emphasis or clarification. Whether you want to circle an important paragraph, a specific word or phrase, or an image, Word provides several options to achieve this.
This guide covers 4 methods across Microsoft Word and WPS Word, with step-by-step instructions for both text and images. Part 3 also covers how UPDF handles the same task when your document is shared as a PDF — no shape-drawing frustration required.
Part 1: 2 Methods to Circle Something in Microsoft Word
While multiple methods are available to circle a piece of text or a part of an image in Word, you may want to get the job done quickly with comparatively easier methods. For that, we will share two methods; first, using the "Shapes" tool, and then with the "Drawing" tool. So let's get started with the first one!
1. Using the Shape Tool to Circle Something in Microsoft Word
Word's Shapes tool gives you the most precise, adjustable circles of any built-in option. Here's how to use it:
- Step 1. Open your document in Word.
- Step 2. Click the Insert tab → Shapes → select the Oval shape (Word has no dedicated circle shape; Oval is the correct substitute).
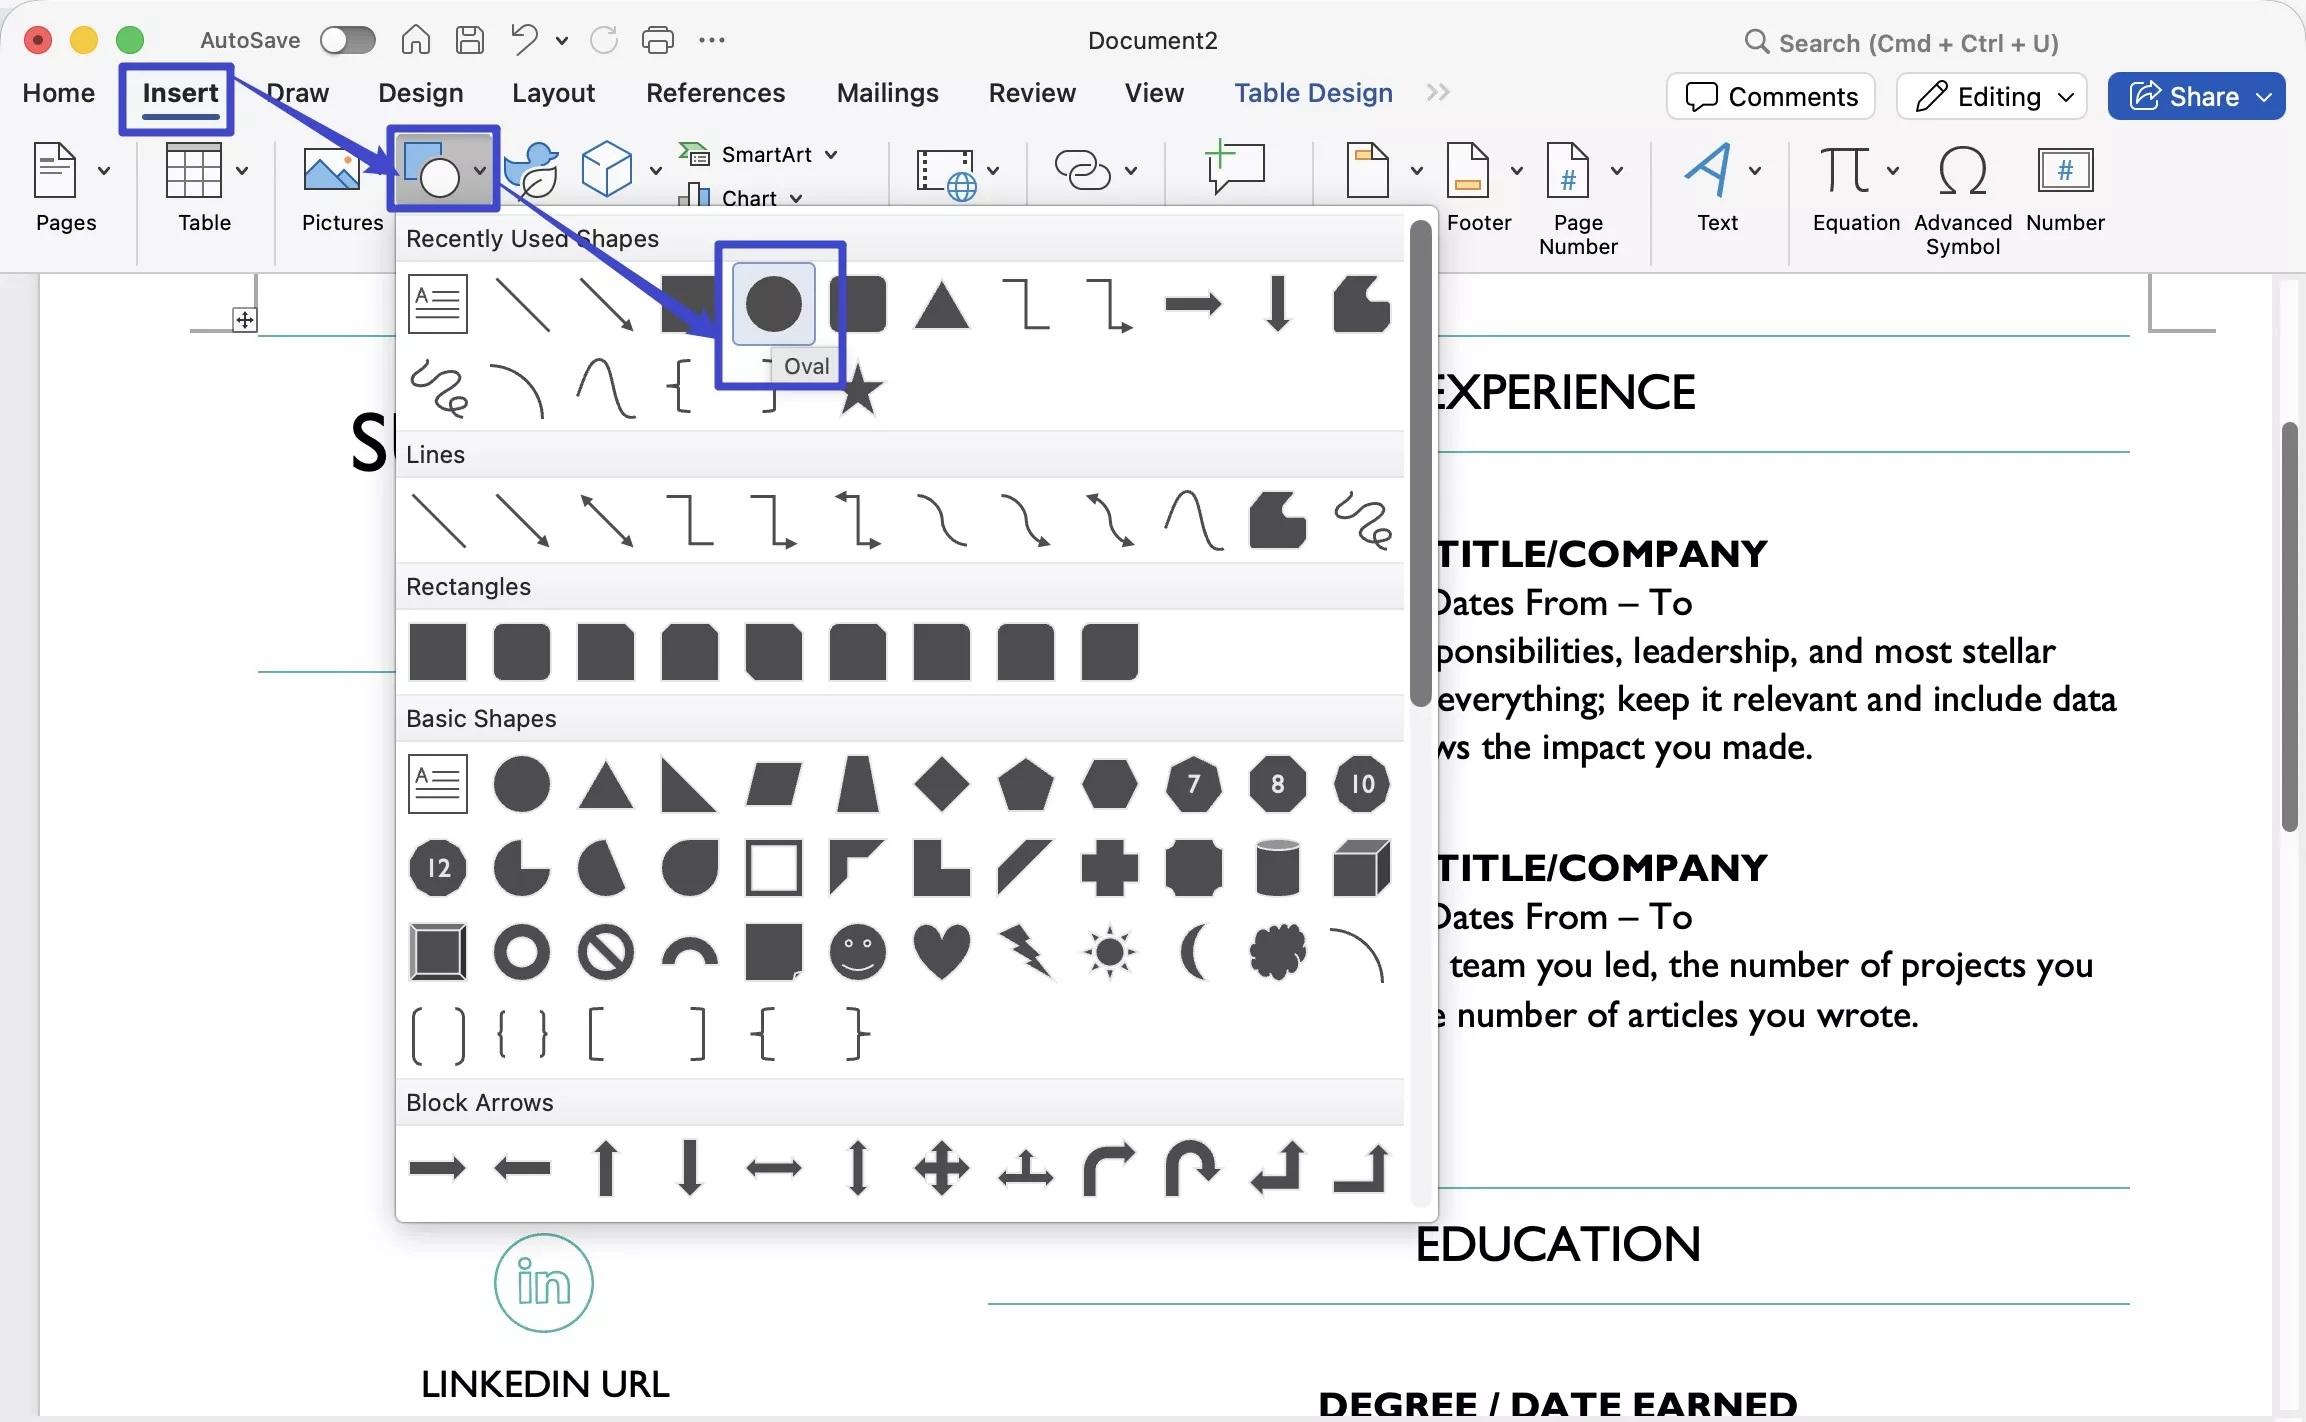
- Step 3. Hold Shift while dragging to constrain the shape to a perfect circle, then draw it over the text or image you want to highlight.
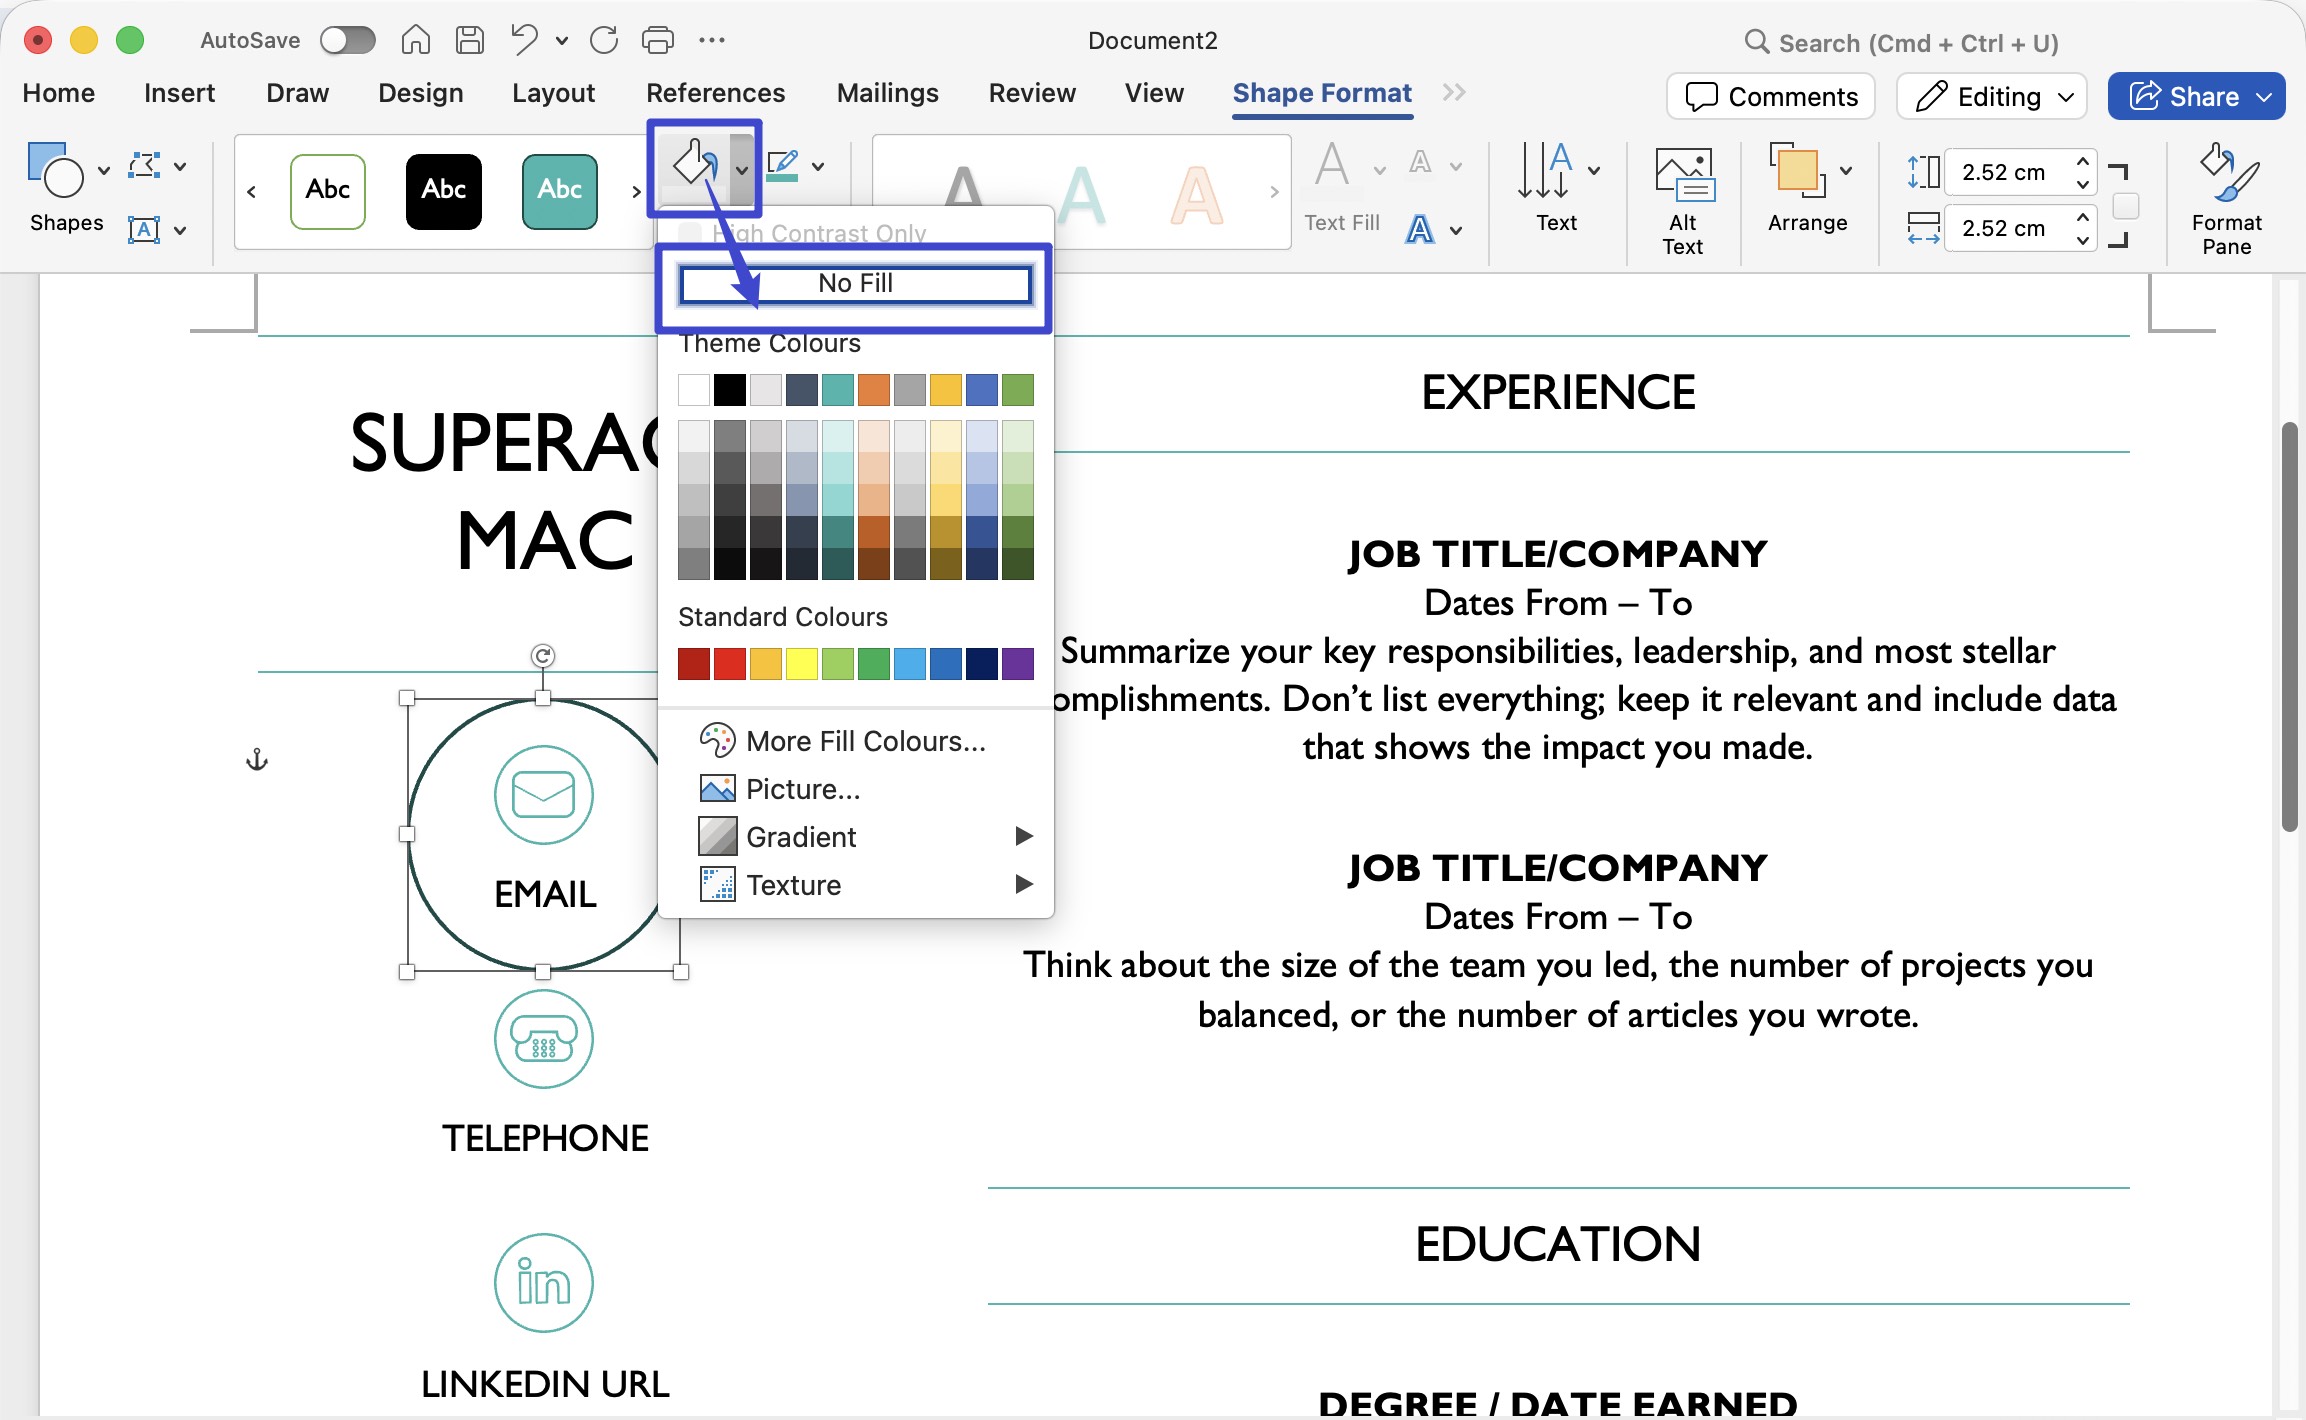
- Step 4. With the shape selected, click Shape Fill → No Fill so the content underneath stays visible.
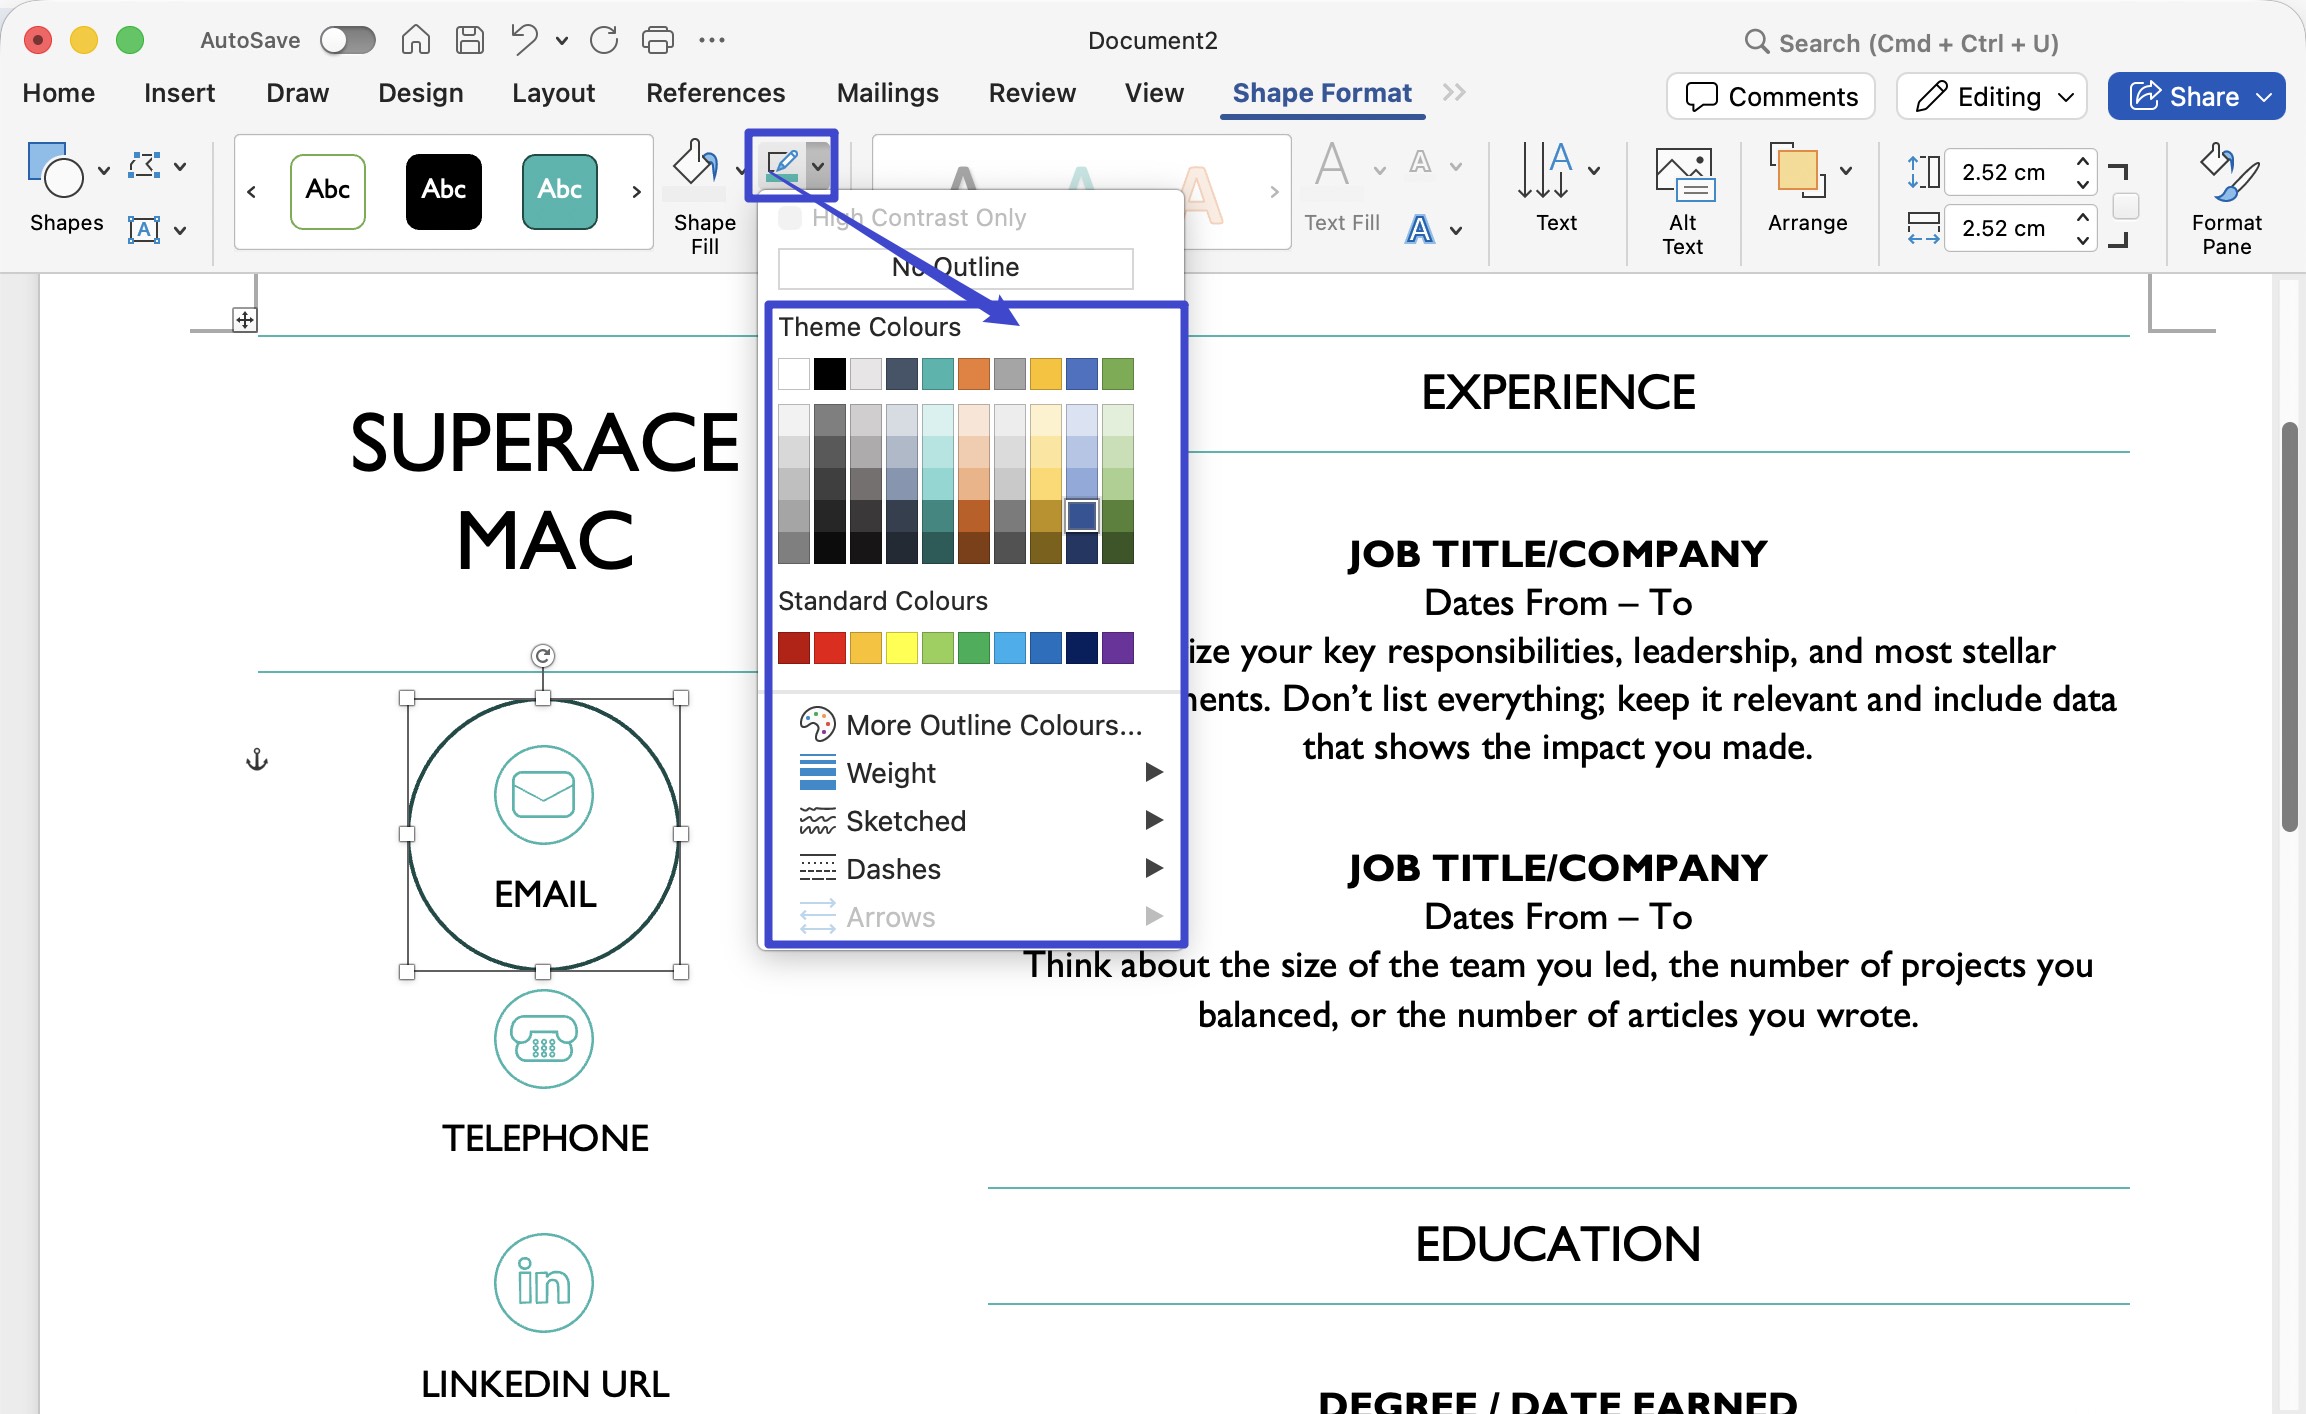
- Step 5. Click Shape Outline to change the circle's border color and line weight.
2. Using the Drawing Tools to Circle Something in Microsoft Word
Word offers two drawing approaches: the Freeform Scribble tool and the dedicated Draw tab.
2.1 Using Freeform Scribble:
- Step 1. Click Insert → Shapes → in the Lines section, select Freeform: Scribble.
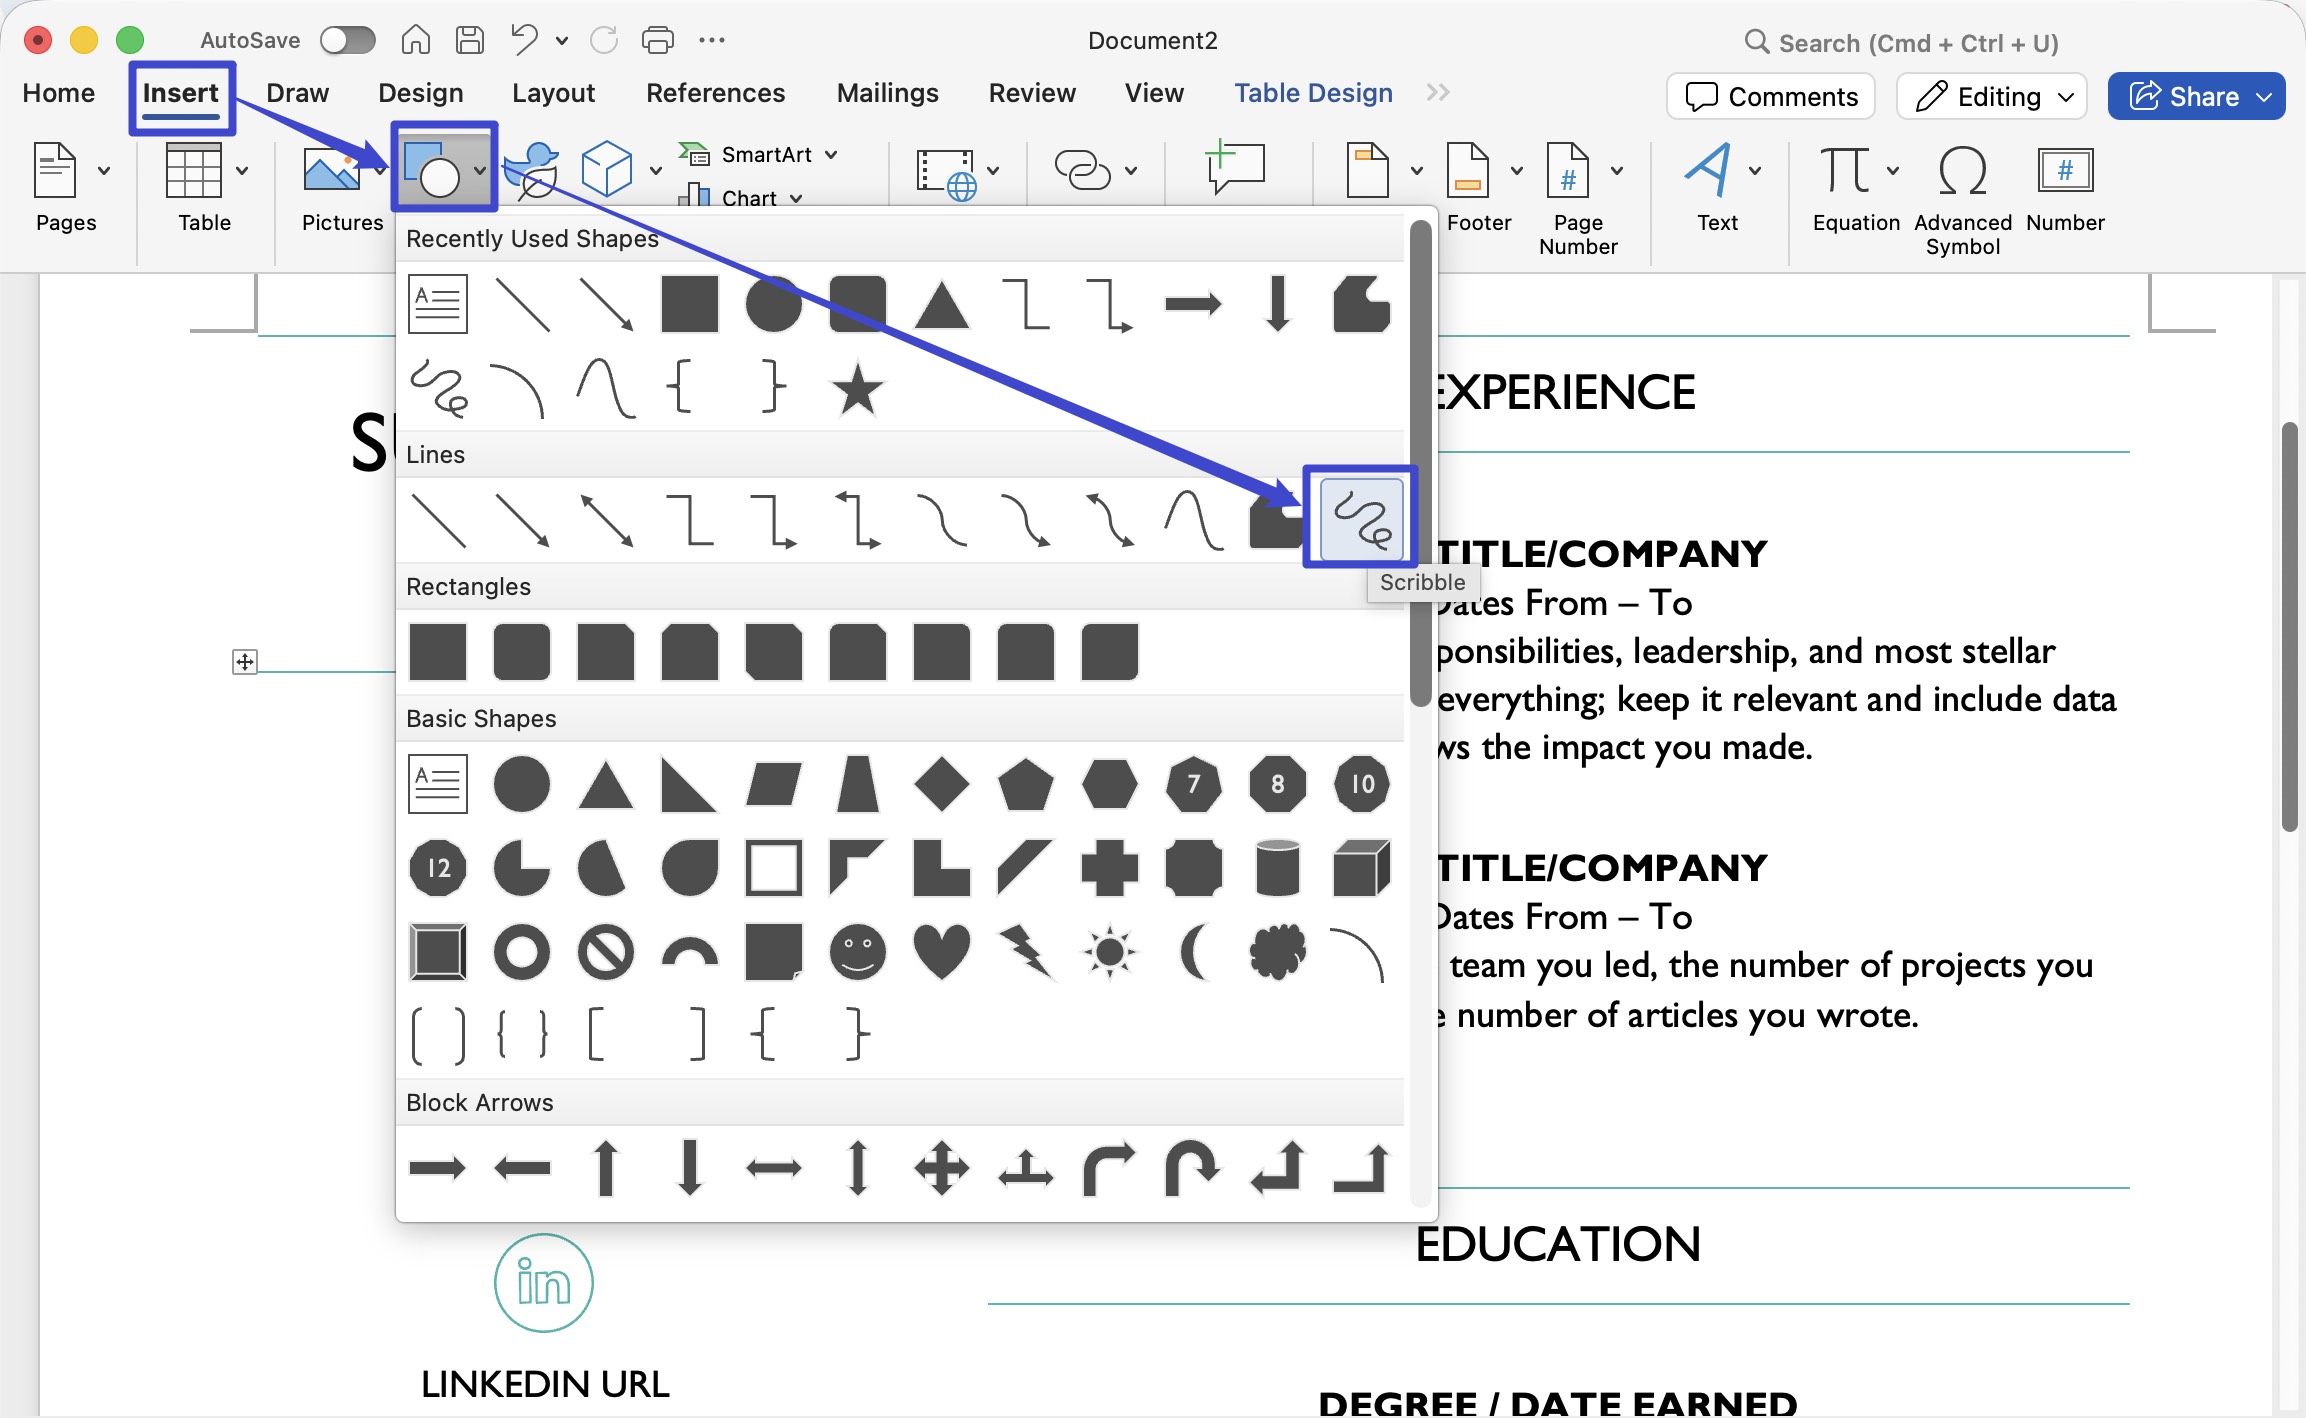
- Step 2. Draw a circle over the content as precisely as you can.
- Step 3. With the shape selected, apply Shape Fill → No Fill to reveal the content underneath.

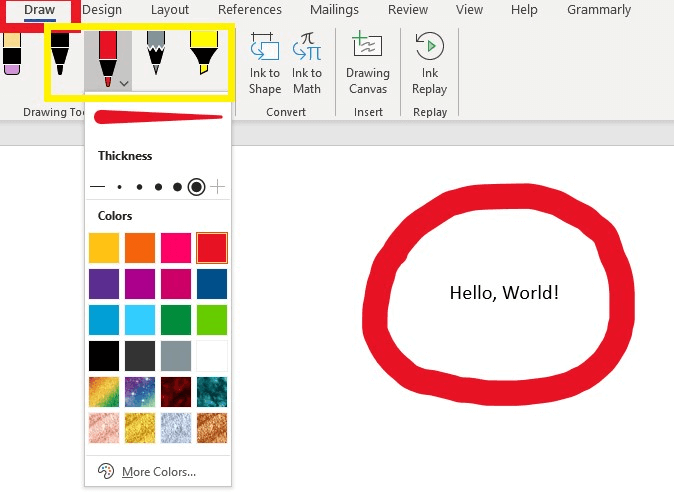
2.2 Using the Draw tab:
- Step 1. Click the Draw tab in the top toolbar.
- Step 2. Select the Pen tool.
- Step 3. Use your mouse to draw a circle around the text or image you want to encircle.
- Step 4. Click the dropdown arrow (▼) next to the Pen tool to adjust color and line thickness.
Keep in mind that both Scribble and Pen are freehand tools — the cleanliness of the circle depends on how steady your hand is. For precise, repositionable circles, Method 1 is more reliable.
Also Read: How to Redline a Contract in PDF/Word? (Step by Step)
Part 2: 2 Methods to Circle Something in WPS Word
You could very well be a WPS Word user, a wonderful alternative to Microsoft Word, coming to this guide. Don't worry; we have you covered with equally good 2 methods to circle something in WPS Word. Let's take you to those now!
1. Circle Something in WPS Word with the Shapes Tool
To circle something in WPS Word using its Shapes tool, follow the steps below:
- Step 1. Open the document in WPS Word.
- Step 2. Click the Comment tab → Shapes → select the Circle shape from the list.
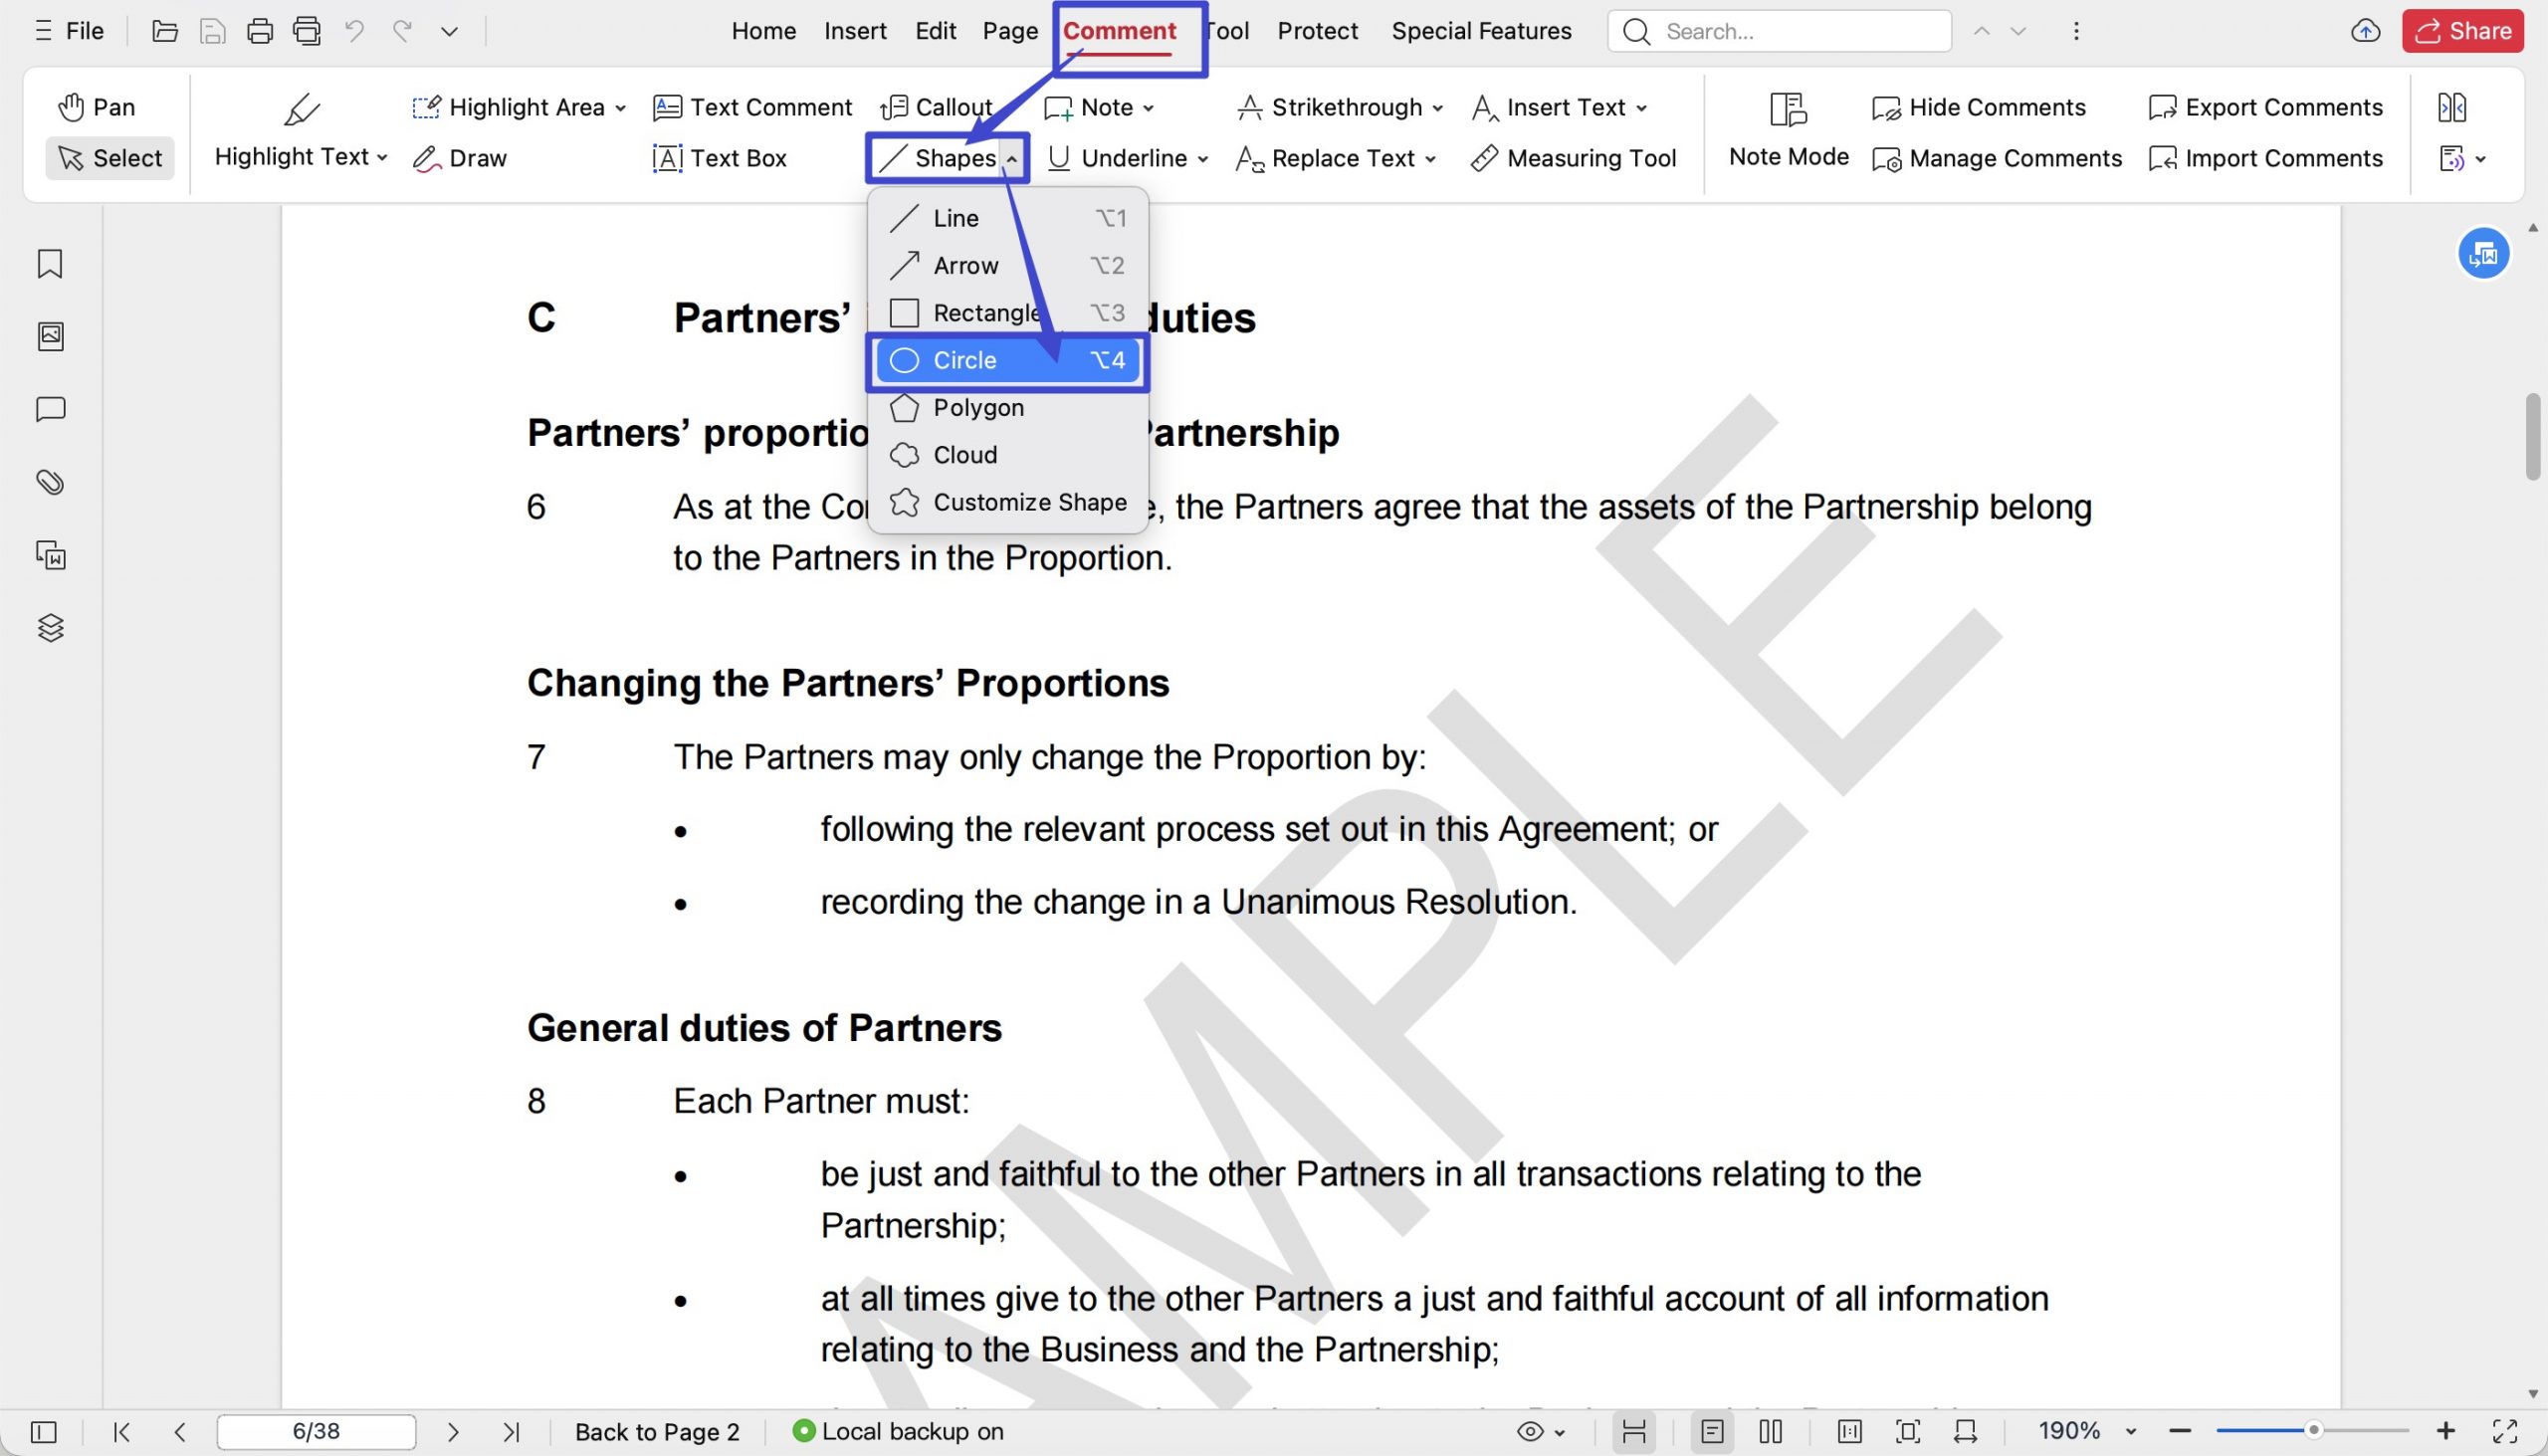
- Step 3. Hold Shift while dragging to constrain the shape to a perfect circle, then draw it over the text or image you want to highlight.
- Step 4. Adjust the circle's size and border color using the Drawing Tools panel.

- You can now customize the size, position, and color of the circle as necessary.
2. Circle Something in WPS Word with the Draw Tool
Now that we are making a circle in WPS Word with the Shapes tool, let's take this to the next level with the Highlighting tool, and for that, here are some easy steps:
- Step 1. Click the Comment tab in the top toolbar.
- Step 2. Select the Draw tool.
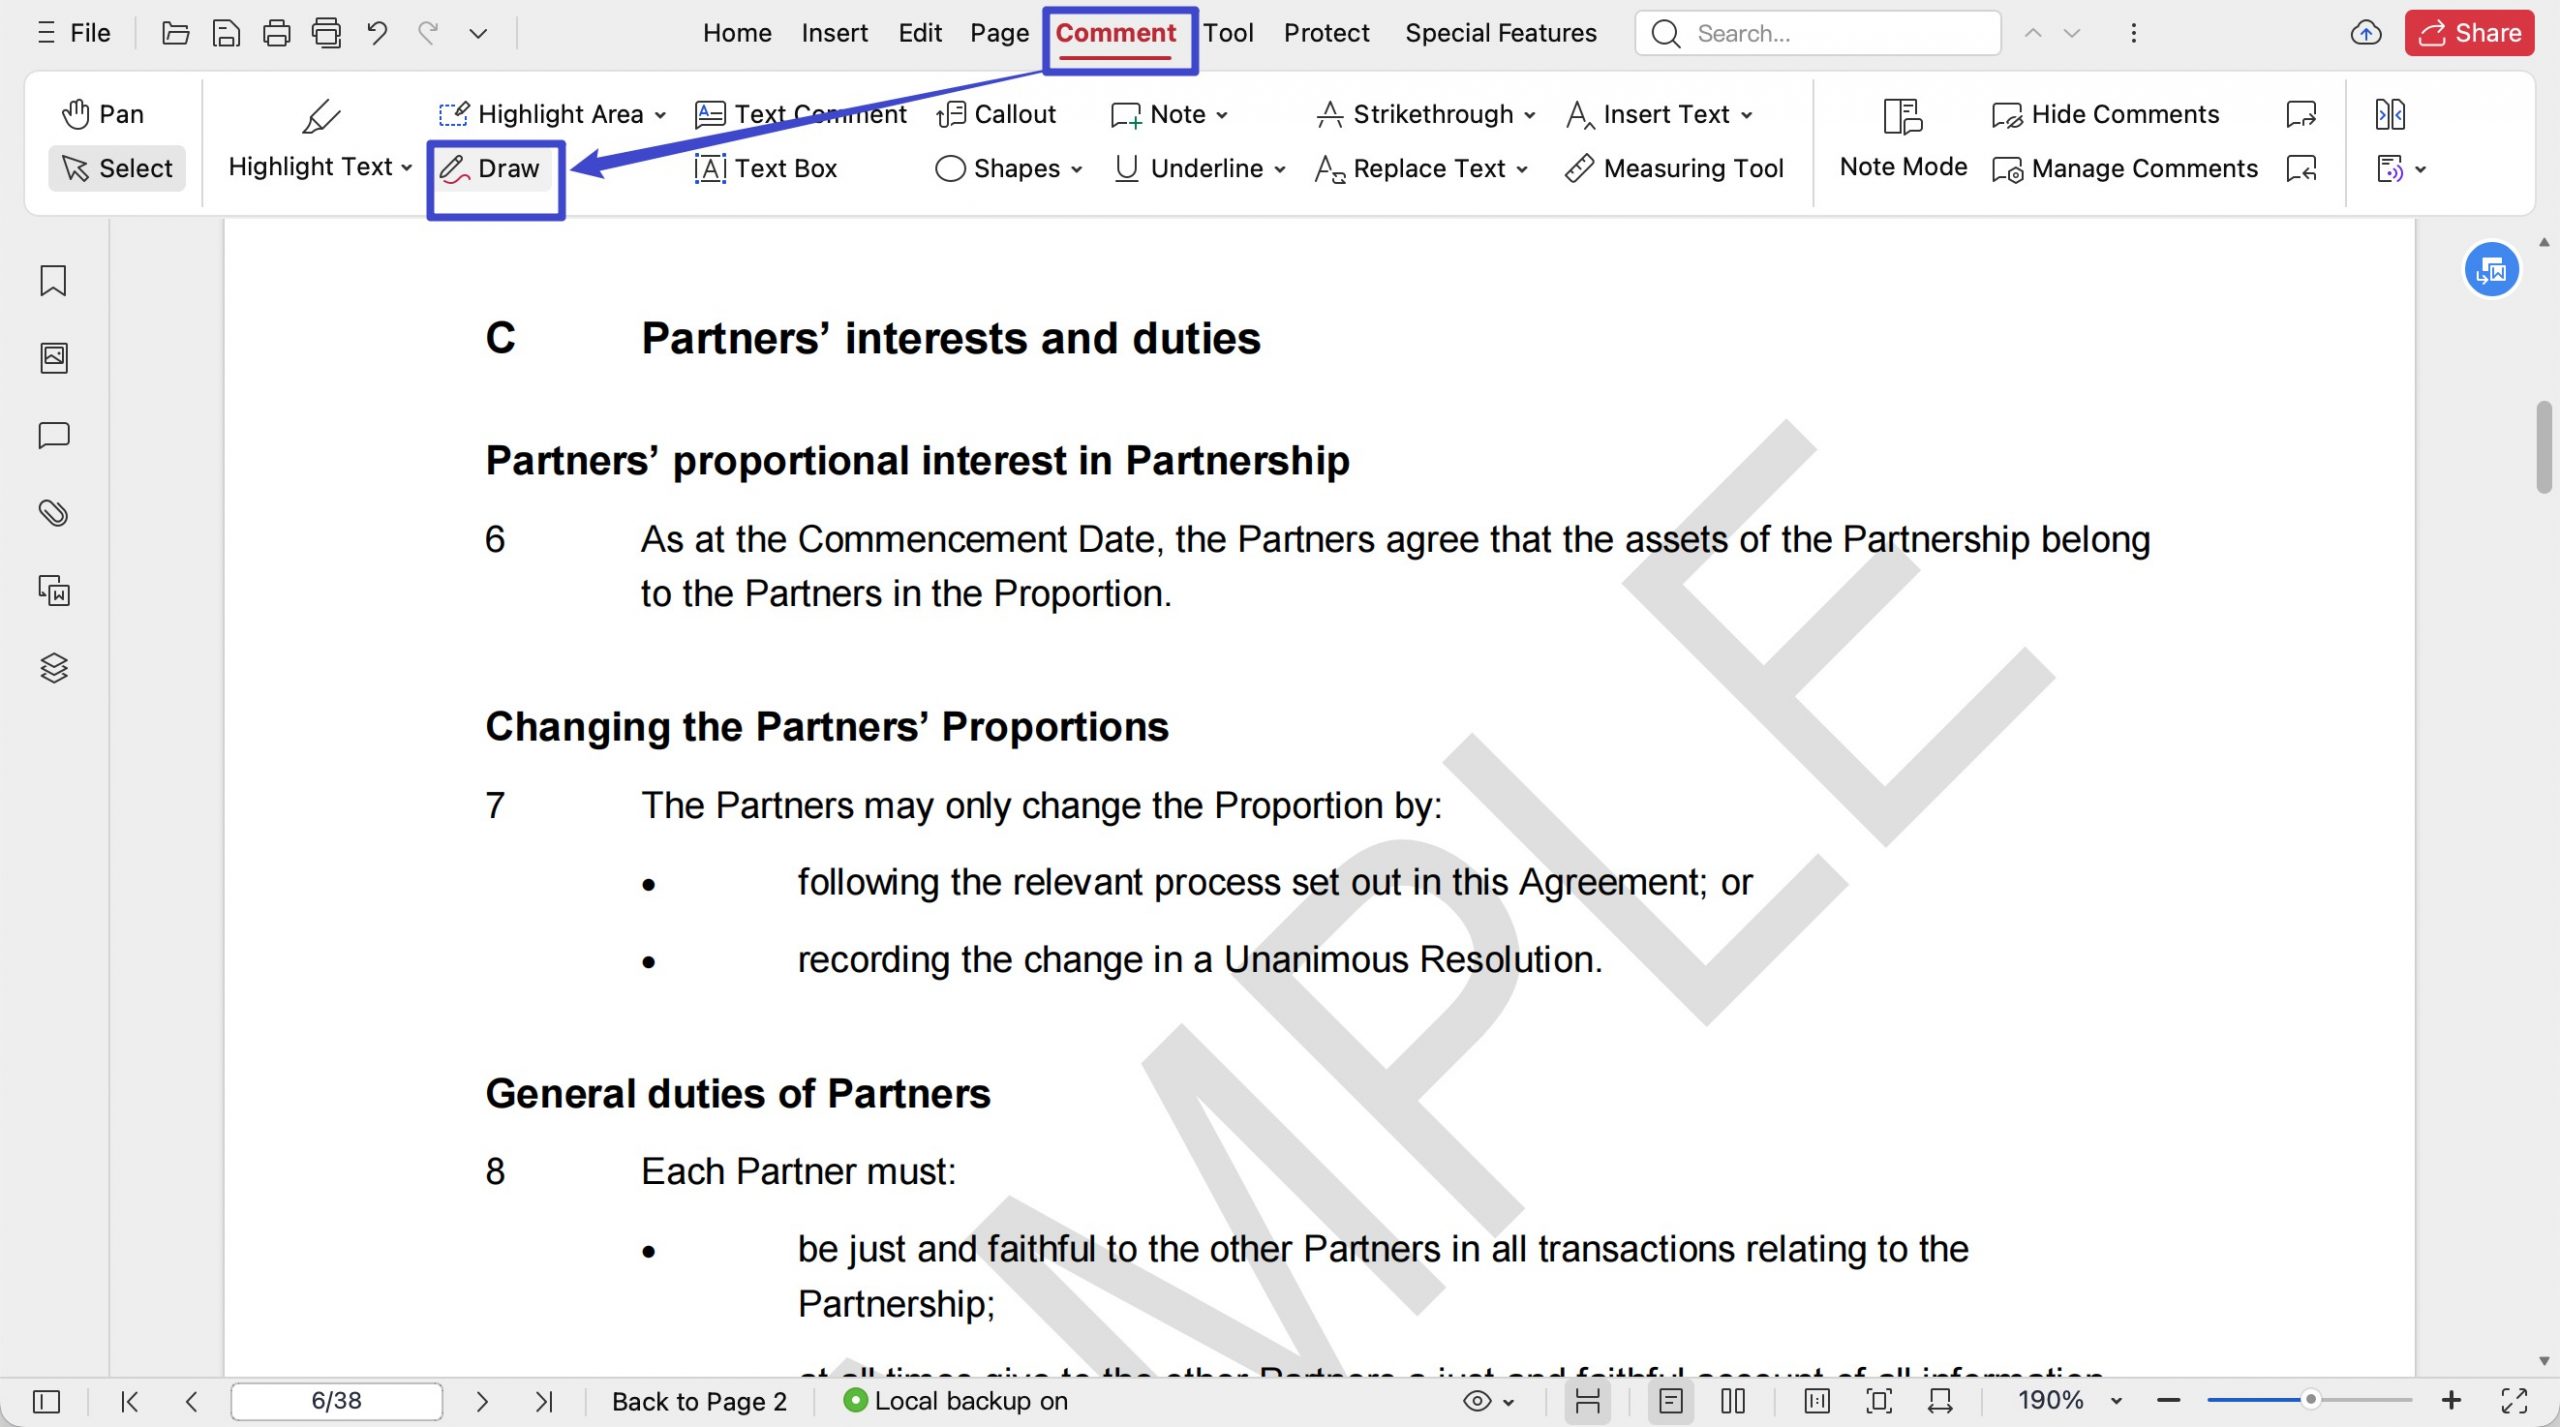
- Step 3. Adjust the width, opacity and border color using the Drawing Tools panel before drawing.

- Step 4. Use your mouse to draw a circle around the text or image you want to encircle.
Also Read: How to Highlight & Add More Highlight Colors in Word
Part 3: How to Circle Content in a PDF with UPDF
When a document is shared as a PDF — which is standard in most review and approval workflows — Word's shape tools are no longer available. UPDF solves this with a built-in annotation toolkit that places clean, repositionable oval annotations directly on the PDF, without any format conversion loop.
Windows • macOS • iOS • Android 100% secure
Getting your Word file into UPDF is easier than most people expect. You can drag the .docx file directly into UPDF's main window — UPDF converts it to PDF automatically, no manual export step needed. If you prefer, you can also go to File → Save As → PDF in Word first, then open the resulting file in UPDF.
Once your document is open in UPDF:
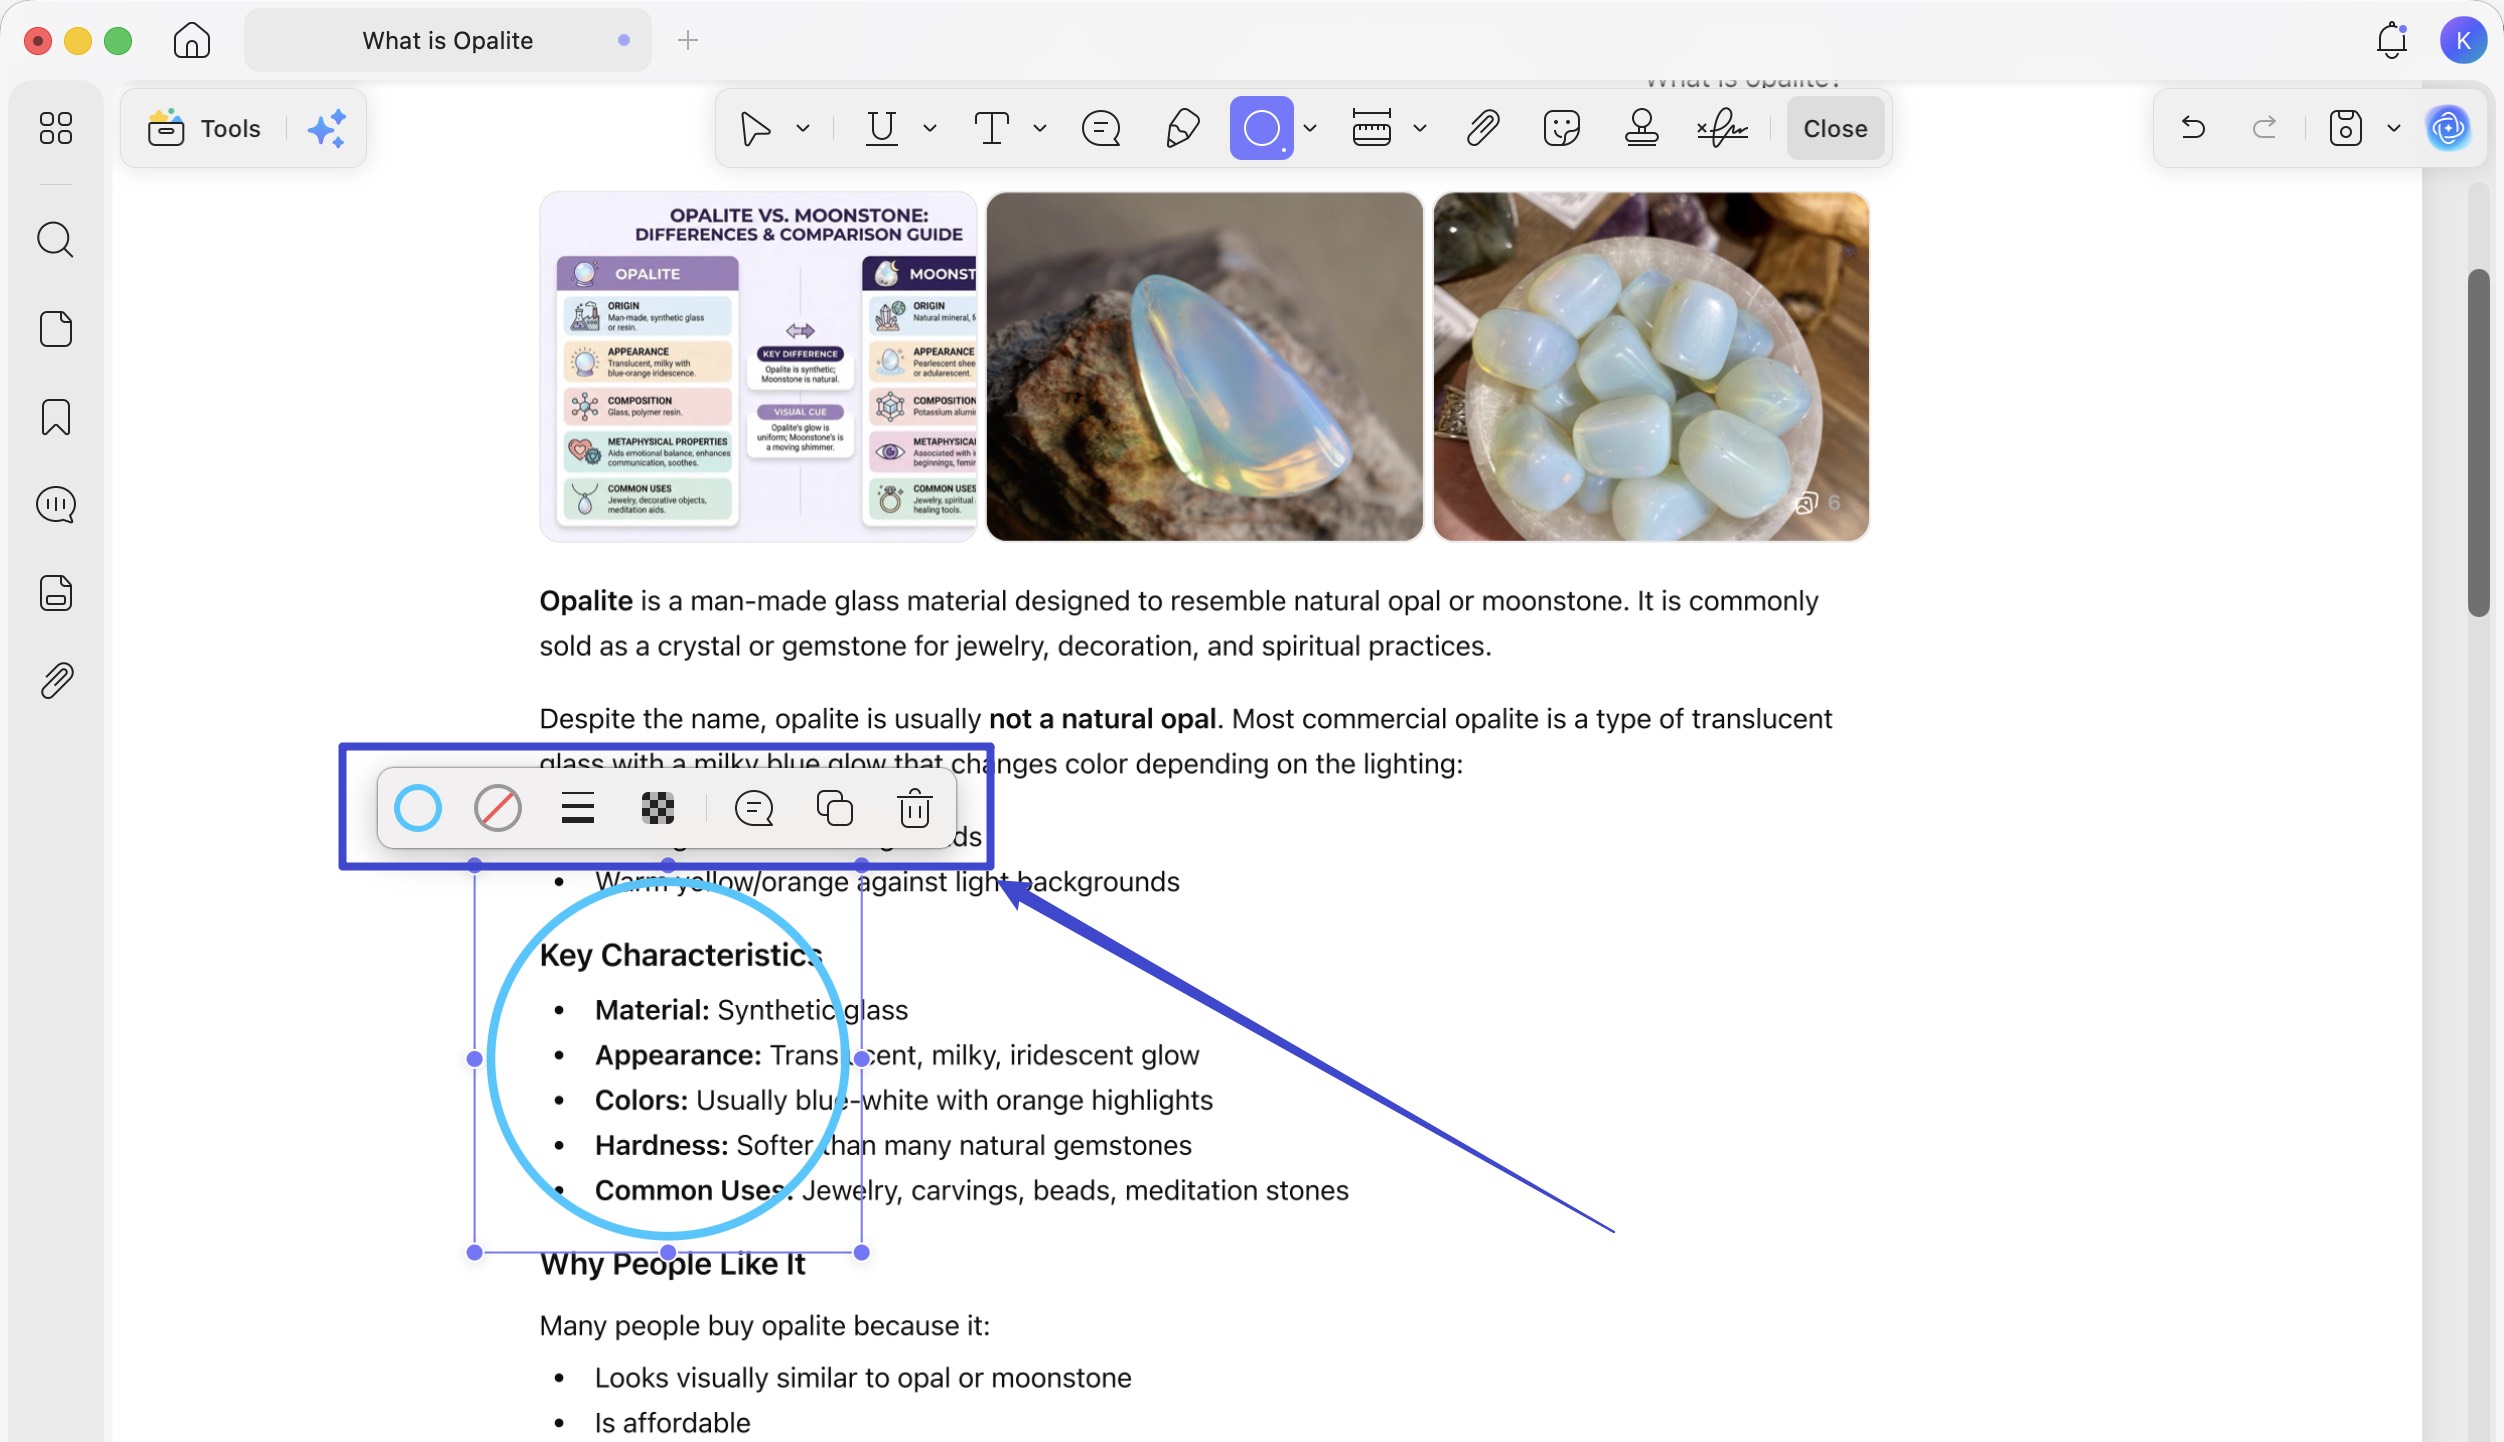
Step 1. Click Comment in the top toolbar.
Step 2. Select the Oval shape from the shapes panel that appears.
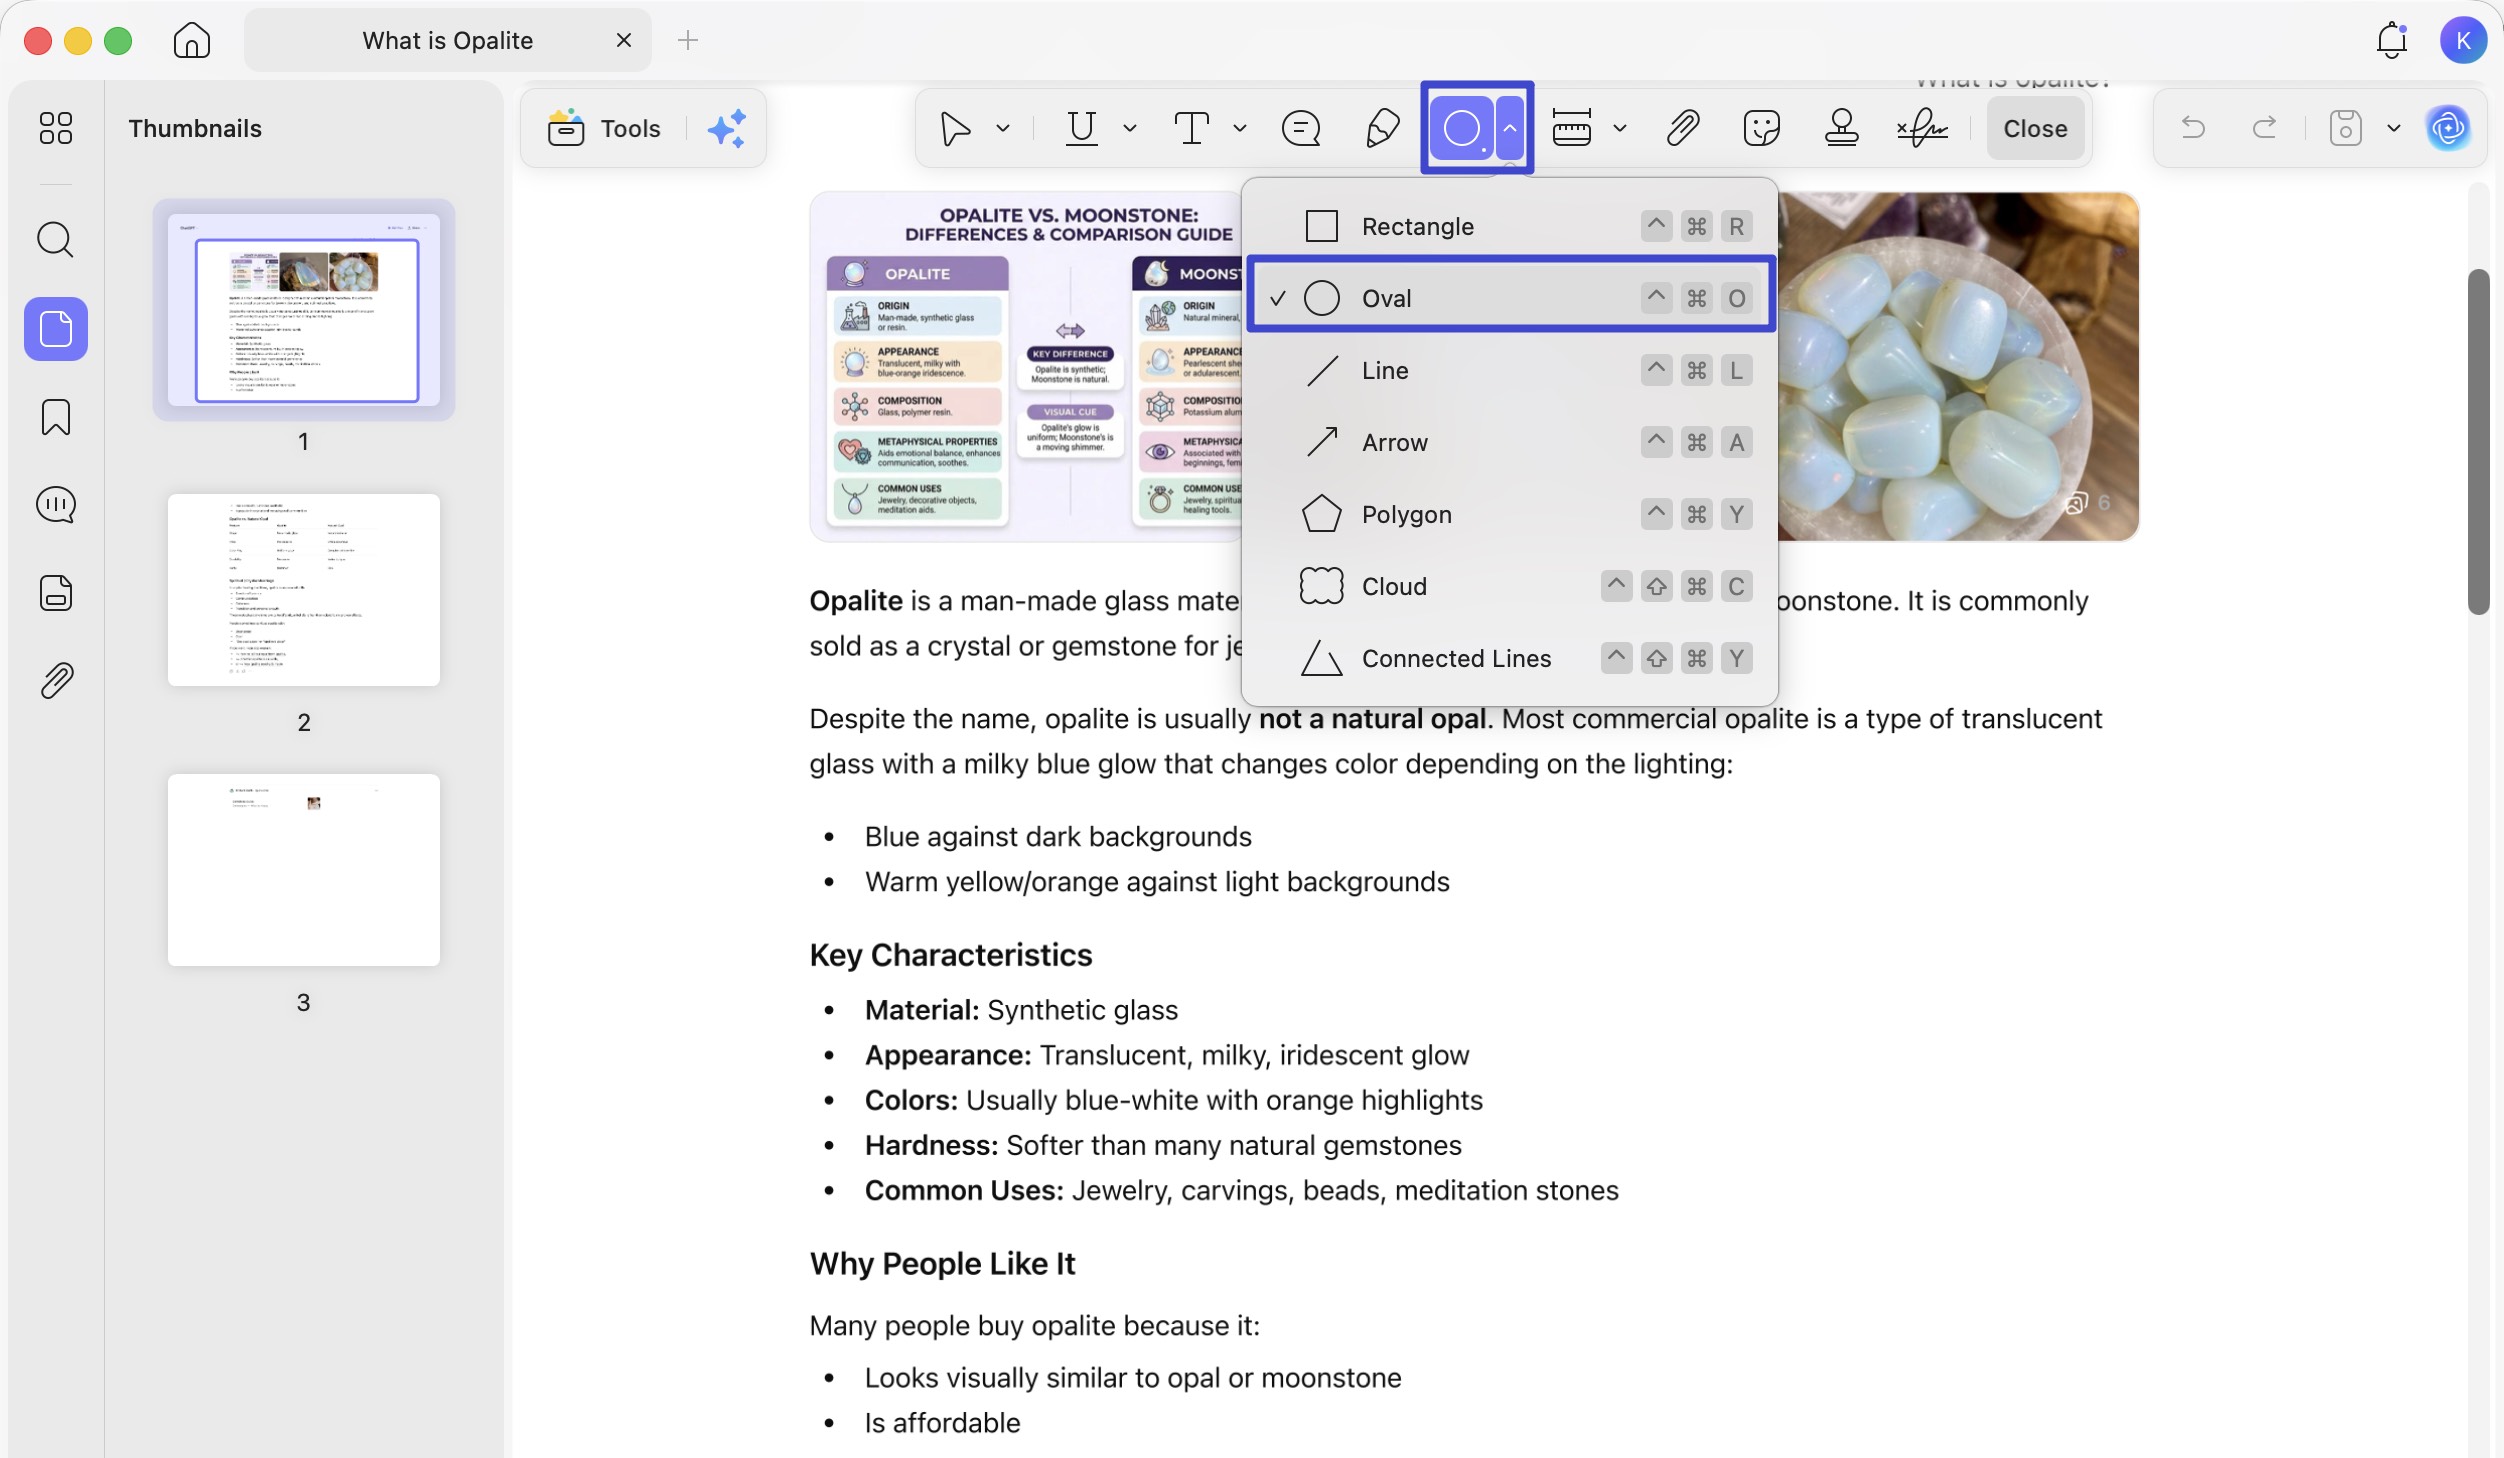
Step 3. Hold Shift while dragging to draw a perfect circle over the text or image you want to highlight.
Step 4. Click the circle and use the floating tool bar to adjust border color, fill color, line thickness, and opacity.
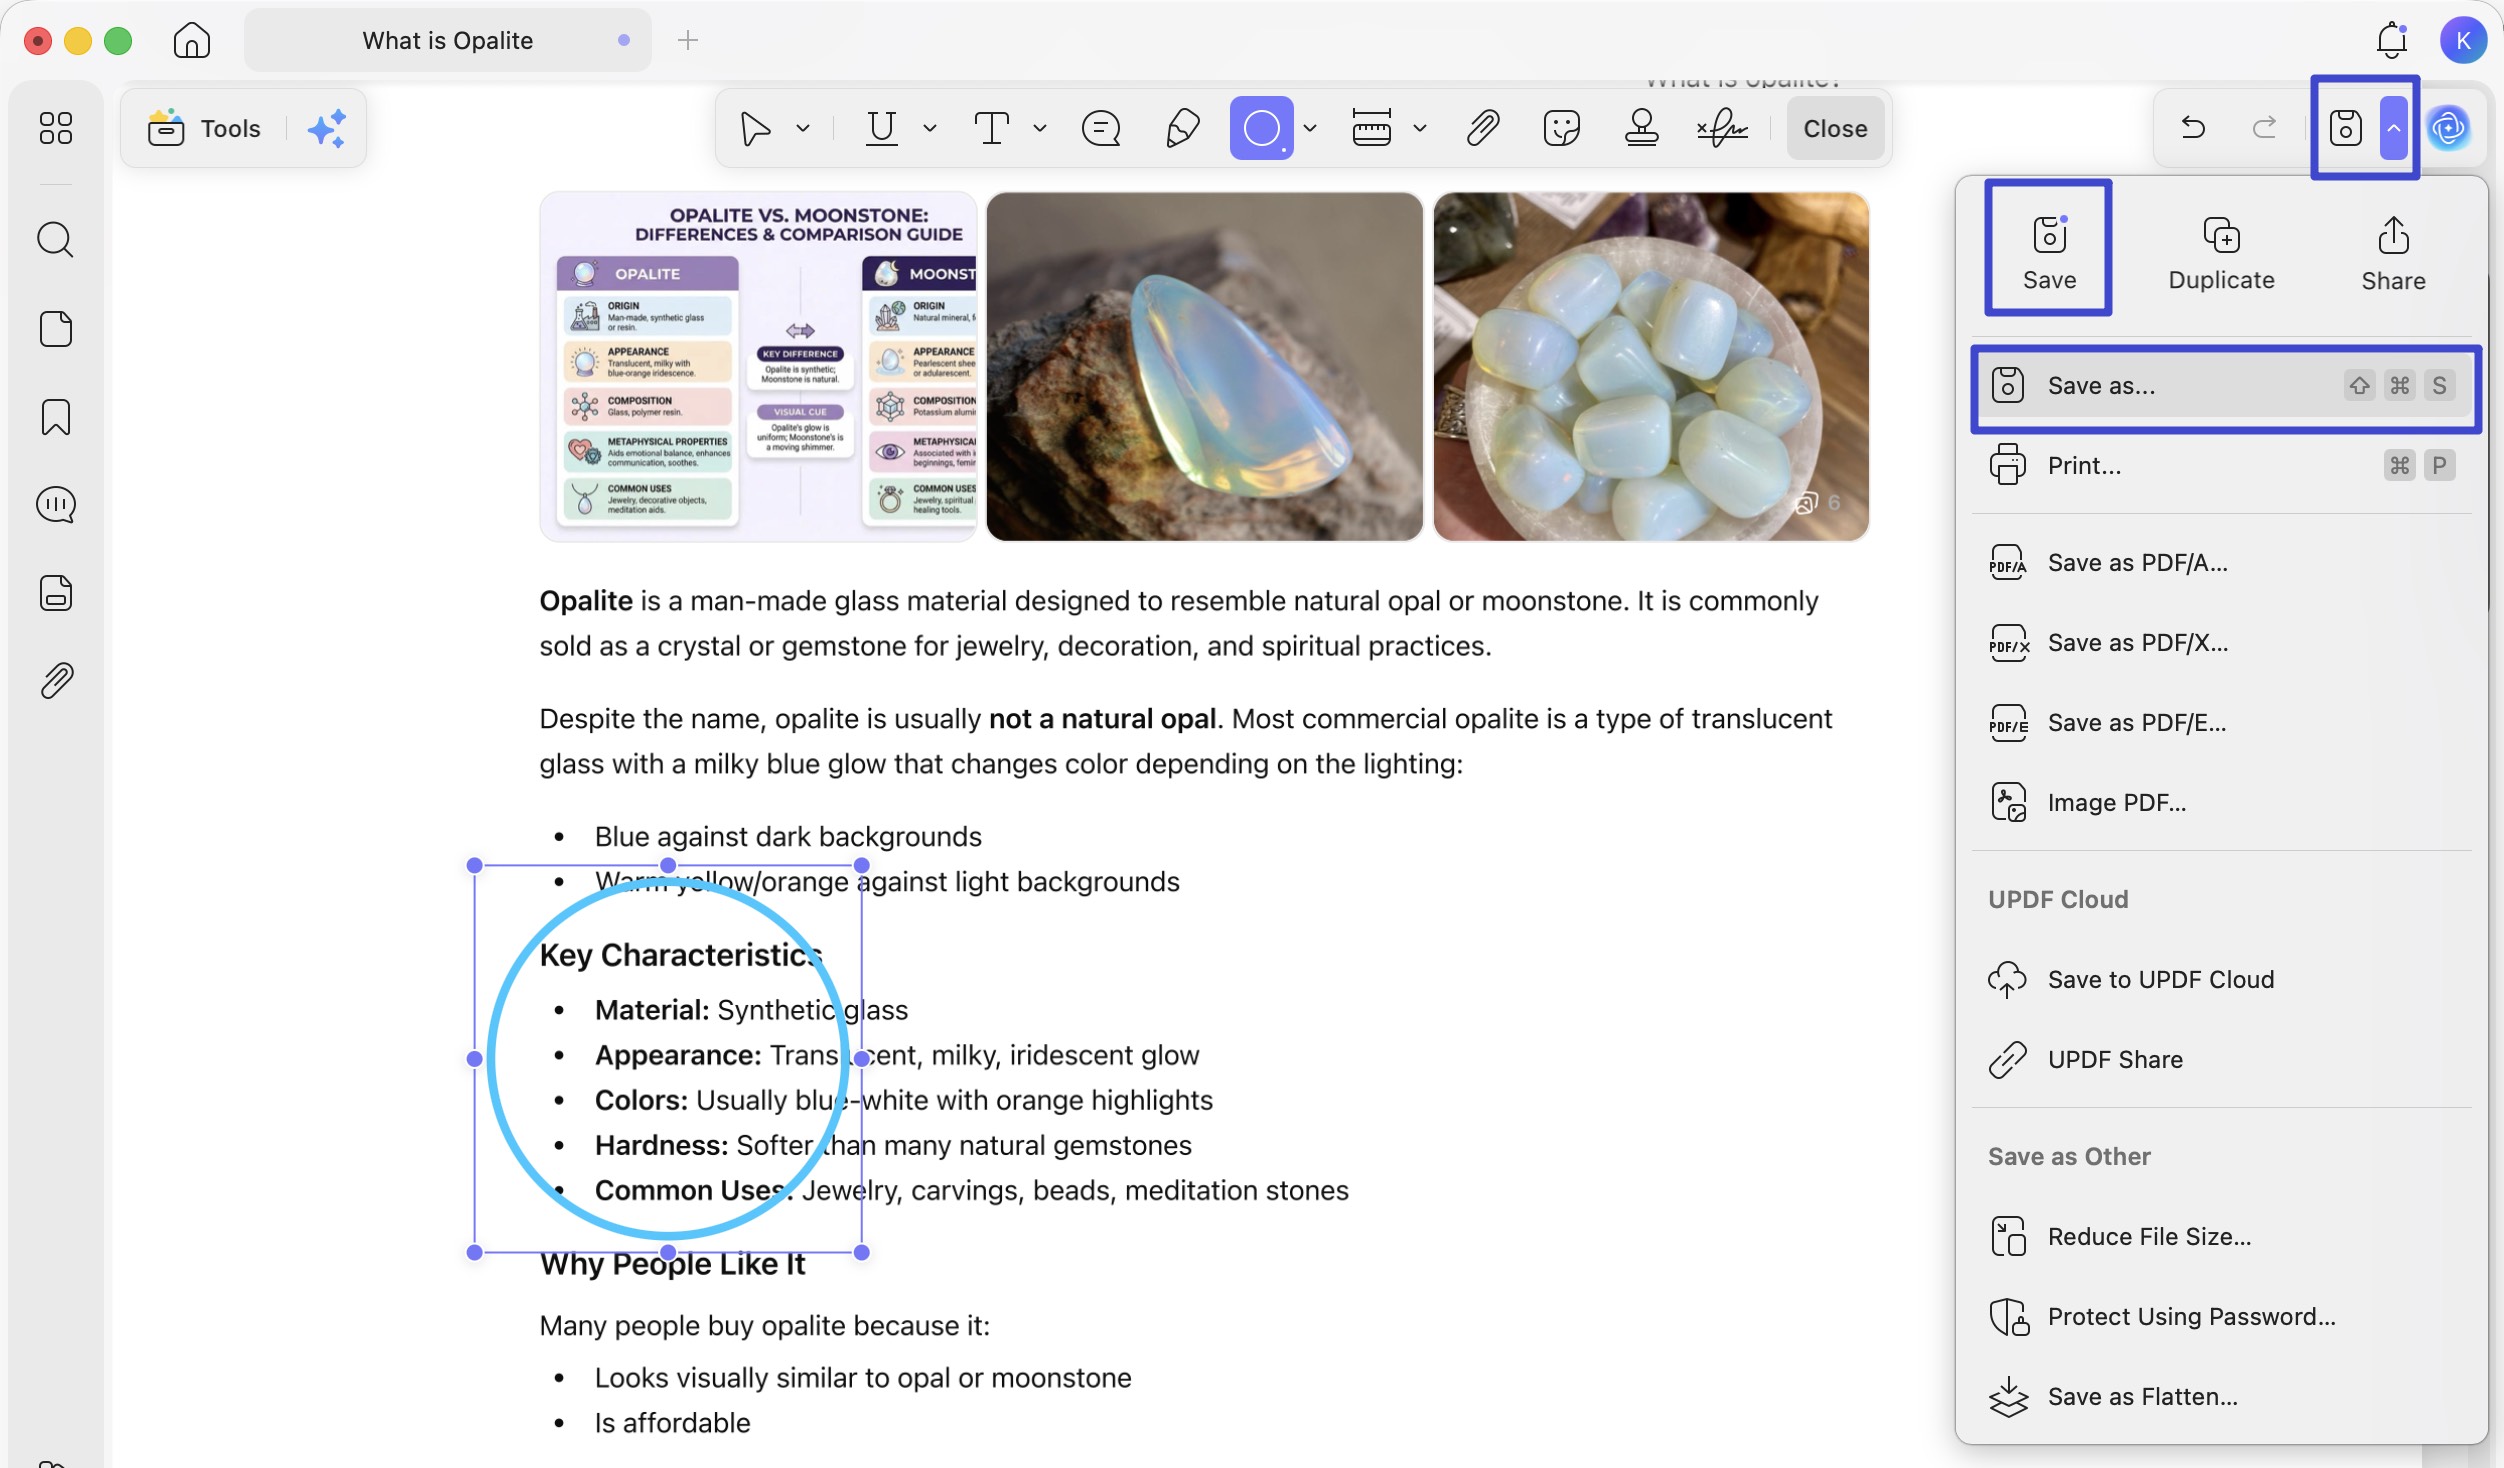
Step 5. Click the dropdown arrow (▼) next to the Save option and click Save as.. to save your annotated PDF as a separate file, or Save to update the original.
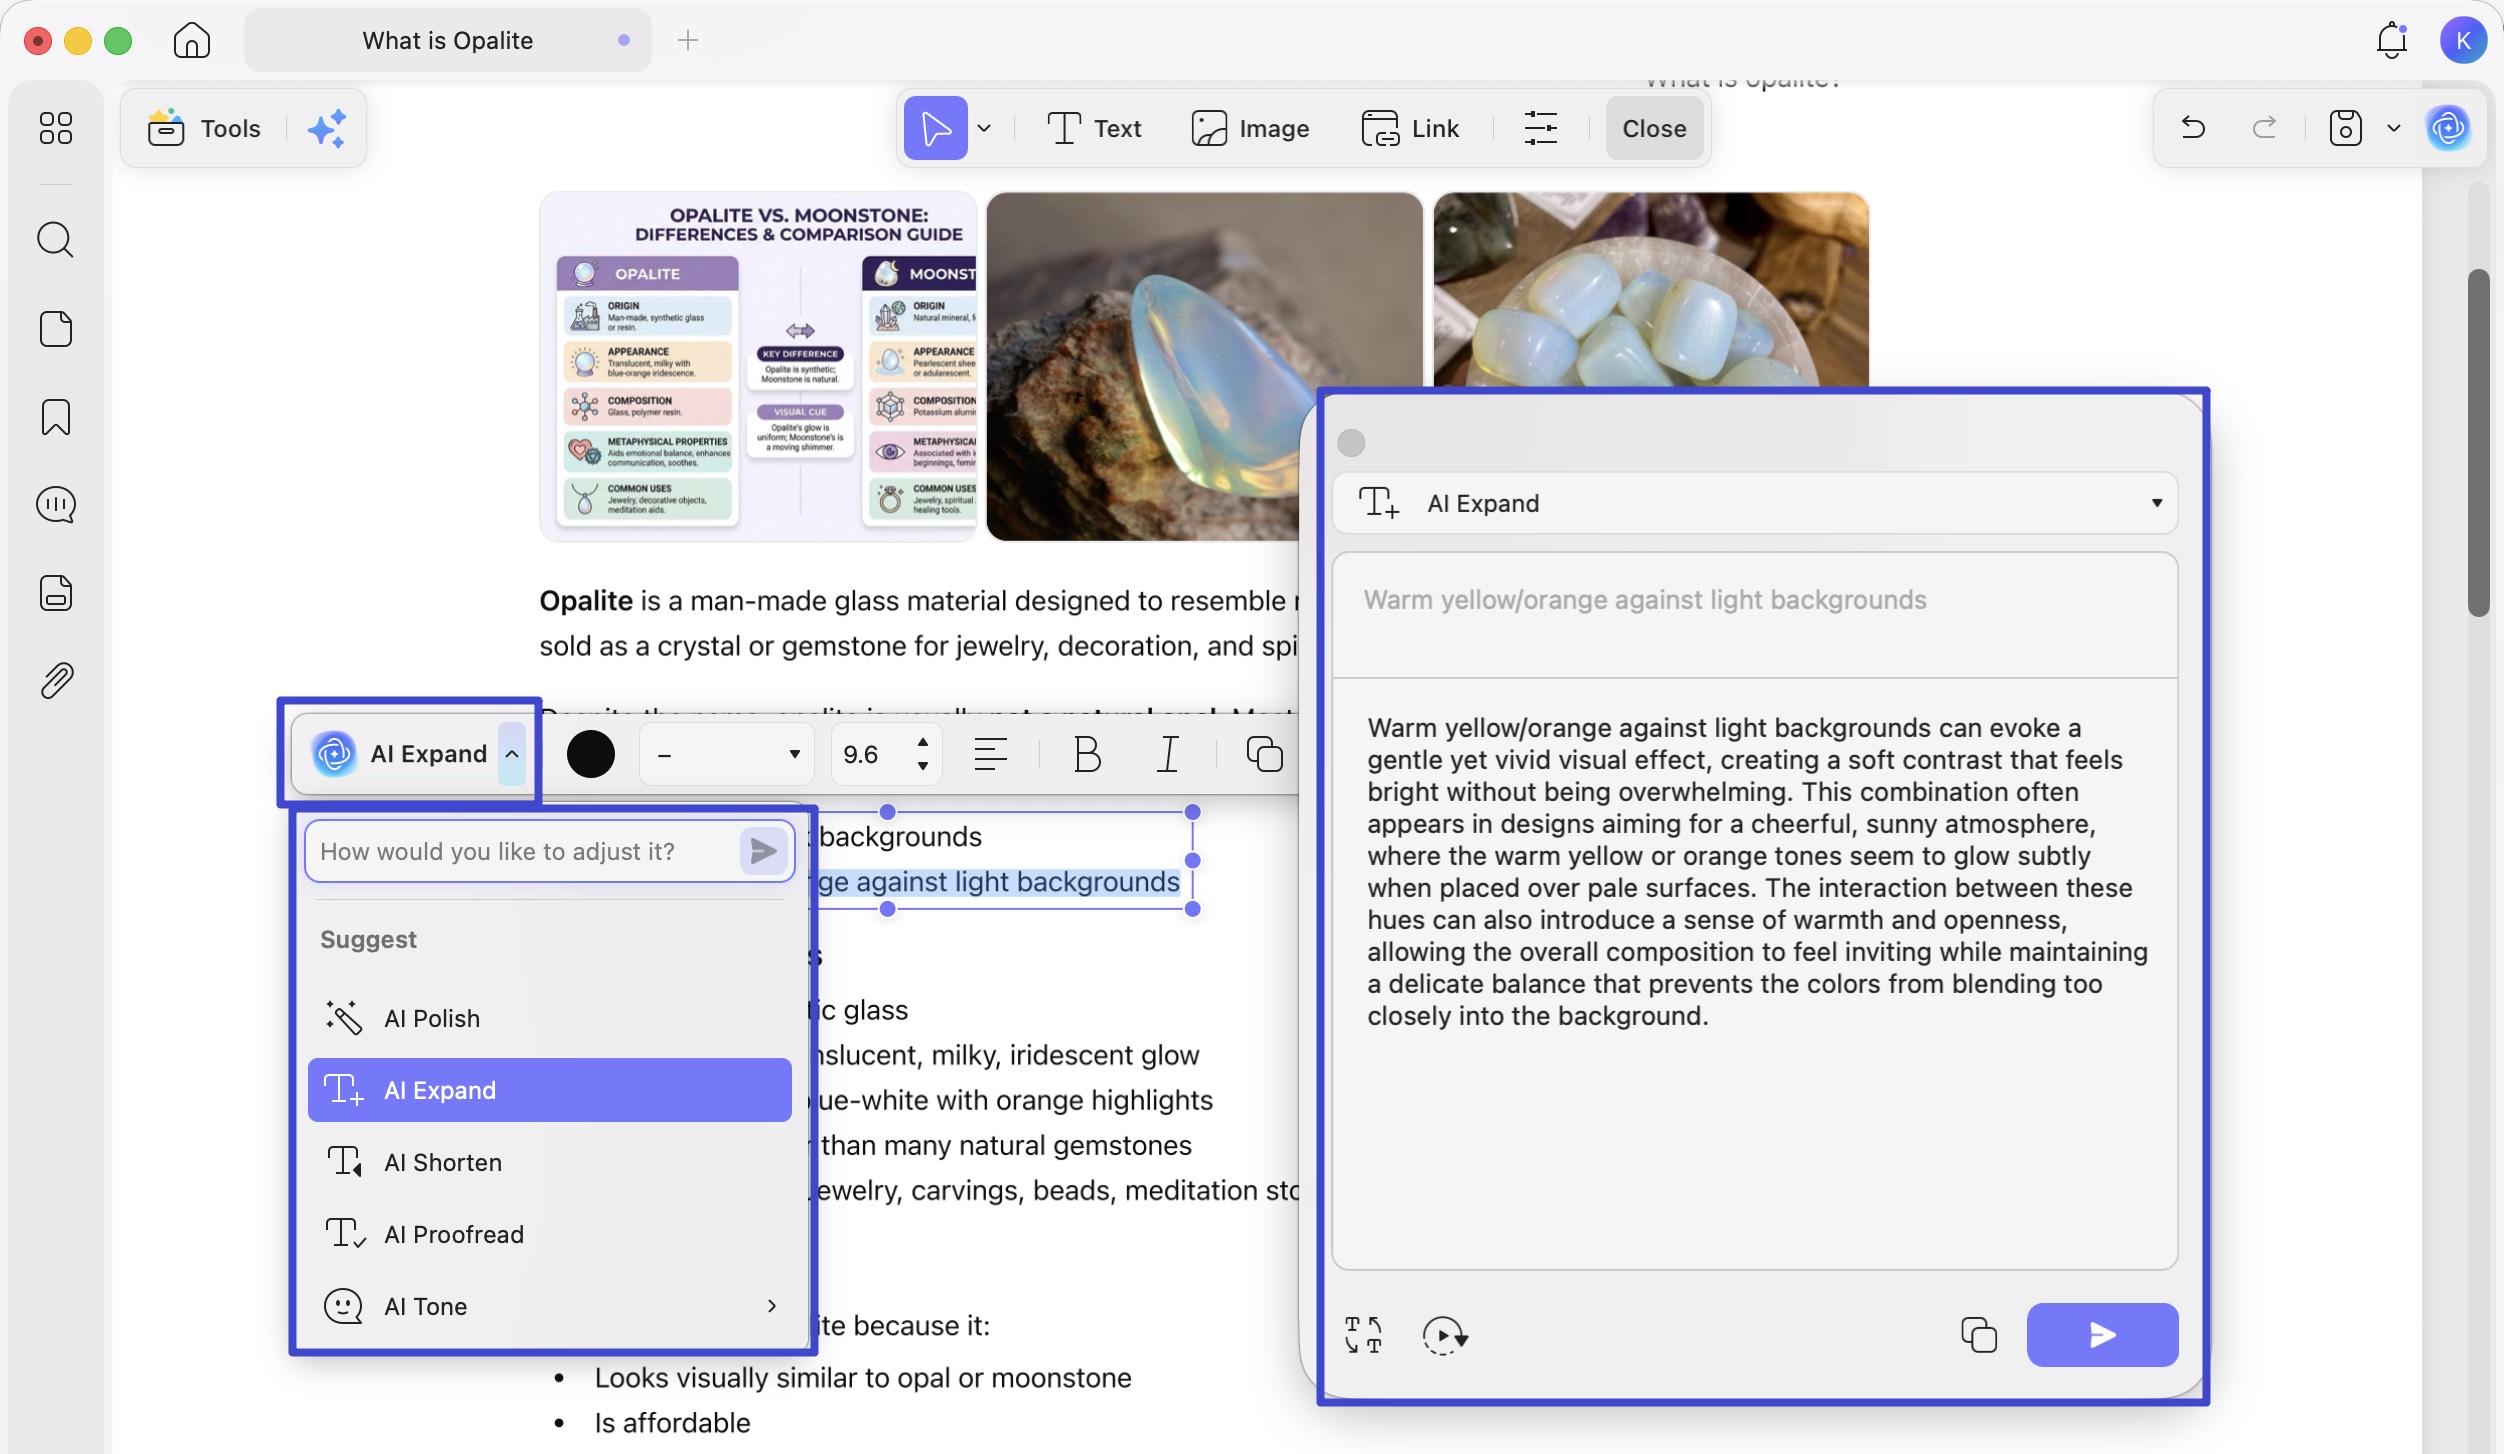
Going Further: Rewrite What You've Circled
Circling a passage for revision is often just the first step. If a reviewer circles a paragraph and flags it for rewriting, UPDF's AI Editing Suite lets you act on that feedback immediately: click into the text box inside the circle, and use AI Editing Suite to rewrite the sentence, refine the tone, or correct grammar — all directly inside the PDF, without switching back to Word. The export-edit-reimport cycle disappears entirely.
Download UPDF for free and annotate your PDFs without a subscription — the full annotation toolkit, including shape tools, is available at no cost. UPDF Pro starts at $49.99/year (or $79.99 for a lifetime license), a fraction of Adobe Acrobat Pro's $239.88/year for comparable editing features.
Windows • macOS • iOS • Android 100% secure
Conclusion
Word's Shapes tool gives you the most reliable circles for in-document markup, while the Draw tab works well for quick freehand annotations. WPS Word covers both approaches. When you need to work in PDF, drag your Word file directly into UPDF — it converts automatically — then use the Oval annotation tool to circle content with precision. UPDF's AI Editing Suite means you can act on whatever you've marked up without bouncing between apps.
Download UPDF for free and start annotating your PDFs today — no subscription required to get started.
Windows • macOS • iOS • Android 100% secure


 Enola Davis