 UPDF for Windows
 UPDF for Mac
 UPDF for iPhone/iPad
 UPDF for Android
 UPDF AI Online
 UPDF Sign
 Edit PDF
 Annotate PDF
 Create PDF
 PDF Form
 Edit links
 Convert PDF
 OCR
OCR PDF to Word
 PDF to Image
 PDF to Excel
 Organize PDF
 Merge PDF
 Split PDF
 Crop PDF
 Rotate PDF
 Protect PDF
 Sign PDF
 Redact PDF
 Sanitize PDF
 Remove Security
 Read PDF
 UPDF Cloud
 Compress PDF
 Print PDF
 Batch Process
 About UPDF AI
 UPDF AI Solutions
 AI User Guide
 FAQ about UPDF AI
 Summarize PDF
 Translate PDF
 Chat with PDF
 Chat with AI
 Chat with image
 PDF to Mind Map
 Explain PDF
 PDF AI Tools
 Image AI Tools
 AI Chat Tools
 AI Writing Tools
 AI Study Tools
 AI Working Tools
 Other AI Tools
 PDF to Word
 PDF to Excel
 PDF to PowerPoint
 User Guide
 UPDF Tricks
 FAQs
FAQs UPDF Reviews
 Download Center
 Blog
Blog Newsroom
 Tech Spec
 Updates
 UPDF vs. Adobe Acrobat
 UPDF vs. Foxit
 UPDF vs. PDF Expert
Digital accessibility is essential for organizations sharing documents with diverse audiences worldwide. In my experience, accessibility issues often surface only after users report difficulty accessing PDF content. This is where PDF/UA standards become critical, as they define how PDFs interact with screen readers and other assistive technologies.
In this article, I explain what PDF/UA means, why compliance matters, and how I approach accessibility in practice. In real workflows, this often involves working with scanned or image-based PDFs, where OCR plays a key role in turning them into accessible, usable documents. Tools like UPDF. For this process, I recommend UPDF, as it makes their content readable and accessible for assistive technologies.
Windows • macOS • iOS • Android 100% secure
Part 1. What Does PDF/UA Stand For?
The name PDF/UA is an abbreviation that means Portable Document Format Universal Accessibility, and is interpreted as an international standard of accessibility. It makes PDF compatible with screen readers and other assistive technologies. Unlike visual design, PDF/UA places more emphasis on structure, meaning, and logical order of reading. Proper tagging also enables users to navigate between headings, text, tables, and images without getting lost.
- Universal Accessibility: PDF/UA makes documents receptive to screen readers and other support devices.
- Inclusive Design: Provides proper structure and tagging to support users with visual, cognitive, and motor accessibility needs.
- Legal Compliance: PDF/UA assists organizations in accessing the requirements of the law, regulations, and other standards that are necessary in various fields.
- Enhanced Usability: Easy to follow logical reading sequence and headings make navigation, clarity, and understanding easier for all users.
- Equal Access: Provides equitable and uniform access to electronic documents to the various audiences in the world.
Part 2. How to Make a PDF/UA Compliant
Whenever I am dealing with PDF accessibility, I begin with the standards. WCAG 2.0 specifies what must be accessible, and PDF/UA describes how a PDF must be constructed to ensure accessibility. WCAG 2.0 is user-oriented, and PDF/UA converts this to technical guidelines that may be reliably read in PDF files by the assistive technologies
Key Technical Requirements
- Every meaningful element is tagged properly, including headings, paragraphs, lists, tables, links, and figures.
- Reading order is checked carefully so content flows logically for screen readers and keyboard navigation.
- Meaningful images include accurate alternative text, while decorative elements are marked as artifacts.
- Document language, title, and metadata are set to support assistive technologies and search behavior.
- All text remains selectable or is processed through OCR for machine readability.
- Interactive elements remain keyboard-accessible with clear focus order and readable labels.
With these technical requirements clearly defined, the next step is applying them in a practical workflow. I now explain how I make a PDF/UA-compliant document by structuring content correctly, fixing tags, and validating accessibility at each stage.
A. Starting from Word Documents
I always begin with an accessible source file in Word to simplify PDF/UA compliance. I use built-in styles for headings, lists, and tables instead of manual formatting, ensuring structure converts correctly into tagged PDFs. Meaningful images receive clear alternative text, while tables remain simple and properly labelled.
Before exporting to PDF, I run Word’s accessibility checker to identify issues early. This approach significantly reduces remediation work later and helps maintain accurate structure, reading order, and semantics in the final PDF.
B. Making Scanned PDFs Accessible with OCR
After preparing accessible source files in Word, I often encounter scanned or image-based PDFs that lack readable text. This is where UPDF’s built-in OCR becomes essential. UPDF detects text in scanned documents and converts it into copyable content while preserving the original layout, making the PDF usable for assistive technologies. To apply this efficiently, I first use UPDF Desktop, which offers precise control for full-document OCR processing.
UPDF OCR – Desktop
Adhere to the guide below to use the UPDF OCR Desktop without any difficulty:
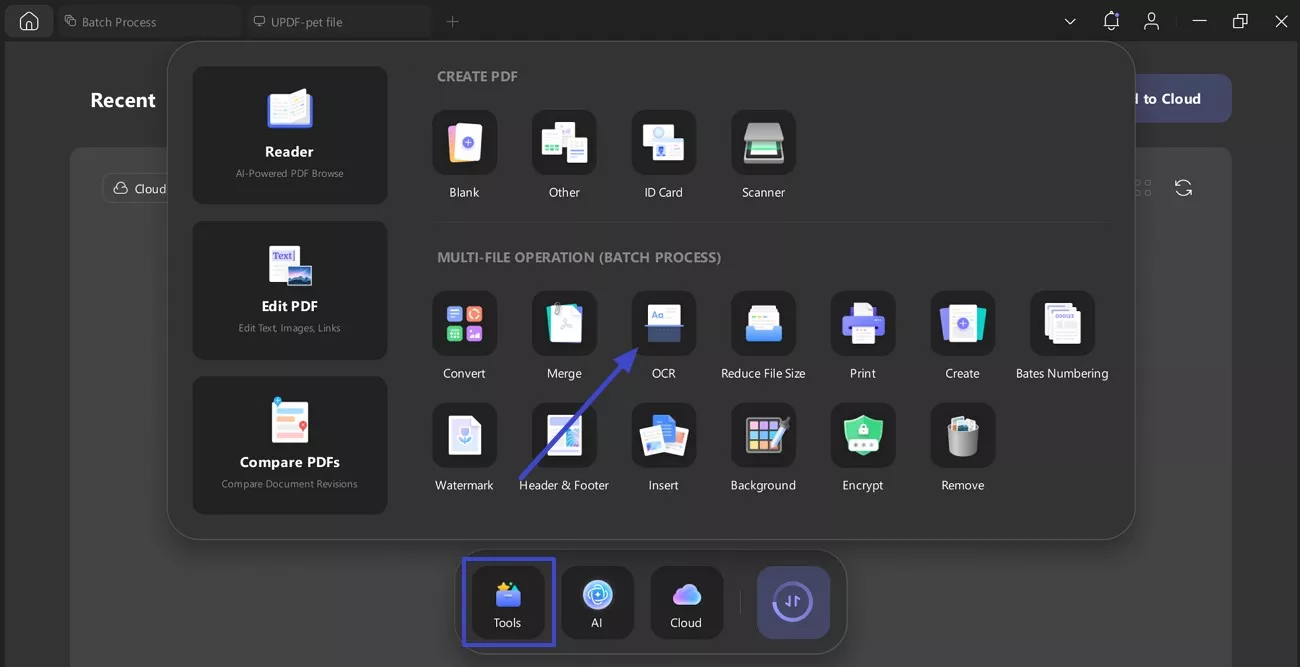
Step 1. Open the OCR Tool in UPDF Desktop
Upon launching UPDF Desktop, click “Tools” on the home screen. Under “Multi-File Operation,” select “OCR” to start the text recognition process.
Windows • macOS • iOS • Android 100% secure
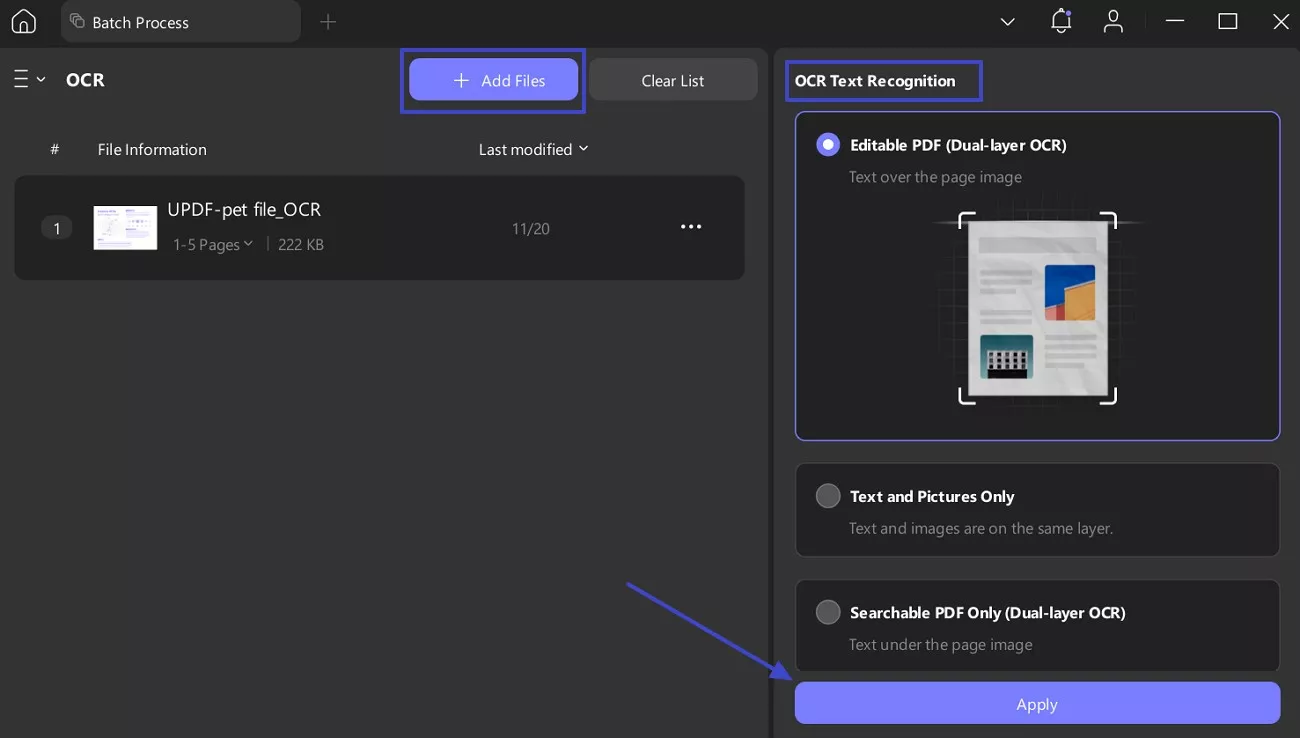
Step 2. Add PDF and Choose OCR Mode
Here, click “Add Files” and upload your scanned or image-based PDF. From the right panel, select “Editable PDF (Dual-layer OCR)” in Text OCR Text Recognition. Later, set the correct language and press “Apply” to run OCR on all pages.
UPDF OCR – Mobile
When desktop access is unavailable, UPDF Mobile provides a reliable way to maintain access while working remotely, with the following simple steps:
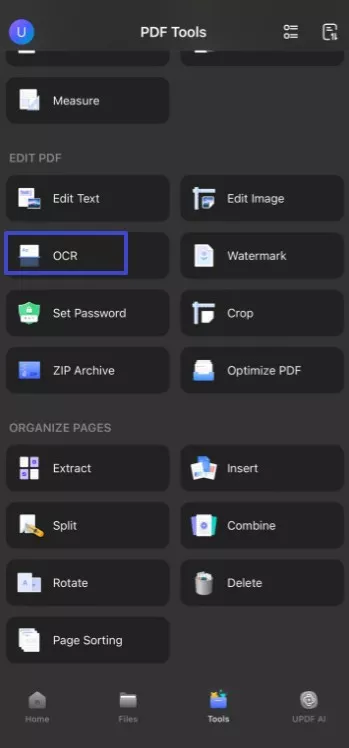
Step 1. Access the OCR Tool in UPDF Mobile
First, open the UPDF app (iOS/Android) and tap “Tools” from the bottom menu. Next, under “Edit PDF,” select the “OCR” option to begin text recognition.
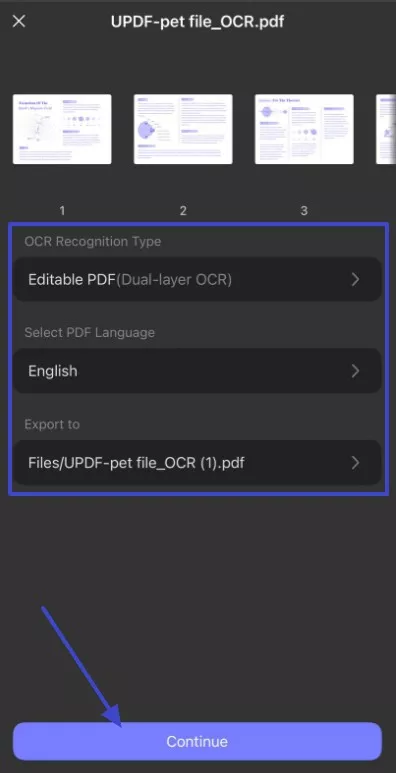
Step 2. Choose OCR Settings to Run OCR
Upon start, select the “Editable PDF (Dual-layer OCR)” and set the correct document language. After that, tap “Continue” to apply OCR and save the searchable PDF.
C. Tip: Use UPDF’s Read‑Aloud for Simple Accessibility
Once OCR converts images into readable text, accessibility can be extended further through audio support. At this point, UPDF is able to read PDFs aloud to users who are either visually challenged or have a reading impairment. This attribute enables users to listen to the content rather than scan it visually.
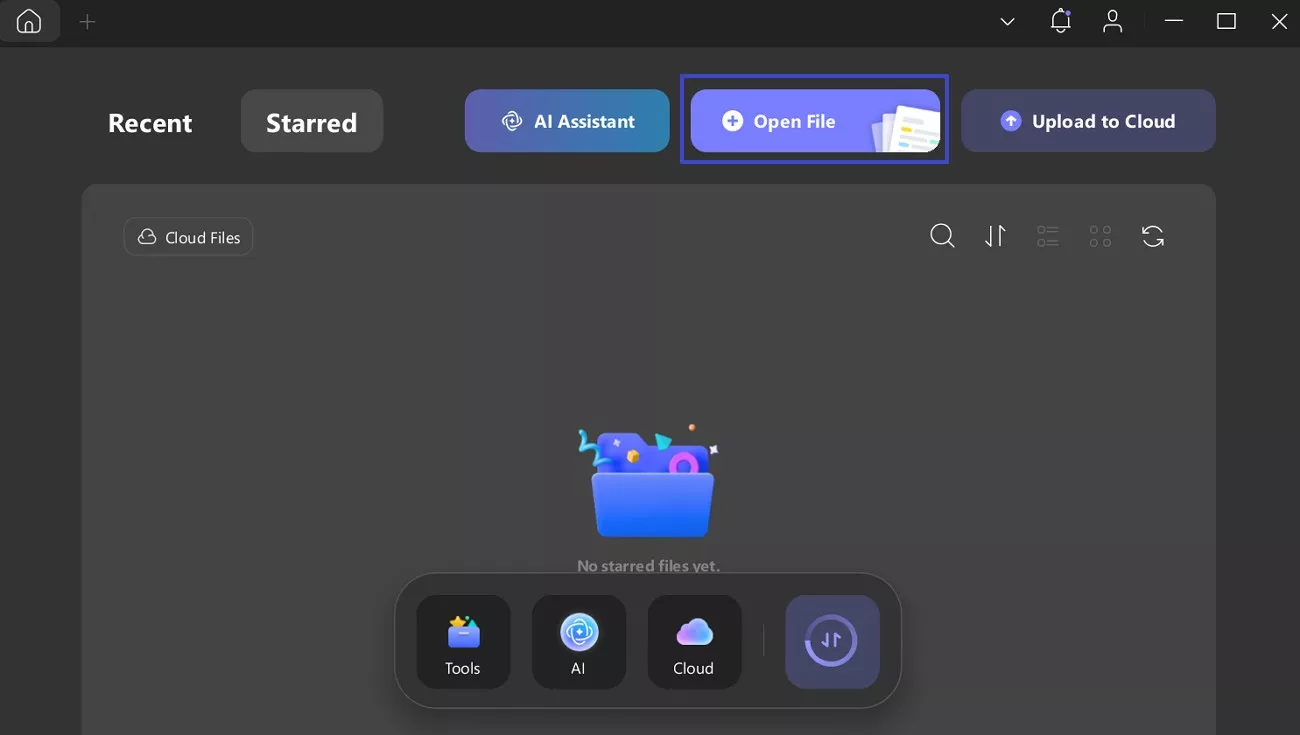
Step 1. Start by clicking “Open File,” to open your PDF in UPDF to continue.
Windows • macOS • iOS • Android 100% secure
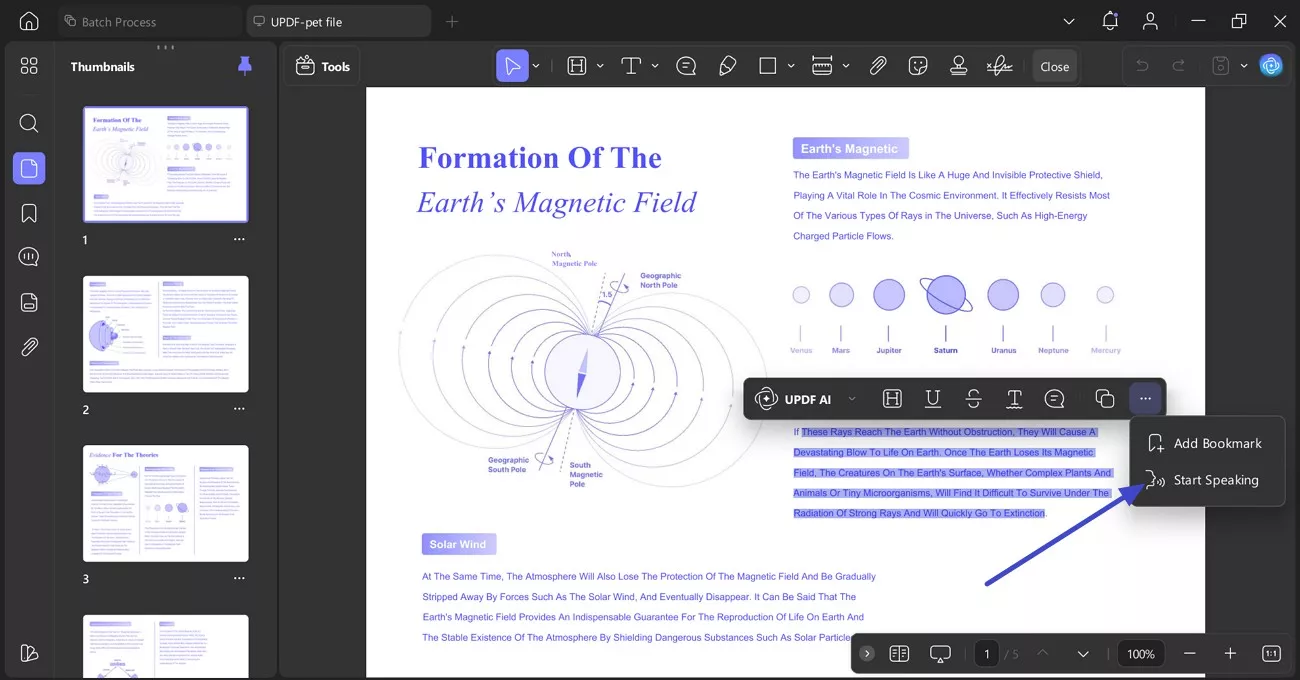
Step 2. Next, select the text and click on the “Three Dots.” From the options, choose “Start Speaking” to activate Read Aloud.
OCR with speech is usually adequate for users with problems such as non-selectable text or basic read-aloud access. In these situations, UPDF is an almost affordable alternative, costing about one-sixth of Adobe Acrobat. It also includes most daily PDF editing, annotation, and accessibility-supporting functions.
If tasks are required, such as tagging, correcting reading order, or performing full WCAG and PDF/UA checks, users can complete them in Adobe Acrobat.
D. Continue with Adobe for Full Accessibility
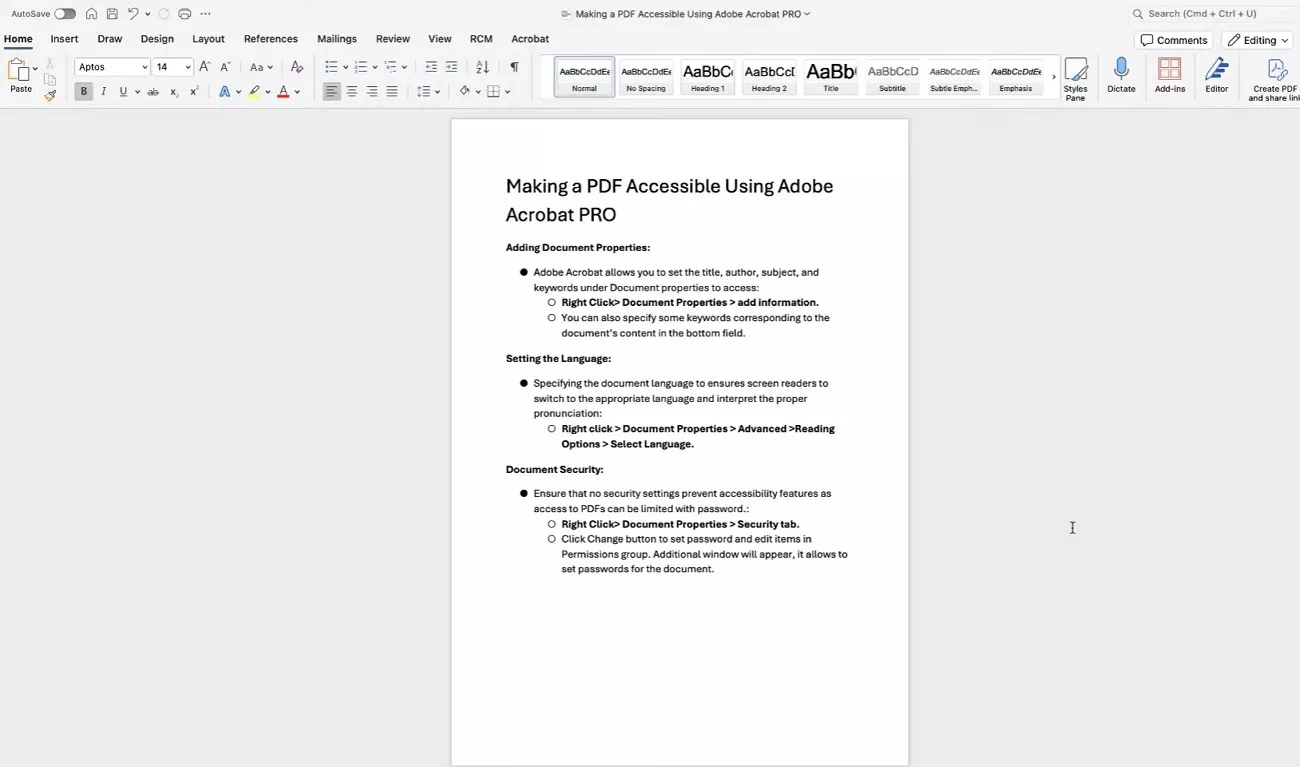
Afterwards, once I address basic accessibility needs, I use Adobe Acrobat to make PDFs fully accessible. Adobe supports advanced accessibility tasks and full WCAG and PDF/UA compliance with precise structure control. I continue with the stepwise guide below to apply these accessibility features:
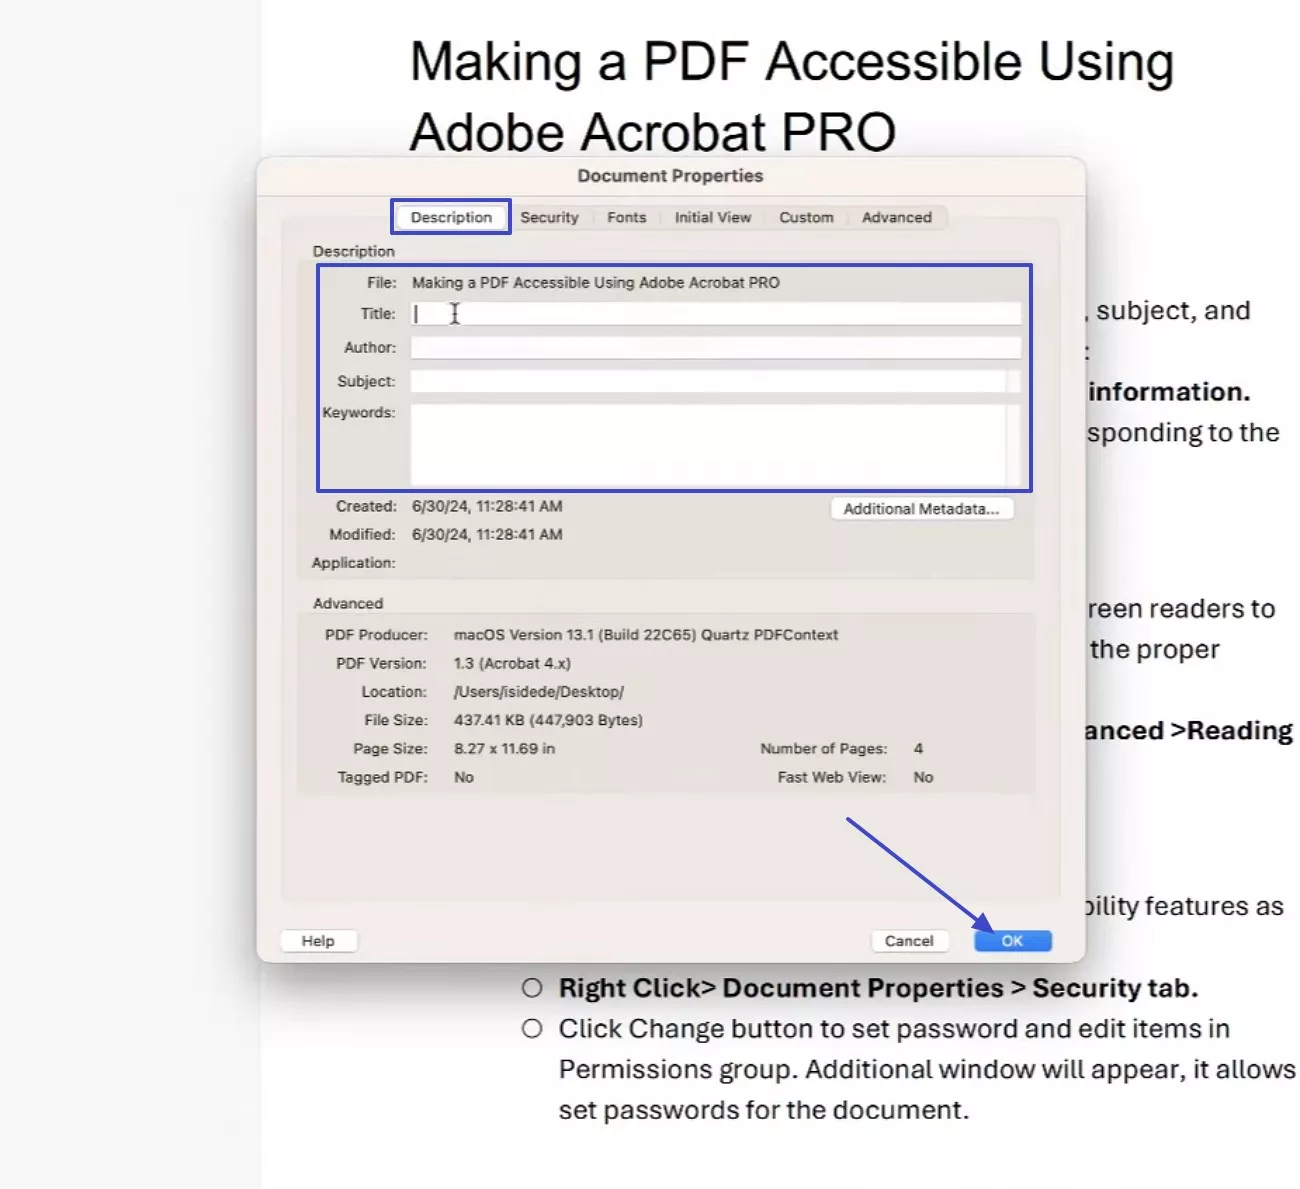
Step 1. First, right-click on the file to choose “Document Properties” and later add a clear title, author, subject, and keywords to click “OK”.
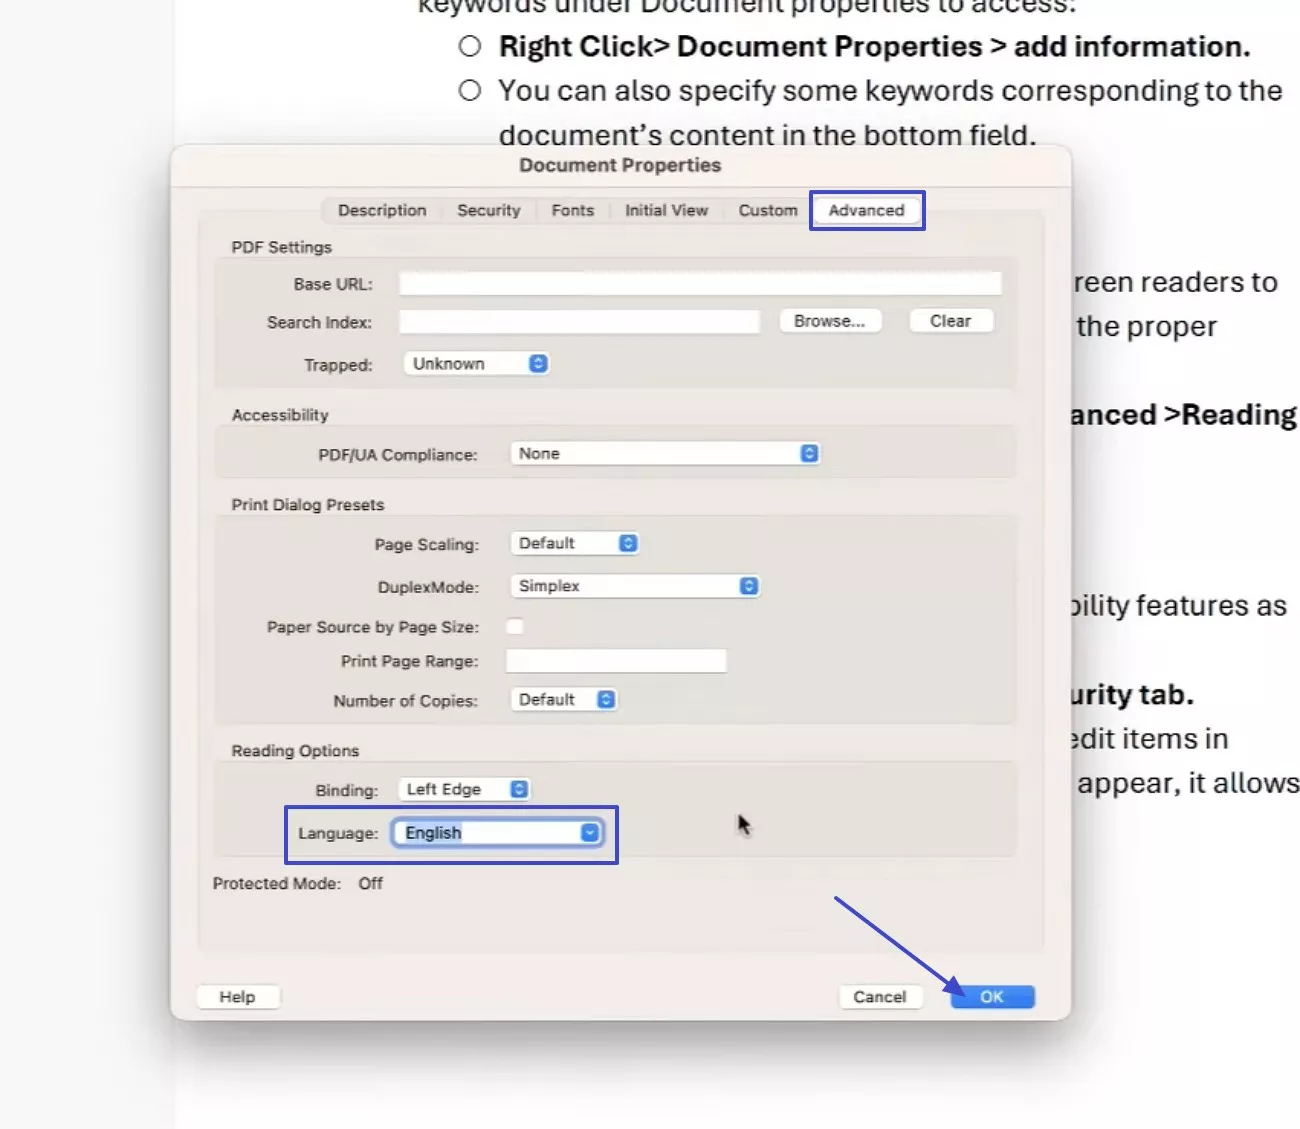
Step 2. Next, move to the “Advanced” tab and set the document language correctly for screen readers.
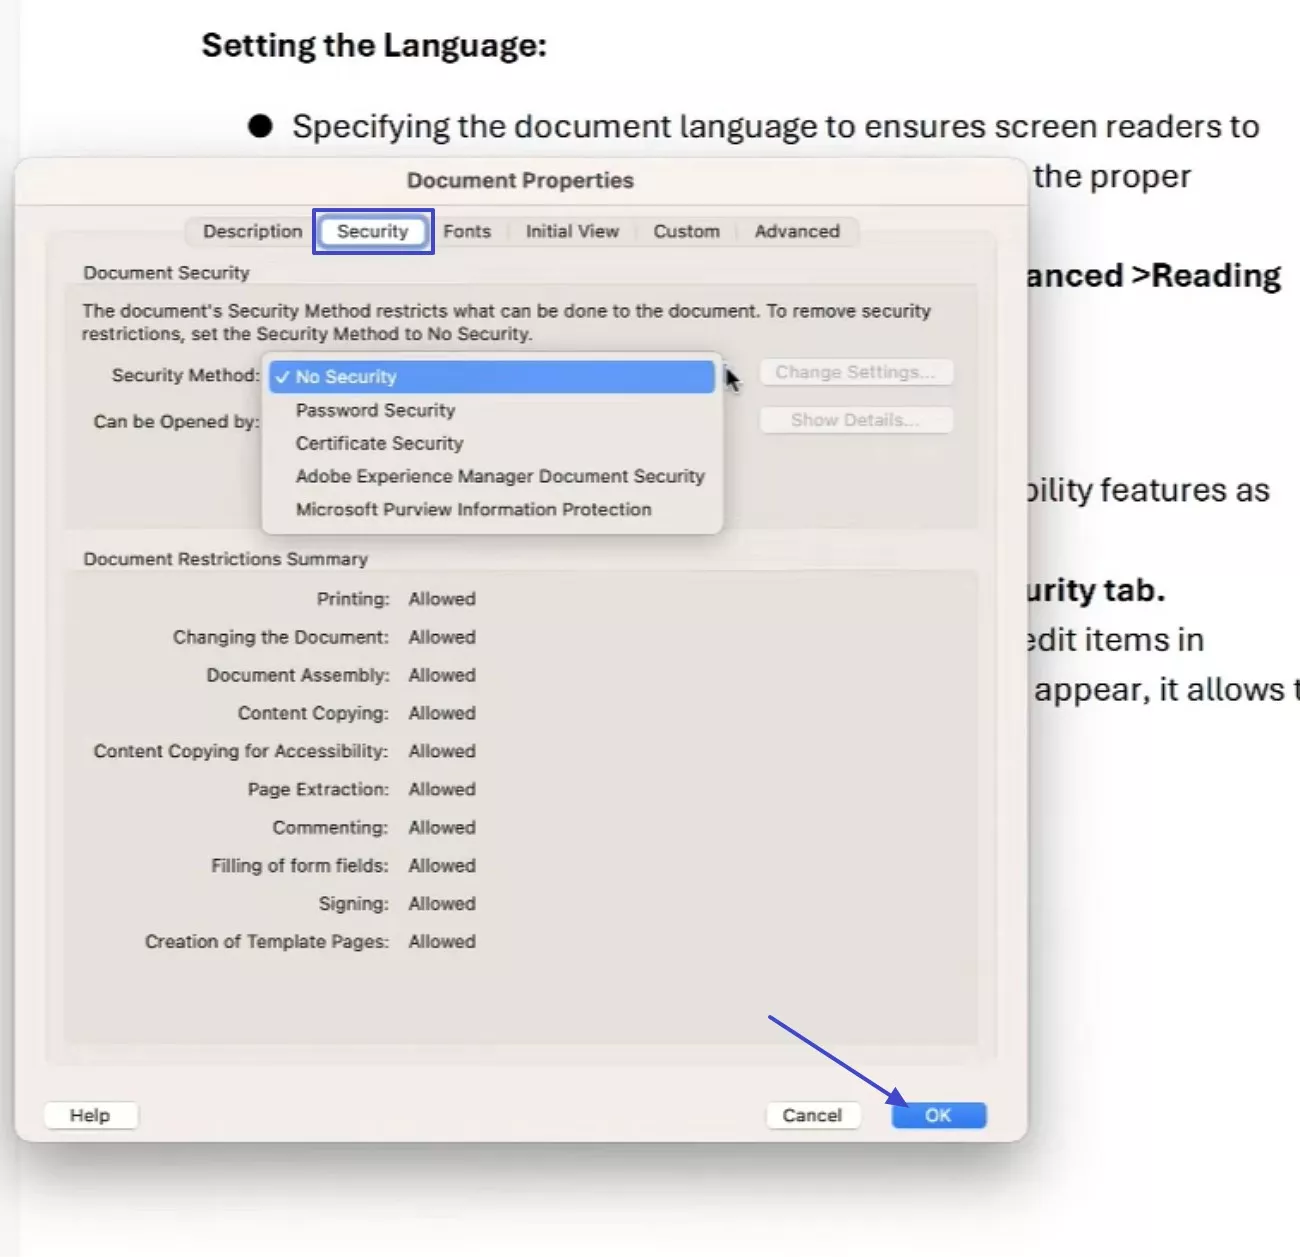
Step 3. Check the "Security" tab and ensure there are no restrictions on accessibility features, and press the "OK" button.
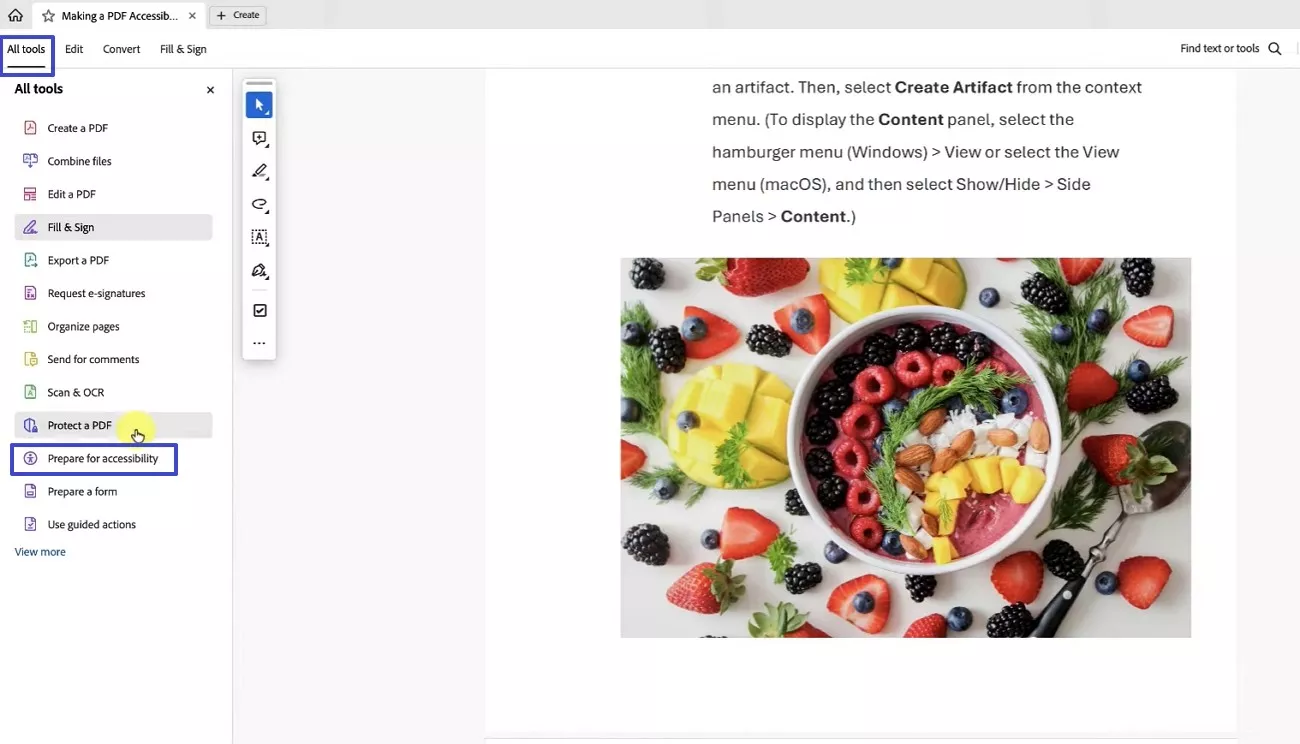
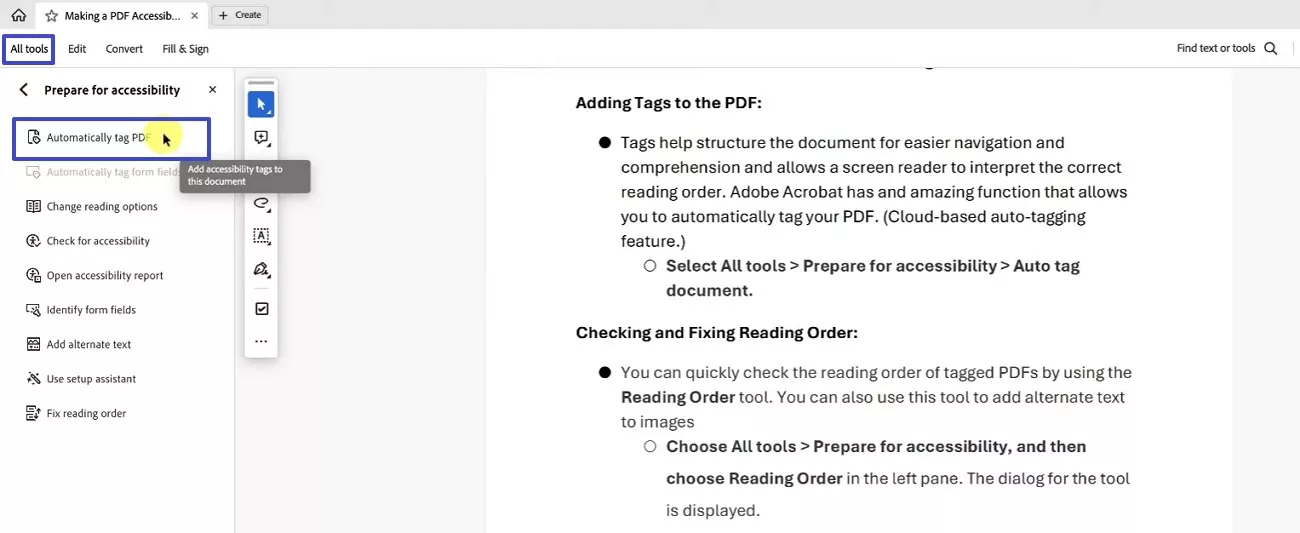
Step 4. After that, navigate to the “All Tools” option and select “Prepare for Accessibility” to further select the “Add Alternate Text” option.
Step 5. Afterwards, click on the “All tools”, then select the “Automatically tag PDF” to apply structural tags and improve navigation order.
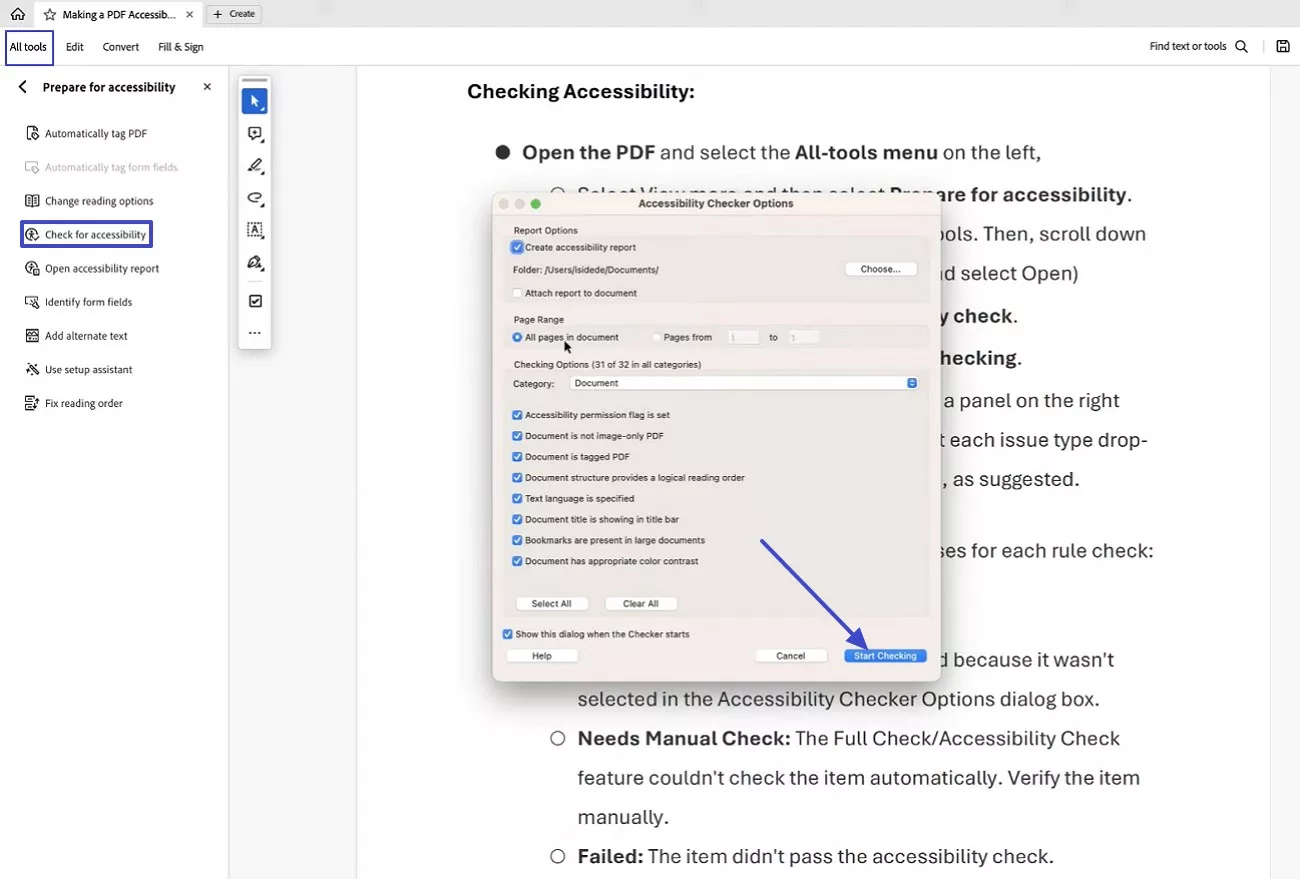
Step 6. Finally, I run the “Accessibility Check,” review the reported issues, fix items needing manual verification, and then select “Continue Checking."
Part 3. PDF/UA Compliance Test (How to check)
After completing accessibility work, I always test the PDF to confirm PDF/UA compliance. This step verifies tags, reading order, language, and assistive technology compatibility. For a clear, step-by-step guide to checking PDF accessibility, review this detailed UPDF article, which explains testing methods and common validation issues.
Part 4. What is the Difference Between PDF/UA and PDF/A?
After understanding how to create and test accessible PDFs, it is also important to distinguish PDF/UA from other PDF standards. To better understand how these formats differ, review the table below:
| Aspect | PDF/UA | PDF/A |
| Primary Purpose | Ensures accessibility for users with disabilities | Ensures long-term document preservation |
| Main Focus | Usability and assistive technology support | Visual consistency and archival stability |
| Tagging Requirement | Mandatory structural and semantic tagging | Not required |
| Screen Reader Support | Fully supported through logical structure | Not guaranteed |
| Interactive Elements | Must be accessible and keyboard navigable | Often restricted or limited |
| Legal Use Cases | Accessibility compliance and inclusive publishing | Records management and long-term storage |
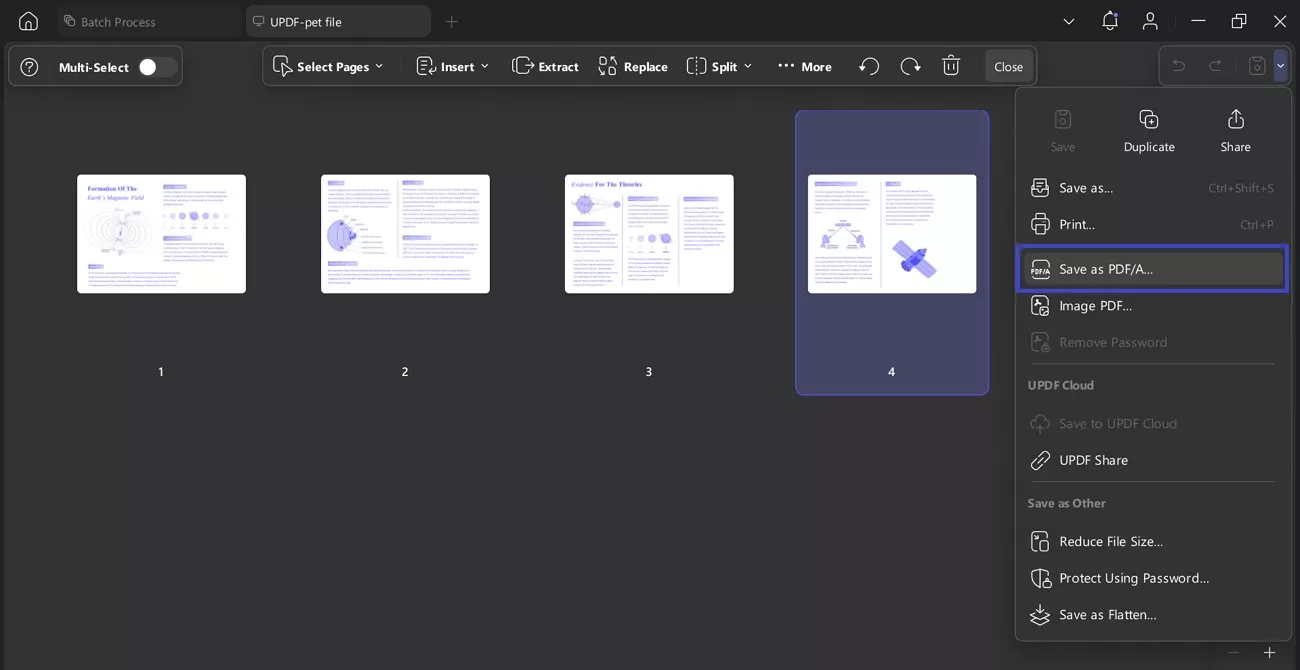
Although PDF/UA and PDF/A have various purposes, I consider both to be crucial in the present document processes. PDF/UA deals with accessibility and usability, whereas PDF/A is aimed at long-term preservation and consistency. I would convert PDFs to PDF/A with the aid of UPDF to ensure that the companies can fulfil their preservation needs with minimal cost in their archives.
Part 5. How to Add a PDF/UA Identifier?
Adding a PDF/UA identifier is a step I use to confirm that my PDF meets formal accessibility requirements. By applying this identifier, I ensure that assistive technologies can correctly recognize and interpret the document structure. Adobe Acrobat makes this possible through its accessibility tools and Preflight options, so review the guide below to further understand:
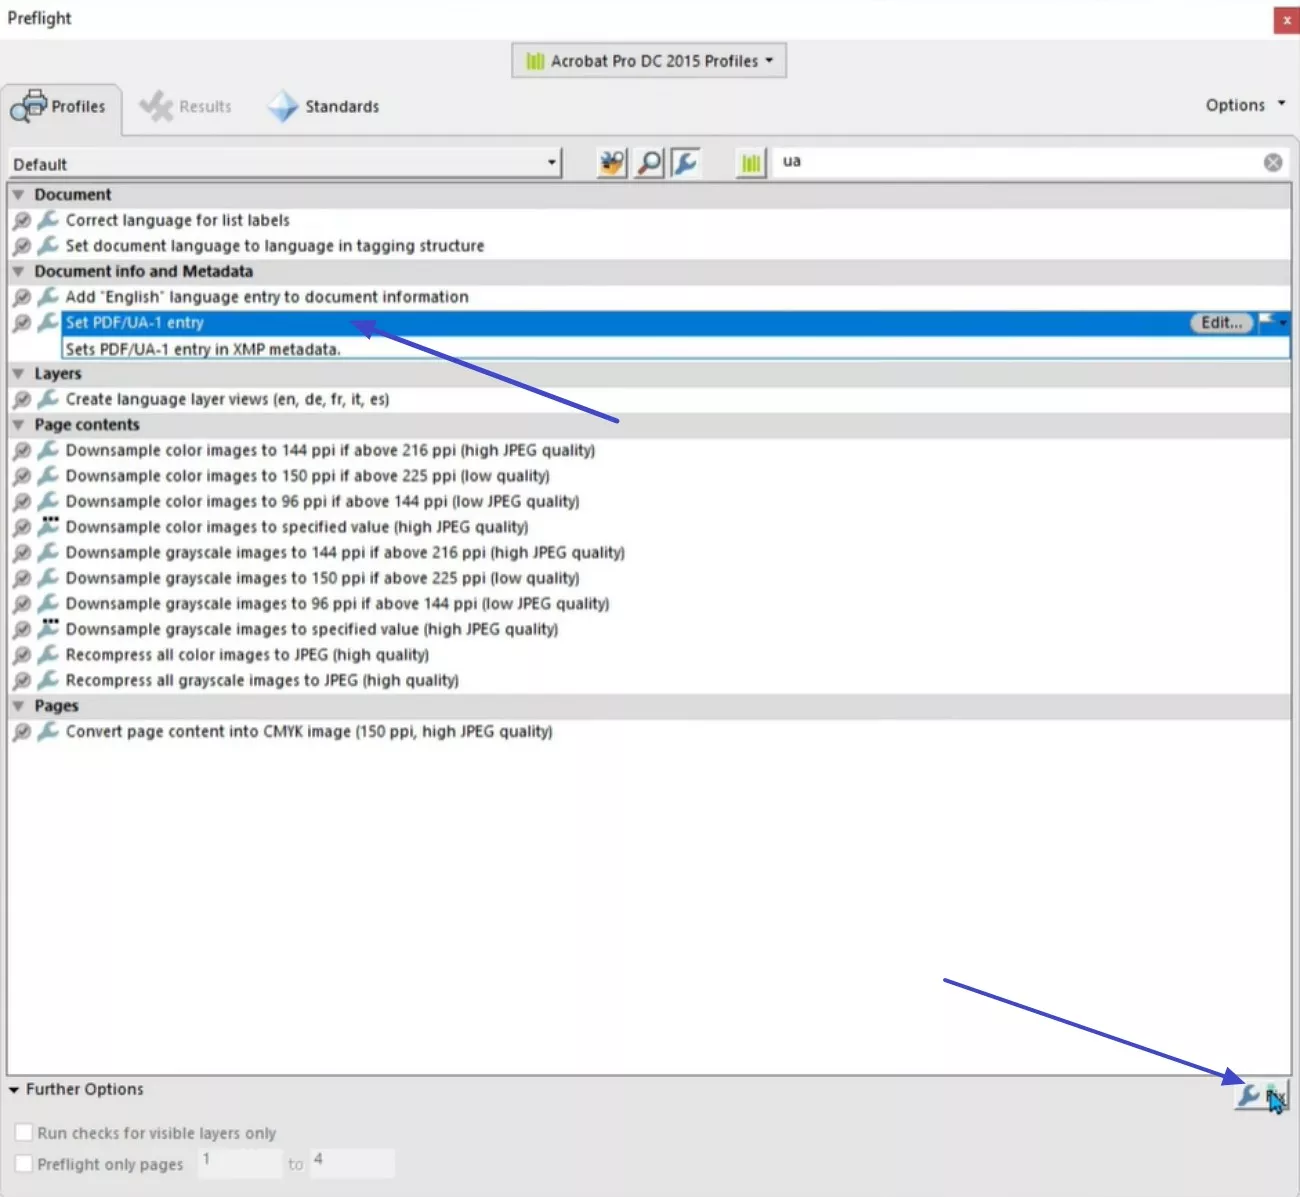
Step 1. First, move towards the “All Tools” option to open the “Use print production,” and from here choose “Pre Flight” to continue.

Step 2. Later, select “Set PDF/UA-1 entry” under Document info and Metadata and run the fix, then save the file, and confirm the PDF/UA status is applied.
Conclusion
In conclusion, the development of accessible documents should be based on clear standards, proper organization, and regular testing at all levels. Adhering to PDF/UA principles, I make content accessible to all devices and assistive technology users. Achieving PDF UA compliance becomes manageable when using practical workflows, OCR, and validation checks.
To simplify this process without unnecessary complexity, I recommend UPDF as a reliable, cost-effective accessibility companion. With all features highlighted, do consider purchasing UPDF’s exclusive plan and get an official 10% discount with the coupon code “ENARTICLE” upon purchasing.
Windows • macOS • iOS • Android 100% secure


 Enid Brown
 Lizzy Lozano

 Engelbert White
-ADefiniteDescription