UPDF for Windows
 UPDF for Mac
 UPDF for iPhone/iPad
 UPDF for Android
 UPDF AI Online
 UPDF Sign
 Edit PDF
 Annotate PDF
 Create PDF
 PDF Form
 Edit links
 Convert PDF
 OCR
OCR PDF to Word
 PDF to Image
 PDF to Excel
 Organize PDF
 Merge PDF
 Split PDF
 Crop PDF
 Rotate PDF
 Protect PDF
 Sign PDF
 Redact PDF
 Sanitize PDF
 Remove Security
 Read PDF
 UPDF Cloud
 Compress PDF
 Print PDF
 Batch Process
 About UPDF AI
 UPDF AI Solutions
 AI User Guide
 FAQ about UPDF AI
 Summarize PDF
 Translate PDF
 Chat with PDF
 Chat with AI
 Chat with image
 PDF to Mind Map
 Explain PDF
 PDF AI Tools
 Image AI Tools
 AI Chat Tools
 AI Writing Tools
 AI Study Tools
 AI Working Tools
 Other AI Tools
 PDF to Word
 PDF to Excel
 PDF to PowerPoint
 User Guide
 UPDF Tricks
 FAQs
FAQs UPDF Reviews
 Download Center
 Blog
Blog Newsroom
 Tech Spec
 Updates
 UPDF vs. Adobe Acrobat
 UPDF vs. Foxit
 UPDF vs. PDF Expert
Most PDF editors won’t let you remove a certified signature unless you’re the original signer or have proper rights.
That sounds like a dead end, but it isn’t.
Certified signatures carry authentication details and prevent edits; that’s why they stop normal deletion. Still, there are clear ways to handle them when you have permission.
In this article I’ll explain how to remove a certified signature from a PDF, including step-by-step instructions using UPDF (an all-in-one PDF editor). Keep reading until the end to get all the details and regain control of your PDF files!
Windows • macOS • iOS • Android 100% secure
Part 1. What Is a Certified PDF?
A certified PDF is one that’s been “sealed” by the author with a digital certificate. In plain terms, it’s a PDF that’s digitally signed with a trusted certificate that verifies the author’s identity and confirms the document hasn’t been changed.
When you open a certified PDF, you often see a ribbon or badge indicating the document is certified. This certification locks the content and proves the document is authentic. In other words, a certified PDF shows that the author is vouching for the file’s integrity.
The downside is, once certified, the document is locked to keep it from being tampered with.
Part 2. How To Remove Certified Signature From PDF?
In my workflow, I use UPDF to handle certified PDFs. Before I walk you through how to remove a certified signature from a PDF, let me first give you a brief introduction to this tool to help you get a basic understanding of it.
Windows • macOS • iOS • Android 100% secure
UPDF at a Glance
UPDF is a powerful PDF editor with an intuitive interface that lets me edit, convert, compress, sign, and do much more with my PDFs. It’s often my go-to solution for PDF headaches. Below I highlight some key UPDF features I love:
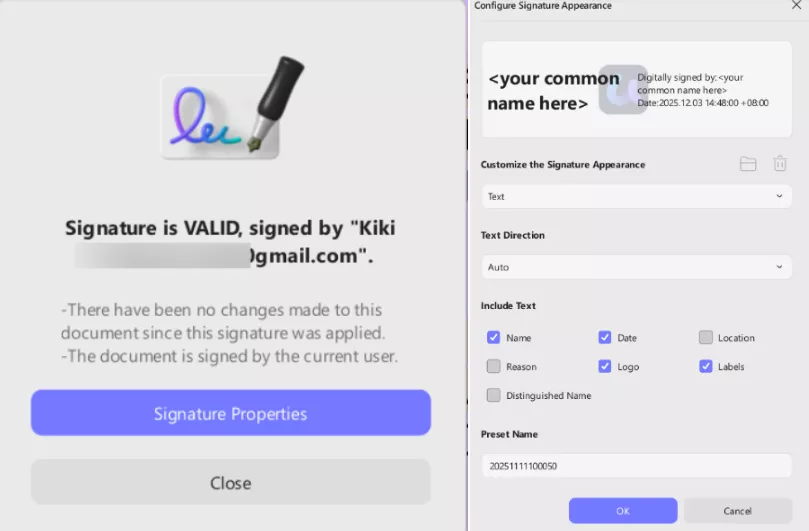
- Sign/E-Sign Tool: I frequently need to manage signatures, so UPDF’s signing tool is a lifesaver. It supports both traditional electronic signatures and certificate-based digital signatures.
Sometimes I’ll draw my signature with a stylus; other times, I’ll upload a scanned version so it looks exactly like it does on paper. I can store all of them in the UPDF cloud, which saves a surprising amount of time. If I need a certified digital signature, I can lock it with a password and adjust the styling so it still feels like “my” signature.
- Convert Tool (with OCR): I often convert PDFs to other formats like Word, Excel, or PowerPoint. UPDF handles this smoothly and even integrates OCR in the process. That means if I have a scanned, image-based PDF, I can enable OCR during conversion so text becomes editable at the same time.
And when I need something beyond the usual formats, UPDF can export to images, PPT, long images, and a bunch of others without any extra steps.

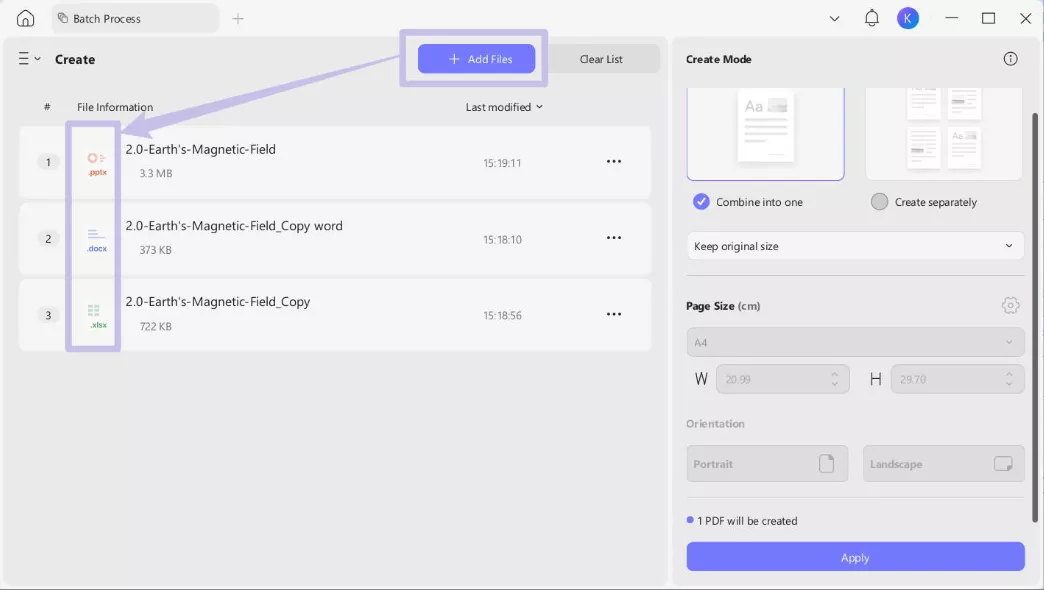
- Merge PDFs (Multiple Formats): Combining files is another scenario I run into. UPDF lets me merge PDFs and even combine files of different formats into a single PDF. In practice, I can drag in a Word file, an Excel file, and a PDF and merge them into one PDF document. This is something many PDF editors don’t do. They only merge PDFs but UPDF handles multiple types.
- OCR Modes: The built-in OCR feature is surprisingly advanced. It offers three modes: Editable PDF, Text and Picture Only, and Searchable PDF Only. I can choose “Searchable PDF” when I want the text to be selectable while keeping the original look of the page. Or I pick “Editable PDF” to have pure text output for editing.
Each time I run OCR, I can also choose the document’s language; there are more than 38, which helps the tool pick up characters more accurately.

- Compress PDF: One more feature I use is compression. UPDF’s “Reduce File Size” tool is smart: after choosing a compression quality (e.g. High, Medium, Low), I can click “Click to calculate” and it will show me the estimated output file size before I commit. This is great because I know exactly how much smaller my PDF will be, and I can balance quality and size.

Step-by-Step Guide
With that context in place, here are the actual steps to remove a certified signature from a PDF using UPDF:
Step 1. Launch UPDF on your computer. Click the “Open File” icon (or simply drag and drop your PDF) to load the certified PDF you want to edit.
Windows • macOS • iOS • Android 100% secure

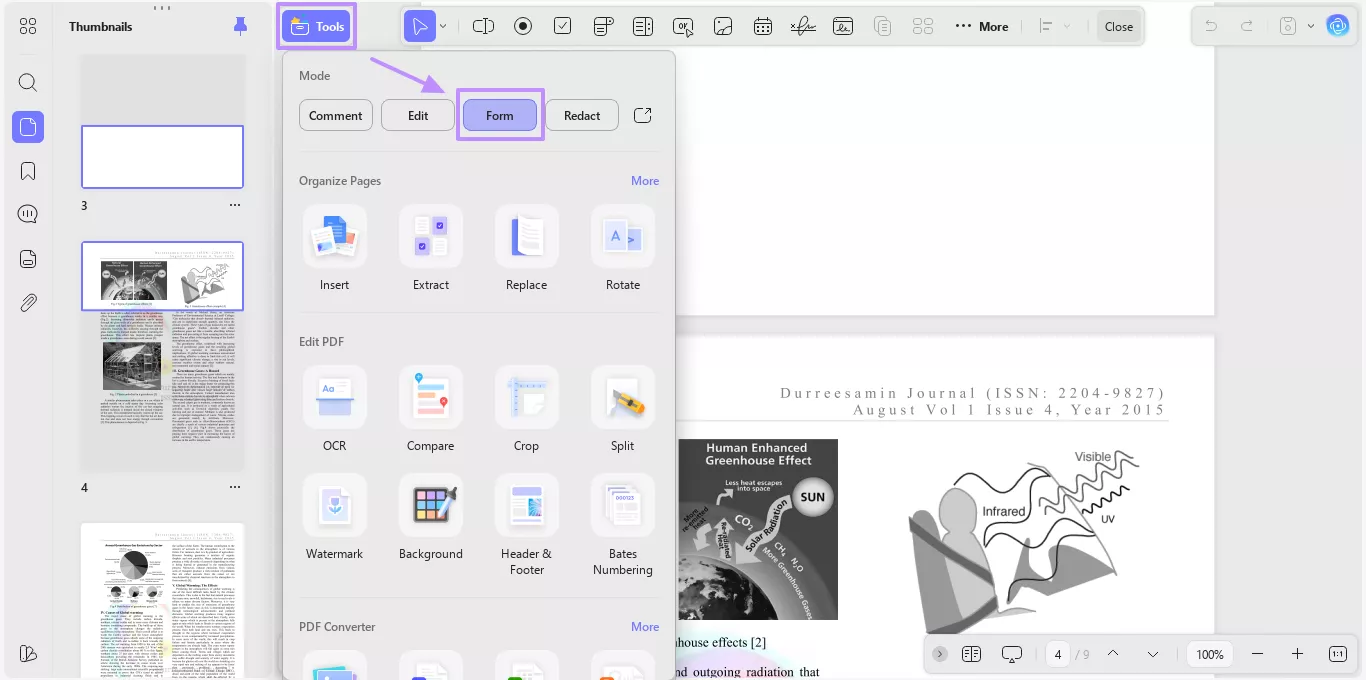
Step 2. In the toolbar, go to “Tools” and select “Form”. This switches UPDF into a mode where you can delete annotations, including signatures.
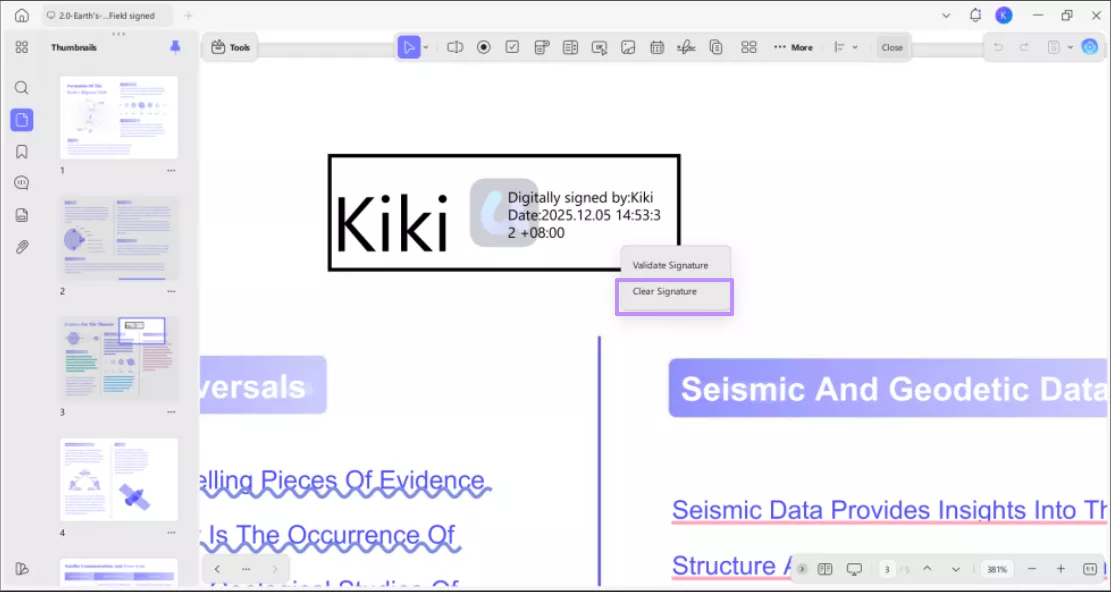
Step 3. Click on the certified signature or signature field in the PDF. Right-click the signature and choose “Clear Signature.”
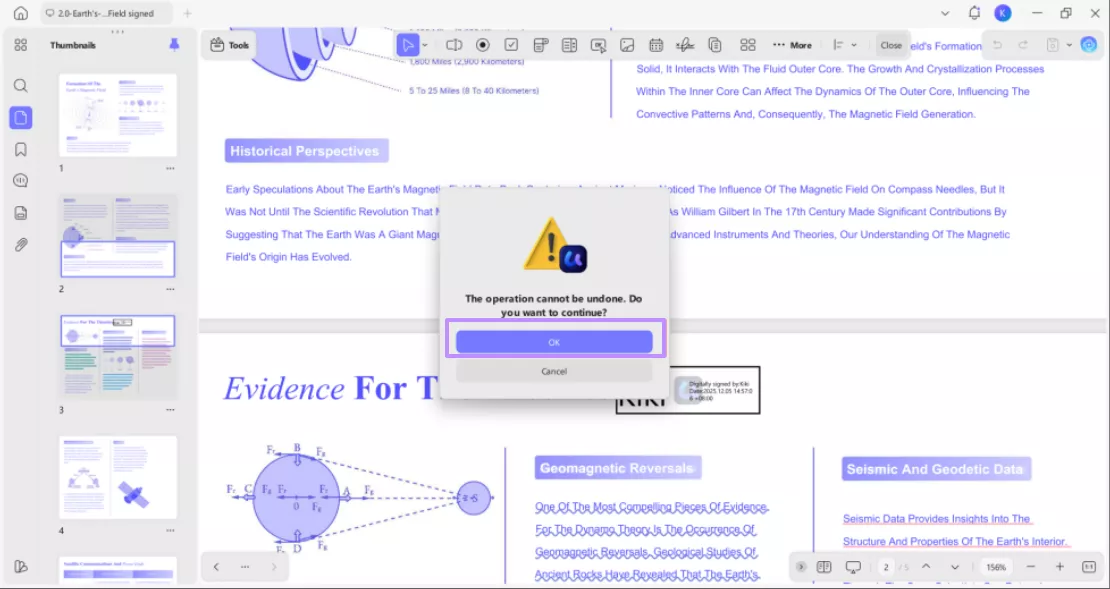
Step 4. Now, hit the “OK” button. This clears the signature from the document.
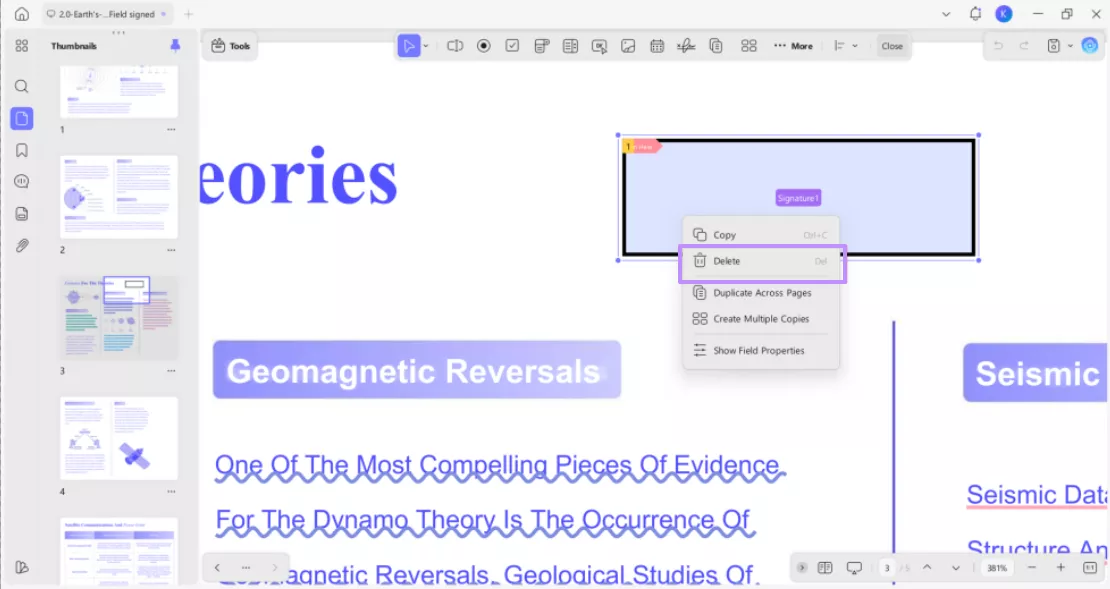
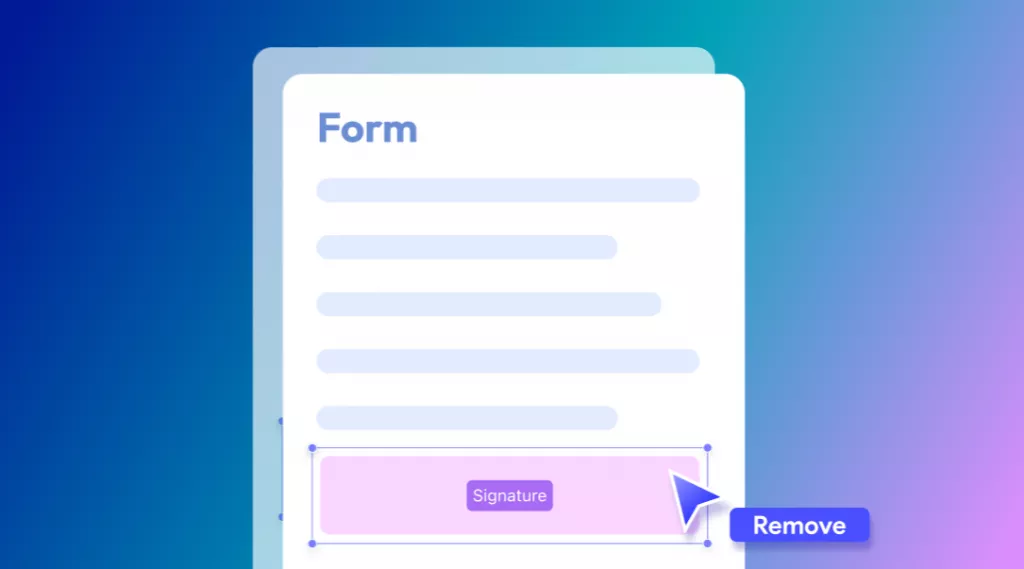
Step 5. Finally, you need to select the signature field, right click it, and hit the “Delete” option to clear the area.
Windows • macOS • iOS • Android 100% secure
Part 3. How Do I Remove a Certificate From My Adobe Signature?
If you’re using Adobe Acrobat Pro DC to manage signatures, the process is a bit different. For Adobe, a signature certificate is actually managed as a Digital ID in the app’s preferences. Here’s how you can do it,
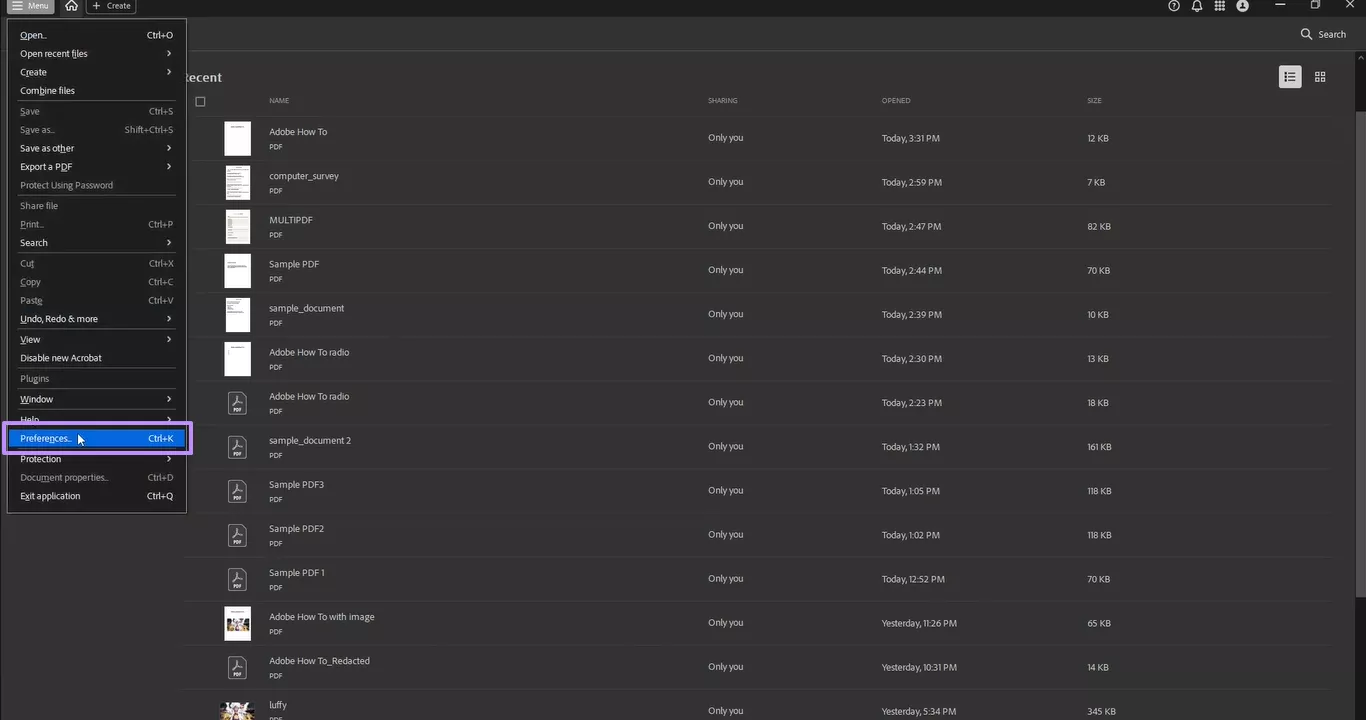
Step 1. In Acrobat, head over to the menu at the left corner of the screen and select “Preferences.”
Step 2. A new window will pop up. Look to the left side and select “Signatures” in the left menu. Then click “More” under “Identities & Trusted Certificates.”

Step 3. After that, look for the “Digital ID” section within the panel that appears. You can see the list of certificates. Select the one you want to delete and click “Remove ID.”

Step 4. At this stage, a confirmation dialogue box will pop up on your screen. Go ahead and click “OK” here.

Step 5. Finally, Acrobat will prompt for the password. Enter your password within the designated field and then click “OK.”
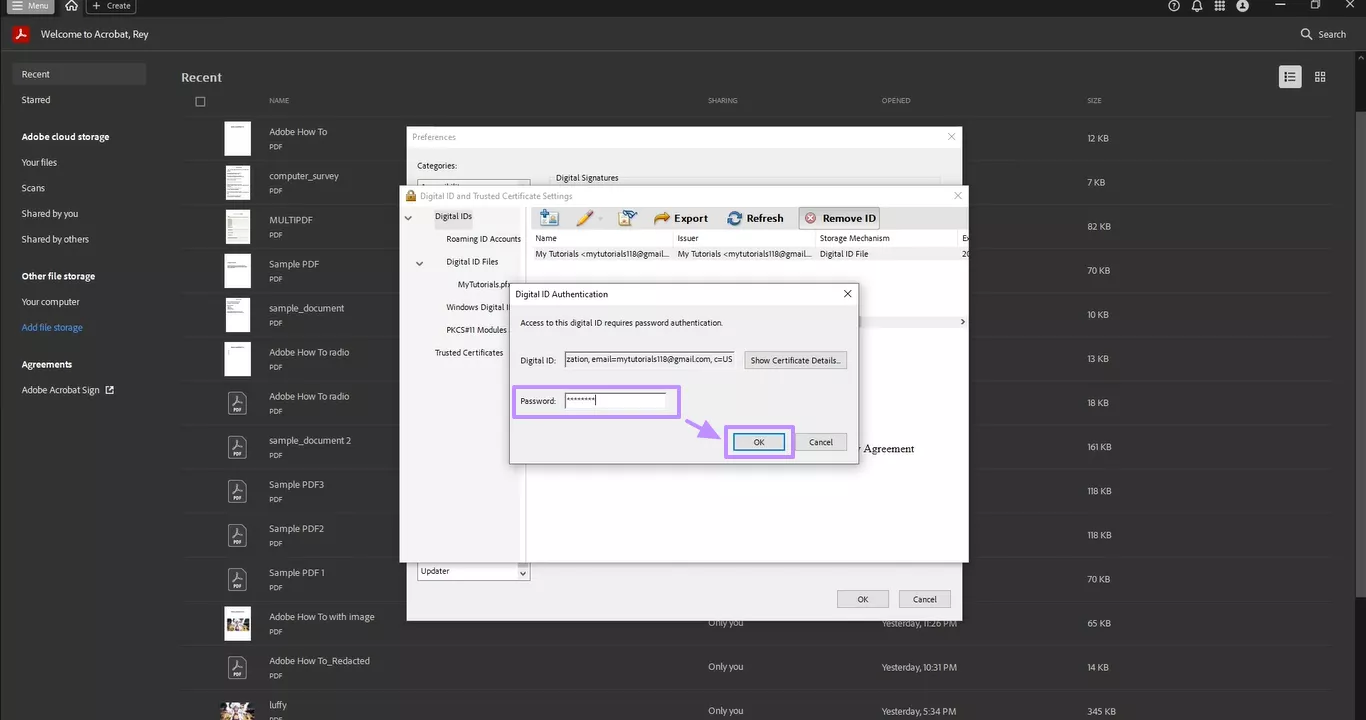
This removes the certificate from Acrobat’s stored IDs. Note that this only deletes the certificate from the app, it won’t change any signed PDFs themselves unless you clear the signature on the document.
Part 4. Why Won’t Adobe Let Me Remove My Signature?
Sometimes you might find that even these steps don’t let you remove a signature. That’s usually because Adobe locks certified PDFs by design. Adobe’s documentation explains that signing a PDF with a digital ID or certificate locks it and prevents further changes.
If the author also selected the “Lock document after signing” option, then no one (not even the original signer) can modify or remove that signature after the fact. The only fixes are to get the original, unsigned version from the author or to recreate the PDF from scratch without applying a certification.
Reminder:
Conclusion
Removing a certified signature in a PDF really depends on two things: the tool you’re using and the permissions set on the file. In my experience, UPDF makes the removal process simple, with its flexible PDF editing features. I can delete the signature, then convert, merge, or compress the file as needed.
You should definitely test UPDF for your PDF edits; it’s built to make jobs like this quick. Using the tips above, you can clean up your files, drop in a new signature when needed, and keep the whole document secure while you’re at it.
Windows • macOS • iOS • Android 100% secure


 Enrica Taylor
  Delia Meyer