With the ongoing digital transformation, digital signatures have become a new norm in the business world. The growing shift towards virtual communication and remote work has made electronic signatures a convenient and effective way of signing and validating documents. Since Microsoft Word is the most popular word processing software, many Word users intend to learn how to add a digital signature to Word. So, if you are also looking for this solution, then this guide is for you. Here we will present the step-by-step approach on how to add digital signatures to Word, starting with the most effective way of adding digital signs to documents by downloading UPDF.
Windows • macOS • iOS • Android 100% secure
Part 1. What is Digital Signature, and Why is It Important?
In simple words, a digital signature is an electronic form of signature used to confirm the authenticity and integrity of a digital document. The digital signature validates that the information is originated from the signer and is not altered. It ensures end-to-end integrity by using a mathematical algorithm that validates the transparency of digital content.
One of the most crucial benefits of a digital signature is ensuring the signer's identity. It is based on public-key cryptography, which eradicates the chances of manipulating the signature. Moreover, electronic signatures are easily signed and verified, thereby reducing the time and cost linked with printing, signing, scanning, and sending paper documents. In short, a digital signature is an effective way to ensure the authenticity and integrity of the document.
Part 2. The Best Way to Add Digital Signature to Documents
Since most digital documents are shared in PDF form, the preferred approach is adding a digital signature directly to the PDF file. To add your sign in a PDF document, UPDF is the best easy-to-use PDF tool.
UPDF is an all-in-one PDF editor toolkit that provides a click-based interface to easily sign digital documents without hassle. It allows you to draw and insert a digital signature anywhere in the PDF without compromising the quality of the PDF. Follow the below steps to add a digital signature to a PDF file with UPDF:
Step 1. Download UPDF on your device. Currently, the digital signing feature is available in UPDF's Windows app, and it will be successively available in UPDF for Mac, iOS, and Android.
Windows • macOS • iOS • Android 100% secure
Step 2. Save the Word documents as PDFs, and open them with UPDF.
Step 3. Choose the 'Form' mode in "Tools" from the left panel, then click 'Digital Signature' in the top menu bar. After that, click on the area in the PDF where you want to place the digital signature.
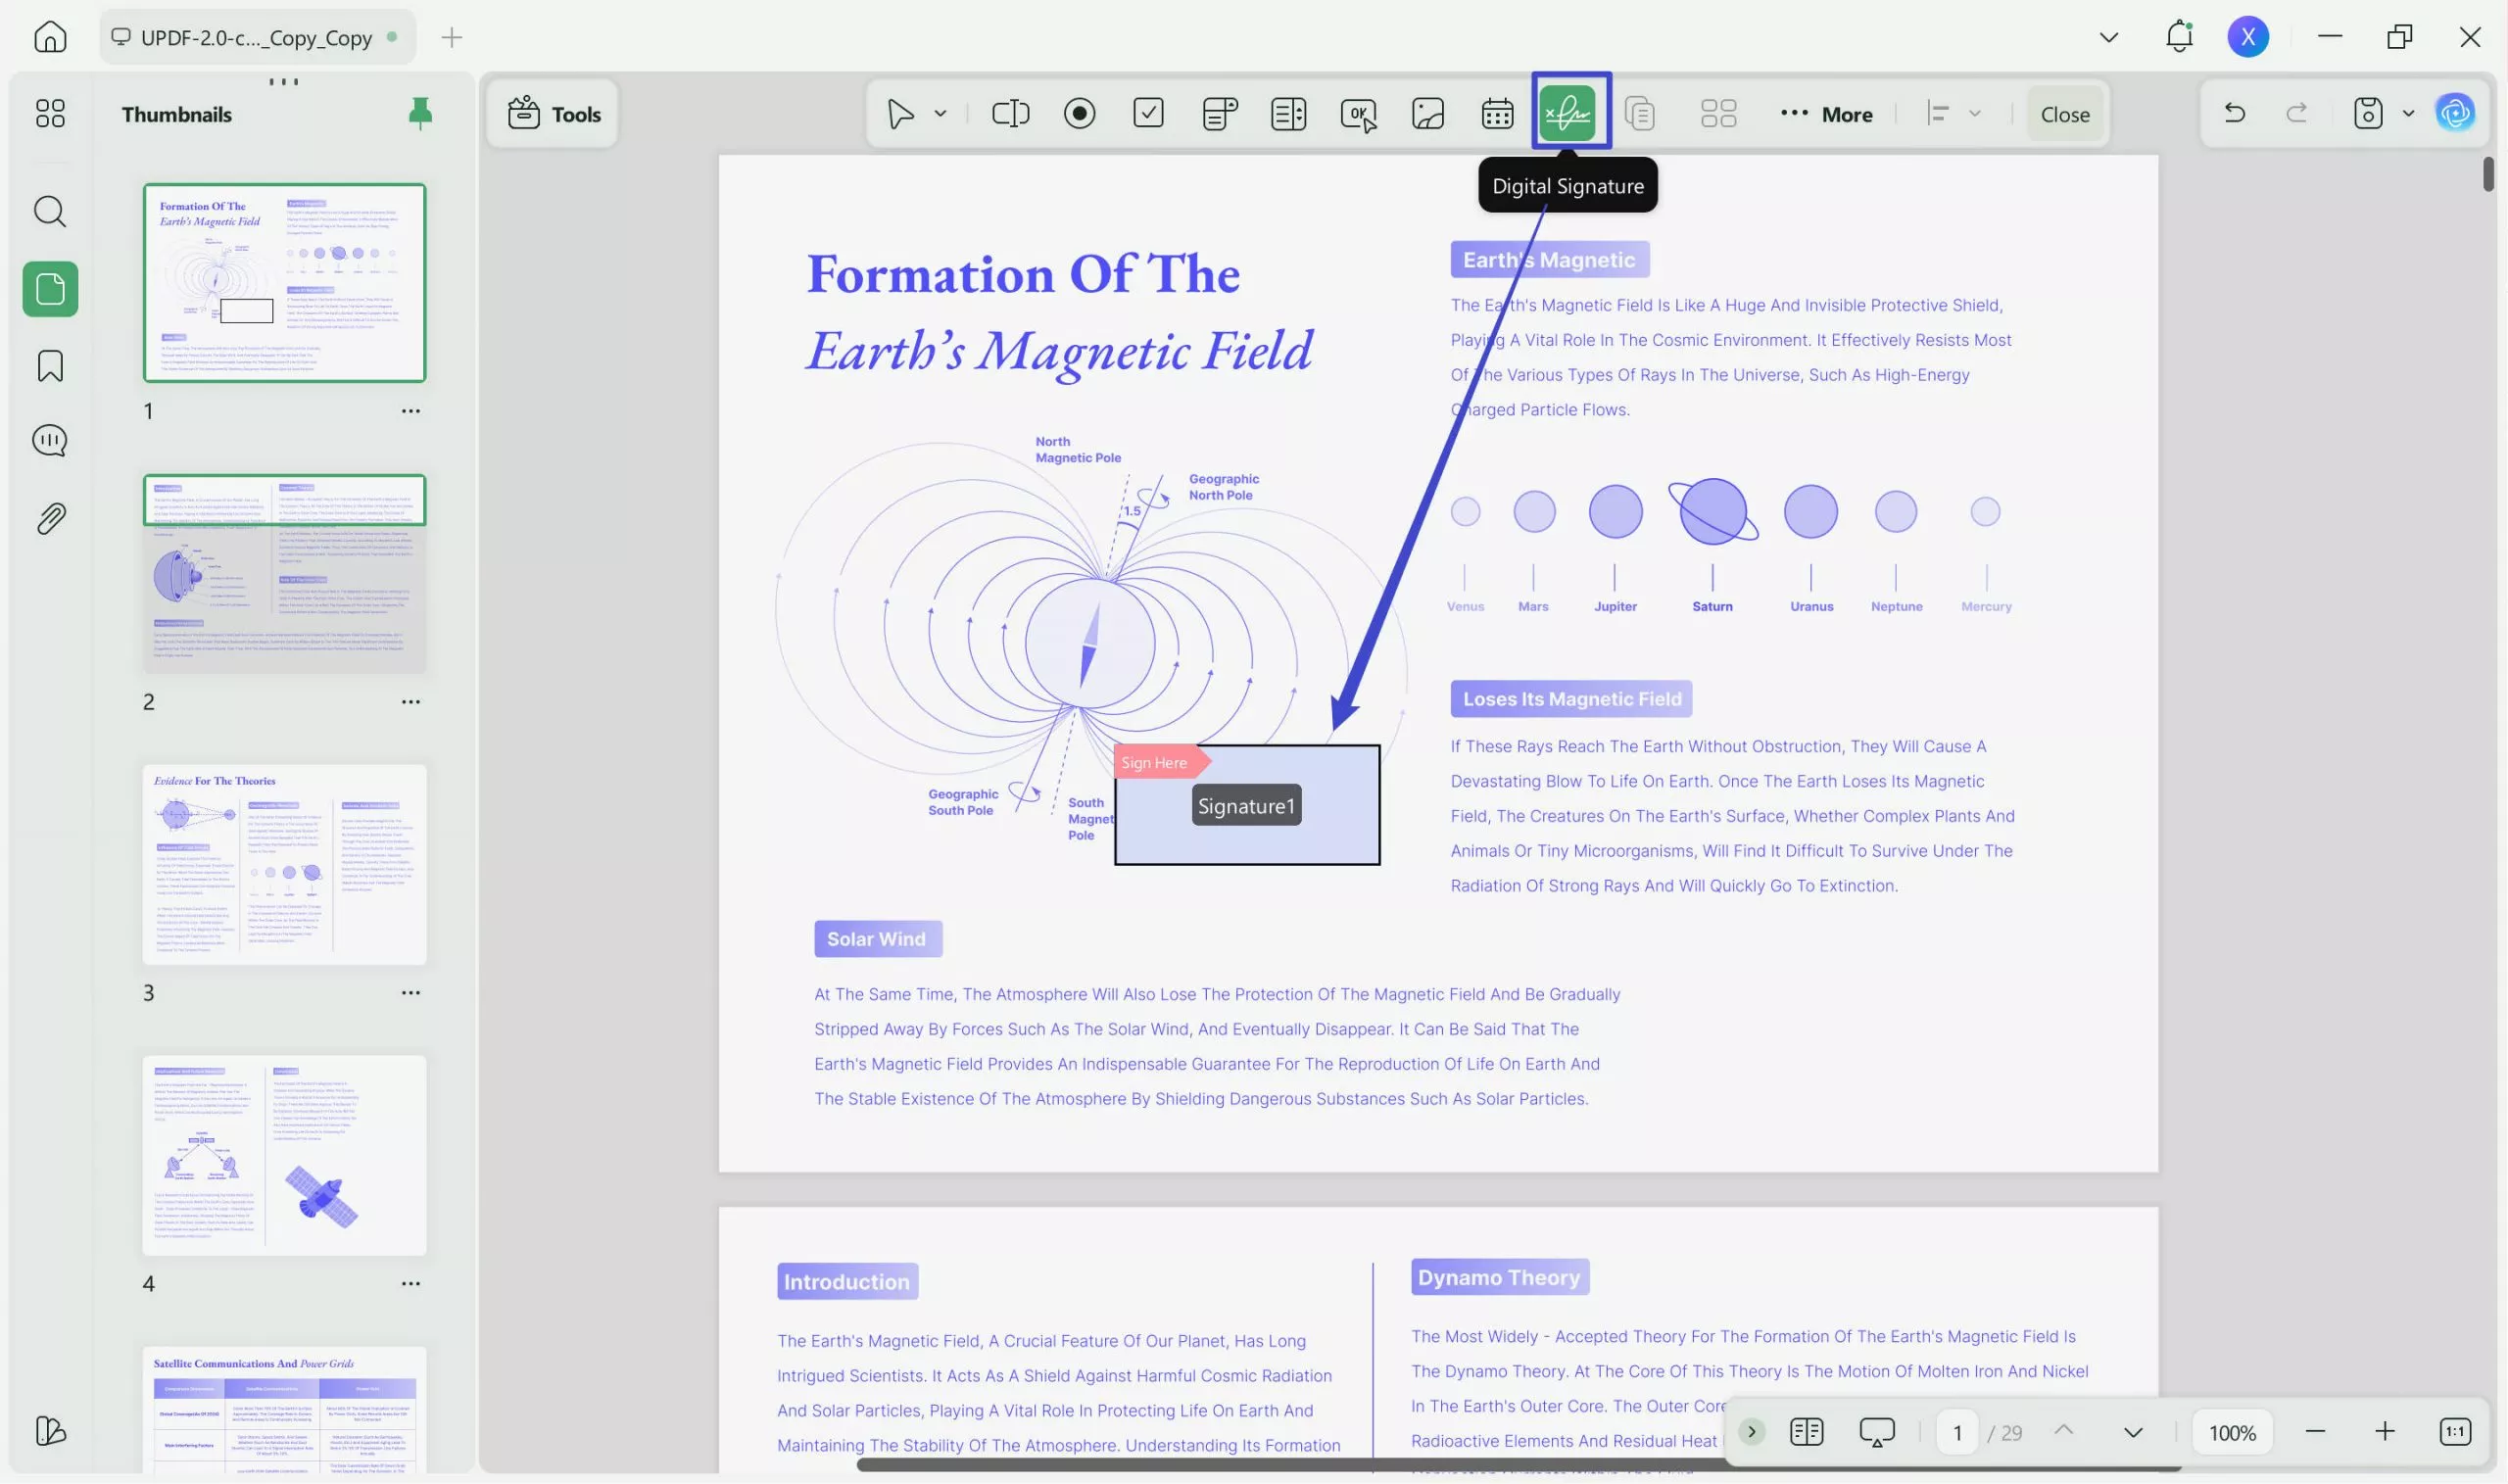
Step 4. Afterward, switch to the Comment mode in "Tools" and create and add a digital signature by following the on-screen prompts.
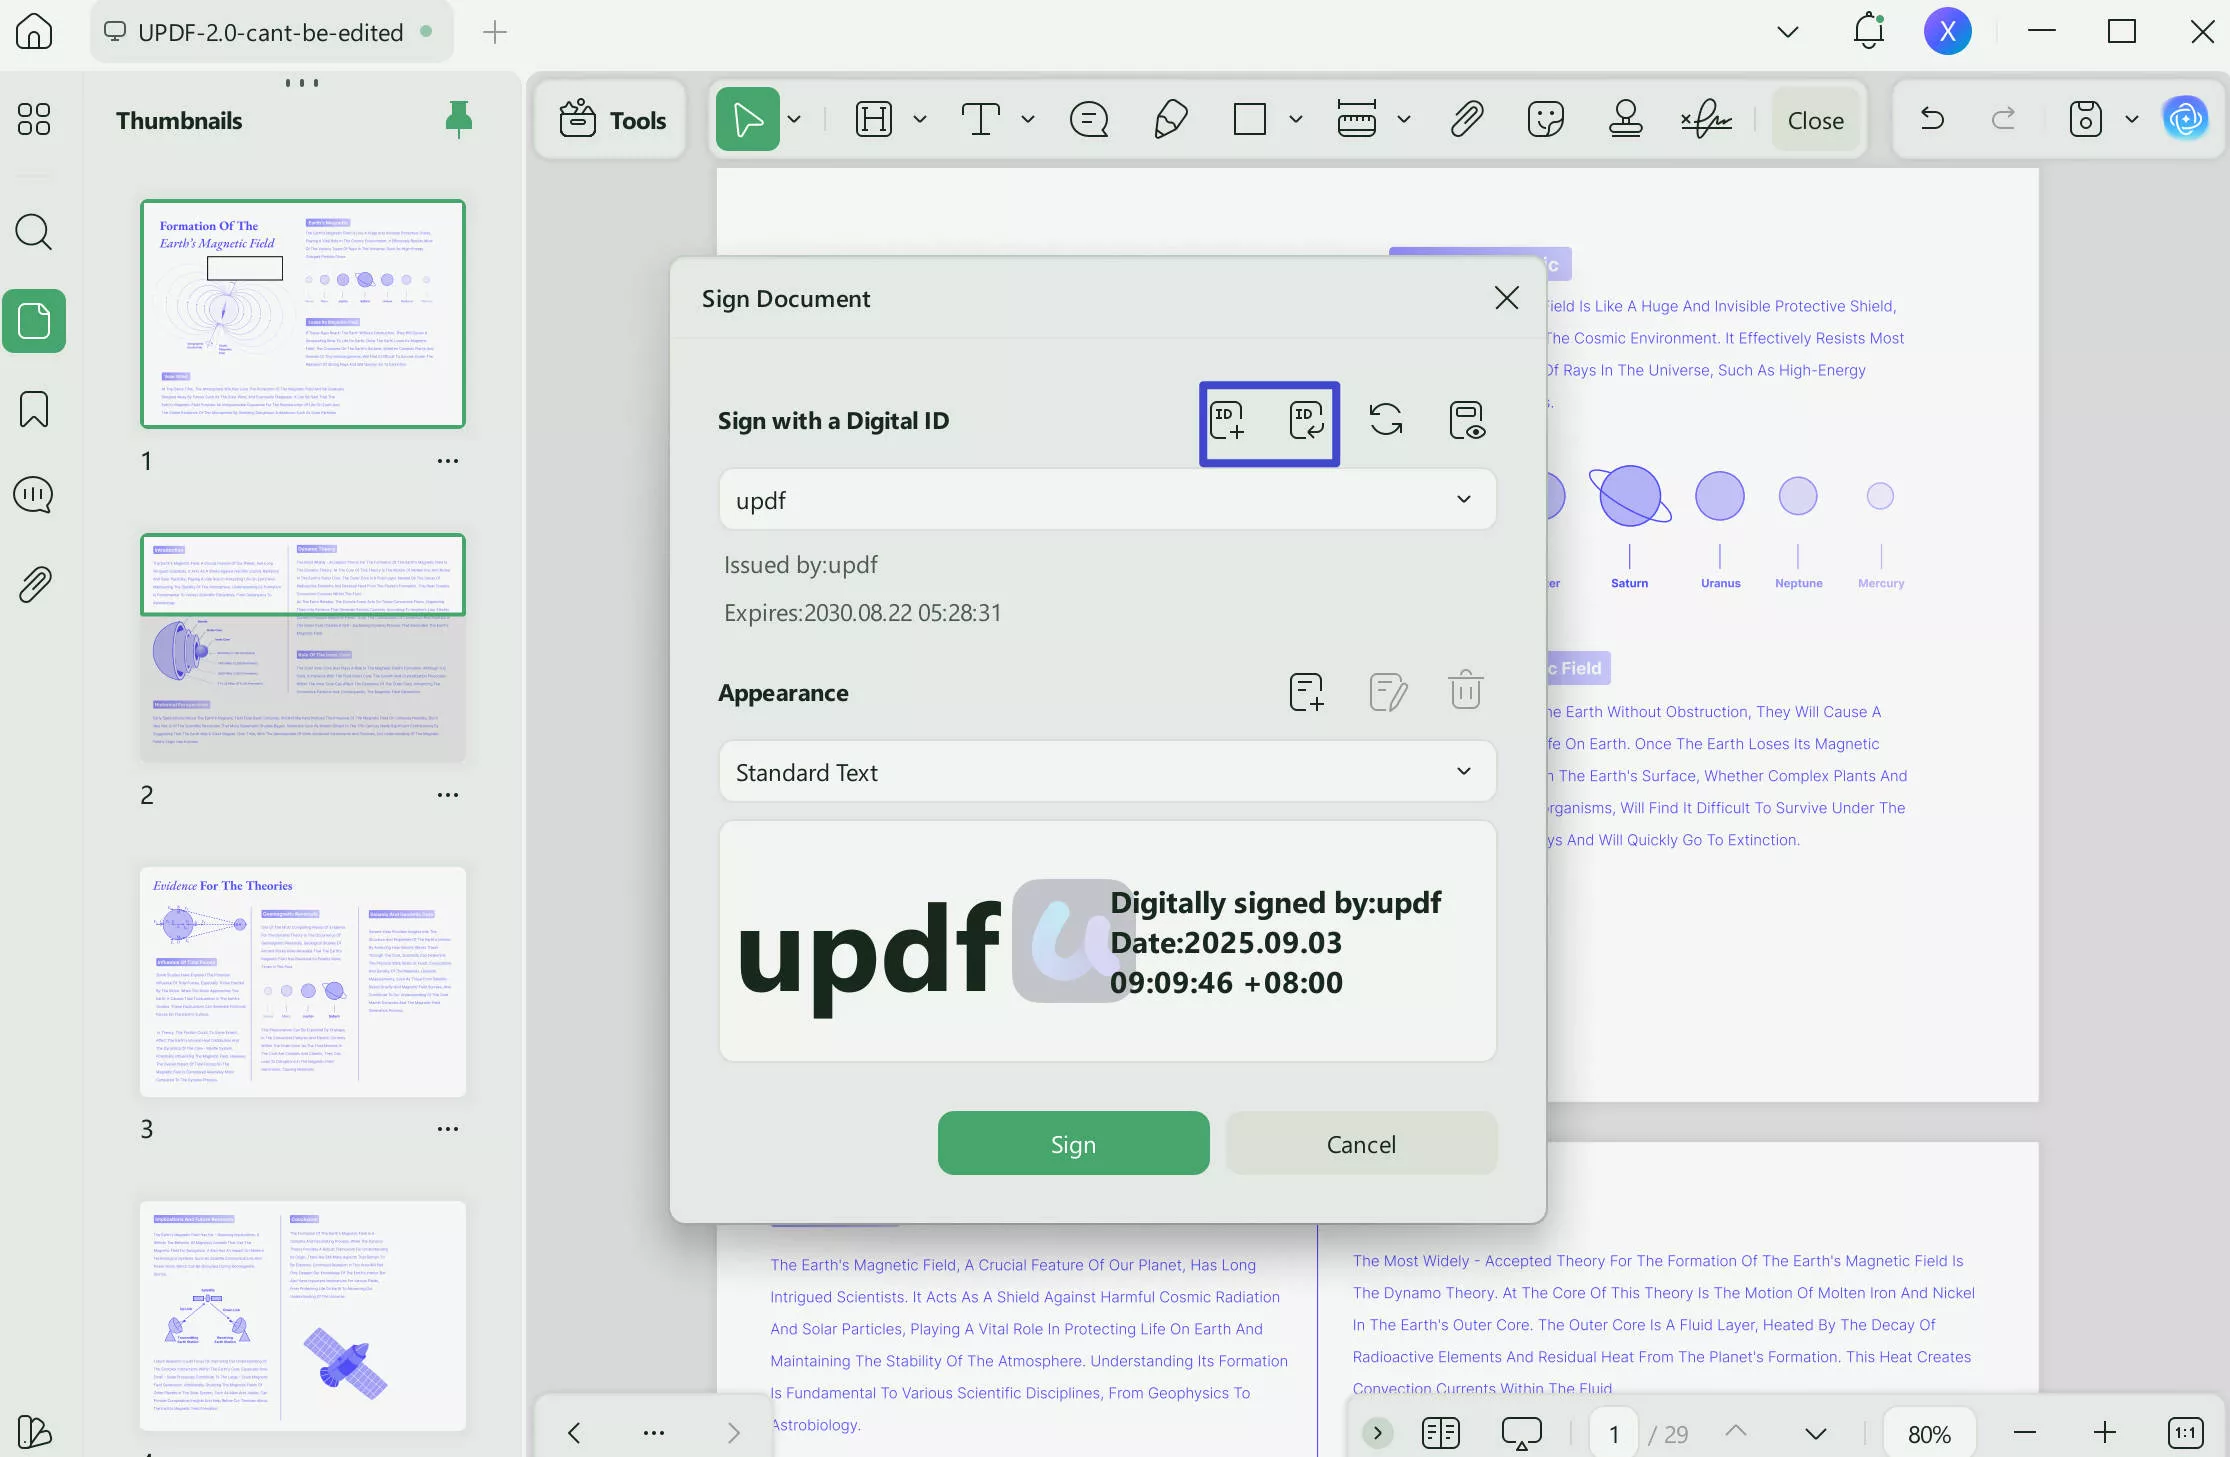
That's it! This way, you can easily add a digital signature to a Word document with an instant, click-based approach of UPDF. Other than just signing Word or PDFs, UPDF is a complete toolbox for PDF files with key features, such as:
- Editing: It allows the editing of texts, images, fonts, backgrounds, watermarks, links, and all other aspects of PDF documents.
- Annotating: It makes it easy to highlight, add comments, insert stamps and stickers, and do other annotations.
- Converting: It provides an instant way to convert PDFs to different formats, such as Word, Excel, PowerPoint, images, text, etc.
- Organizing: It lets you easily add, replace, delete, rotate, crop, rearrange, split, or extract PDF pages.
- OCR PDF Documents: Its OCR technology intelligently converts scanned PDFs and paper images and documents into searchable and editable PDFs.
- Create PDF: UPDF also supports creating PDFs from images, blank pages, or CAJ files.
- UPDF AI: UPDF is integrated with the latest AI technology and is now capable of summarizing, translating, and rewriting PDFs!
In short, UPDF is a must-have tool for electronic signatures and for easy editing and customizing PDF files instantly. Download it for a free trial!
Windows • macOS • iOS • Android 100% secure
Discount Notice
Part 3. Other Common Ways to Add Digital Signature to Word
Microsoft Word is a globally used word processing software for creating professional-looking documents with ease. Besides creating documents, another useful feature of Word is its ability to add a digital signature to a document. In fact, you can add a digital signature to Word in two ways, i.e., you can draw and add a fresh signature or insert a picture of your signature directly in Word. Let's discuss how to use both these methods by following the below steps:
Method 1. Draw and Add a Signature to Word
- Open the Word document where you want to add a signature.
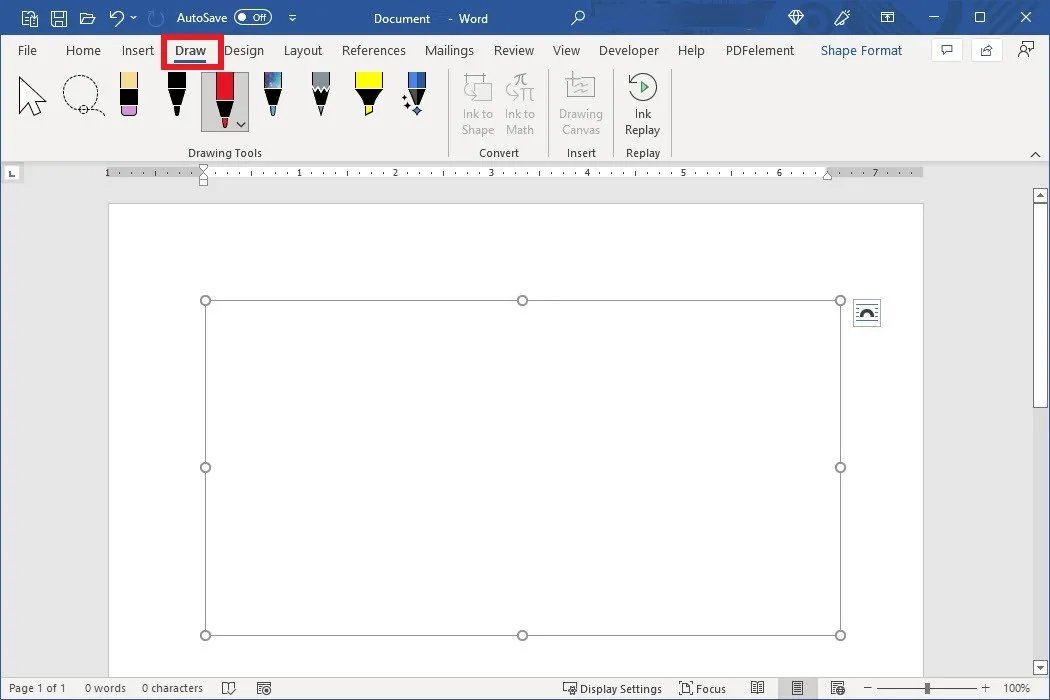
- Click the "Draw" tab from the top and choose the pen of your choice.
- Use the "Drawing Canvas" option to specify the area where you want to add the size.
- Draw your signature.
- Once the signature is added to the document, resize and position it properly in the document.
Method 2. Insert a Picture of the Signature in Word
- Open the Word document where you want to add a signature.
- Click the "Insert" tab from the top and click Pictures > This Device.
- Select the picture of the signature you want to add and click "Insert".
- Once the signature is added to the document, resize and position it properly in the document.

This way, you can easily add a digital signature to Word by drawing the sign or inserting a picture.
Bonus Tip: How to Draw Signature Line in Word
If you also want to add a signature line in Word, you can do it using the below three methods:
1. Add a Horizontal Line
- Under the "Home" tab, click the downward arrow located next to the "Borders" button and select "Horizontal Line".
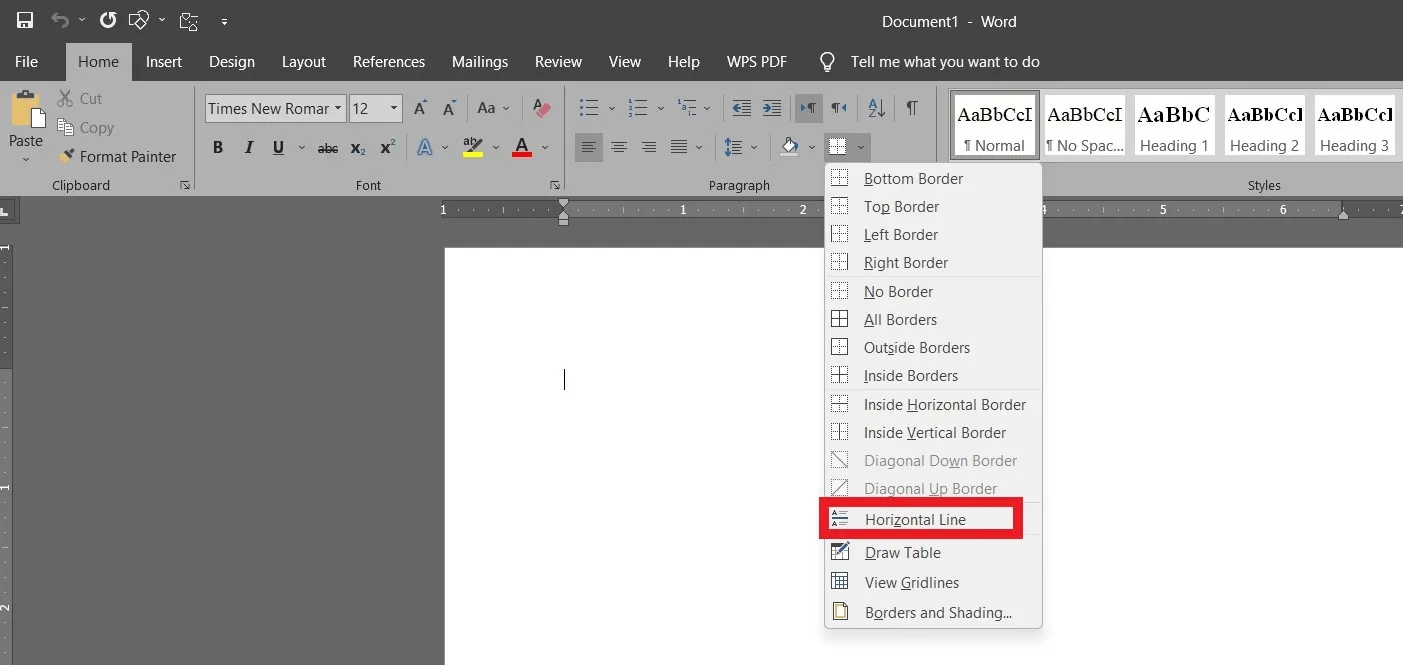
- Once the line is added, double-click it to edit its settings as you want.
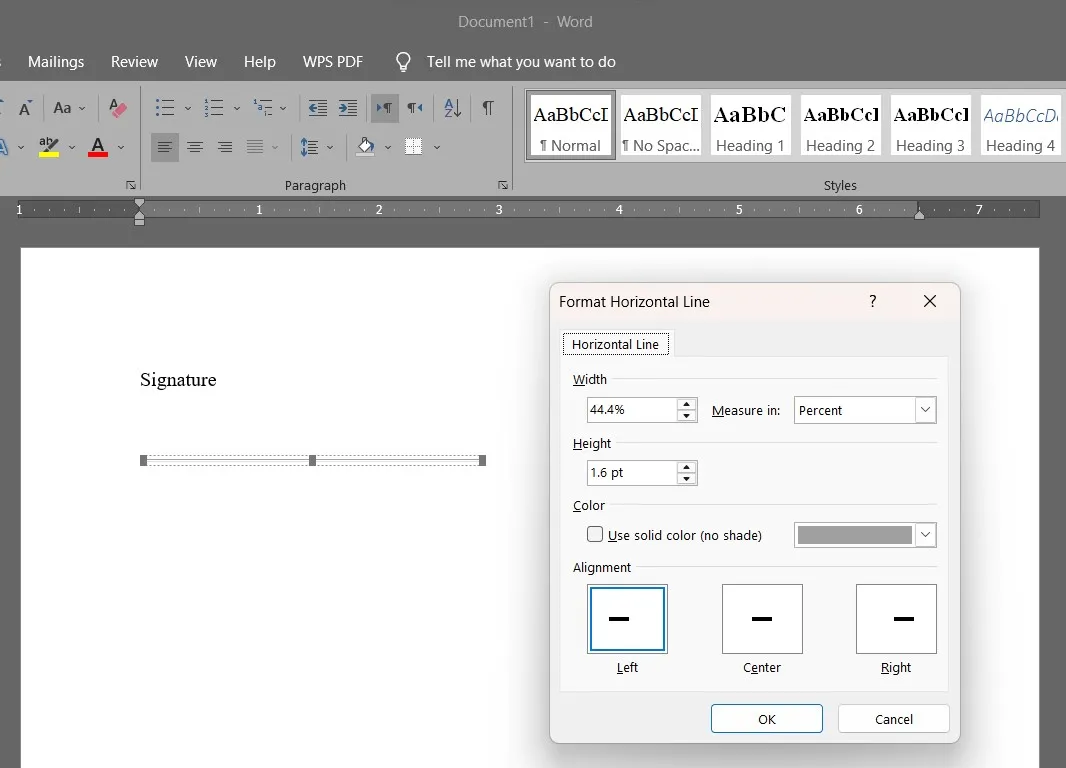
2. Add a Line Shape
- Click the "Insert" tab from the top. Click "Shapes" and then choose the first line.
- Drag the cursor to the point where you want to add the line. To keep the line straight, press the "Shift" key while dragging the cursor.
3. Add an MS Office Signature Line
- Click the "Insert" tab from the top and click the "Signature Line" option under the "Text" section.

- Fill out the details as per your preference and click "OK".
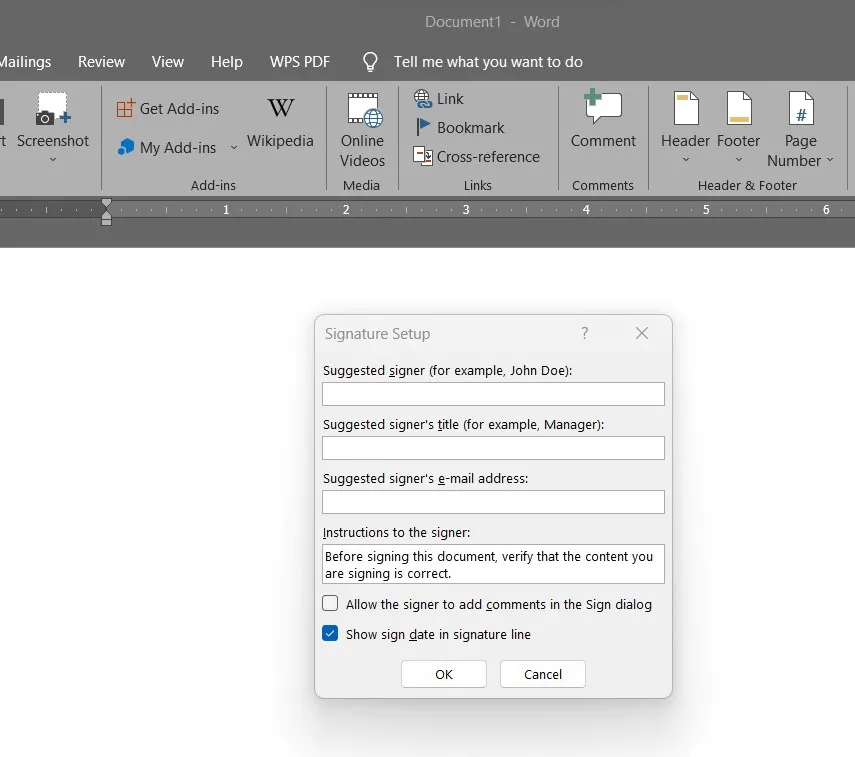
This way, you can easily add a signature line in Word.
Conclusion
In today's digitalized era, digital signatures are highly valuable in authenticating documents. By following the steps discussed in this article, you can easily add digital signatures to Word and quickly sign documents. However, if you are looking for a more convenient and efficient way of signing, then UPDF PDF-based signing approach is more effective.
Its simple click-based interface for instant electronic signing and digital features, such as OCR feature or adding stamps/stickers, make it the ideal tool to digitally sign documents. To sum up, download UPDF today and set a convenient approach to signing documents.
Windows • macOS • iOS • Android 100% secure
 UPDF
UPDF
 UPDF for Windows
 UPDF for Mac
 UPDF for iPhone/iPad
 UPDF for Android
 UPDF AI Online
 UPDF Sign
 Edit PDF
 Annotate PDF
 Create PDF
 PDF Form
 Edit links
 Convert PDF
 OCR
OCR PDF to Word
 PDF to Image
 PDF to Excel
 Organize PDF
 Merge PDF
 Split PDF
 Crop PDF
 Rotate PDF
 Protect PDF
 Sign PDF
 Redact PDF
 Sanitize PDF
 Remove Security
 Read PDF
 UPDF Cloud
 Compress PDF
 Print PDF
 Batch Process
 About UPDF AI
 UPDF AI Solutions
 AI User Guide
 FAQ about UPDF AI
 Summarize PDF
 Translate PDF
 Chat with PDF
 Chat with AI
 Chat with image
 PDF to Mind Map
 Explain PDF
 Scholar Research
 Paper Search
 AI Proofreader
 AI Writer
 AI Homework Helper
 AI Quiz Generator
 AI Math Solver
 PDF to Word
 PDF to Excel
 PDF to PowerPoint
 User Guide
 UPDF Tricks
 FAQs
FAQs UPDF Reviews
 Download Center
 Blog
Blog Newsroom
 Tech Spec
 Updates
 UPDF vs. Adobe Acrobat
 UPDF vs. Foxit
 UPDF vs. PDF Expert








 Enola Miller

 Enola Davis