UPDF for Windows
 UPDF for Mac
 UPDF for iPhone/iPad
 UPDF for Android
 UPDF AI Online
 UPDF Sign
 Edit PDF
 Annotate PDF
 Create PDF
 PDF Form
 Edit links
 Convert PDF
 OCR
OCR PDF to Word
 PDF to Image
 PDF to Excel
 Organize PDF
 Merge PDF
 Split PDF
 Crop PDF
 Rotate PDF
 Protect PDF
 Sign PDF
 Redact PDF
 Sanitize PDF
 Remove Security
 Read PDF
 UPDF Cloud
 Compress PDF
 Print PDF
 Batch Process
 About UPDF AI
 UPDF AI Solutions
 AI User Guide
 FAQ about UPDF AI
 Summarize PDF
 Translate PDF
 Chat with PDF
 Chat with AI
 Chat with image
 PDF to Mind Map
 Explain PDF
 PDF AI Tools
 Image AI Tools
 AI Chat Tools
 AI Writing Tools
 AI Study Tools
 AI Working Tools
 Other AI Tools
 AI Bookmark Generation
 AI Bookmark Summary
 AI Watermark Generation
 AI Background Generation
 AI Sticker Generation
 AI Stamp Generation
 AI Editing Suite
 UPDF Copilot
 AI Page Management
 AI Semantic Search
 PDF to Word
 PDF to Excel
 PDF to PowerPoint
 User Guide
 UPDF Tricks
 FAQs
FAQs UPDF Reviews
 Download Center
 Blog
Blog Newsroom
 Tech Spec
 Updates
 UPDF vs. Adobe Acrobat
 UPDF vs. Foxit
 UPDF vs. PDF Expert
Proper formatting can make or break an academic or professional document, and that’s why learning how to do a hanging indent on google docs is so important. Hanging indents are widely used for citation styles like APA, MLA, and Chicago to keep references neat and readable. In this guide, I’ll show simple, step-by-step ways to create them correctly. Make sure to read to the end because formatting gets even easier with UPDF—you can adjust indents, generate citations with UPDF AI, search academic papers, and get literature insights instantly.
Windows • macOS • iOS • Android 100% secure
Part 1. How To Do a Hanging Indent on Google Docs
If you are writing a bibliography or working on an academic paper, learning how to do a hanging indent on google docs is essential. A hanging indent keeps the first line flush left while indenting all subsequent lines—perfect for APA, MLA, and other citation styles. Once you master it, your document instantly looks cleaner and more professional.
Here’s how I do it in Google Docs:
Step 1:
First, I open the document and highlight the paragraph or list I want to format.
Step 2:
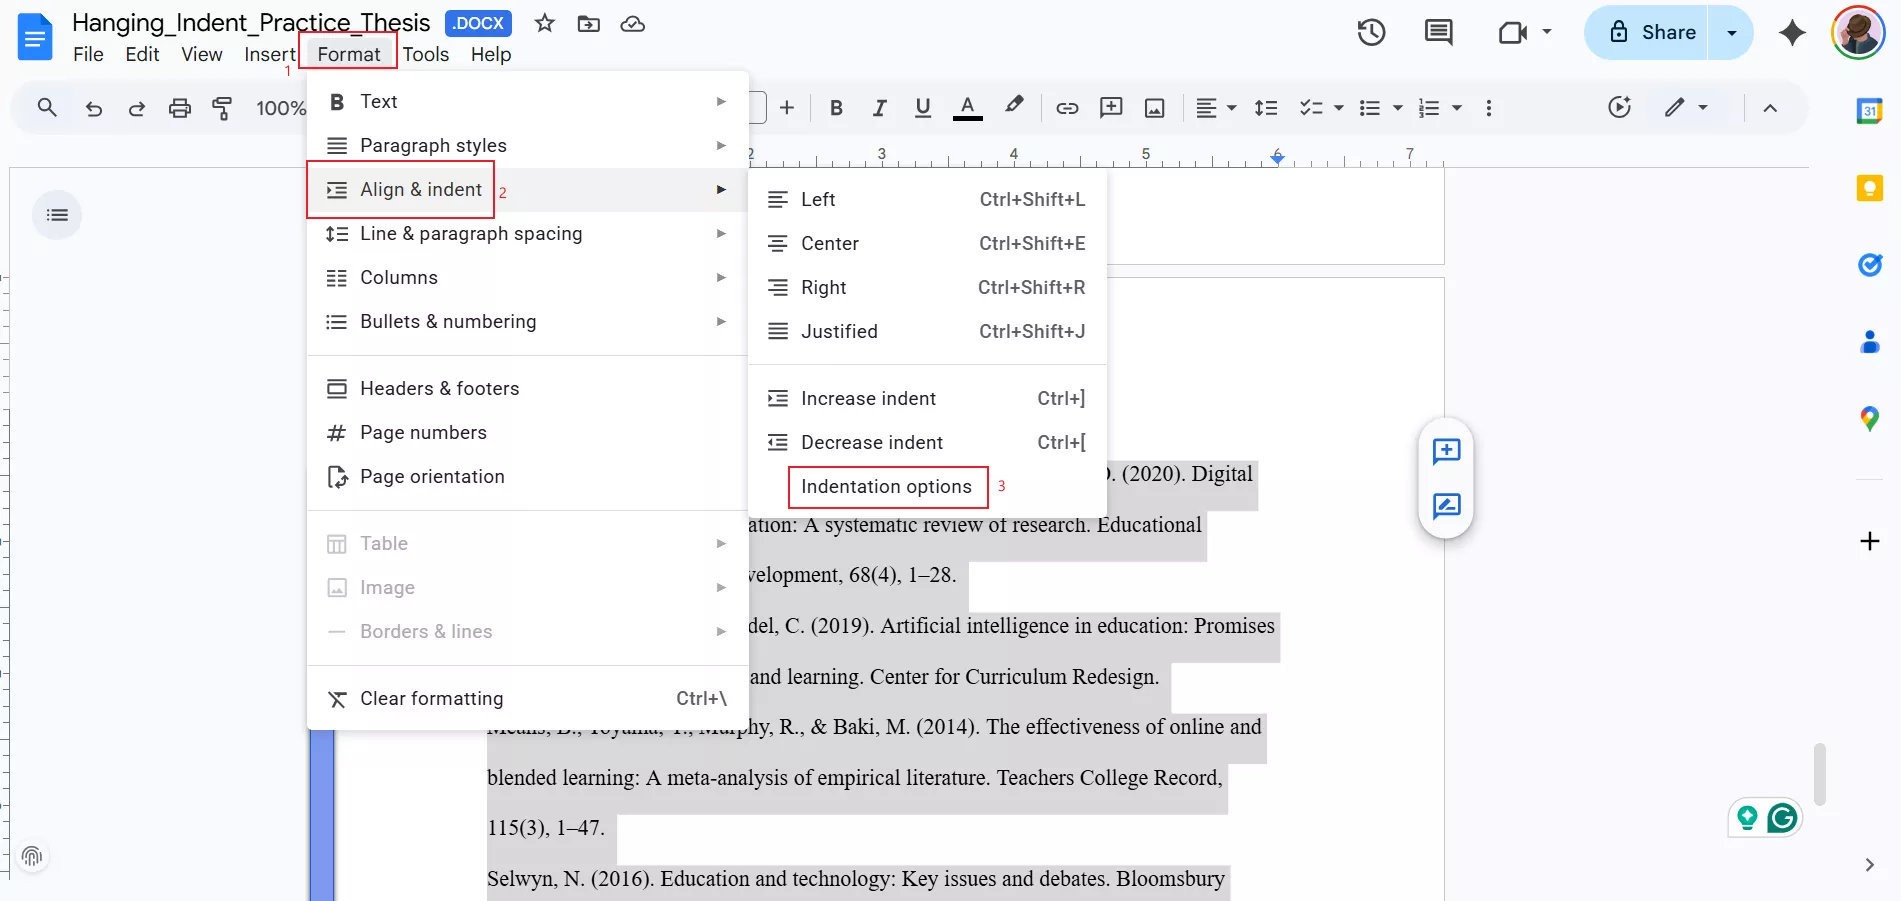
Next, I go to Format > Align & Indent > Indentation Options.
Step 3:
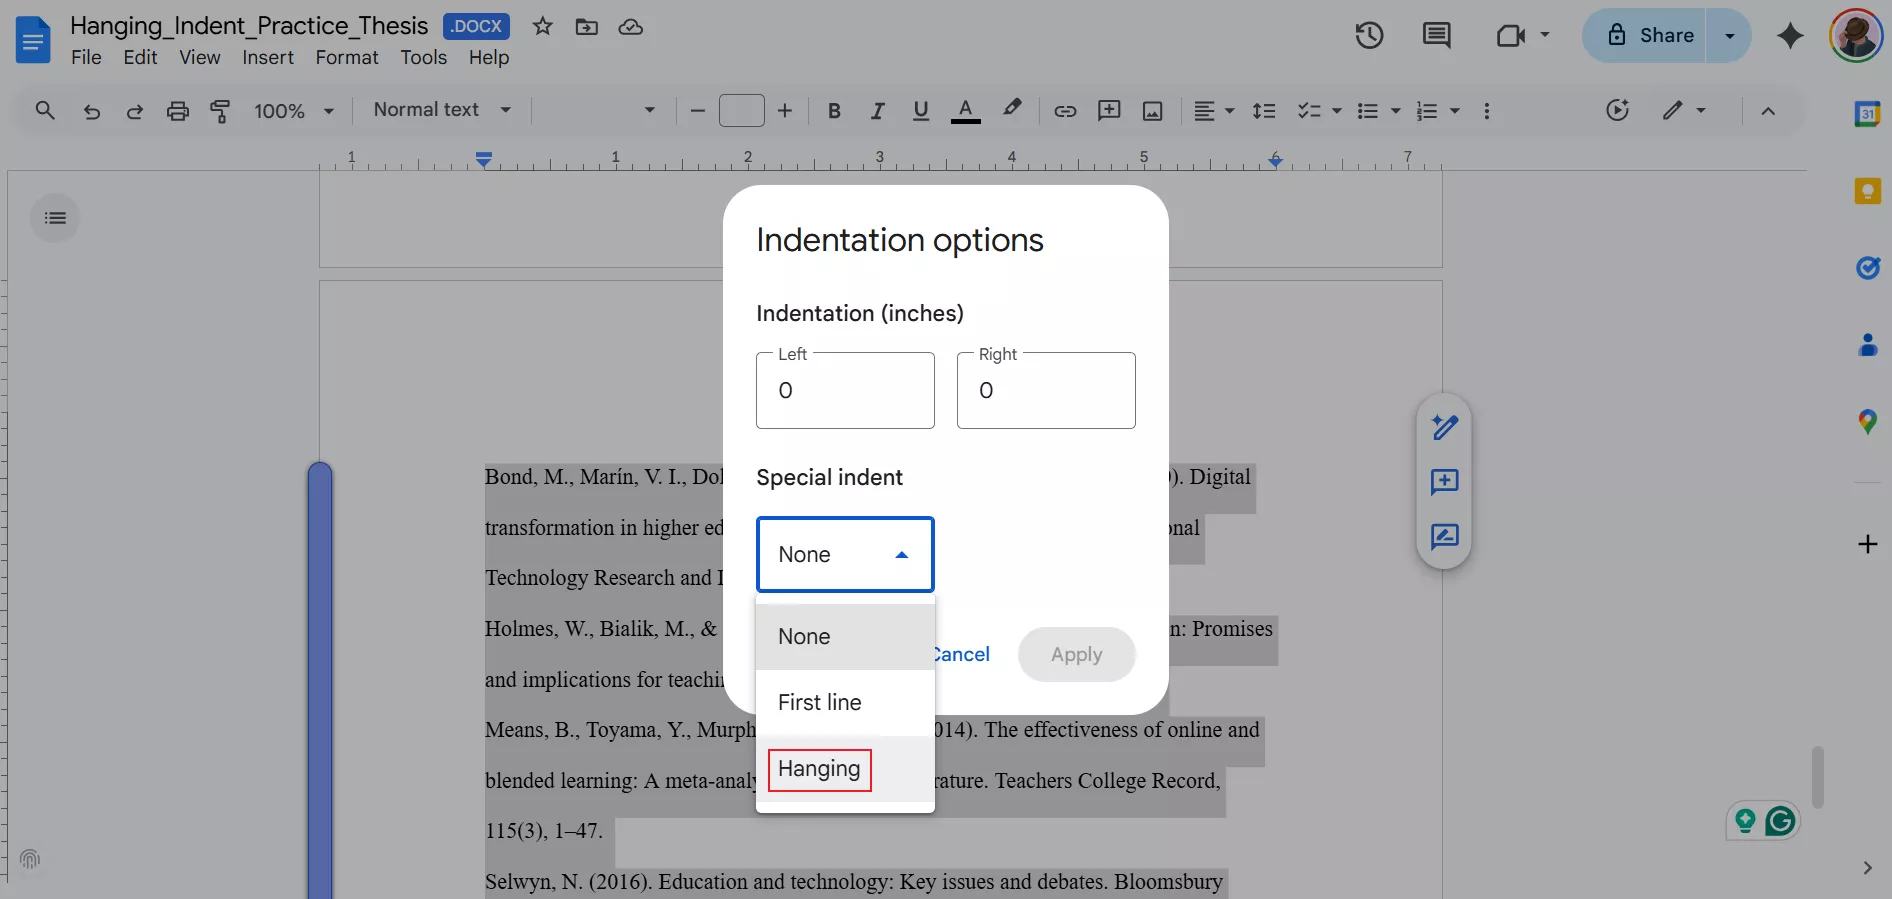
In the popup that appears, I find the Special dropdown and choose Hanging.
Step 4:
I typically set the indent amount to 0.5 inches, but you can adjust it depending on your style guide.
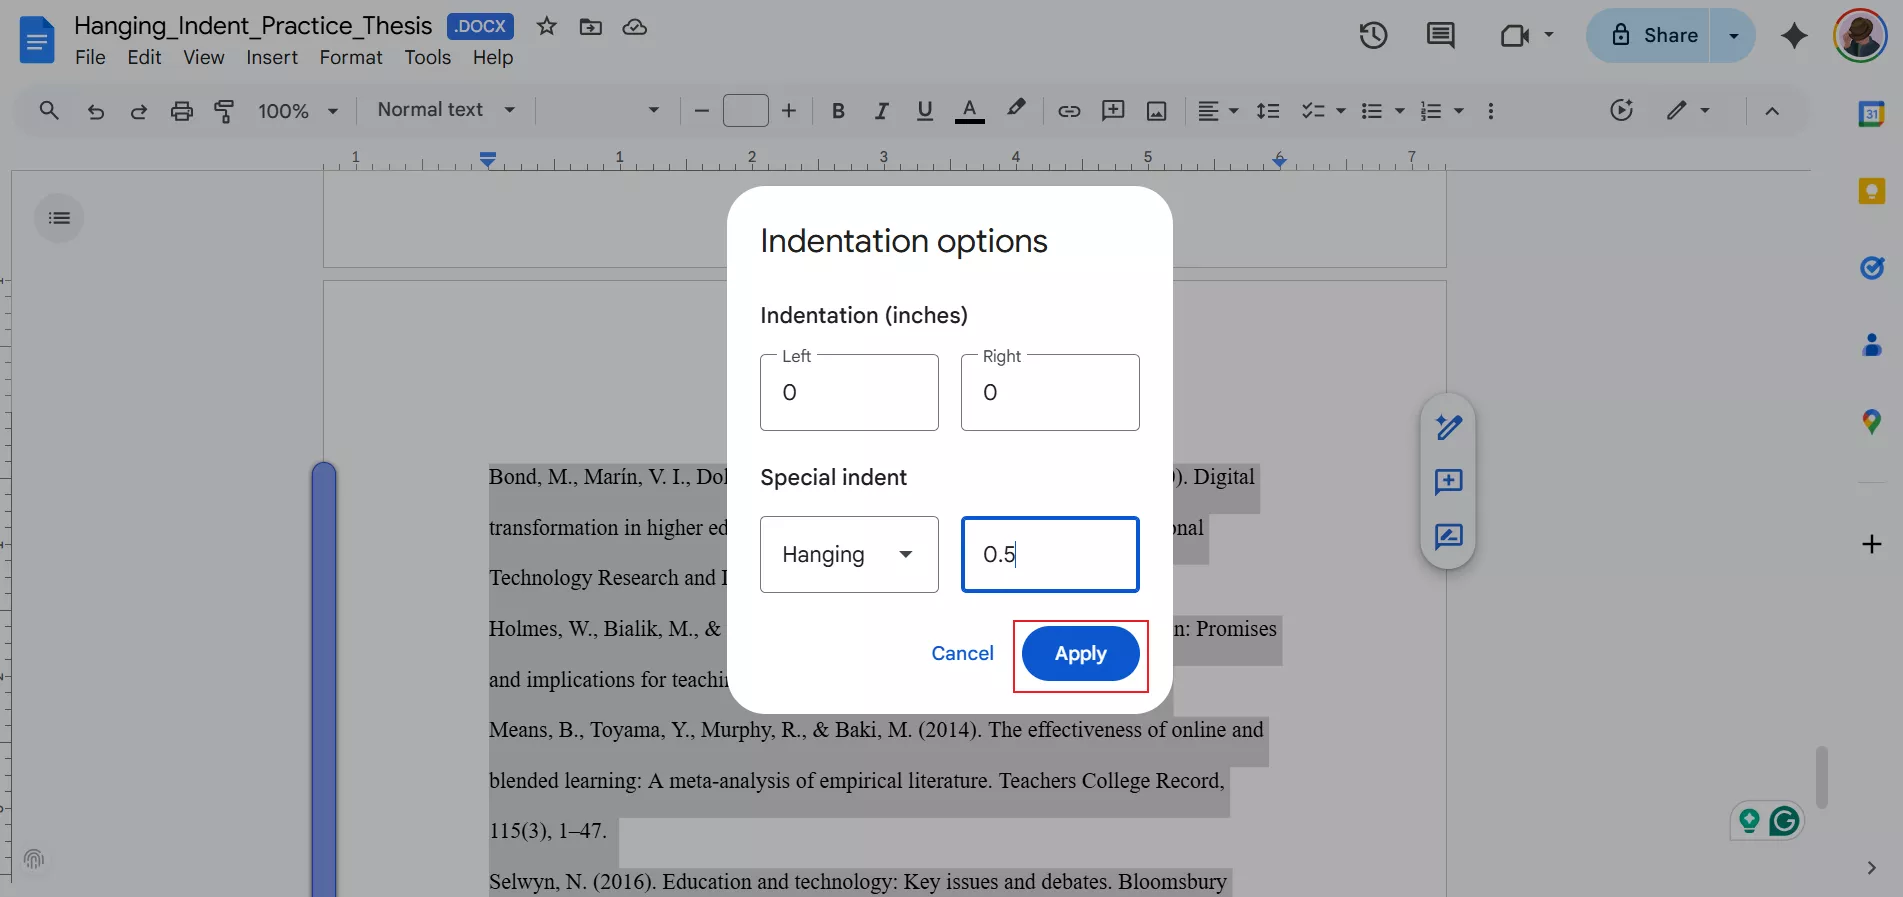
Step 5:
Finally, I click Apply, and the paragraph updates with a hanging indent.
If you need to adjust or fine-tune your formatting afterward, you can easily do it directly within Google Docs using its built-in indentation tools. This makes it quick to fix alignment without switching between different applications.
However, when you are working with finalized documents, such as reports, assignments, or shared files, exporting them as a PDF can be more reliable. In those cases, tools like UPDF help me make final adjustments, add annotations, or manage citations before sharing. It’s a simple way to keep documents polished, especially when working with fixed formats.
Windows • macOS • iOS • Android 100% secure
Part 2. How To Do a Hanging Indent in Word
If you have ever wondered, how do you do a hanging indent in word, the good news is it’s straightforward once you know where the formatting controls are. Hanging indents in Word make your reference list or bibliography much easier to read, especially when following styles like APA or Chicago. I use this almost every time I prepare a research paper or formal report because it keeps citations neat and consistent.
Here’s how I create a hanging indent in Microsoft Word:
Step 1:
First, I open the Word document and highlight the paragraph or list where I want the hanging indent applied.
Step 2:
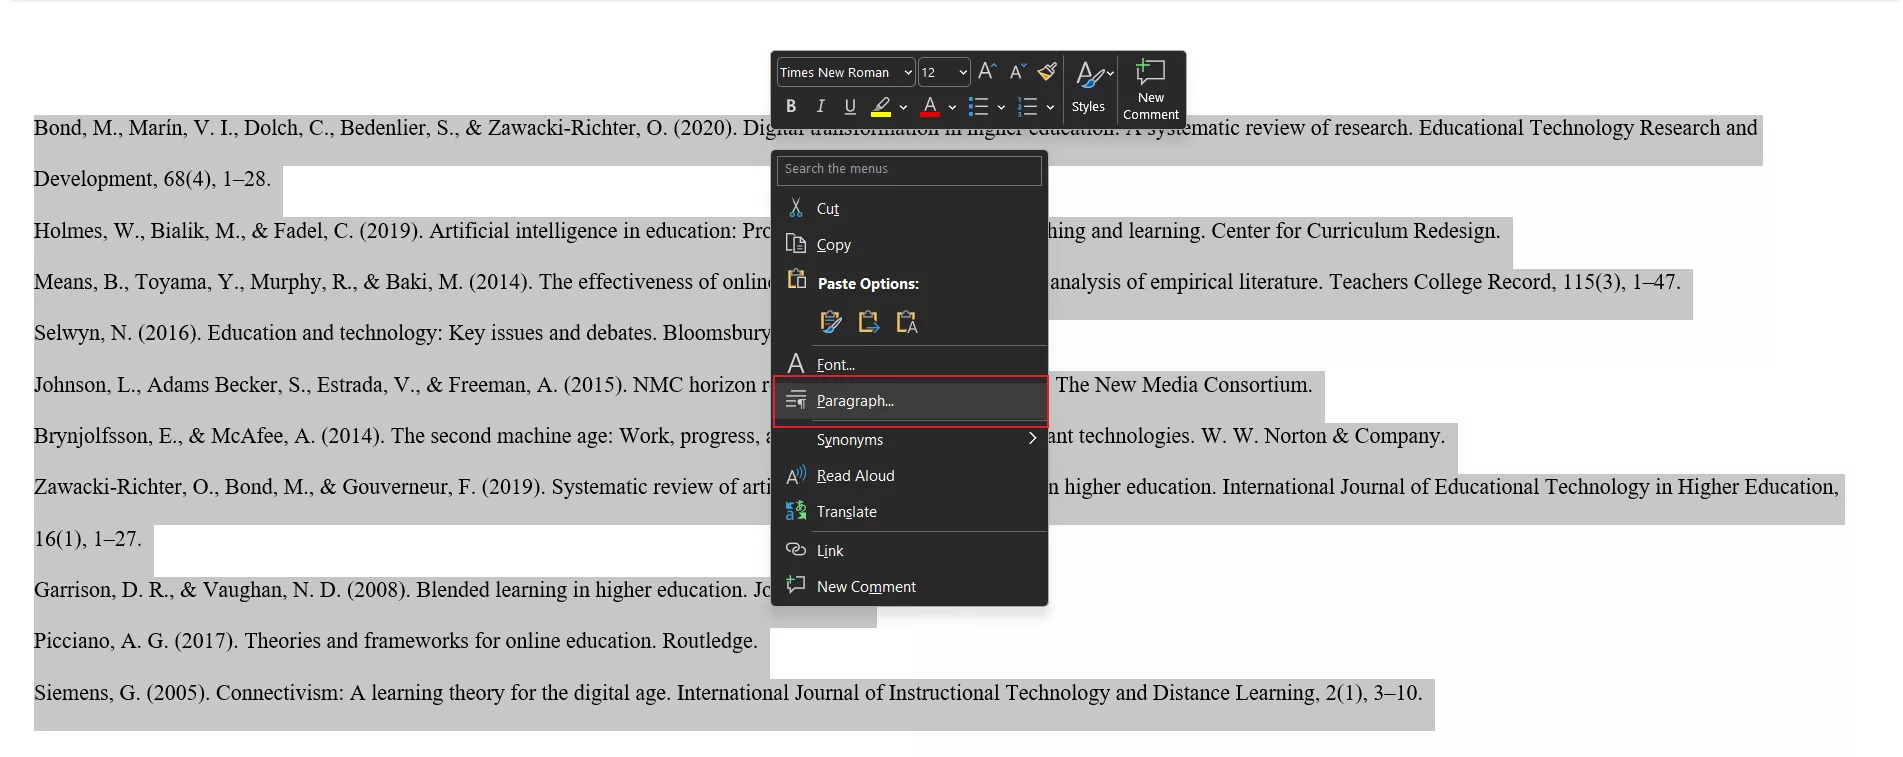
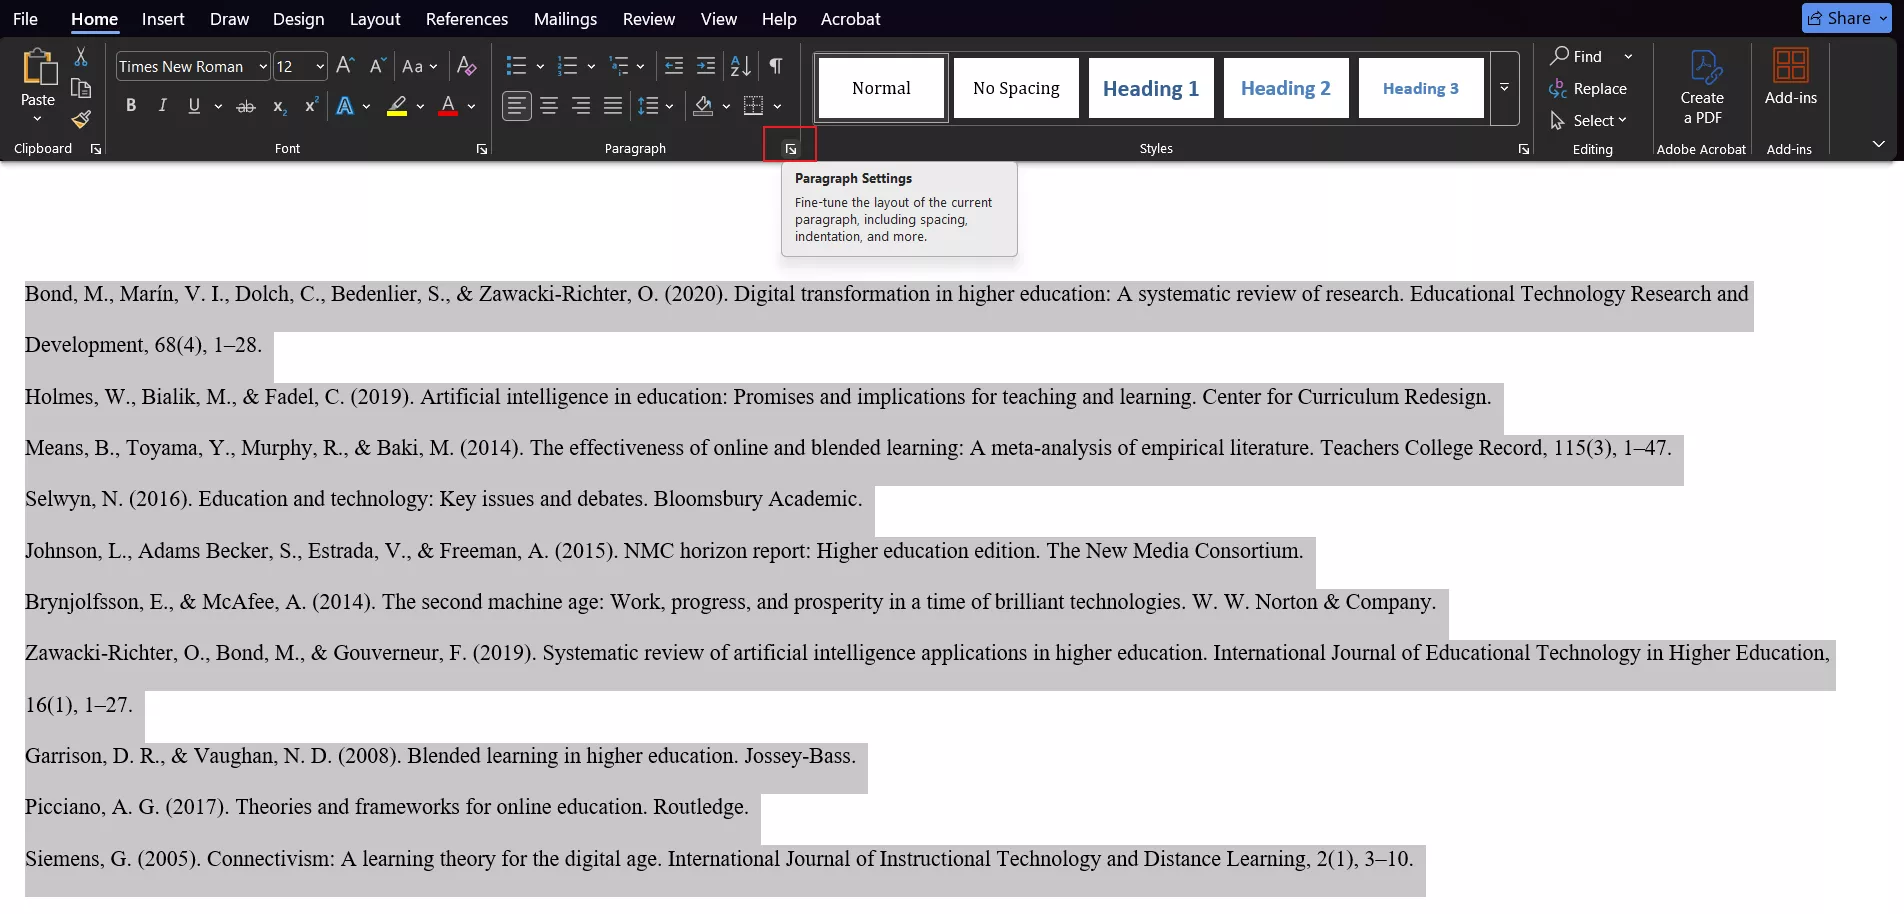
Next, I go to the Home tab and click the small Paragraph Settings launcher in the bottom-right corner of the Paragraph group. This opens the Paragraph dialog box.
You can also right click on the selected text and click on paragraph to open up the settings dialog box.
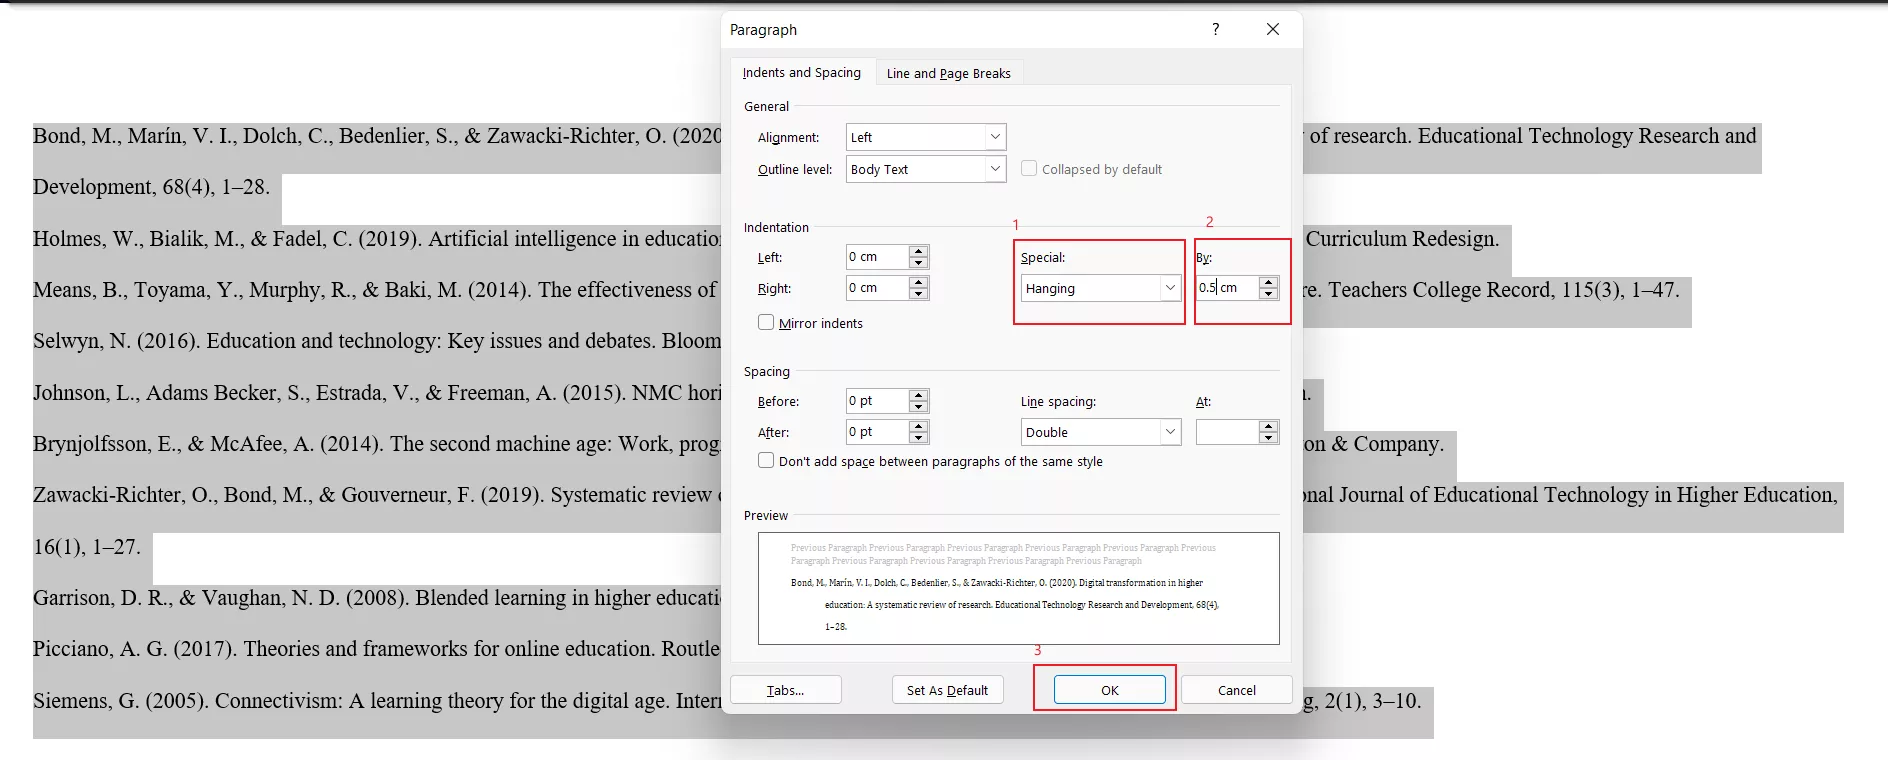
Step 3: In the Paragraph dialog box, I found the Indentation section. Under Special, I choose Hanging from the dropdown. By default, Word sets this to 0.5 inches, which works well for most citation styles.
Step 4:
After selecting Hanging, I click OK. Word immediately formats the paragraph so that the first line stays at the margin, and all following lines are indented.
Part 3. How To Decrease/Increase Indent for PDF
When I finish creating a document in Google Docs or Word, I often convert it into a PDF for sharing. The problem is that once a file becomes a PDF, many people think the formatting is locked forever. That isn’t true. With the right tool, I can still adjust paragraph layout, including increasing or decreasing indents. This is where UPDF becomes extremely useful. It’s more than just a simple PDF viewer—it’s a full-featured editor that lets me modify text, fix formatting, and fine-tune layouts without going back to the original document.
Windows • macOS • iOS • Android 100% secure
About UPDF
UPDF also features a powerful AI assistant that helps you summarize, translate, explain content, generate mind maps and literature reviews, search academic papers, and more.
Both UPDF and UPDF AI can be used for free. Under the UPDF free version, all features are available with trial watermarks added. The UPDF AI free version allows you to ask up to 100 questions.
Adjusting Indent in PDF Using UPDF
UPDF makes it easy to control paragraph spacing and indentation directly inside a PDF file. Here is the general workflow I follow:
Step 1: I open the PDF file in UPDF.
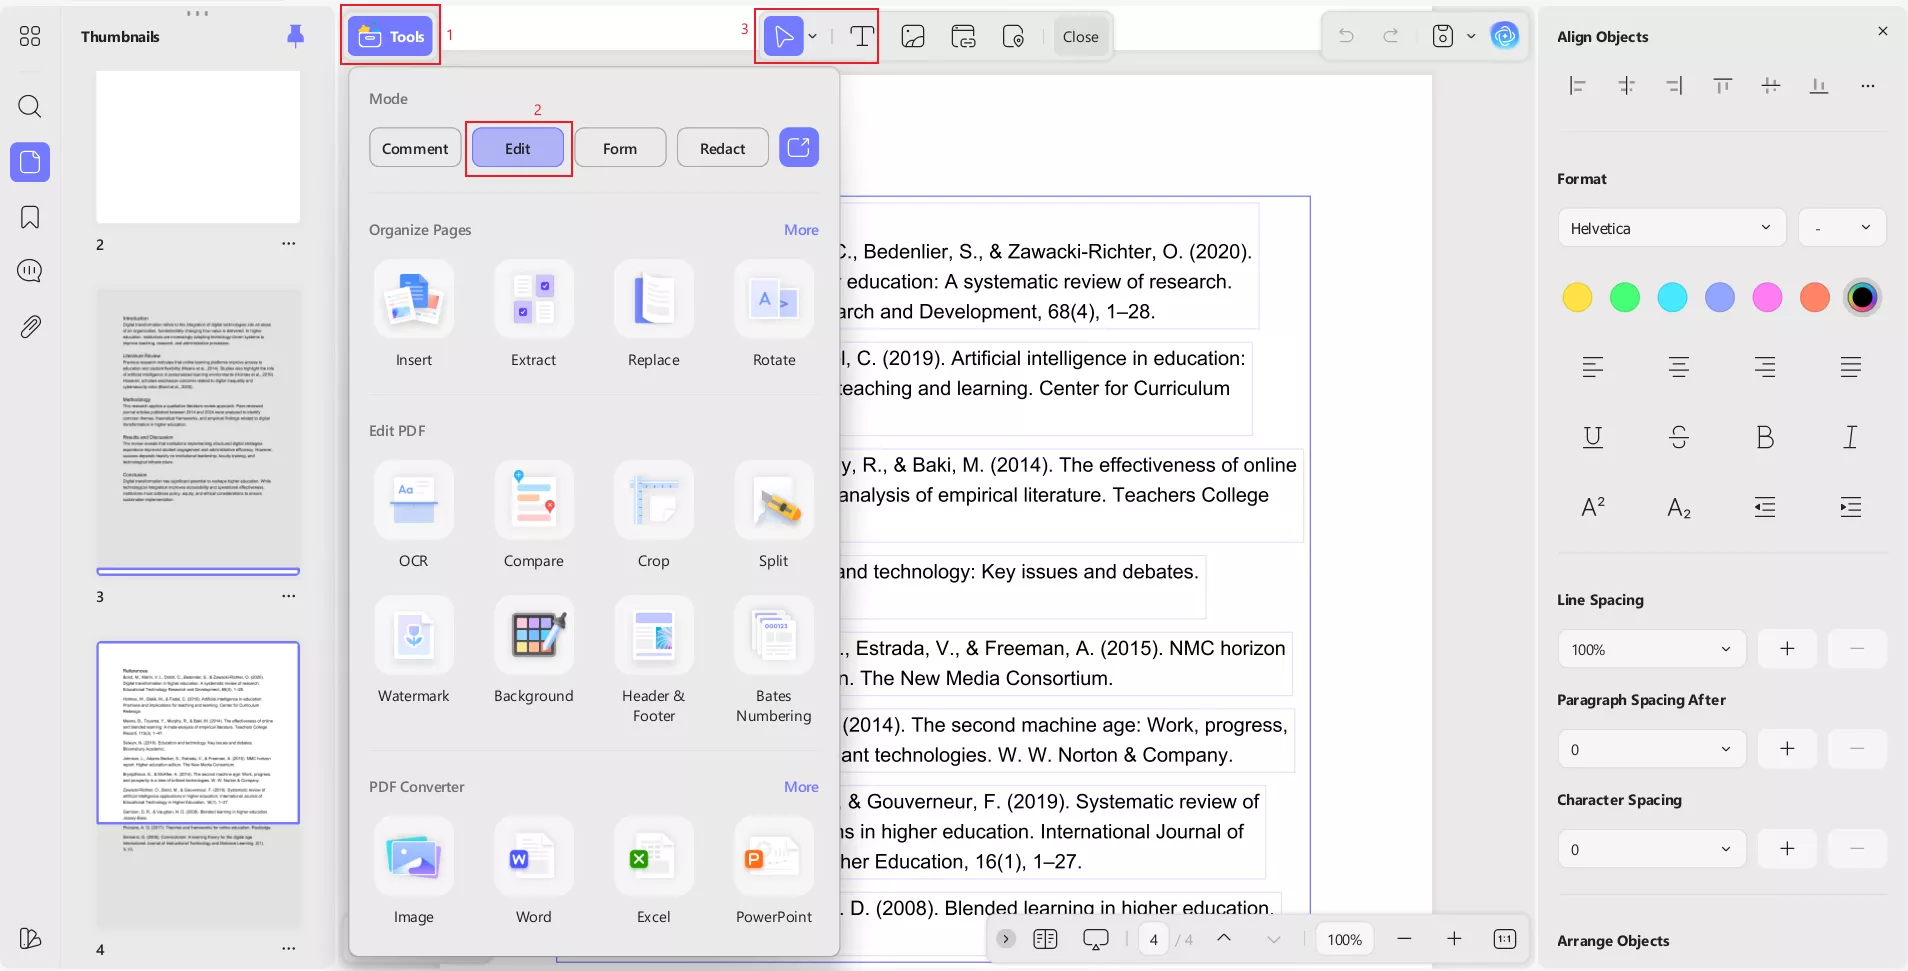
Step 2: I switch to Edit PDF mode.
Step 3: I select the text block where I want to change the indent.
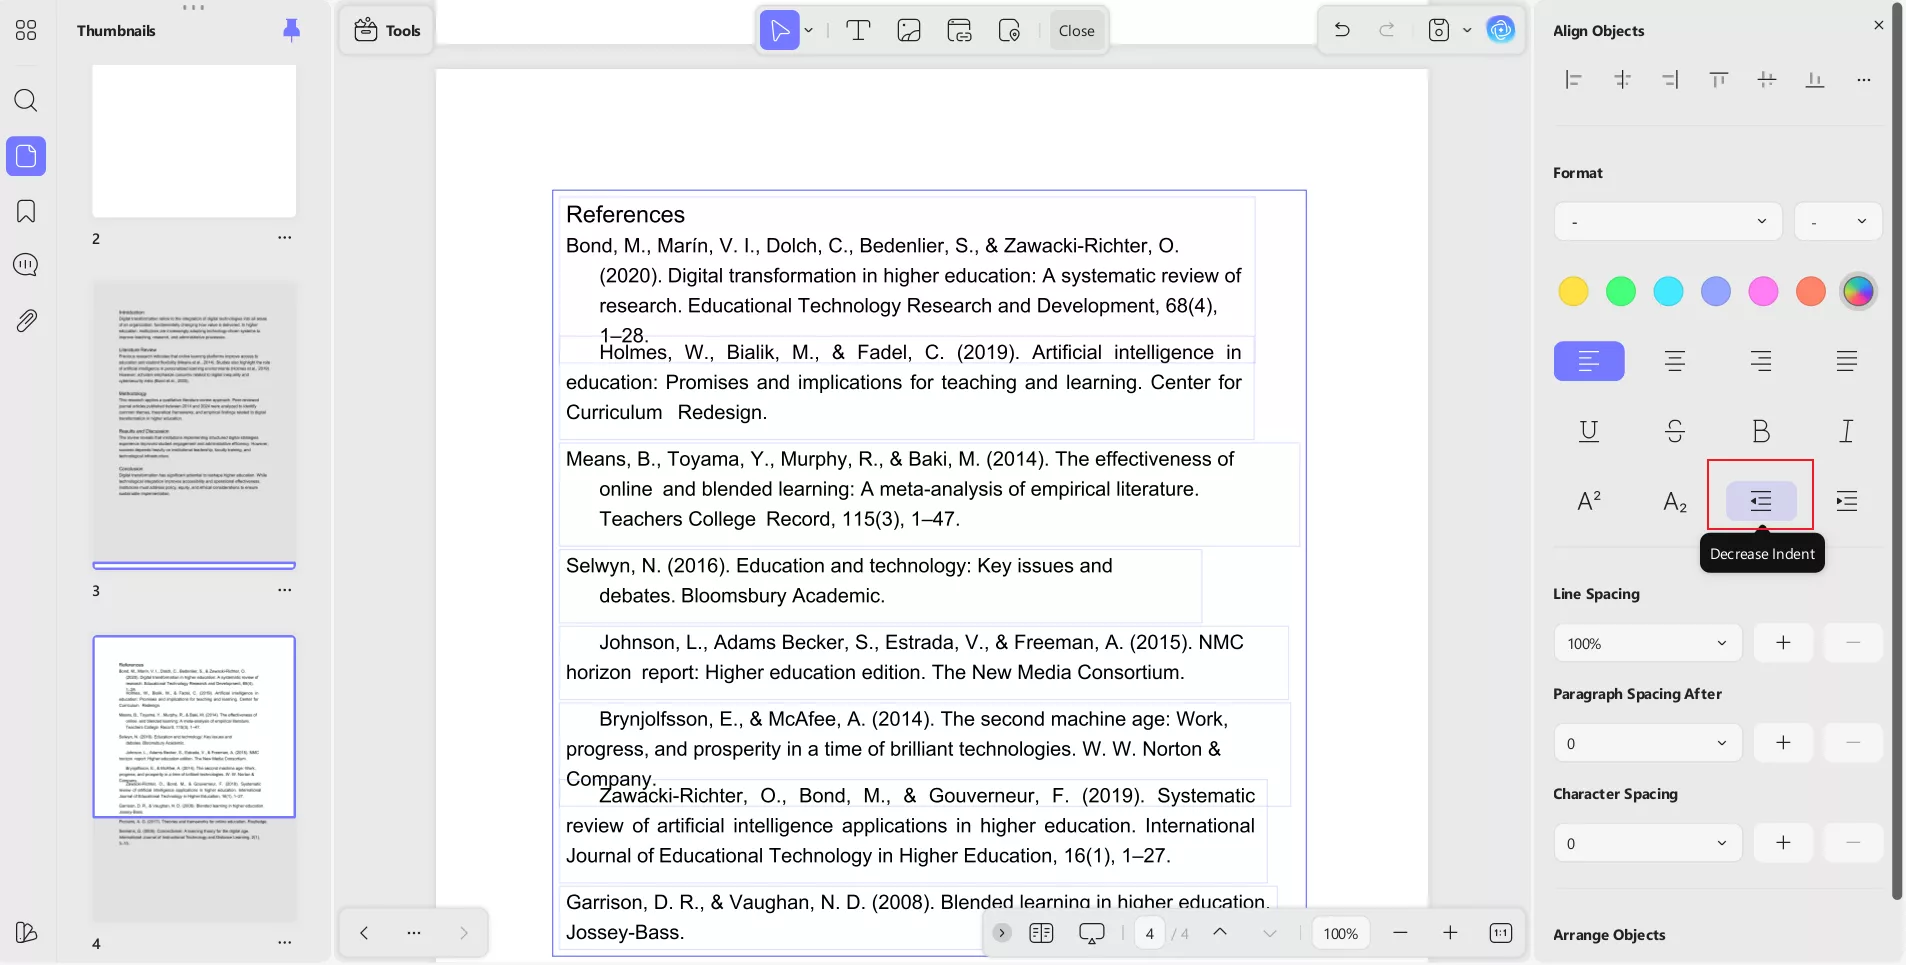
Step 4: Using the formatting panel, I adjust the left or right indent values to increase or decrease spacing as needed.
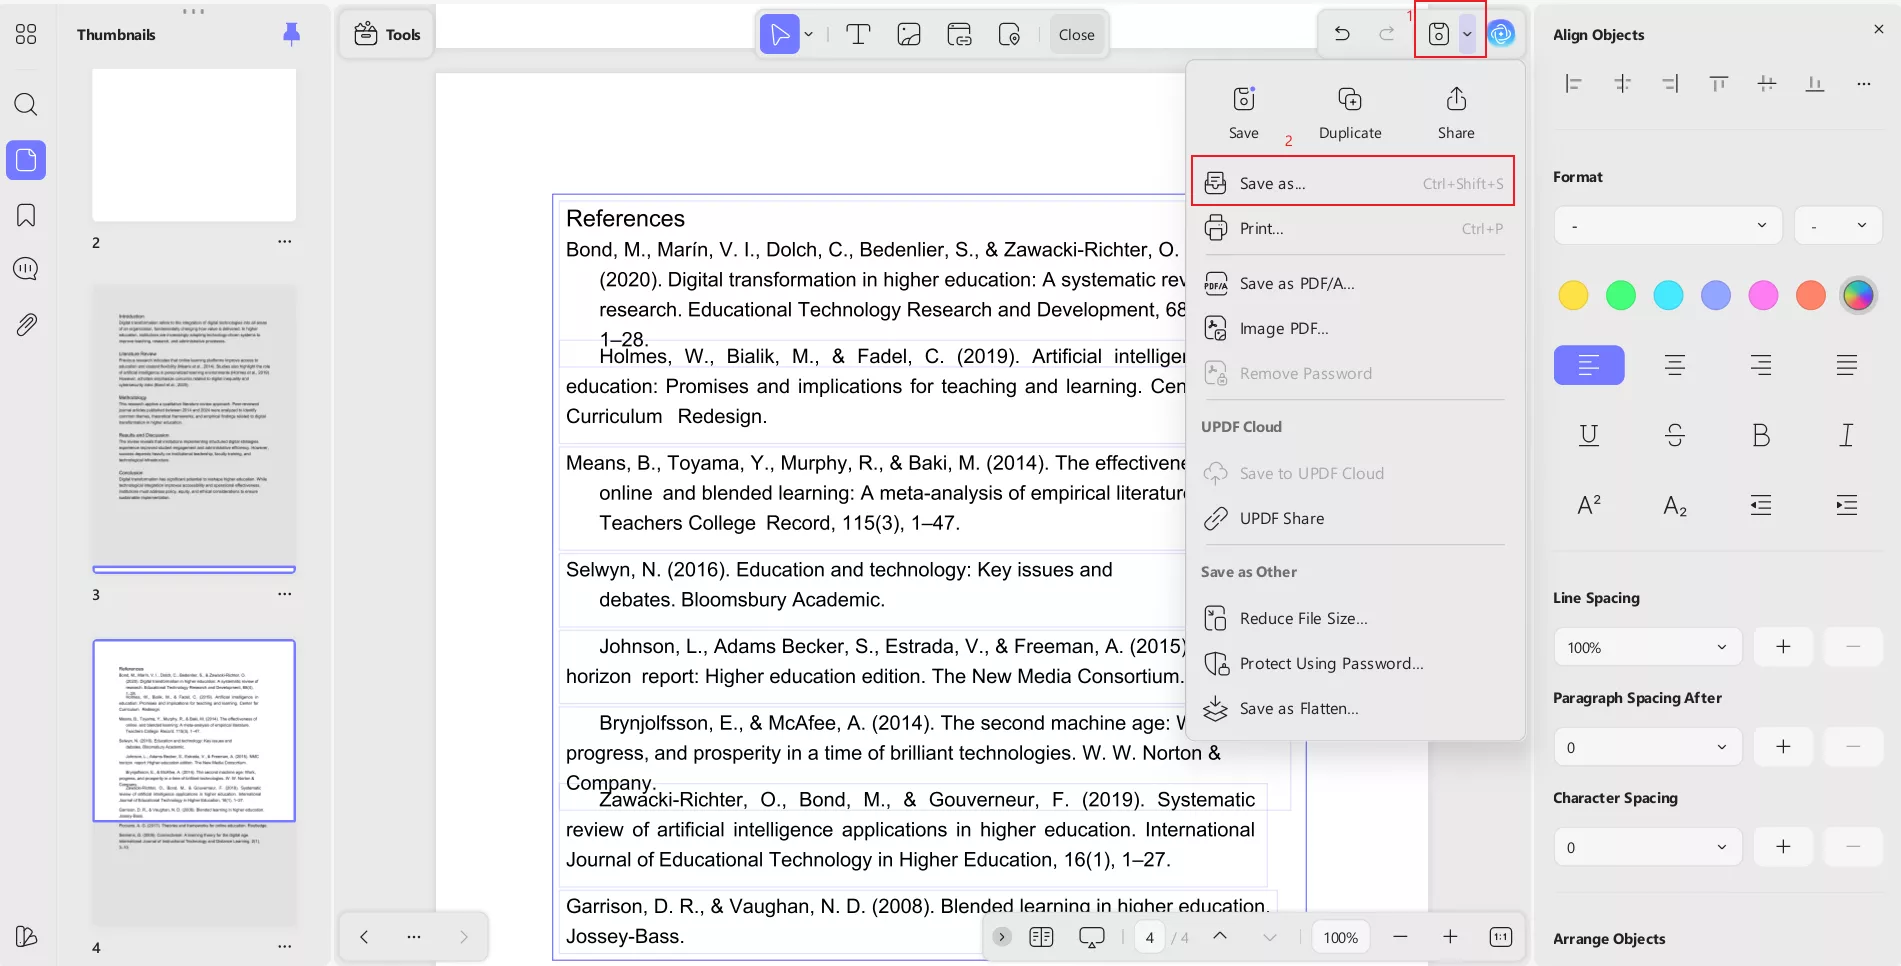
Step 5: I save the file once everything looks correct.
This method really helps when I receive a PDF from someone else and need to correct citation formatting or clean up paragraph alignment quickly. I don’t need to recreate the whole document; UPDF lets me fix it directly.
Windows • macOS • iOS • Android 100% secure
Bonus Part: Using UPDF AI For Citations and Academic Research
Many people create hanging indents because they are working with citations, reference lists, or academic papers. Instead of formatting everything manually, I can rely on UPDF AI to simplify the entire research and citation process.
Generate Citations with UPDF AI (Mobile, Online, And Desktop)
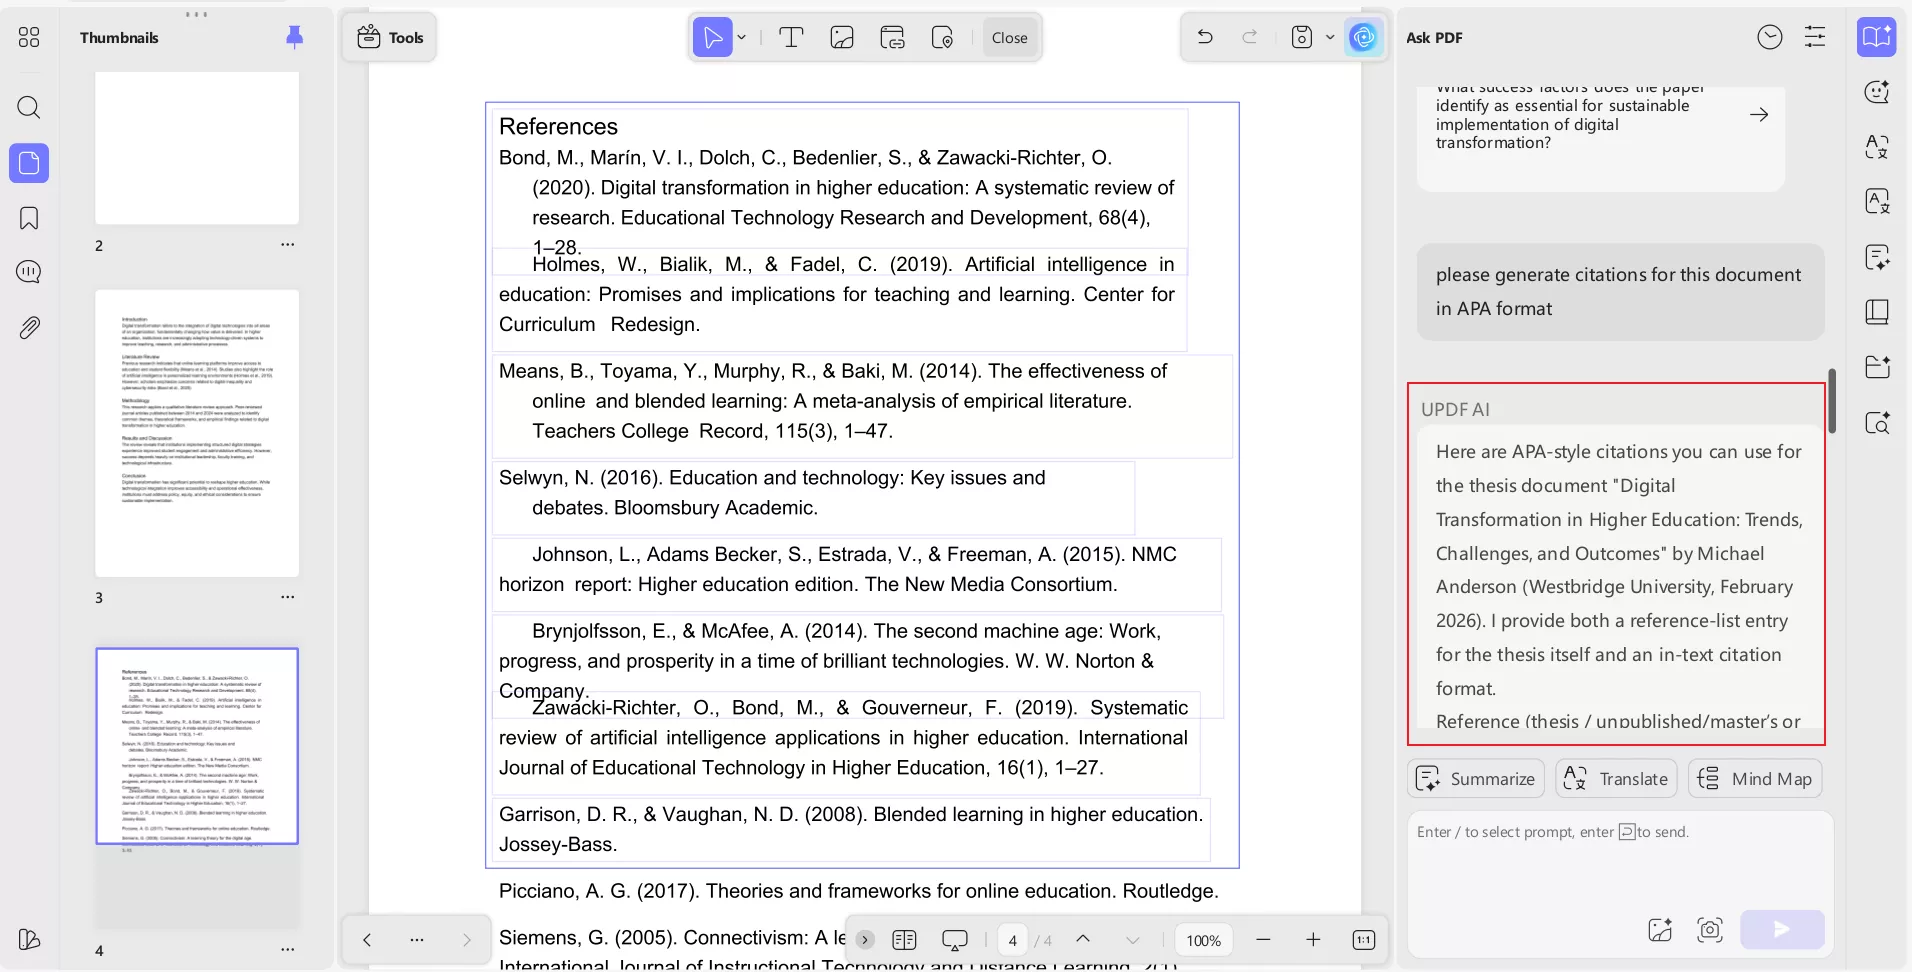
UPDF AI also helps you generate citations without any hassle I simply ask it to generate citations as per my formatting style, and it does it for me within seconds. Whether I’m working on my phone, using the web version, or editing on my desktop, the feature works seamlessly across platforms. I can simply ask UPDF AI to generate citations based on my source information, and it produces accurate results instantly. This saves me from manually checking formats like APA, MLA, or Chicago.
Also Read: How To Cite An Academic Paper Correctly: A Practical Guide
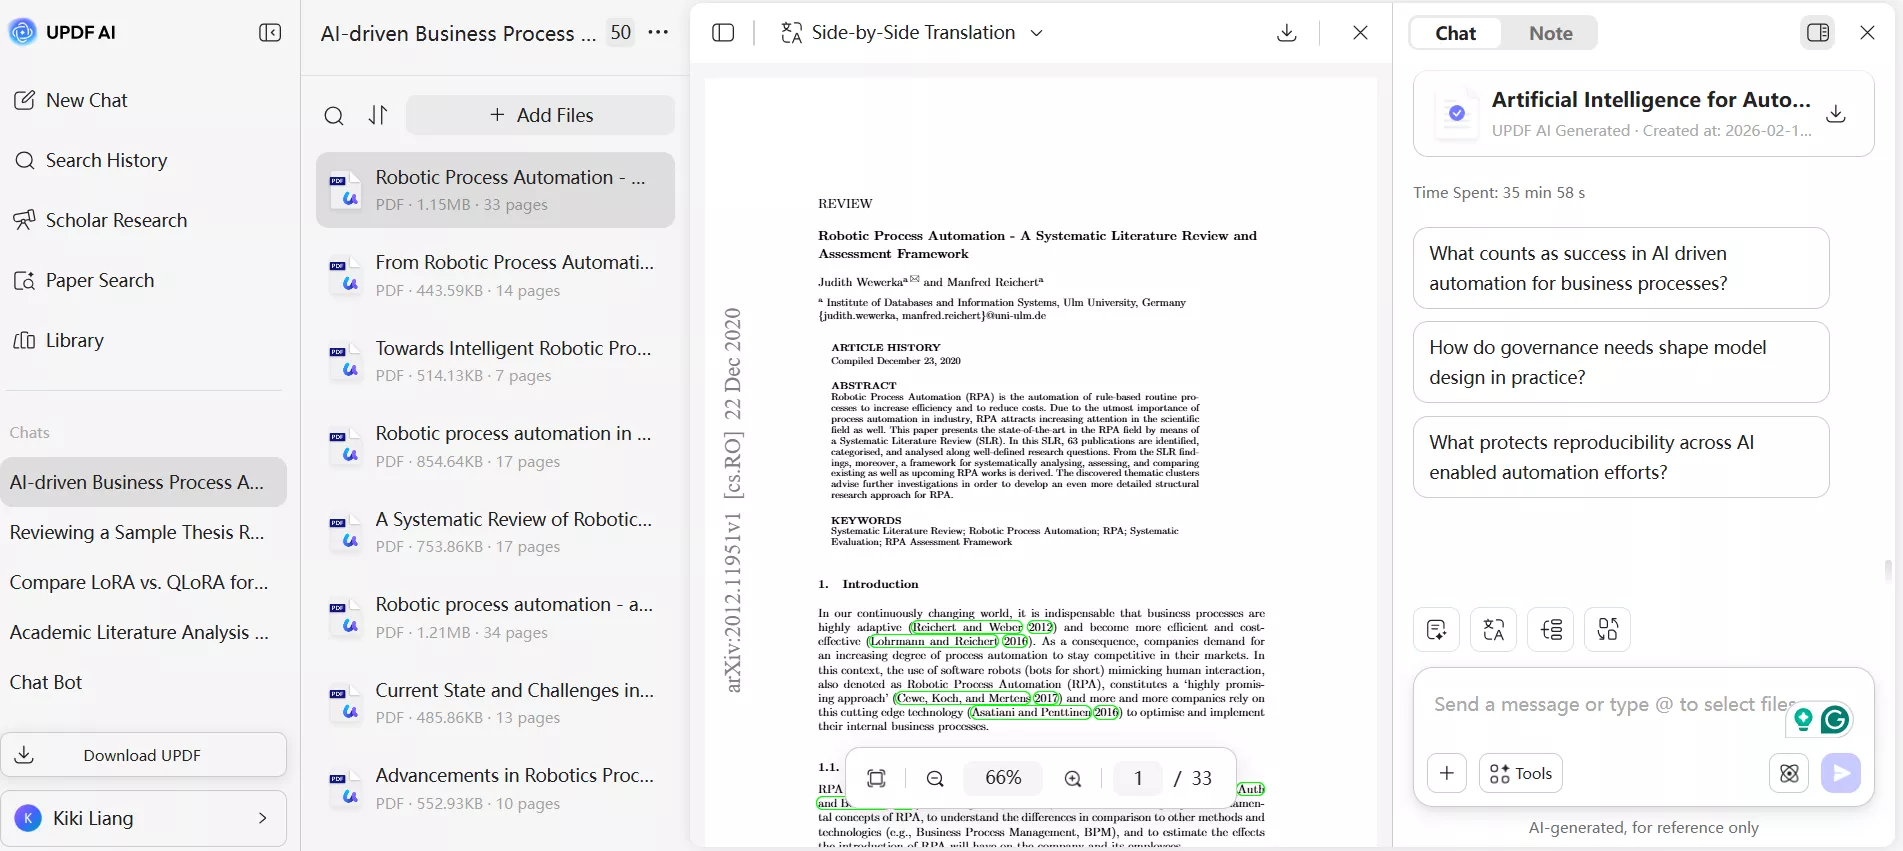
Use UPDF AI For Paper Search
Another feature I find extremely helpful is UPDF AI Paper Search. Instead of browsing the internet and opening dozens of tabs, I can search for academic papers directly inside UPDF. The AI gathers relevant research materials and presents key information in an organized way. This is perfect when I need reliable sources for essays, reports, or thesis writing.
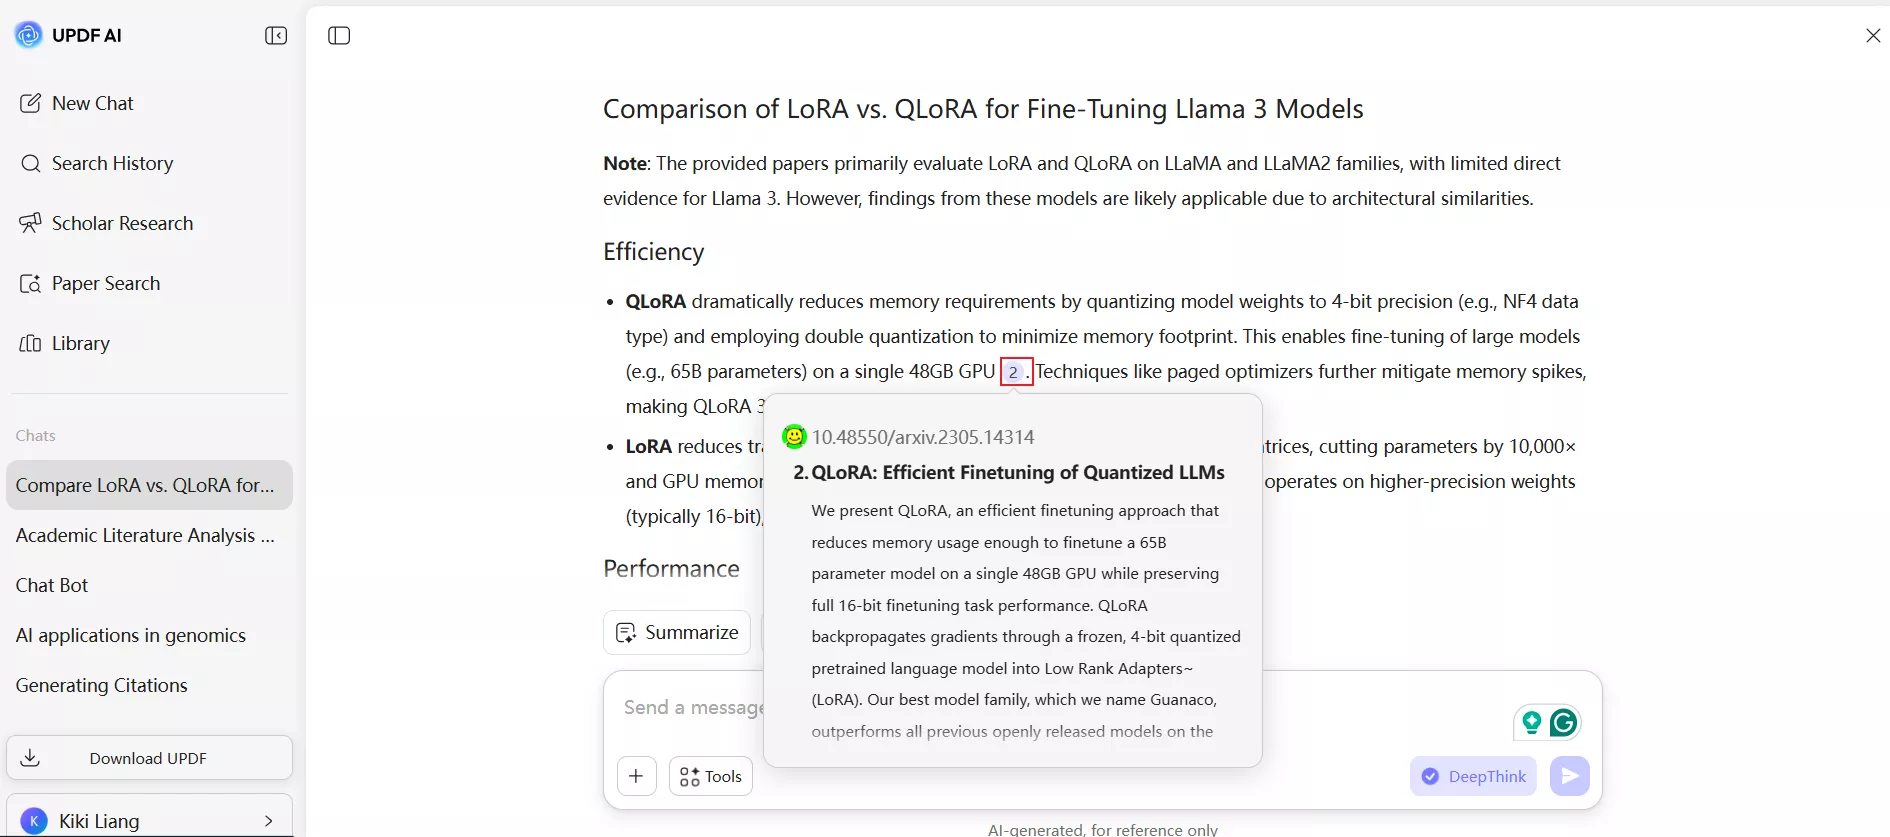
Use UPDF AI For Scholar Research and Literature Review
UPDF AI also offers a Scholar Research feature that can analyze multiple papers at once. When I’m working on a literature review, I don’t have to read and summarize everything manually. I can ask UPDF AI to generate academic insights, compare studies, and create structured summaries from several documents. This makes research faster and far less overwhelming.
Why UPDF Is Helpful Beyond Formatting
What I like most is that UPDF combines traditional PDF editing with modern AI tools. I can fix layout issues like indents, reorganize pages, annotate documents, and then switch to AI features for citations and research—all in the same application. It turns a simple formatting task into a complete academic workflow.
Try UPDF And UPDF AI Today
If you regularly work with PDFs, academic papers, or professional documents, UPDF can make your life much easier. The free version lets users explore core features, but it includes limits such as watermarks on saved files, restricted conversions, and capped AI usage. Upgrading unlocks full editing, unlimited conversions, OCR, batch tools, and complete access to UPDF AI features.
I recommend downloading UPDF, trying the indent tools and AI functions yourself, and seeing how much time you can save.
Windows • macOS • iOS • Android 100% secure
Frequently Asked Questions
Q1. Are Hanging Indents 0.5 Or 1?
In most citation styles, a hanging indent is set to 0.5 inches. This is the standard used in APA, MLA, and Chicago formatting. A 1-inch indent is rarely required and would usually make the reference list look uneven and harder to read. Whenever I create bibliographies, I always keep the indent at 0.5 inches unless a specific guideline says otherwise.
Q2. How Do I Indent The 2nd Line in Google Docs?
To indent only the second line (and any lines after it) in Google Docs, I apply a hanging indent. First, I highlight the paragraph I want to format. Then I go to Format > Align & Indent > Indentation Options, choose Hanging from the Special dropdown, and set the value to 0.5 inches. This automatically moves every line except the first one to the right, which is exactly what most citation formats require.
Q3. How To Do a Hanging Indent Using Keyboard?
There isn’t a direct single keyboard shortcut for creating a hanging indent. However, I can use a quick workaround. After placing my cursor at the start of the second line, I press Ctrl + T (Windows) or Command + T (Mac) in Word to apply a hanging indent instantly. In Google Docs, the fastest method is still through the Indentation Options menu.
Final Thoughts!
Learning how to do a hanging indent on google docs is an essential skill for anyone preparing academic papers, reports, or professional documents. Proper indentation keeps citations organized and makes your work look polished and credible. Whether you’re formatting in Google Docs, Word, or a PDF file, the right tools can save a lot of time.
That’s why I rely on UPDF—it lets me adjust indents, edit PDFs, generate citations with UPDF AI, and even conduct quick academic research in one place. If you want smoother formatting and smarter document workflows, I recommend trying UPDF today.
Windows • macOS • iOS • Android 100% secure


 Engelbert White
 Delia Meyer