 UPDF for Windows
 UPDF for Mac
 UPDF for iPhone/iPad
 UPDF for Android
 UPDF AI Online
 UPDF Sign
 Edit PDF
 Annotate PDF
 Create PDF
 PDF Form
 Edit links
 Convert PDF
 OCR
OCR PDF to Word
 PDF to Image
 PDF to Excel
 Organize PDF
 Merge PDF
 Split PDF
 Crop PDF
 Rotate PDF
 Protect PDF
 Sign PDF
 Redact PDF
 Sanitize PDF
 Remove Security
 Read PDF
 UPDF Cloud
 Compress PDF
 Print PDF
 Batch Process
 About UPDF AI
 UPDF AI Solutions
 AI User Guide
 FAQ about UPDF AI
 Summarize PDF
 Translate PDF
 Chat with PDF
 Chat with AI
 Chat with image
 PDF to Mind Map
 Explain PDF
 PDF AI Tools
 Image AI Tools
 AI Chat Tools
 AI Writing Tools
 AI Study Tools
 AI Working Tools
 Other AI Tools
 PDF to Word
 PDF to Excel
 PDF to PowerPoint
 User Guide
 UPDF Tricks
 FAQs
FAQs UPDF Reviews
 Download Center
 Blog
Blog Newsroom
 Tech Spec
 Updates
 UPDF vs. Adobe Acrobat
 UPDF vs. Foxit
 UPDF vs. PDF Expert
Watermarks are generally added to the document to show the source and origin of the file. Especially when sharing a protocol with someone or a legal document. If you want to use a document as a template but do not want the watermark, you may want to know how to remove the watermark in Word. We have here 2 different ways to do that with step-by-step guides. We will also list the reasons why you may be unable to remove the watermark. However, if you are working with a PDF file, we will also show you how to remove the watermark from a PDF file. You just need to download UPDF to remove the watermark from the PDF file. Download it right now and we will show you below how to use it to remove the watermark from PDF as a bonus tip.
Windows • macOS • iOS • Android 100% secure
Way 1. How to Remove Background Watermark in Word?
You may have a downloaded article or a document someone shared with you which has a watermark. However, you want to use it as your own, but the watermark prevents you from doing so. You cannot simply click on it and delete it as it is generally hidden in the background and not simple to remove. But don”t worry, we will show you step-by-step how to get rid of it. Just follow these steps to remove the watermark from the background.
Step-1. Open the Word document and click the “Design” tab. This will open a banner of tools on the top.
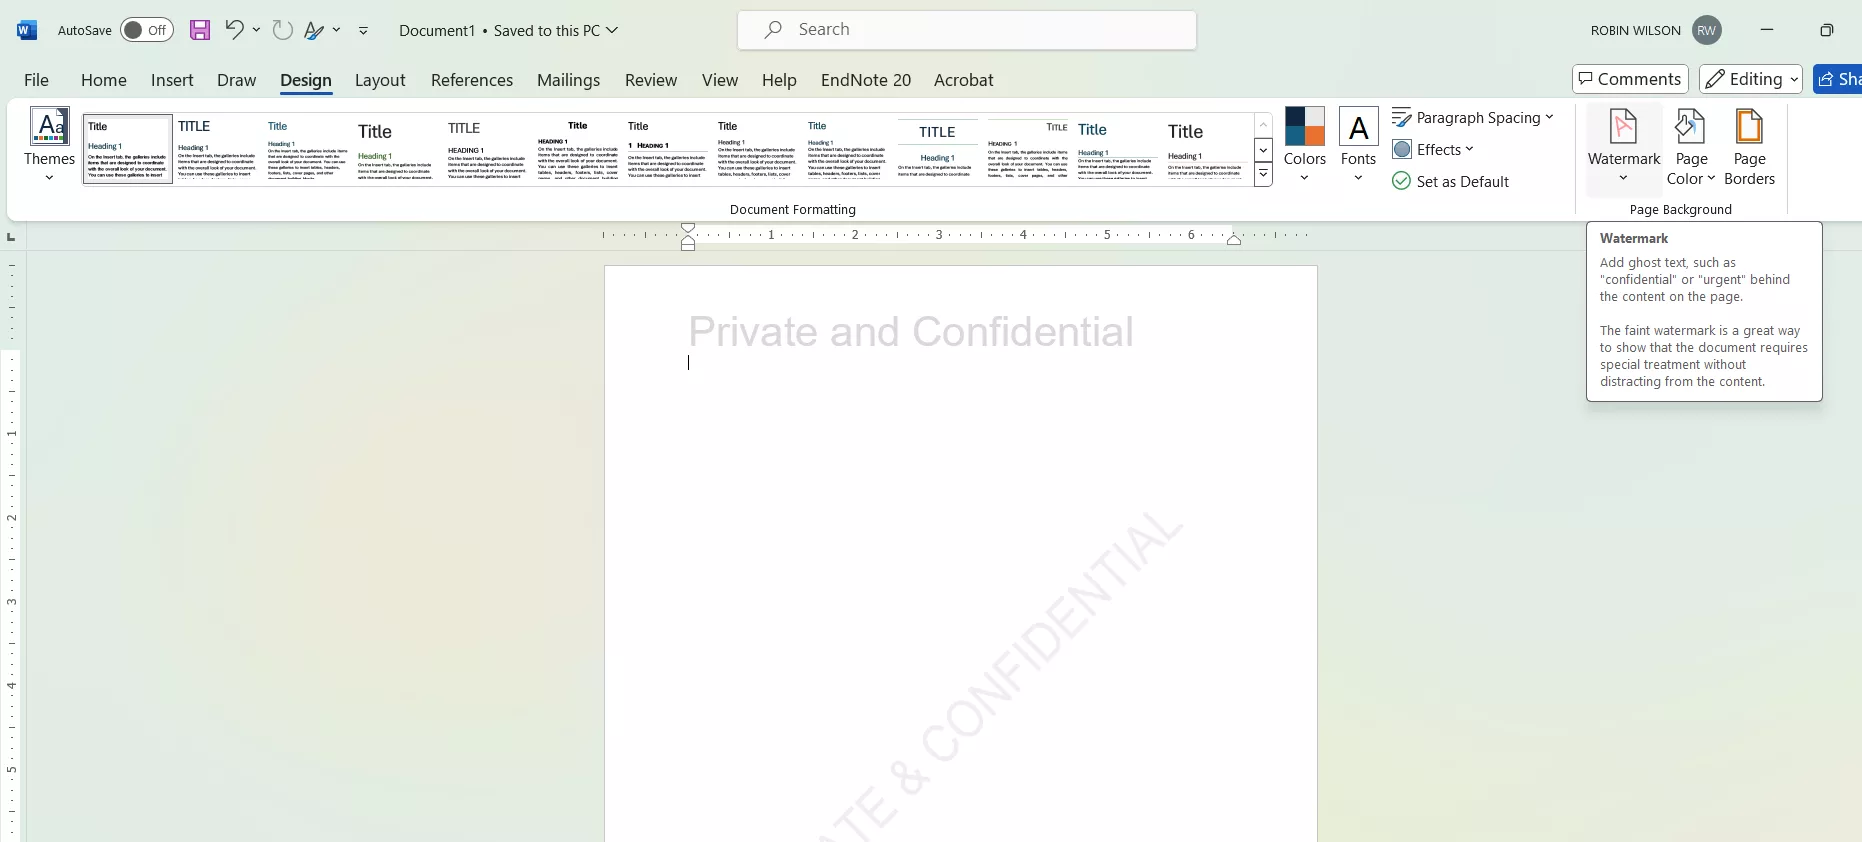
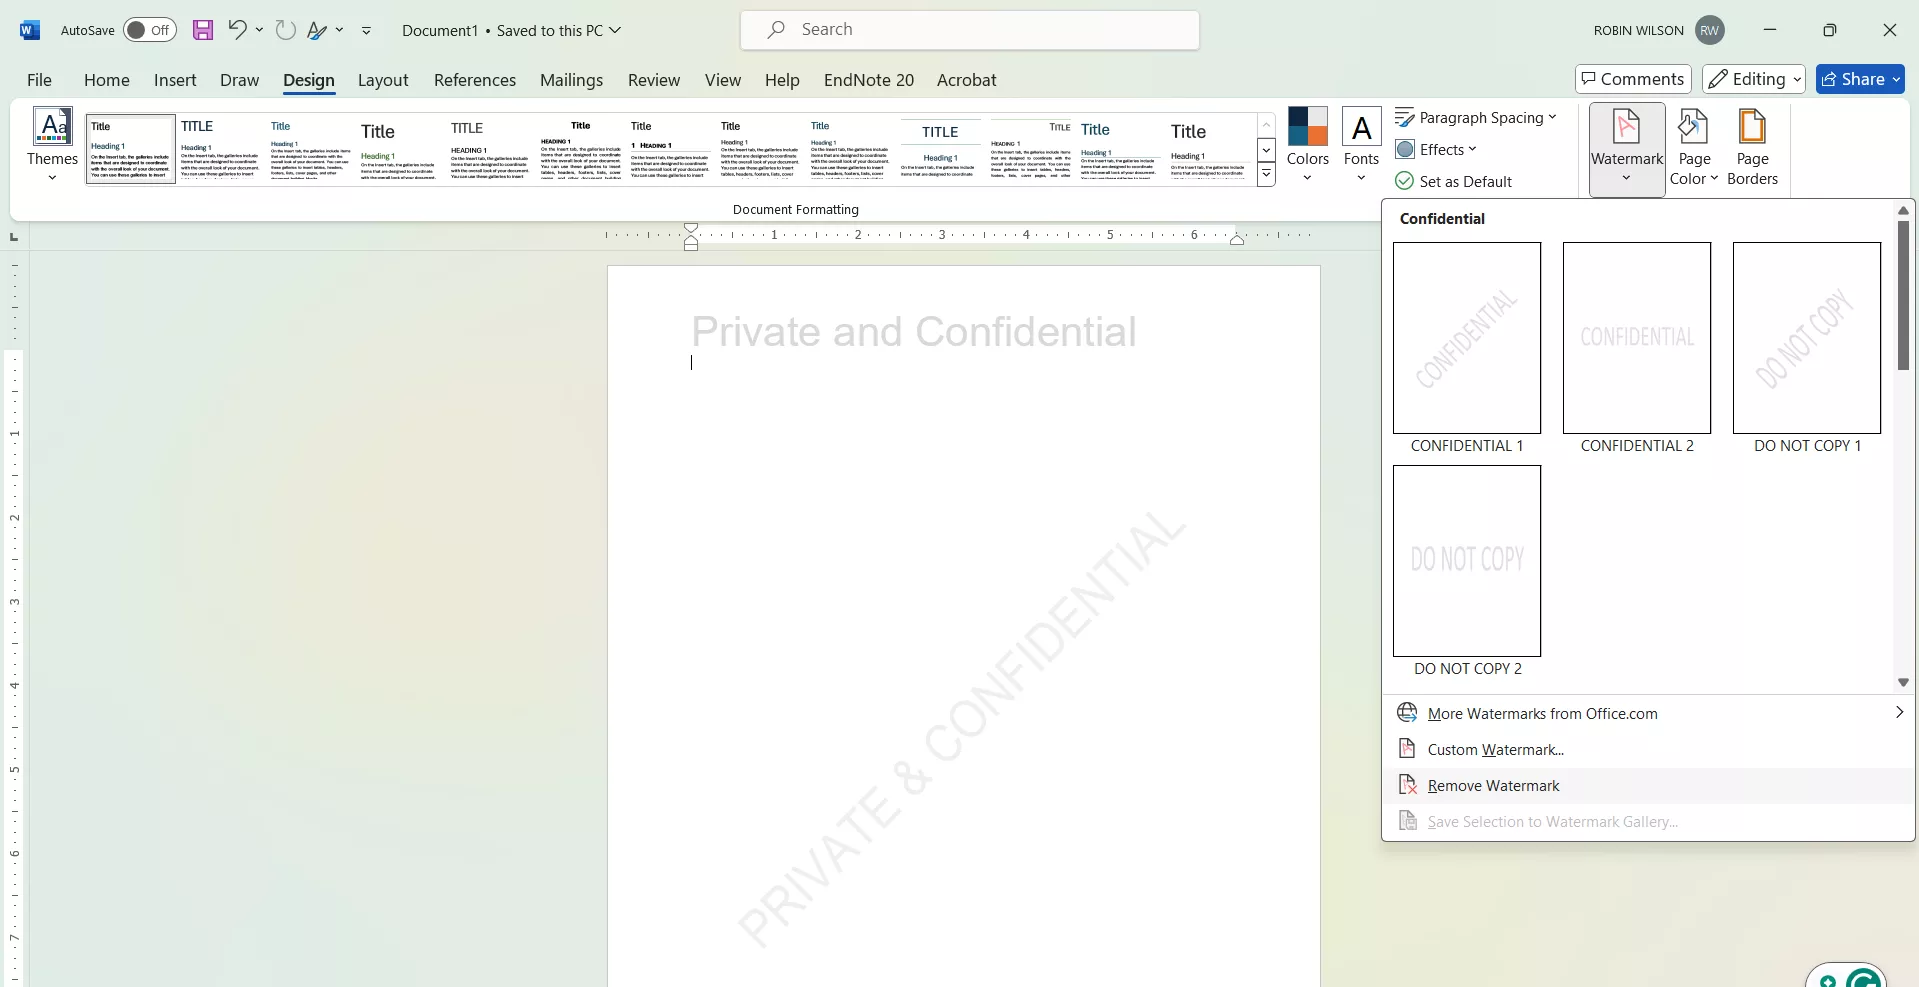
Step-2. Towards the right side of the tools banner, click the “Watermark” to open a menu. Then click to select “Remove watermark”. This will remove the watermark.
Step-3. Press together “Ctrl+S” or click the “Save” icon in the top left corner to save the changes.
Way 2. How to Remove Watermark in Word in Header and Footer?
If the watermark is in the header and footer, it can be a little different to remove than from a background. Follow these steps to remove the watermark from the header and footer in Word.
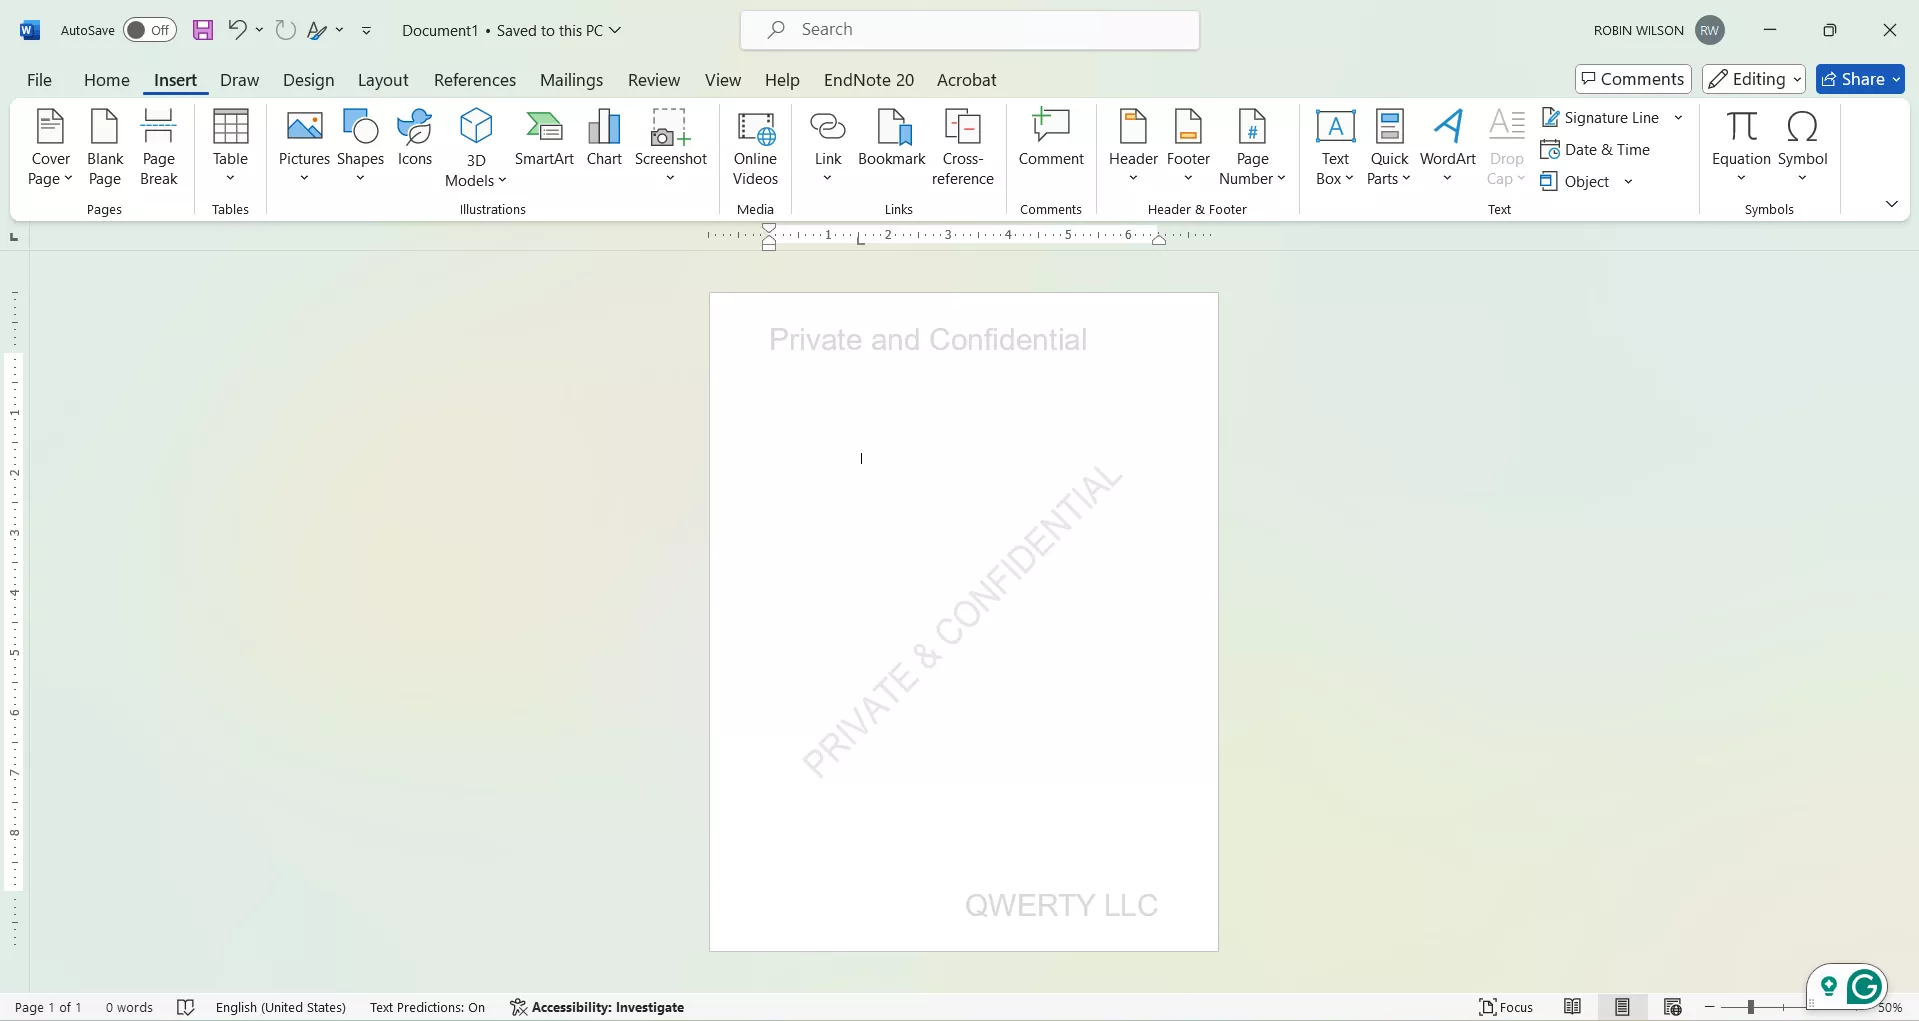
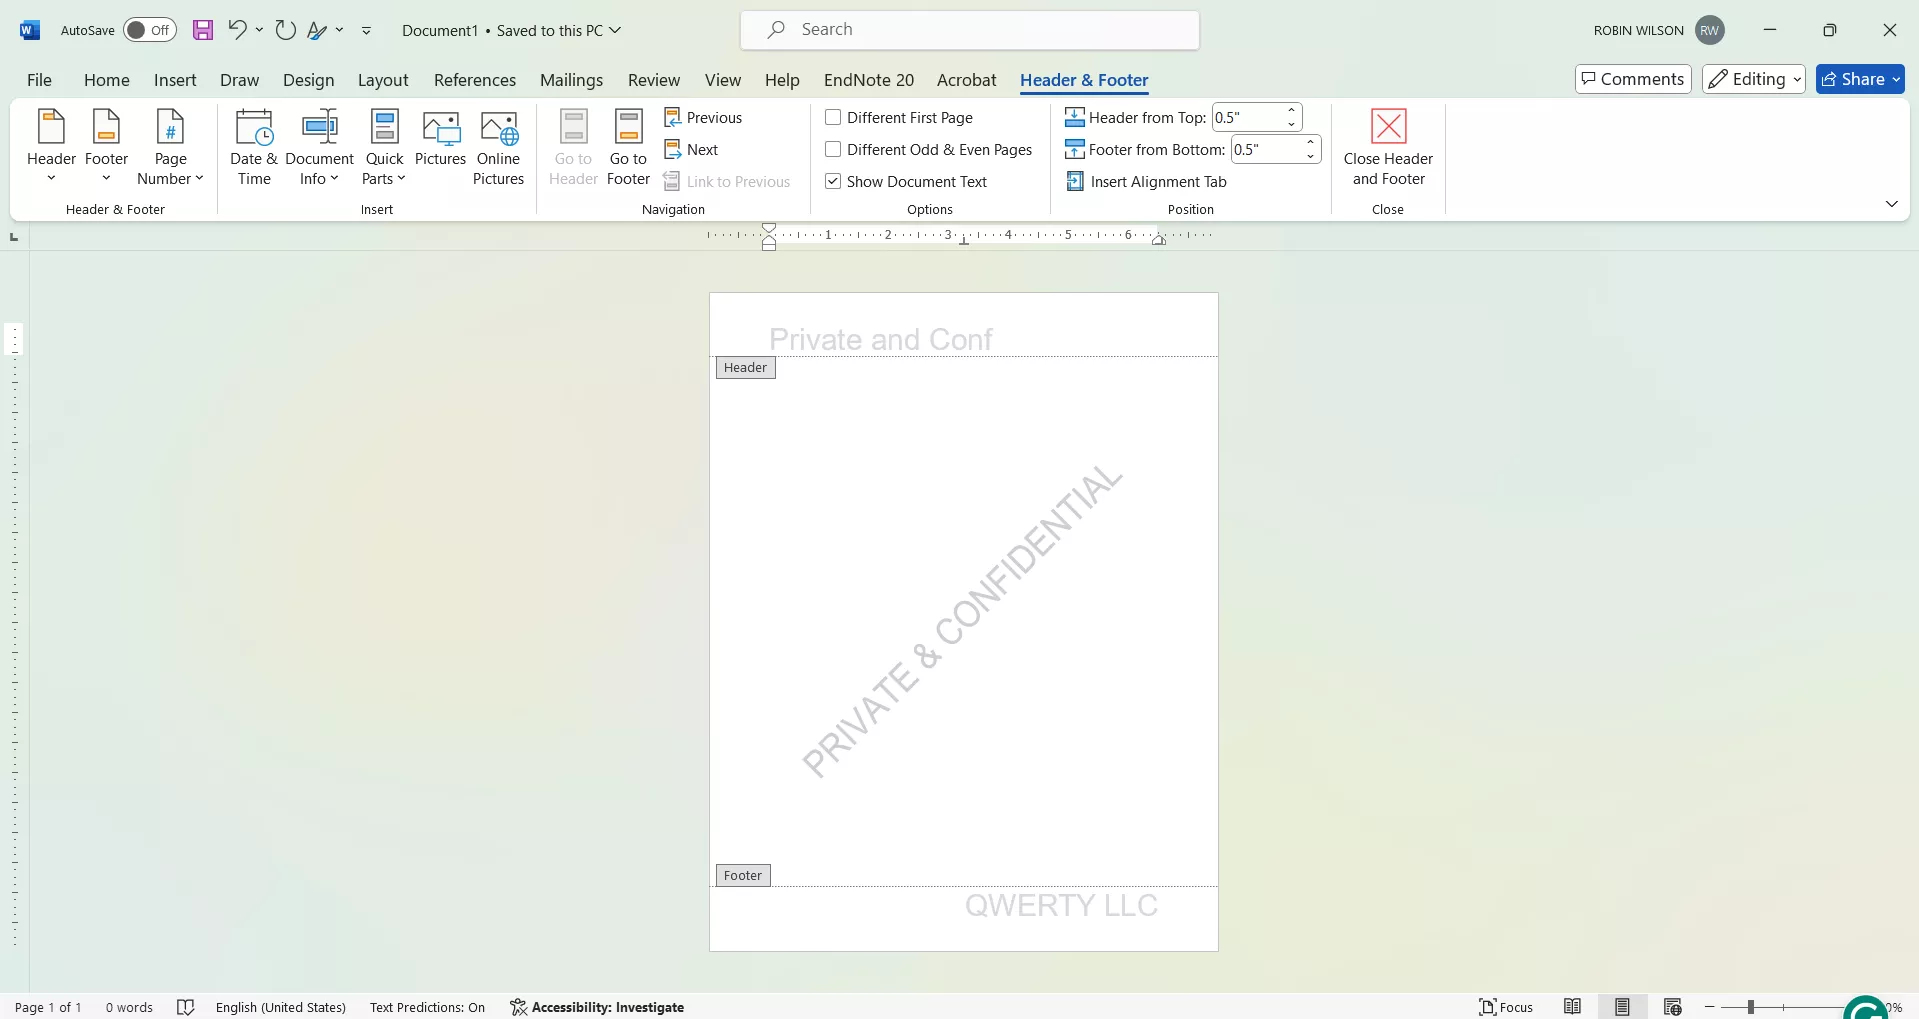
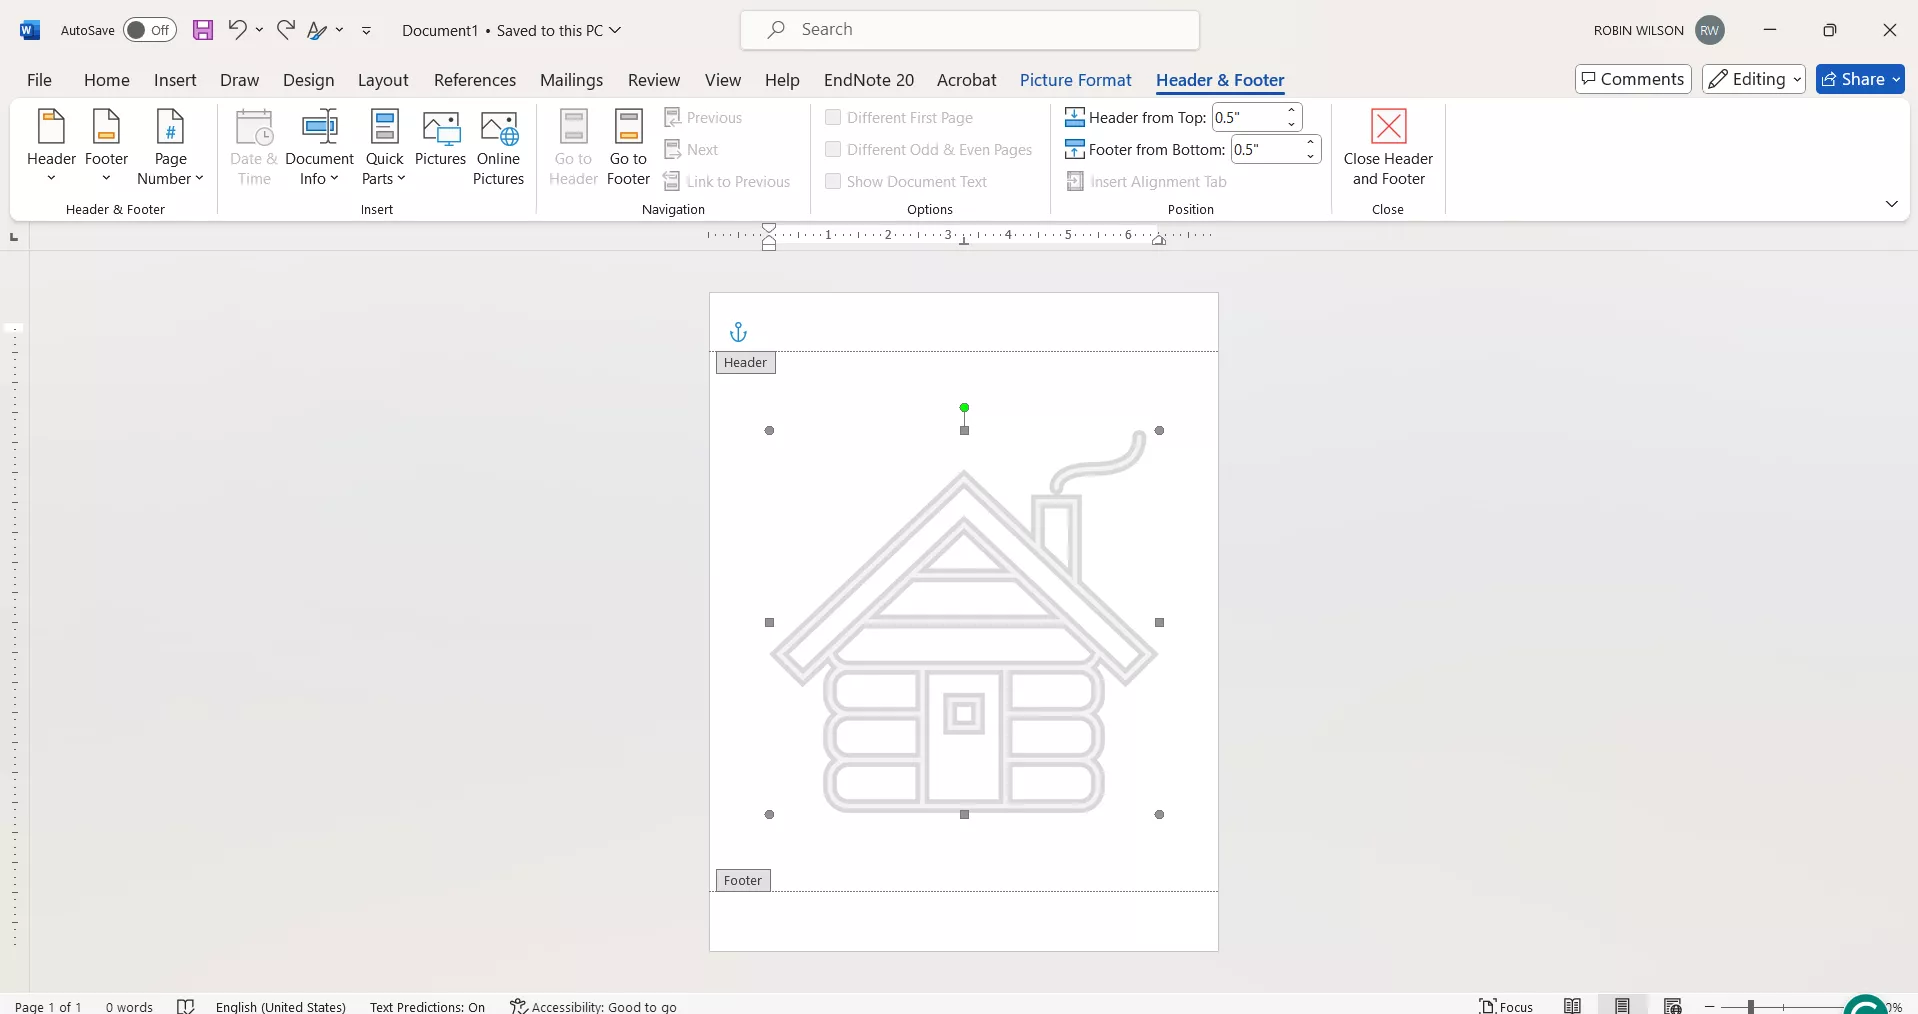
Step-1. Open the Word file and click on the “Insert” tab to open a banner of tools.
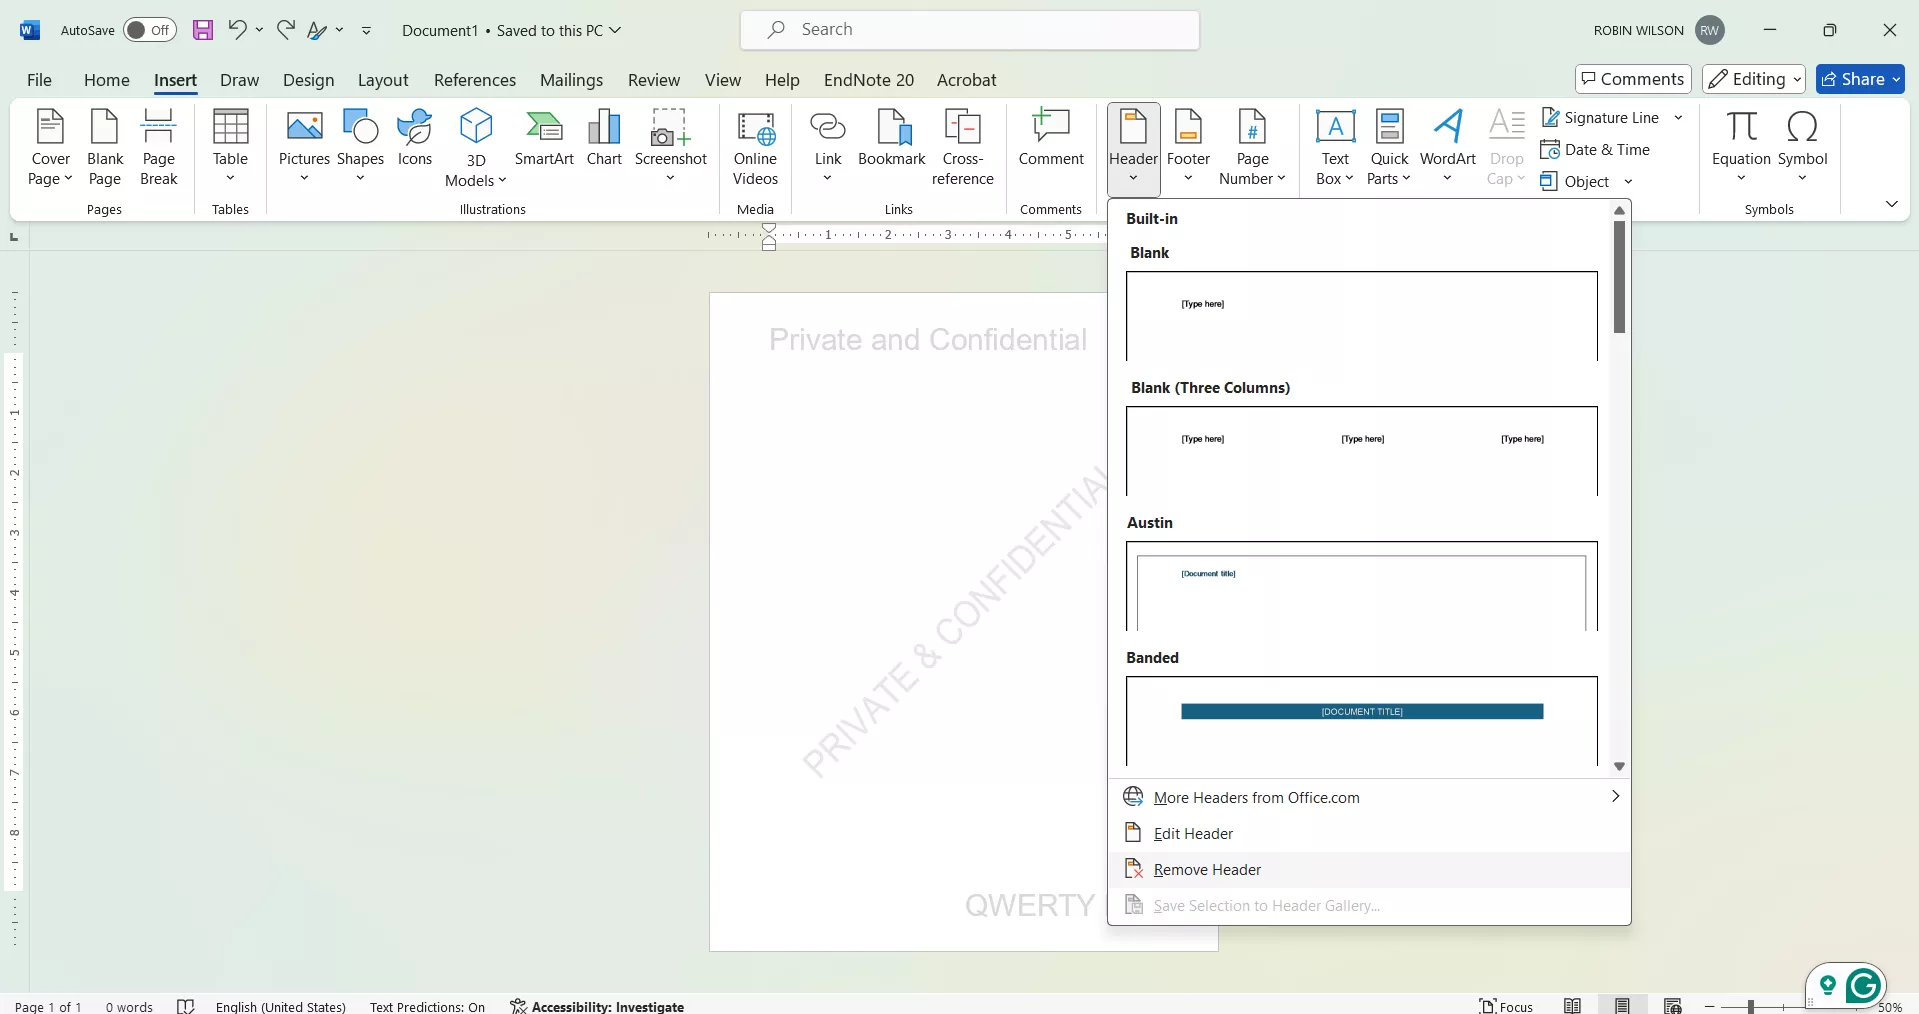
Step-2. Click on the “Header” tab from the panel on the top to open a menu. Click the “Remove Header” option. This will remove the header.
Step-3. To remove the watermark in the footer, click “Footer” from the banner of tools in the “Insert” tab on the top to open the footer menu. Then click “Remove Footer” which will remove the footer.
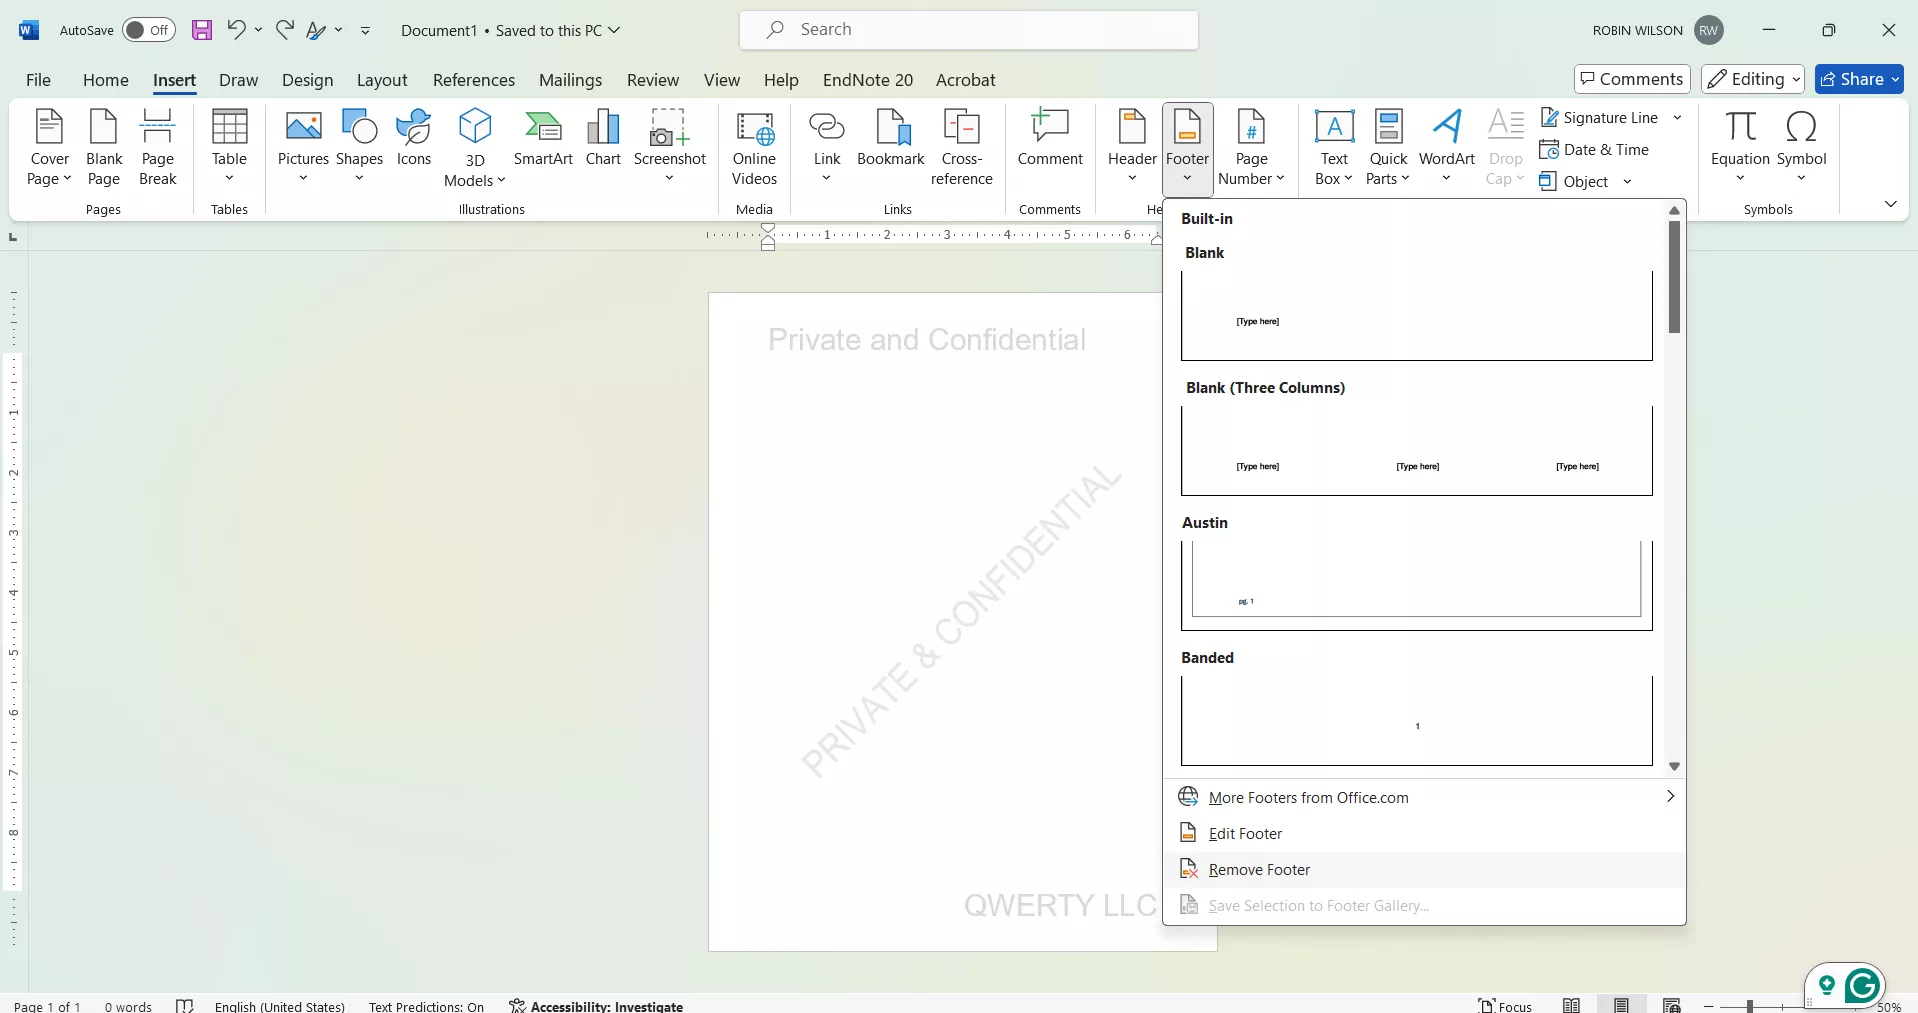
Alternatively, double-click in the Header or footer area. It is generally above and below the page margin. Both the header and footer will become editable. You can delete the watermark text or image from here directly.
Step-4. Once done removing the watermark from the header and footer, save the file by clicking the “Save” icon on the top left corner of the window.
Also Read: How to Circle Something in MS Word: Step-By-Step Guide
Why Can't I Remove Watermark in Word?
There are several reasons why you are unable to remove the watermark in Word. The most common reasons are:
- The file is secured and protected to prevent any editing
- Watermark could be in a different section of the file
- The watermark is inserted as an object rather than through the insert watermark option.
- The document is generated using a different software which makes it incompatible to edit in Word.
- There is a bleak chance that the document is corrupted.
Fix 1. Remove the Watermark in Word with the Selection Panel
If you cannot remove the watermark using one of the methods suggested above, there is a way around it to remove the watermark.
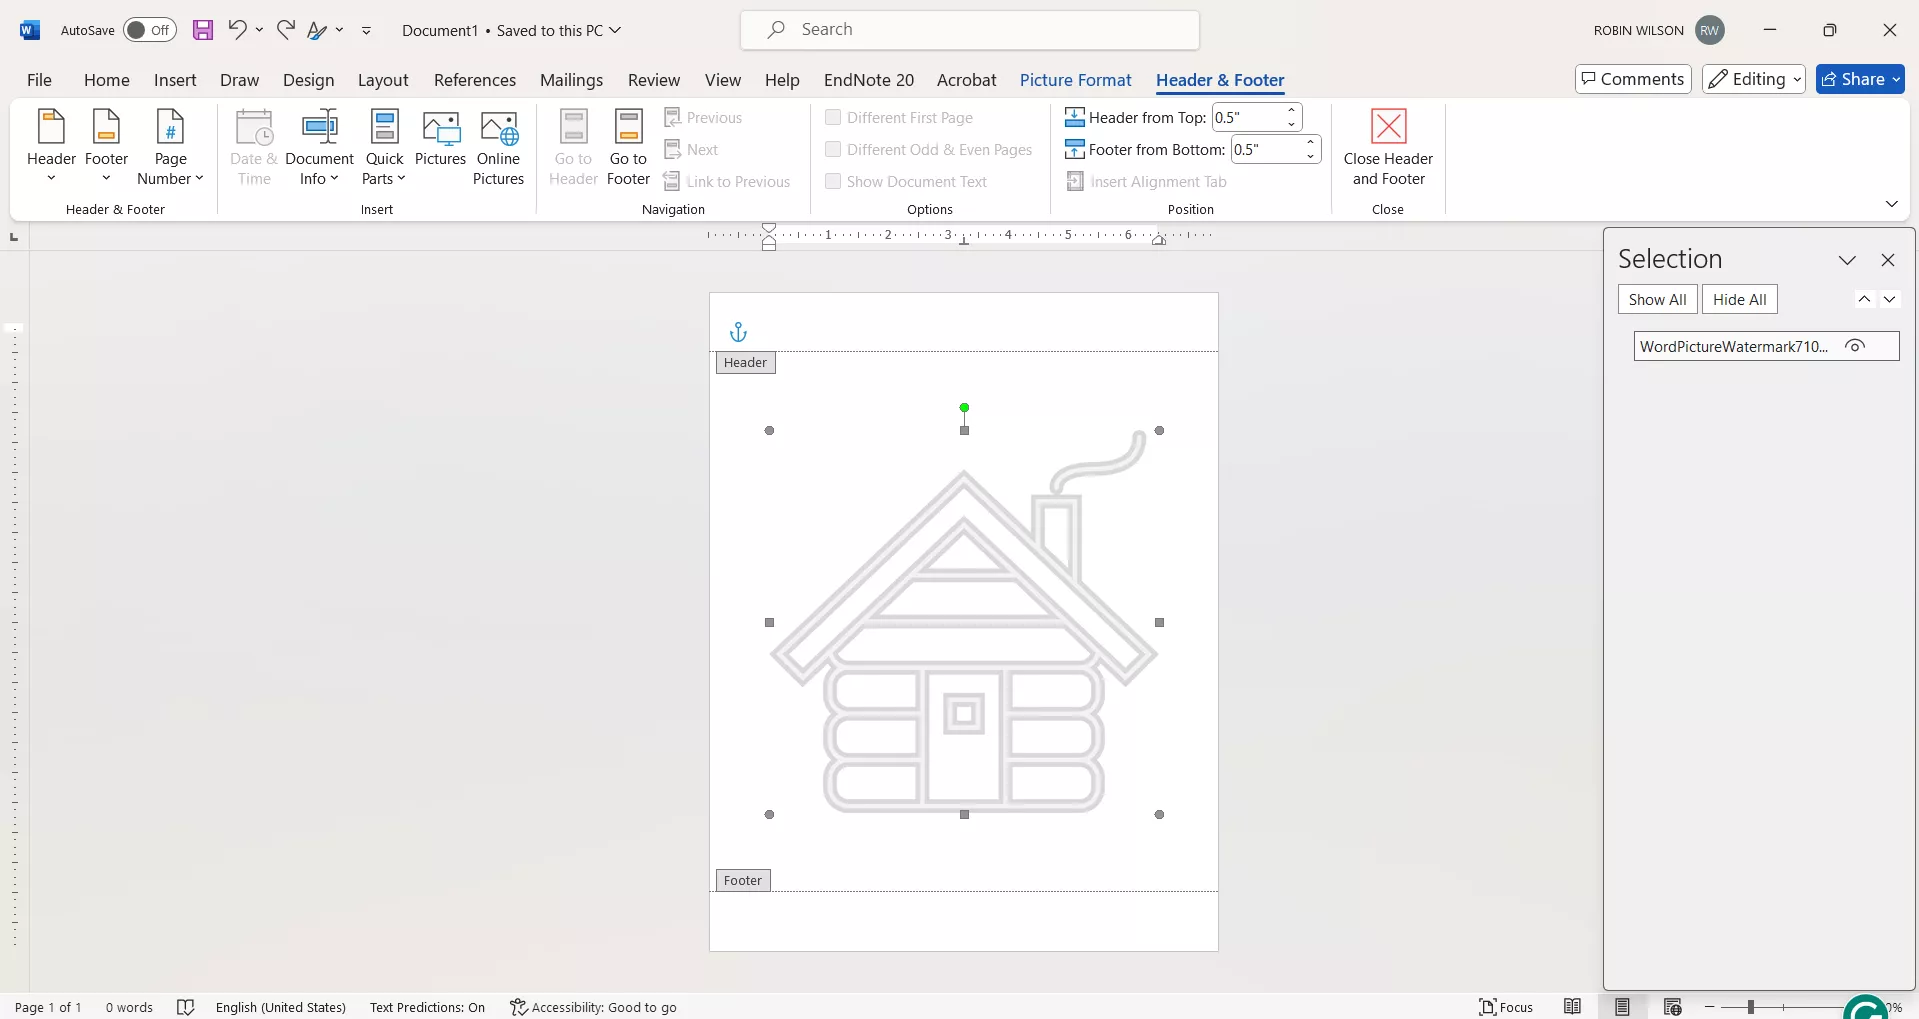
Step-1. Open the Word document and click the “Layout” tab to open the tools panel.
Step-2. Click “Selection Pane” from the panel of tools. A selection pane will open on the right side of the window.
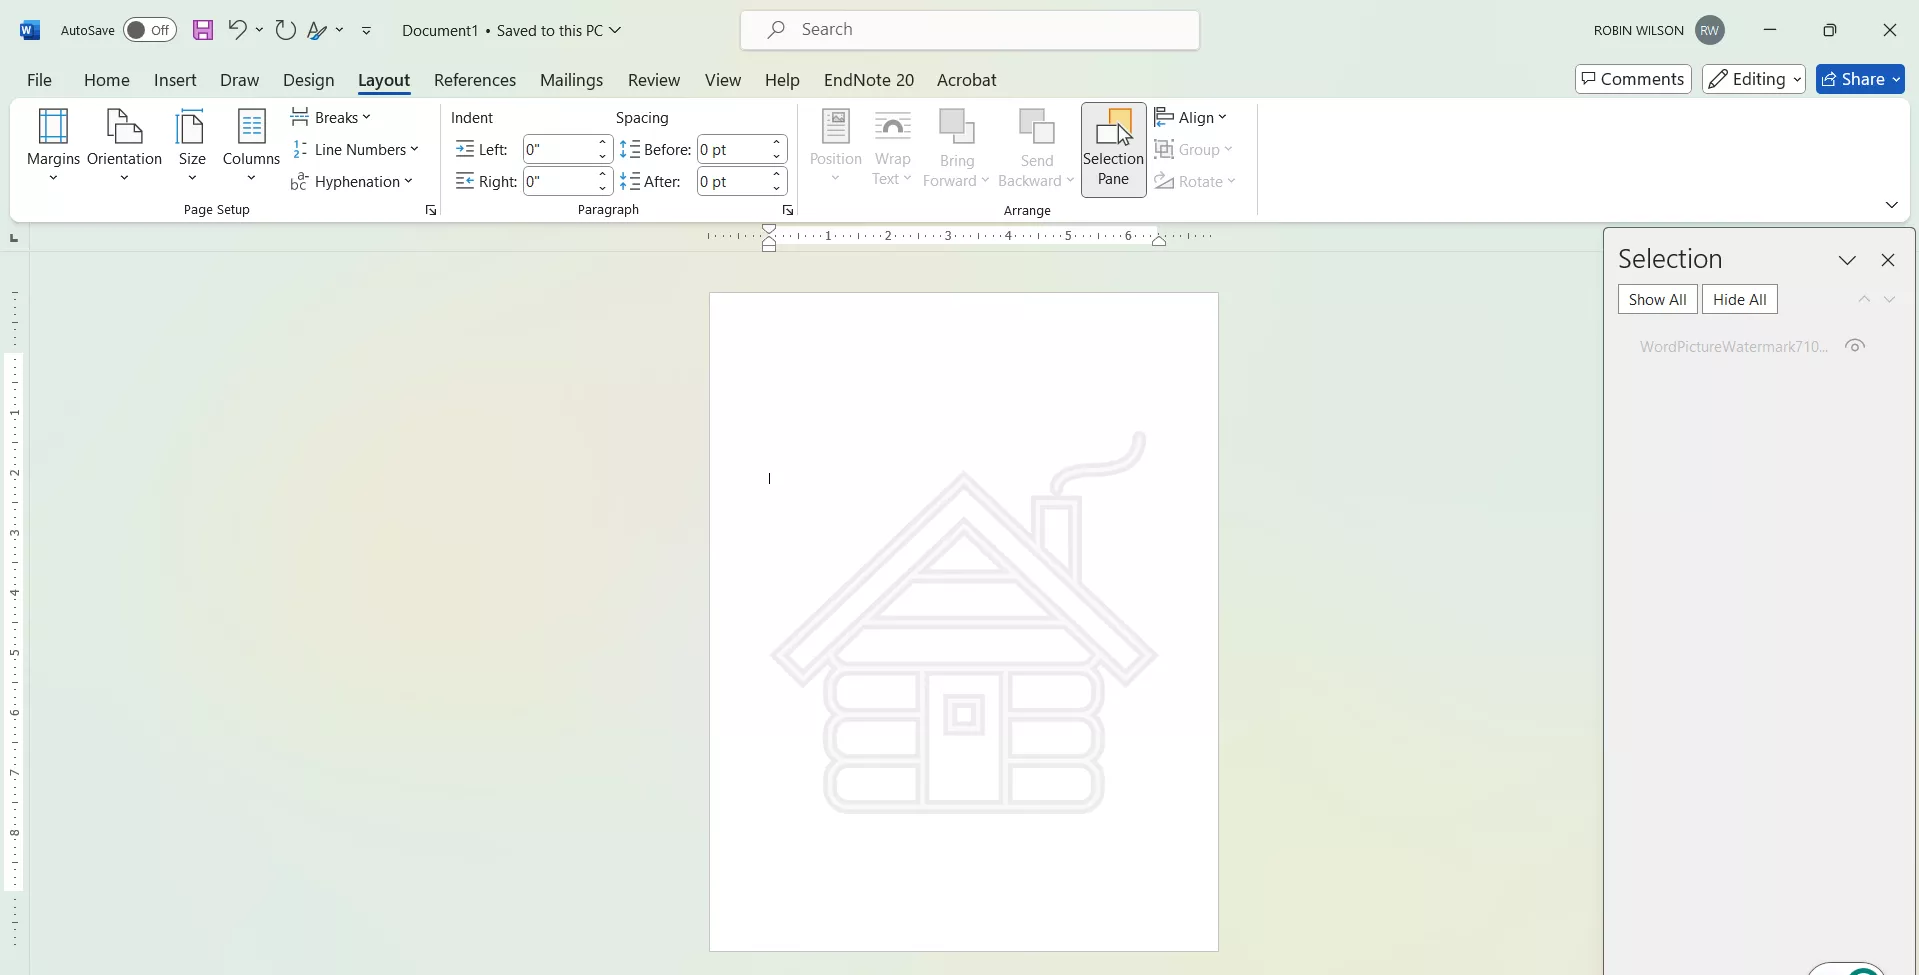
Step-3. Double-click on the page, either above or below the page margins. This will let you see the object list on the selection pane.
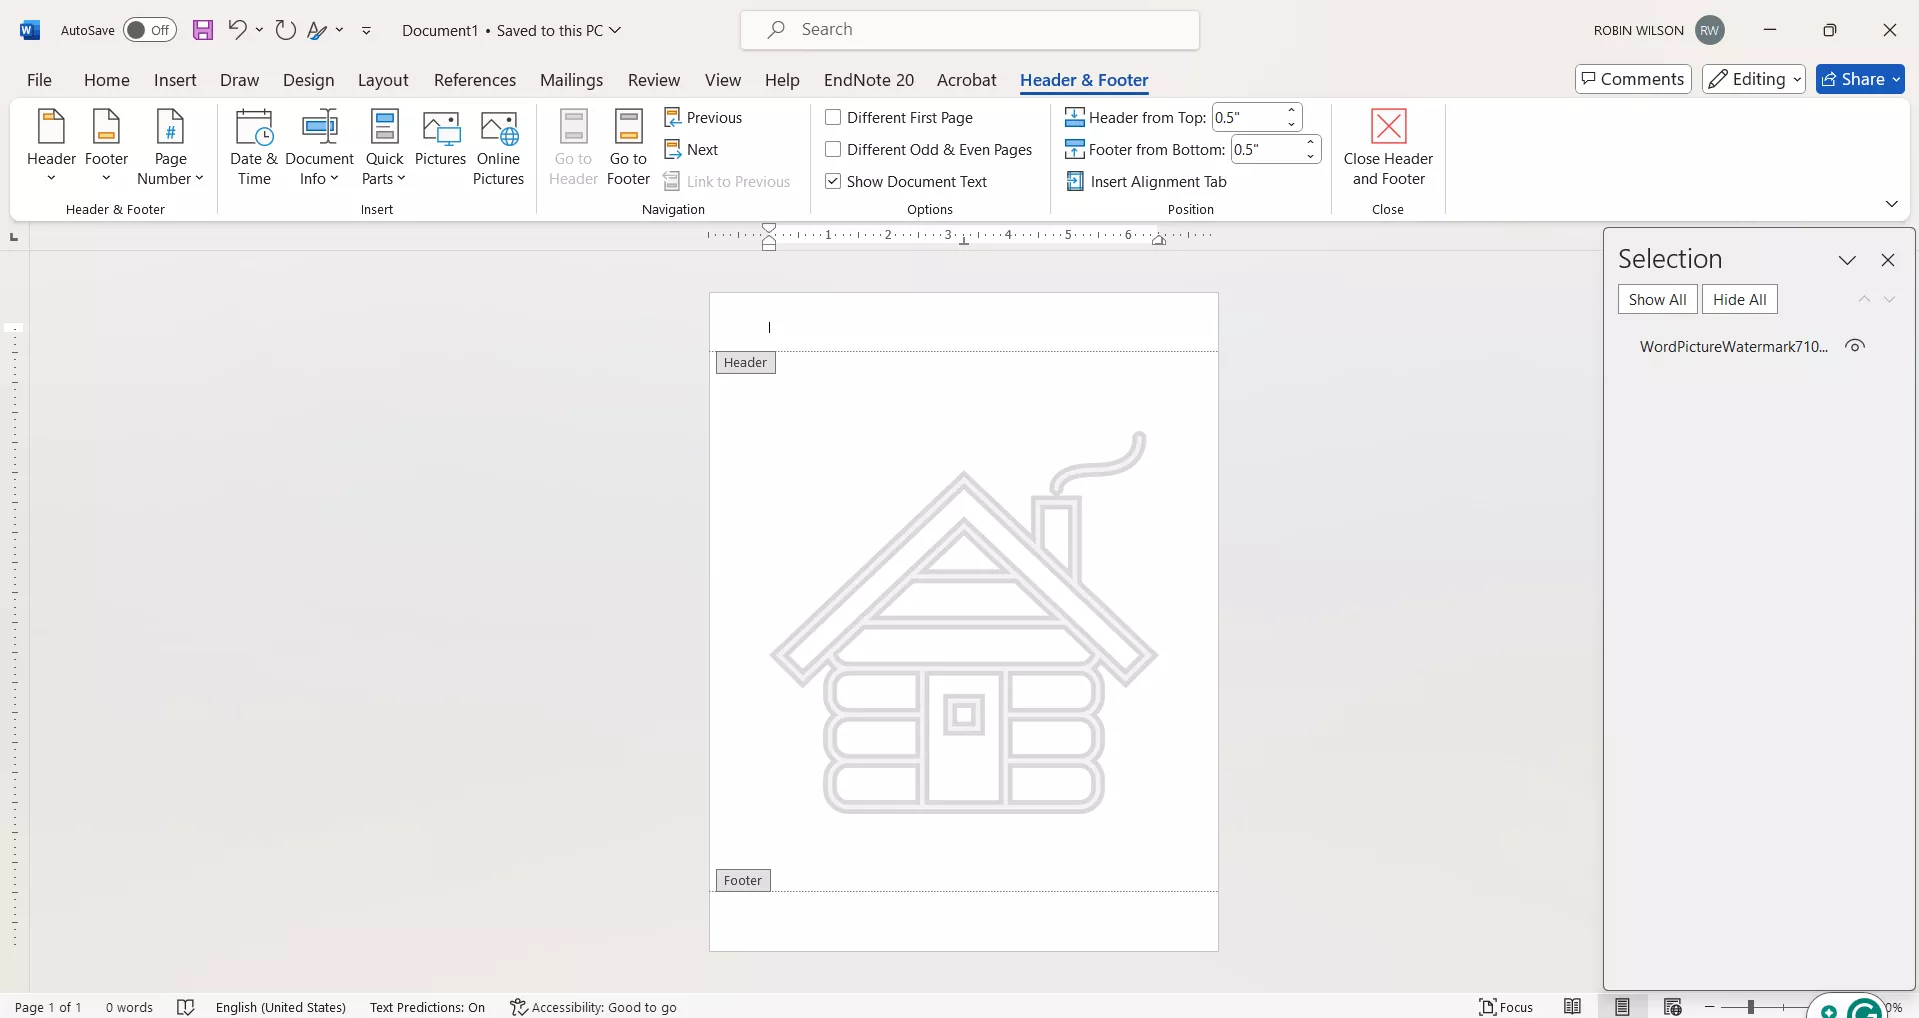
Step-4. Click the watermark object (text or image) to select it on the page itself or you can click the watermark listed on the selection window pane. Hit the “Delete” button to remove the watermark. Save the changes by clicking the “Save” icon or pressing together “Ctrl+S” keys on the keyboard.
Fix 2. Remove the Watermark in Word with Select-Object
If none of the methods above has helped, you can use the one below, which can help remove the watermark. Just follow along to remove the watermark.
Step-1. Open the Word file. From the “Home” tools, click “Editing” to open a menu, then click “Select”.
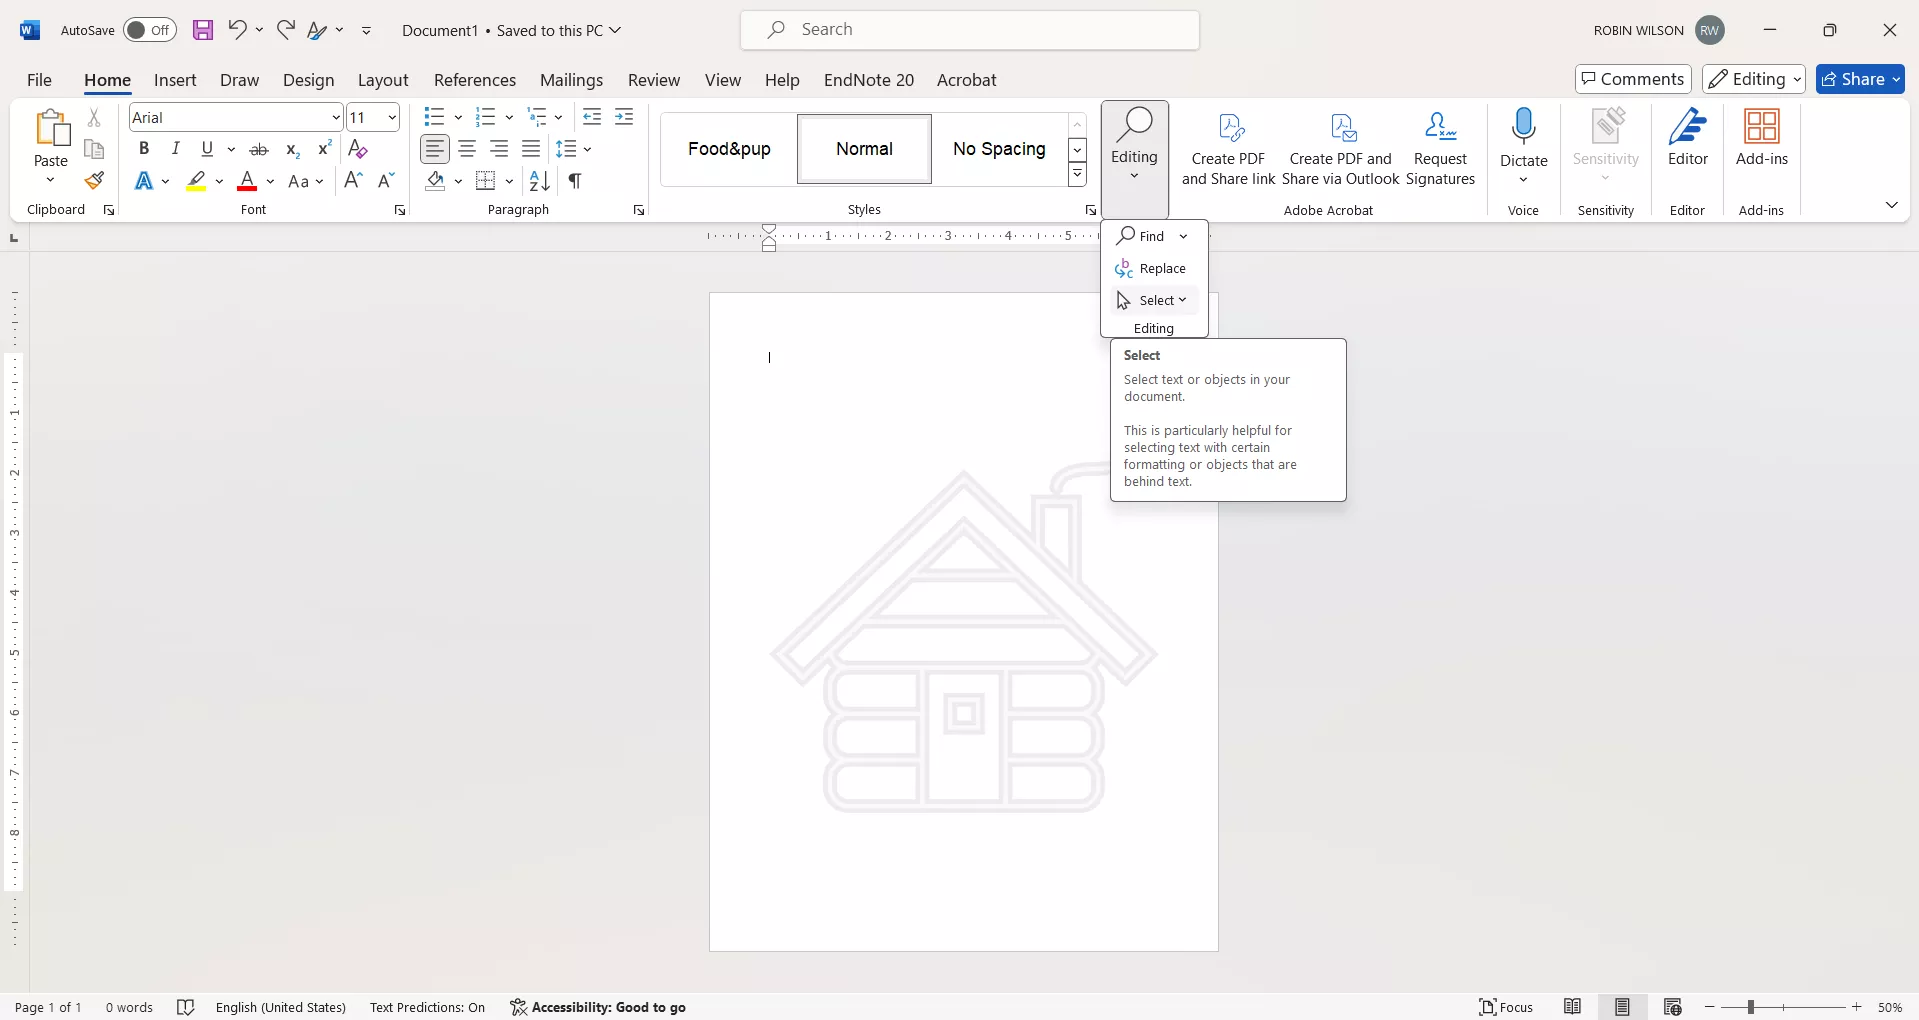
Step-2. Double-click on the area on the page above the margins. This will highlight the header and footer area and it will also allow you to select the watermark by clicking on it. Then press the “Delete” or “Backspace” key to remove the watermark.
Step-3. Save the file either by using the “Ctrl+S” keys or by clicking the “Save” icon.
Part 3. Bonus Tip: How to Remove Watermark from PDF?
If you are working with a PDF file, you would need a PDF editor to remove the watermark. UPDF is the best choice when it comes to PDF editing. In comparison to other flagship PDF editors, UPDF is five times cheaper and has more features to offer. There is no fussing around as the interface is very simple. There is more than one way you can remove the watermarks. There is a direct way through the watermark feature, you can also remove watermarks in the header and footer using tools specific to header and footer editing, or you can also remove watermark by covering it. Download UPDF right now and try it for yourself. It is indeed easy.
Windows • macOS • iOS • Android 100% secure
To remove a watermark from the PDF file in UPDF, one of the most straightforward methods is to use the “Watermark” tool. Follow these steps to remove it.
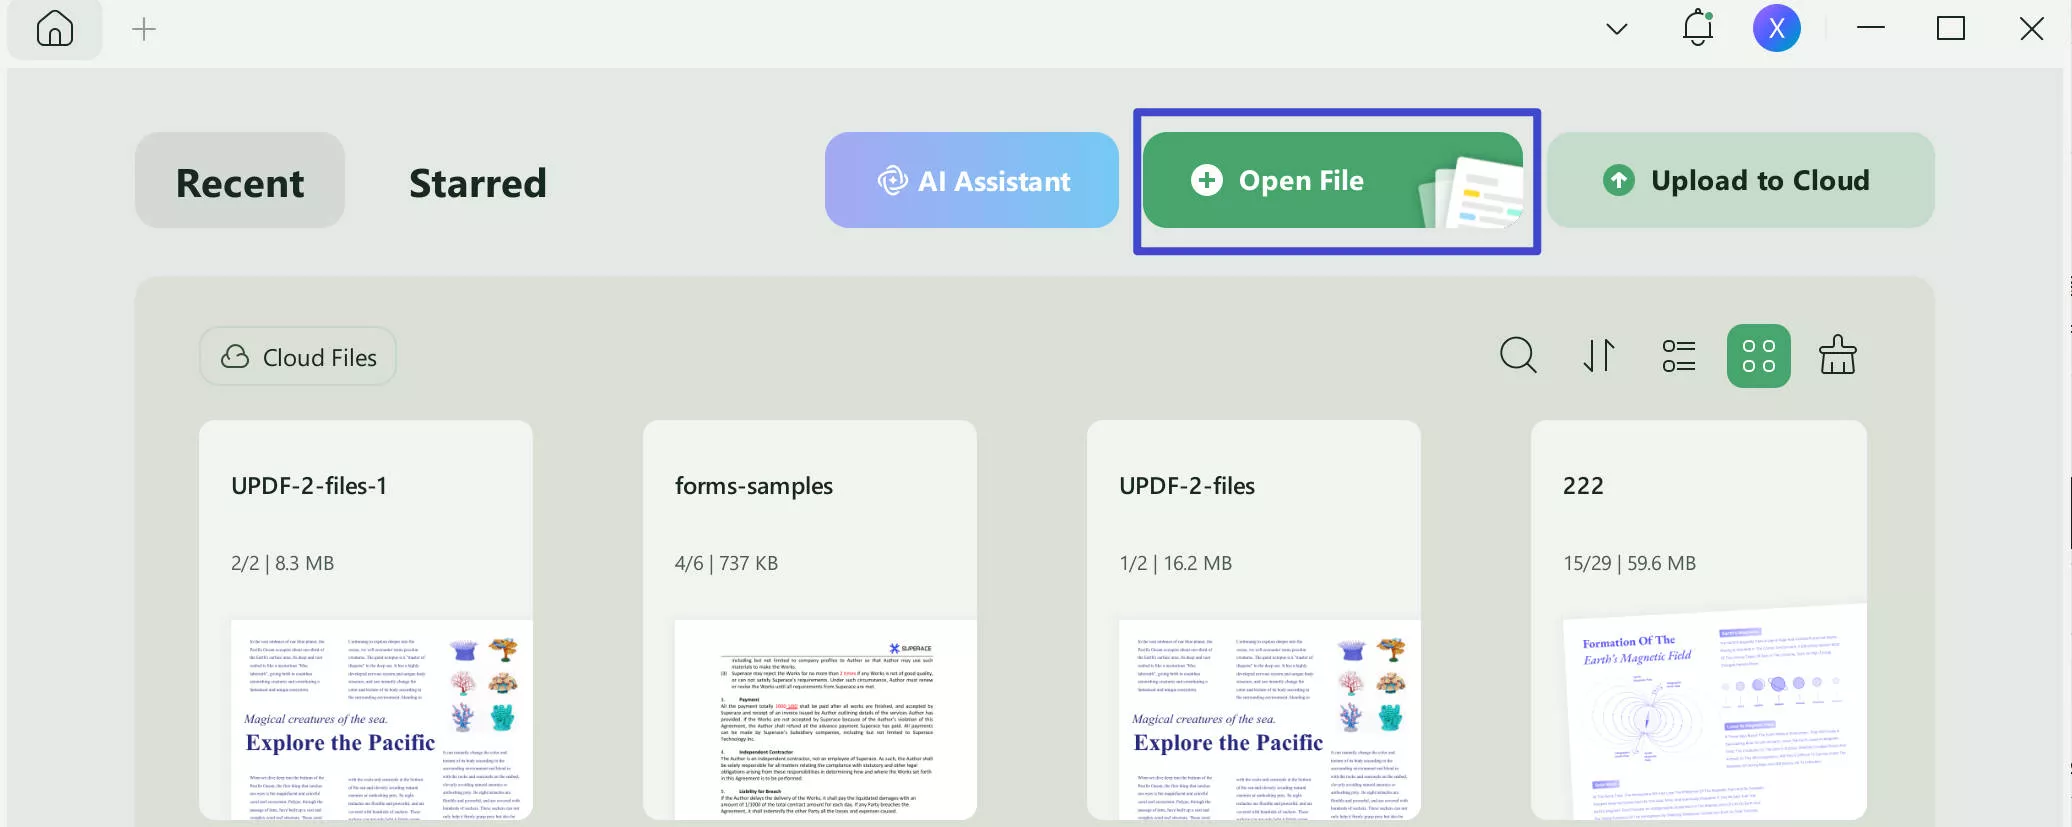
Step-1. Download and install UPDF. Open the app and the file you want to remove the watermark from, using the “Open File” tab on the window or the “Open” option in the file menu.
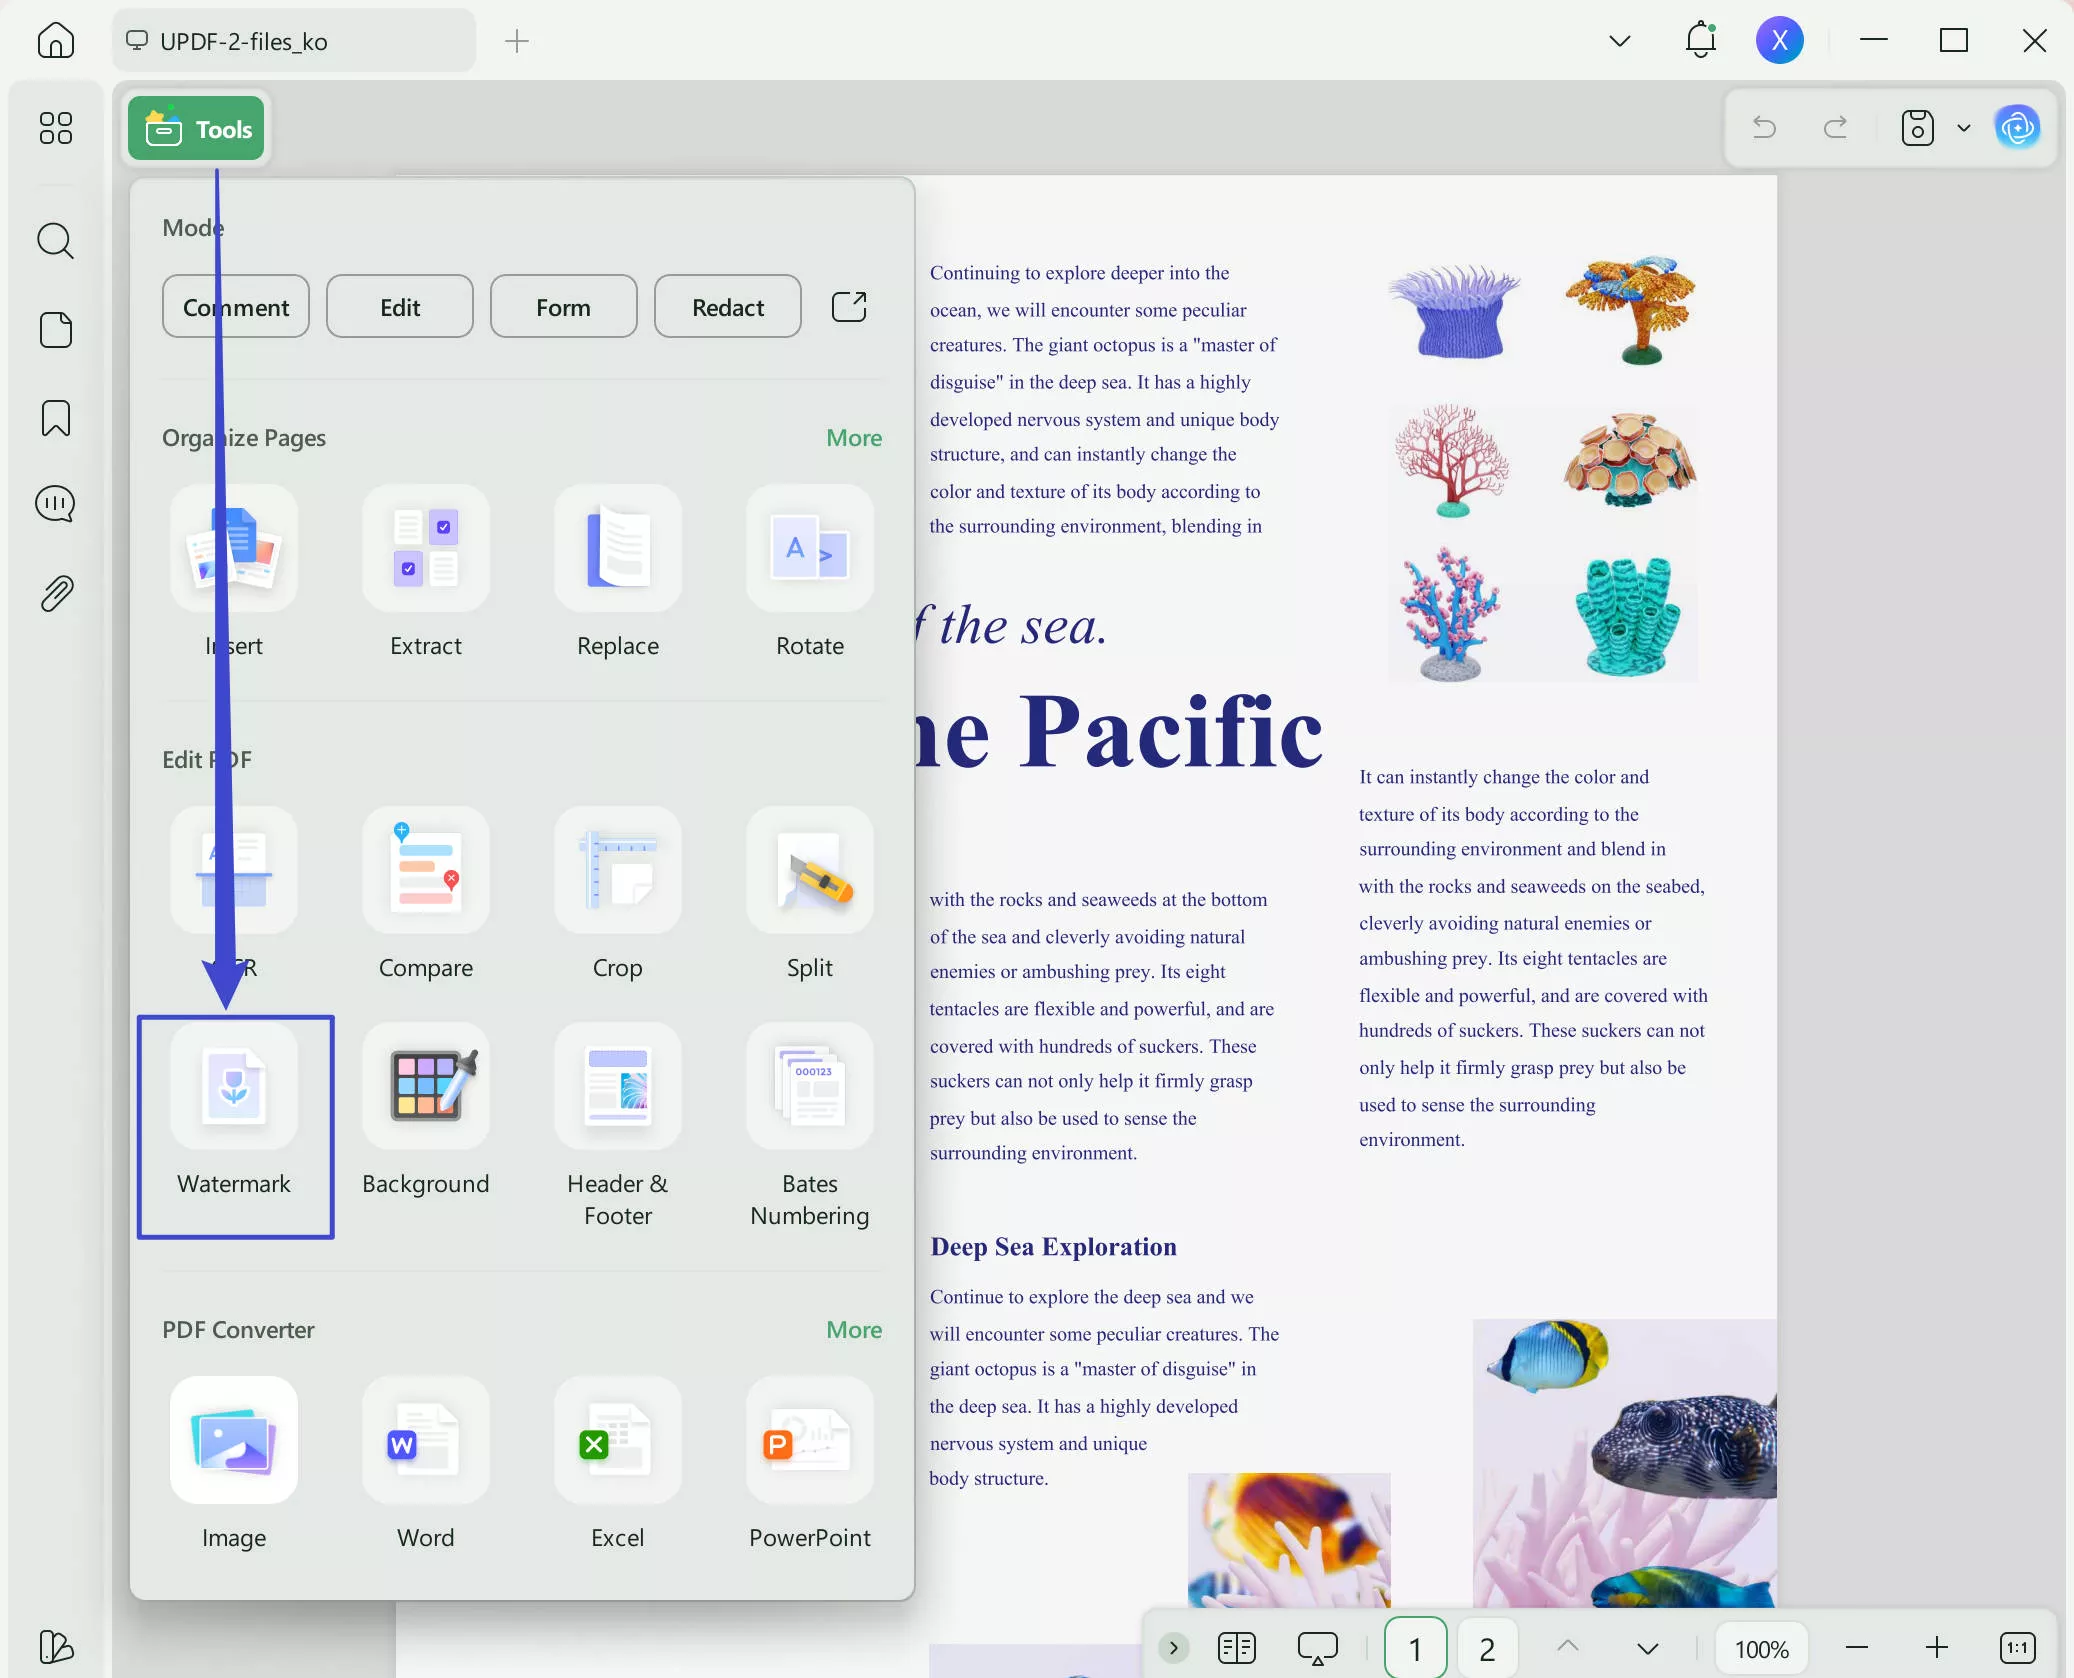
Step-2. From the panel of tools on the left, click “Tools”.
Step-3. From the tools on the top, click “Watermark”. A watermark window will open on the right side of the page, with a watermark that looks like page thumbnails. Move the cursor over the watermark in the side window, you can also click "Remove" to remove the watermark.
Step-4. Once done with deleting the watermark, save the file by using the “Save” option in the file menu.
UPDF has many other features. Once you have removed the watermark, you may want to use the UPDF for:
- Editing text and images, annotating text.
- Organise pages, split, crop, or link pages.
- Export PDF to other file formats.
- Add stamps, signatures, and passwords to protect the file.
- If you want to share the file, you can even generate a link or a QR code to share rather than sending it as an attachment.
- UPDF-integrated AI features can be used for chatting with PDF, asking questions like a chatbot, translating, summarizing, or explaining the PDF.
To avail of all these features, download and purchase UPDF right now. To know more about UPDF watch the YouTube video below.
Windows • macOS • iOS • Android 100% secure
Conclusion
Now if you ever wonder how to remove a watermark in Word, you know where to find the answer. Removing the watermark from the Word file should not be a problem for you now as the step-by-step methods in this article can help you achieve it in a few minutes. However, if you want to remove the watermark from a PDF file, you can use the UPDF. UPDF has so many features to offer. Download UPDF right now and enjoy all the great features.
Windows • macOS • iOS • Android 100% secure


 Engelbert White
 Enid Brown


