Batch Insert on Mac
UPDF now gives you the ability to add a PDF file on multiple PDFs with its Batch Insert feature with defined locations.
Launch UPDF and continue to the "Batch" > "Insert".
1. Add Files
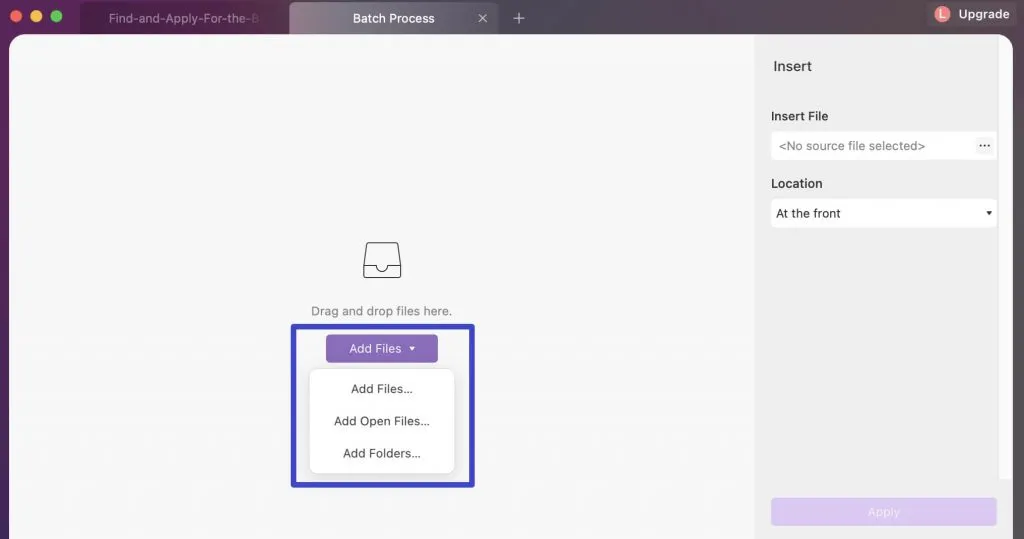
As a new window opens, you can click on "Add Files" to import the PDFs on which you want to insert the specific PDF.
You can consider using different options for adding PDF files on the platform. It includes
- Drag and Drop
Easily drag and drop all the PDF files from your Mac onto UPDF to execute the process.
- Add Files By Browsing
Click the "Add Files" option and continue to select "Add Files…" from the drop-down menu. Continue to add files by browsing them from the device.
- Add Open Files
You can select the "Add Open Files…" option from the drop-down menu to import files that are already open on a tab in UPDF.
- Add Folders
This option gives you the ability to add a complete folder of PDF documents with ease. Select "Add Folders" and continue to browse from your Mac.
2. Select a Source File
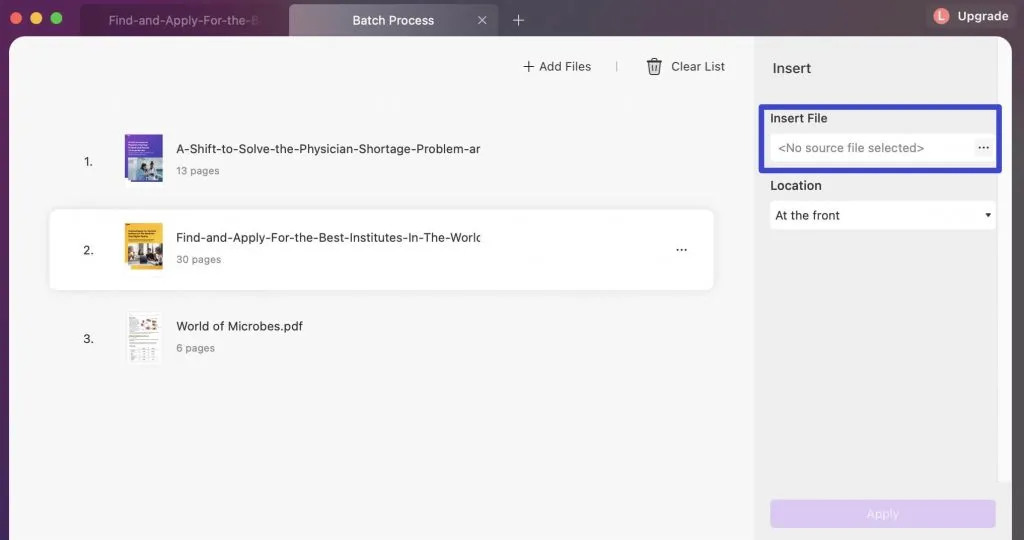
As you add the files, navigate to the right panel to insert the file in the "Insert File" tab to select a source file. This will be the file that will be batch inserted into all the imported PDFs.
3. Select the Position for Insertion and Apply
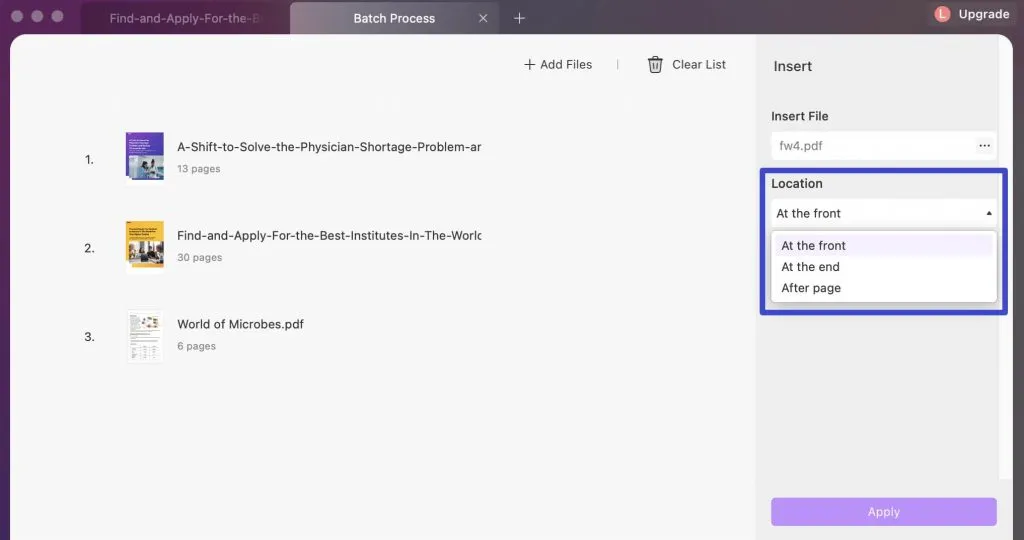
Browse the file by clicking on the "three-dots" icon that appears adjacent to it. Once you add the PDF, set the "Location" where you wish to insert it on pre-imported PDF documents.
You can select the option of "At the front," "At the back," or specify a page with the "After page" option.
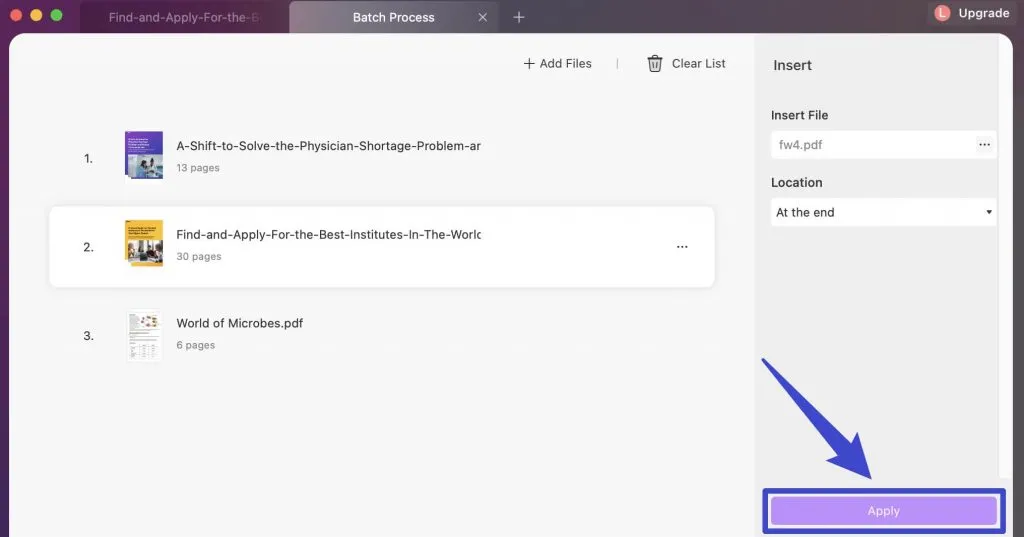
Once you are done with the settings, continue to select "Apply" and define the location of the PDF document in the window that opens.
4. Remove Files from List
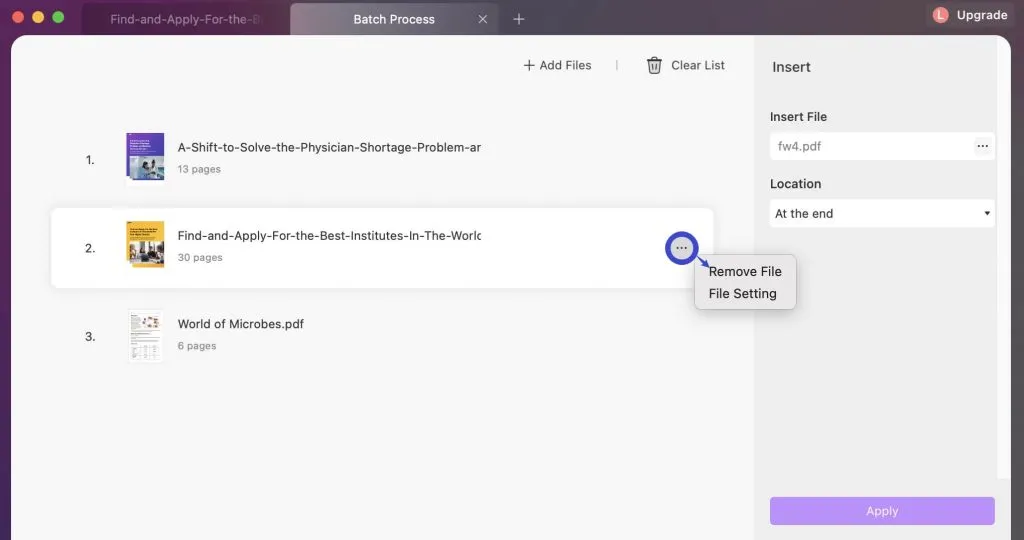
If you seek to clear a specific document from the list, lead to the specific file and tap on the "three-dots" icon alongside it. Select "Remove File" from the options to delete it from the list.
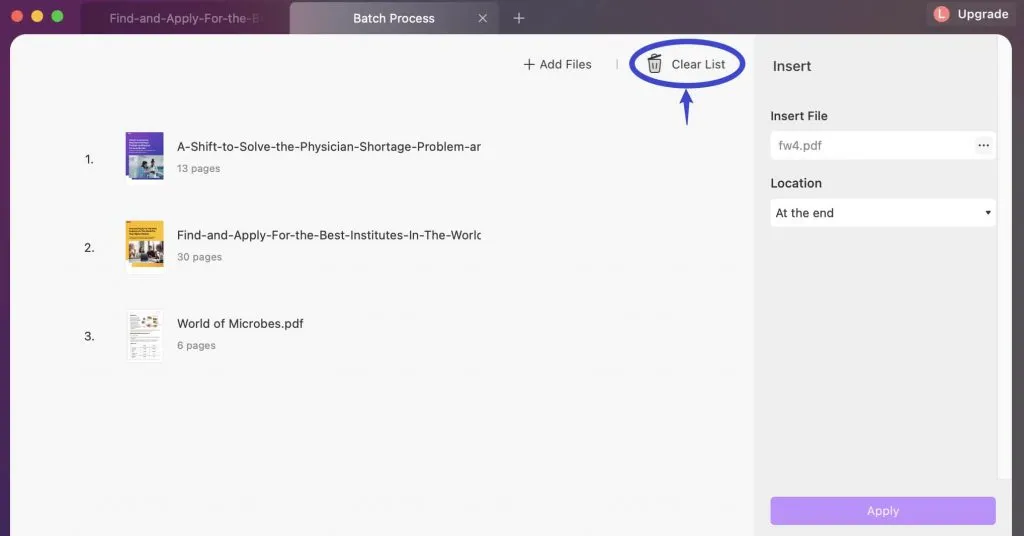
You can also tap on the "Clear List" option and confirm the prompt to delete all files from the list.
 UPDF
UPDF
 UPDF for Windows
 UPDF for Mac
 UPDF for iPhone/iPad
 UPDF for Android
 UPDF AI Online
 UPDF Sign
 Edit PDF
 Annotate PDF
 Create PDF
 PDF Form
 Edit links
 Convert PDF
 OCR
OCR PDF to Word
 PDF to Image
 PDF to Excel
 Organize PDF
 Merge PDF
 Split PDF
 Crop PDF
 Rotate PDF
 Protect PDF
 Sign PDF
 Redact PDF
 Sanitize PDF
 Remove Security
 Read PDF
 UPDF Cloud
 Compress PDF
 Print PDF
 Batch Process
 About UPDF AI
 UPDF AI Solutions
 AI User Guide
 FAQ about UPDF AI
 Summarize PDF
 Translate PDF
 Chat with PDF
 Chat with AI
 Chat with image
 PDF to Mind Map
 Explain PDF
 Scholar Research
 Paper Search
 AI Proofreader
 AI Writer
 AI Homework Helper
 AI Quiz Generator
 AI Math Solver
 PDF to Word
 PDF to Excel
 PDF to PowerPoint
 User Guide
 UPDF Tricks
 FAQs
FAQs UPDF Reviews
 Download Center
 Blog
Blog Newsroom
 Tech Spec
 Updates
 UPDF vs. Adobe Acrobat
 UPDF vs. Foxit
 UPDF vs. PDF Expert

