 UPDF for Windows
 UPDF for Mac
 UPDF for iPhone/iPad
 UPDF for Android
 UPDF AI Online
 UPDF Sign
 Edit PDF
 Annotate PDF
 Create PDF
 PDF Form
 Edit links
 Convert PDF
 OCR
OCR PDF to Word
 PDF to Image
 PDF to Excel
 Organize PDF
 Merge PDF
 Split PDF
 Crop PDF
 Rotate PDF
 Protect PDF
 Sign PDF
 Redact PDF
 Sanitize PDF
 Remove Security
 Read PDF
 UPDF Cloud
 Compress PDF
 Print PDF
 Batch Process
 About UPDF AI
 UPDF AI Solutions
 AI User Guide
 FAQ about UPDF AI
 Summarize PDF
 Translate PDF
 Chat with PDF
 Chat with AI
 Chat with image
 PDF to Mind Map
 Explain PDF
 PDF AI Tools
 Image AI Tools
 AI Chat Tools
 AI Writing Tools
 AI Study Tools
 AI Working Tools
 Other AI Tools
 AI Bookmark Generation
 AI Bookmark Summary
 AI Watermark Generation
 AI Background Generation
 AI Sticker Generation
 AI Stamp Generation
 AI Editing Suite
 UPDF Copilot
 AI Page Management
 AI Semantic Search
 PDF to Word
 PDF to Excel
 PDF to PowerPoint
 User Guide
 UPDF Tricks
 FAQs
FAQs UPDF Reviews
 Download Center
 Blog
Blog Newsroom
 Tech Spec
 Updates
 UPDF vs. Adobe Acrobat
 UPDF vs. Foxit
 UPDF vs. PDF Expert
Have you created the manuscript for your next big book, but wonder how to turn it into a Kindle-ready eBook? I was once at your stage, feeling overwhelmed with the formatting hassle. That's when I used Kindle Create, which made the process much simpler.
In this guide, I will teach you how to use Kindle Create to turn your manuscript into a formatted eBook and then use KDP to publish it. So, stick around with this step-by-step guide to publish your next eBook within the next hour.
Important:
Windows • macOS • iOS • Android 100% secure
Part 1. What Is Kindle Create and Why Use It?
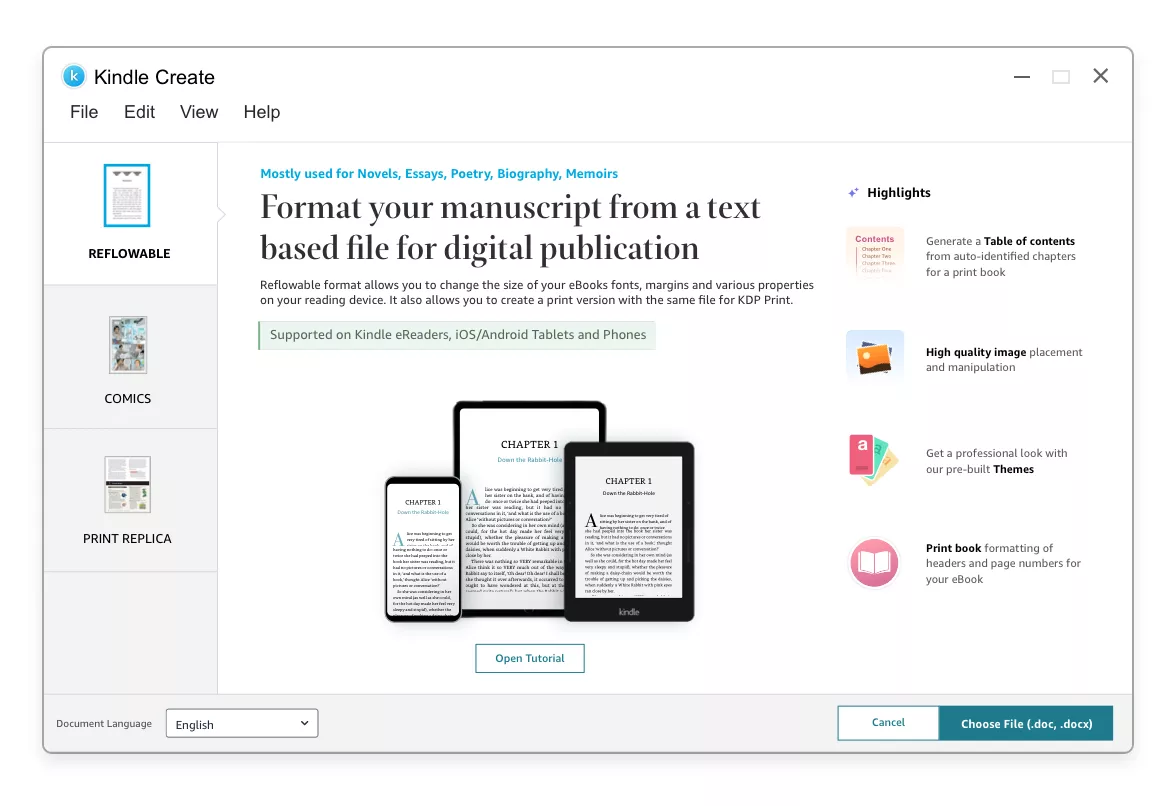
Kindle Create is Amazon's free book formatting software. It turns your completed manuscript into an ebook ready to publish on Kindle Direct Publishing (KDP).
It can accept eBook manuscripts in DOCX, HTML, RTF, TXT, and PDF formats and provides output in KPF or EPUB format. It supports both reflowable eBooks for novels and fixed-layout eBooks ideal for illustration-heavy content.
The Kindle Create process works by importing your manuscript and automatically applying formatting styles. You get to customize fonts, themes, and layout. Moreover, it also lets you add a table of contents, chapter headings, page breaks, and more to make your eBook reader-friendly.
The key reasons to use Kindle Create include:
- Free tool for Kindle eBook formatting.
- Supports multiple manuscript formats, including DOCX, HTML, RTF, TXT, and PDF.
- Outputs files in KPF or EPUB formats compatible with KDP.
- Handles both reflowable and fixed-layout eBooks.
- Automatically applies professional formatting styles.
- Allows customization of fonts, themes, and layouts to match your book's style.
- Makes it simple to add essential eBook elements, including a table of contents, chapter headings, page breaks, hyperlinks, images, etc.
- Provides a preview function to see how your eBook looks across various Kindle devices and apps.
Simply put, Kindle Create provides a quick way to create a KPF for free and make your eBook ready for publication through KDP.
Kindle Direct Publishing (KDP) allows users to self-publish eBooks, hardcover books, and paperbacks for free. After formatting the eBook with Kindle Create, you can upload the file to KDP for publishing and global distribution. The close relationship between Kindle Create and KDP ensures your book maintains formatting integrity throughout the process.
Part 2. Refine Your Manuscript with UPDF Before Kindle Formatting
Kindle Create isn't friendly for manual formatting. Setting heading types, adjusting text alignment, and making other changes directly in the tool are limited and complicated. That's why it is recommended to make changes in your manuscript before uploading to Kindle Create eBook. This is where UPDF comes into action.
Windows • macOS • iOS • Android 100% secure
UPDF is a versatile AI document editor and annotator tool that provides an all-in-one platform to format your manuscript with an intuitive approach. It lets you add/modify text, images, and other elements. Moreover, you can also annotate the document or convert it to other formats.
The key features of UPDF you can enjoy include:
- Edit or annotate text, add images or stickers, add bookmarks, and more.
- OCR scanned manuscript pages to make text selectable and editable.
- Convert DOC manuscript to PDF or convert PDF manuscript to DOC easily, with format preserved.
- Ask UPDF AI to provide writing inspiration when you are stuck or proofread your content to optimize quality.
- Organize pages by adding, deleting, replacing, or rearranging them.
In short, UPDF provides an all-in-one, modernized platform to format your manuscript before you upload it to Kindle Create. Download UPDF now and have a well-formatted manuscript for a faster eBook creation process that results in a professional-quality Kindle eBook.
Windows • macOS • iOS • Android 100% secure
Part 3. Creating eBooks with Kindle Create
Impressed with Kindle Create eBook capabilities? Let's now look into the steps on how to create an eBook with Kindle Create:
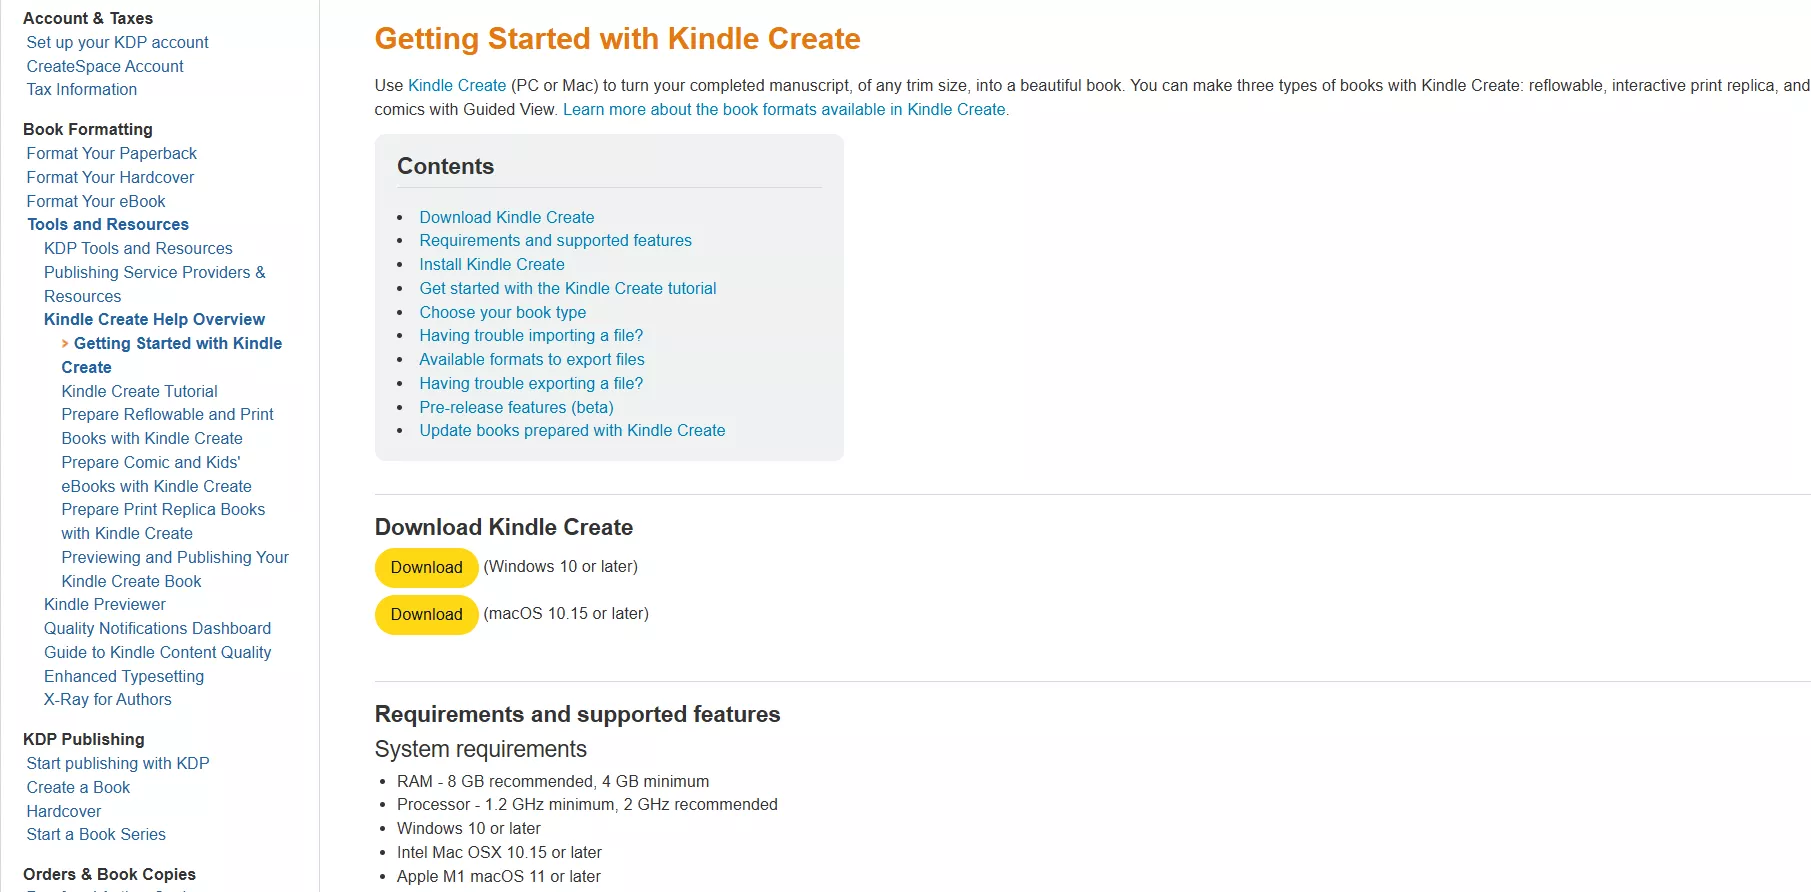
Step 1. Download and Install Kindle Create
Go to the KDP Amazon webpage and download the Kindle Create software for Windows or macOS. Afterward, follow the on-screen instructions to complete the installation.
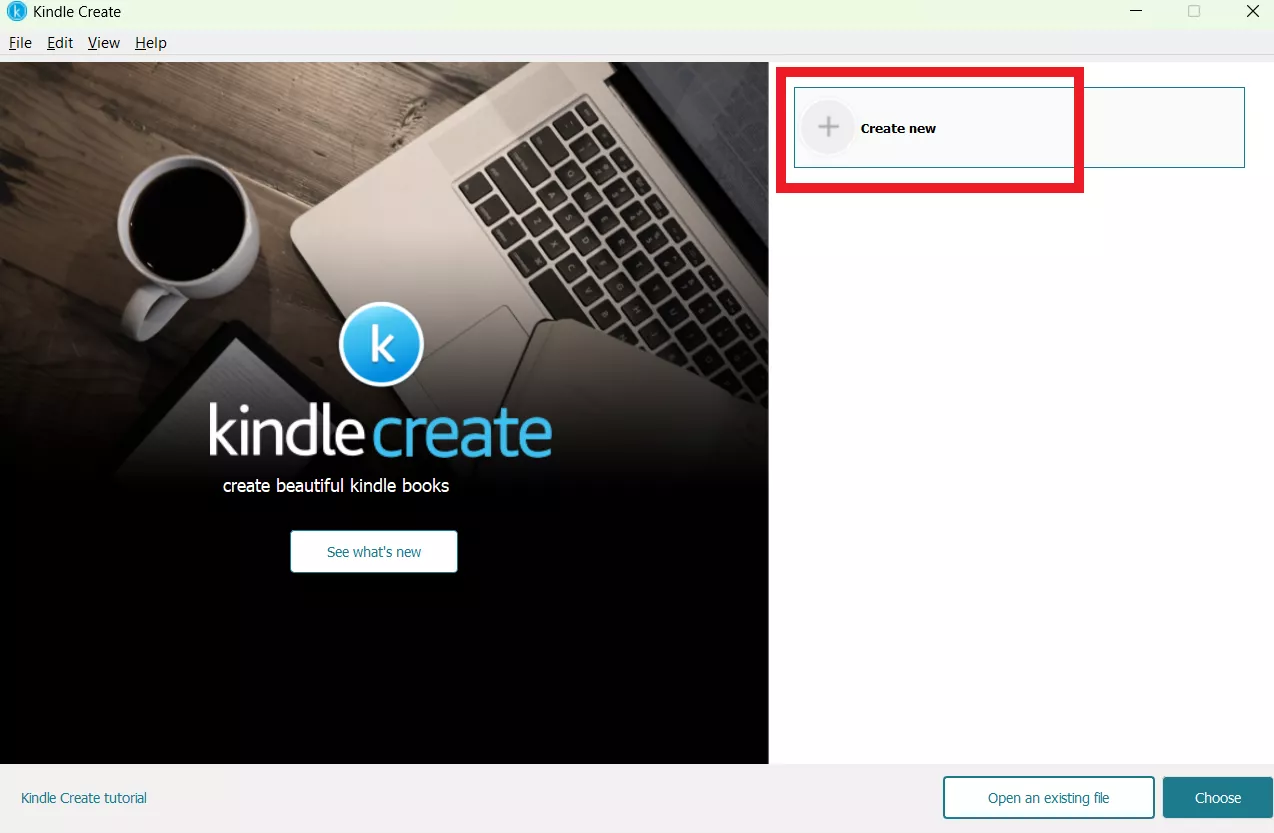
Step 2. Create New Project
From the home screen, click Create new.
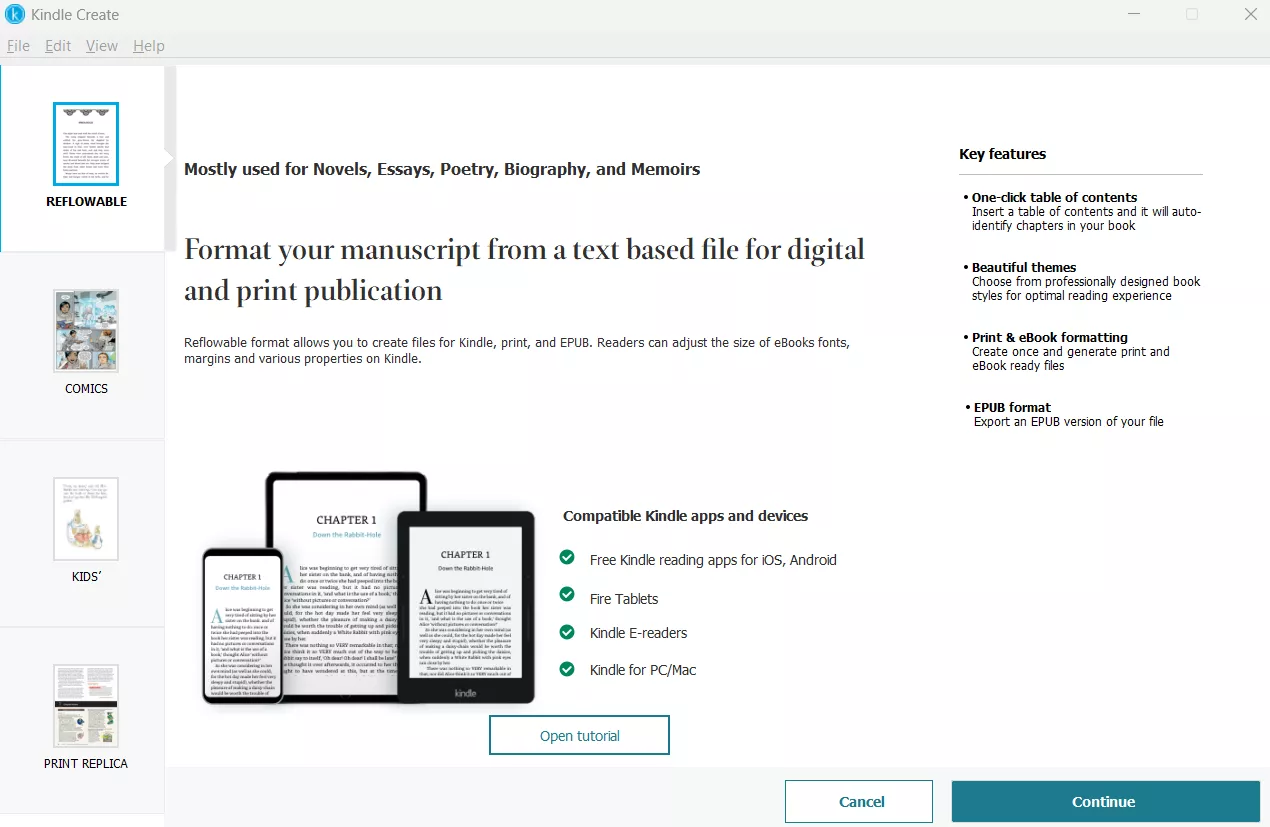
Next, you have to choose the format:
- Reflowable - Text-heavy books.
- Comics - Graphic novels and comic-style layouts.
- Kids - Children's books with interactive and colorful elements.
- Print Replica - Preserves exact page layouts of print edition.
Once selected, click Continue.
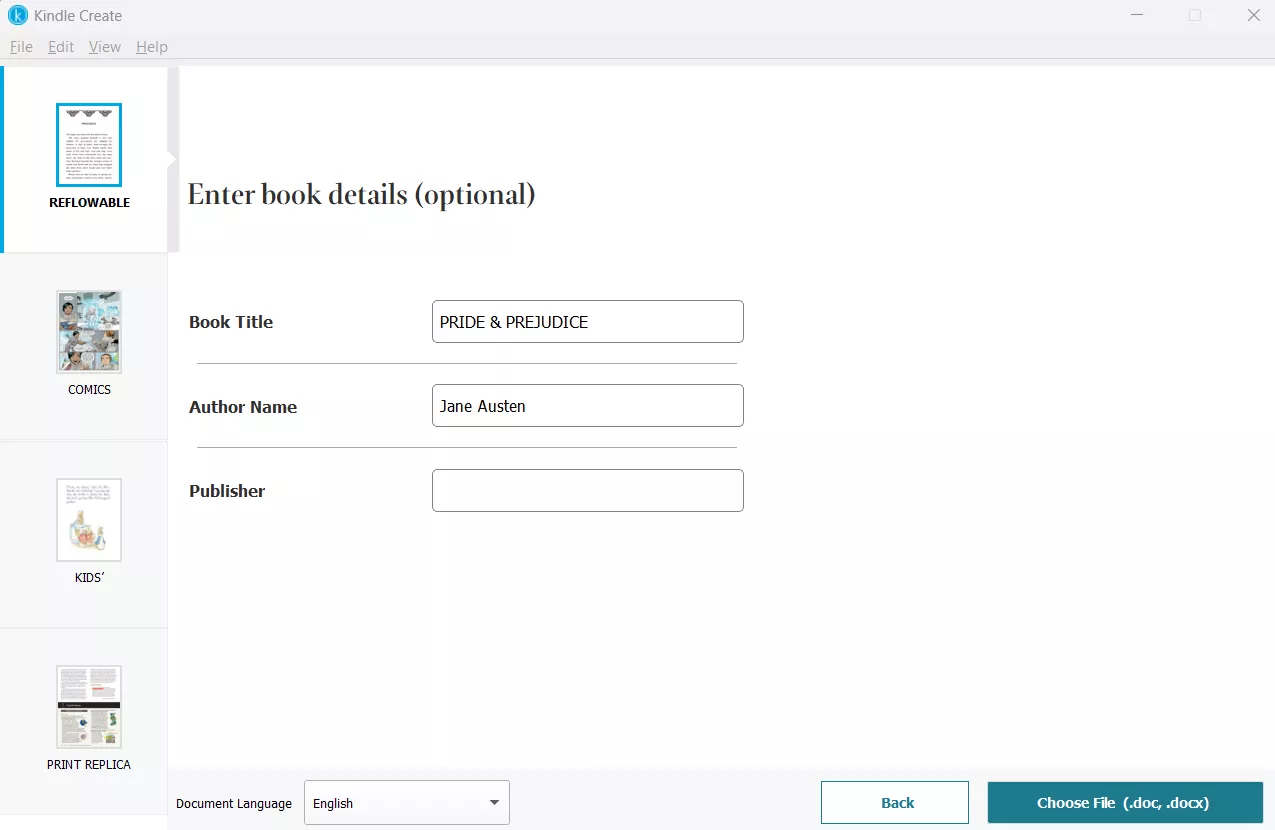
Enter book details and click the Choose File button to upload the manuscript.
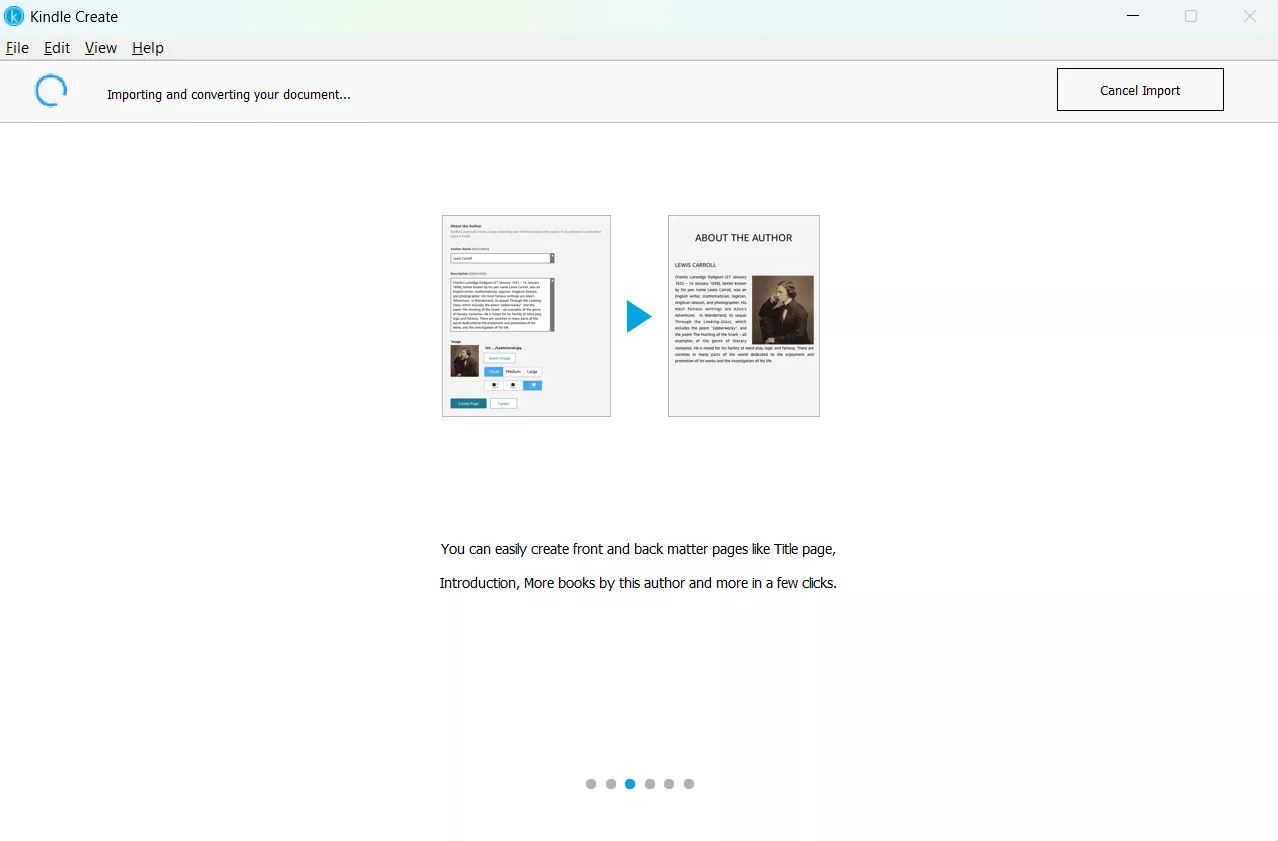
Now wait for Kindle Create to import and convert your document.
Step 3. Customize the Elements and Formatting
Kindle Create offers a wide range of customization options. First, it will automatically pull out a list of Suggested Chapter Titles, which you can review and remove unwanted ones.
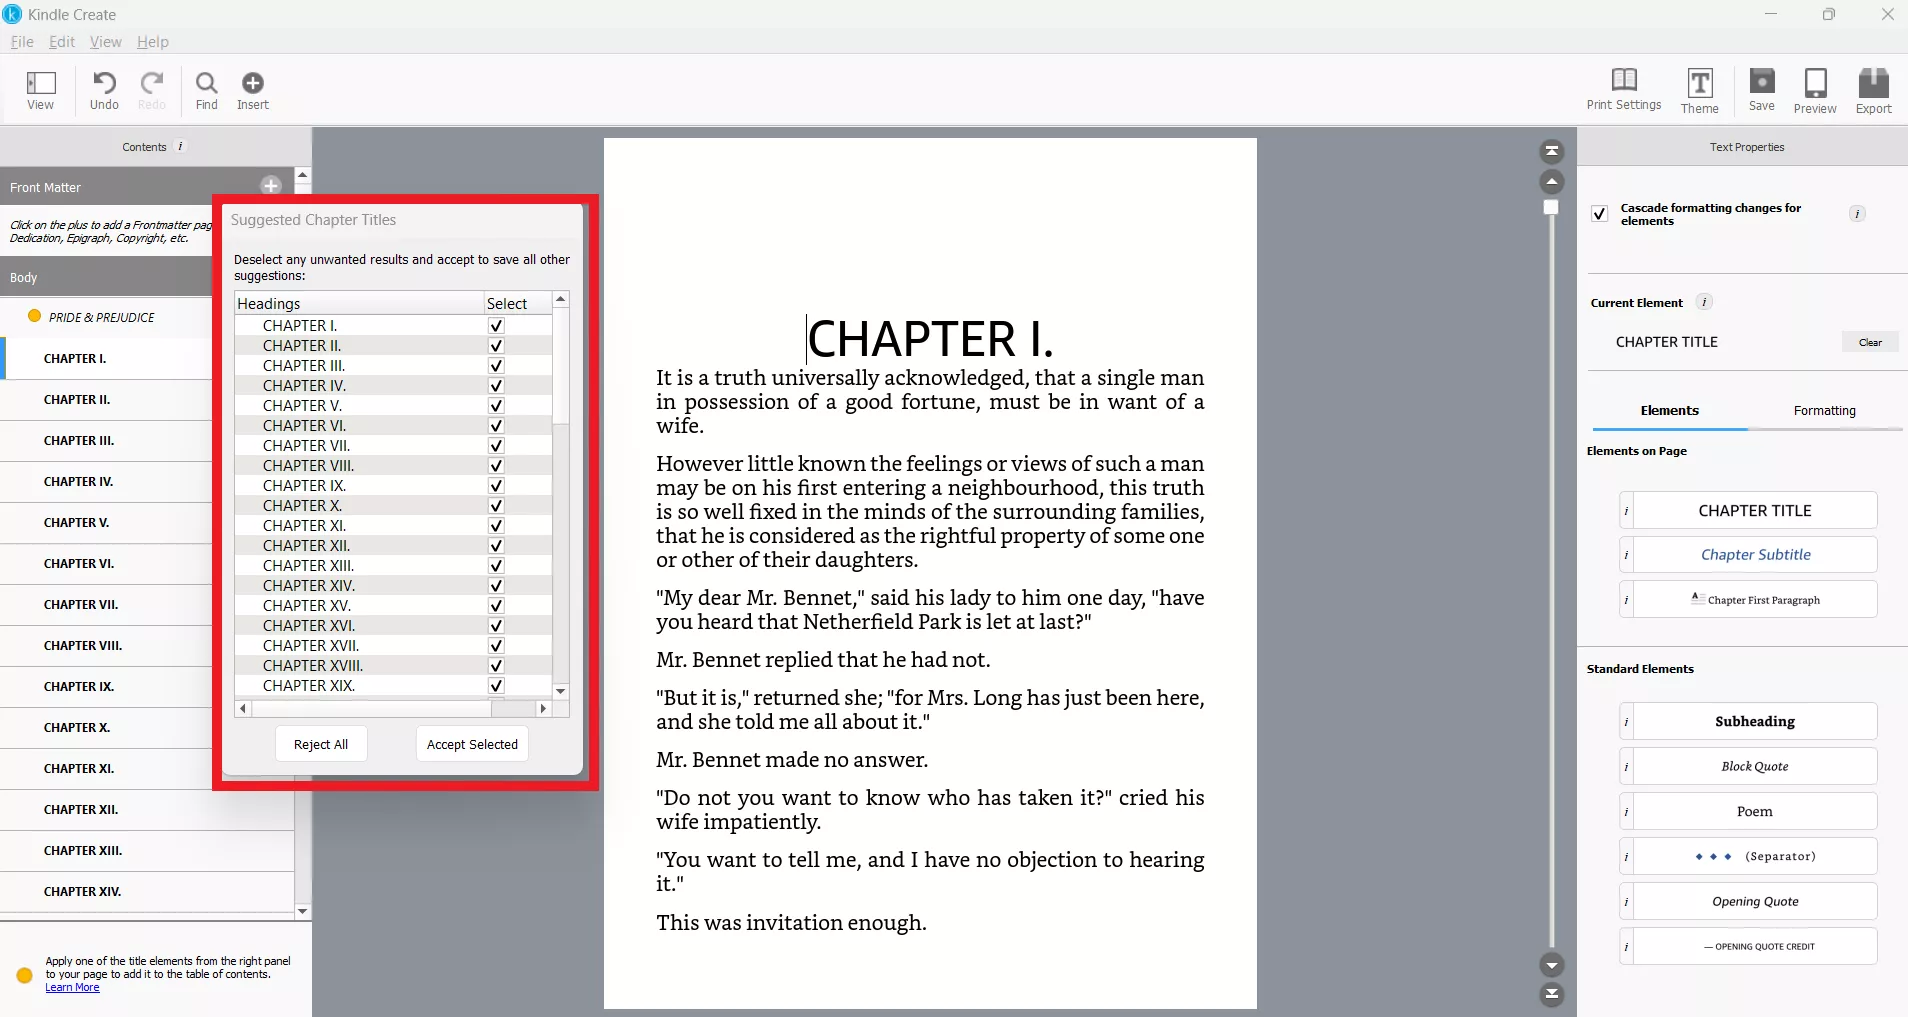
Next, use the Elements section from the right panel to adjust title, subtitle, paragraph, quote, separator, and more. For example, I have added a drop cap to the first sentence of the paragraph to make it look more visually appealing.
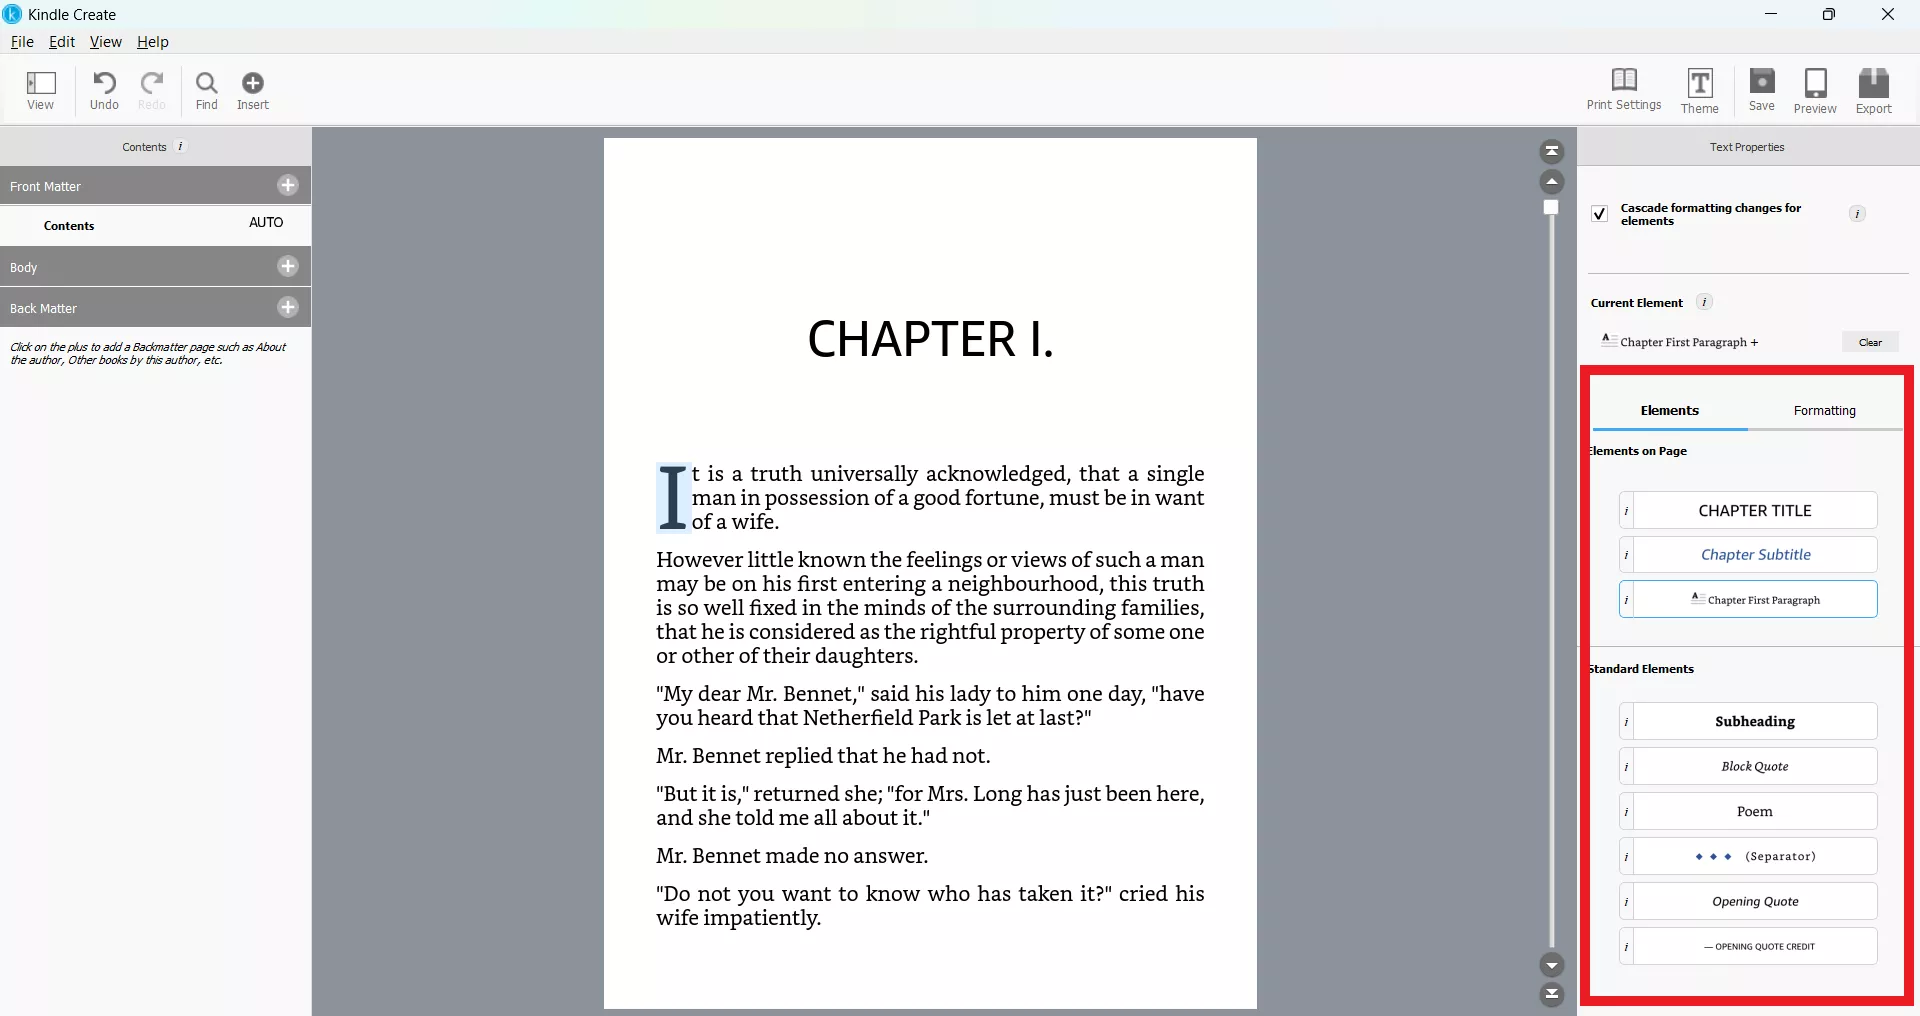
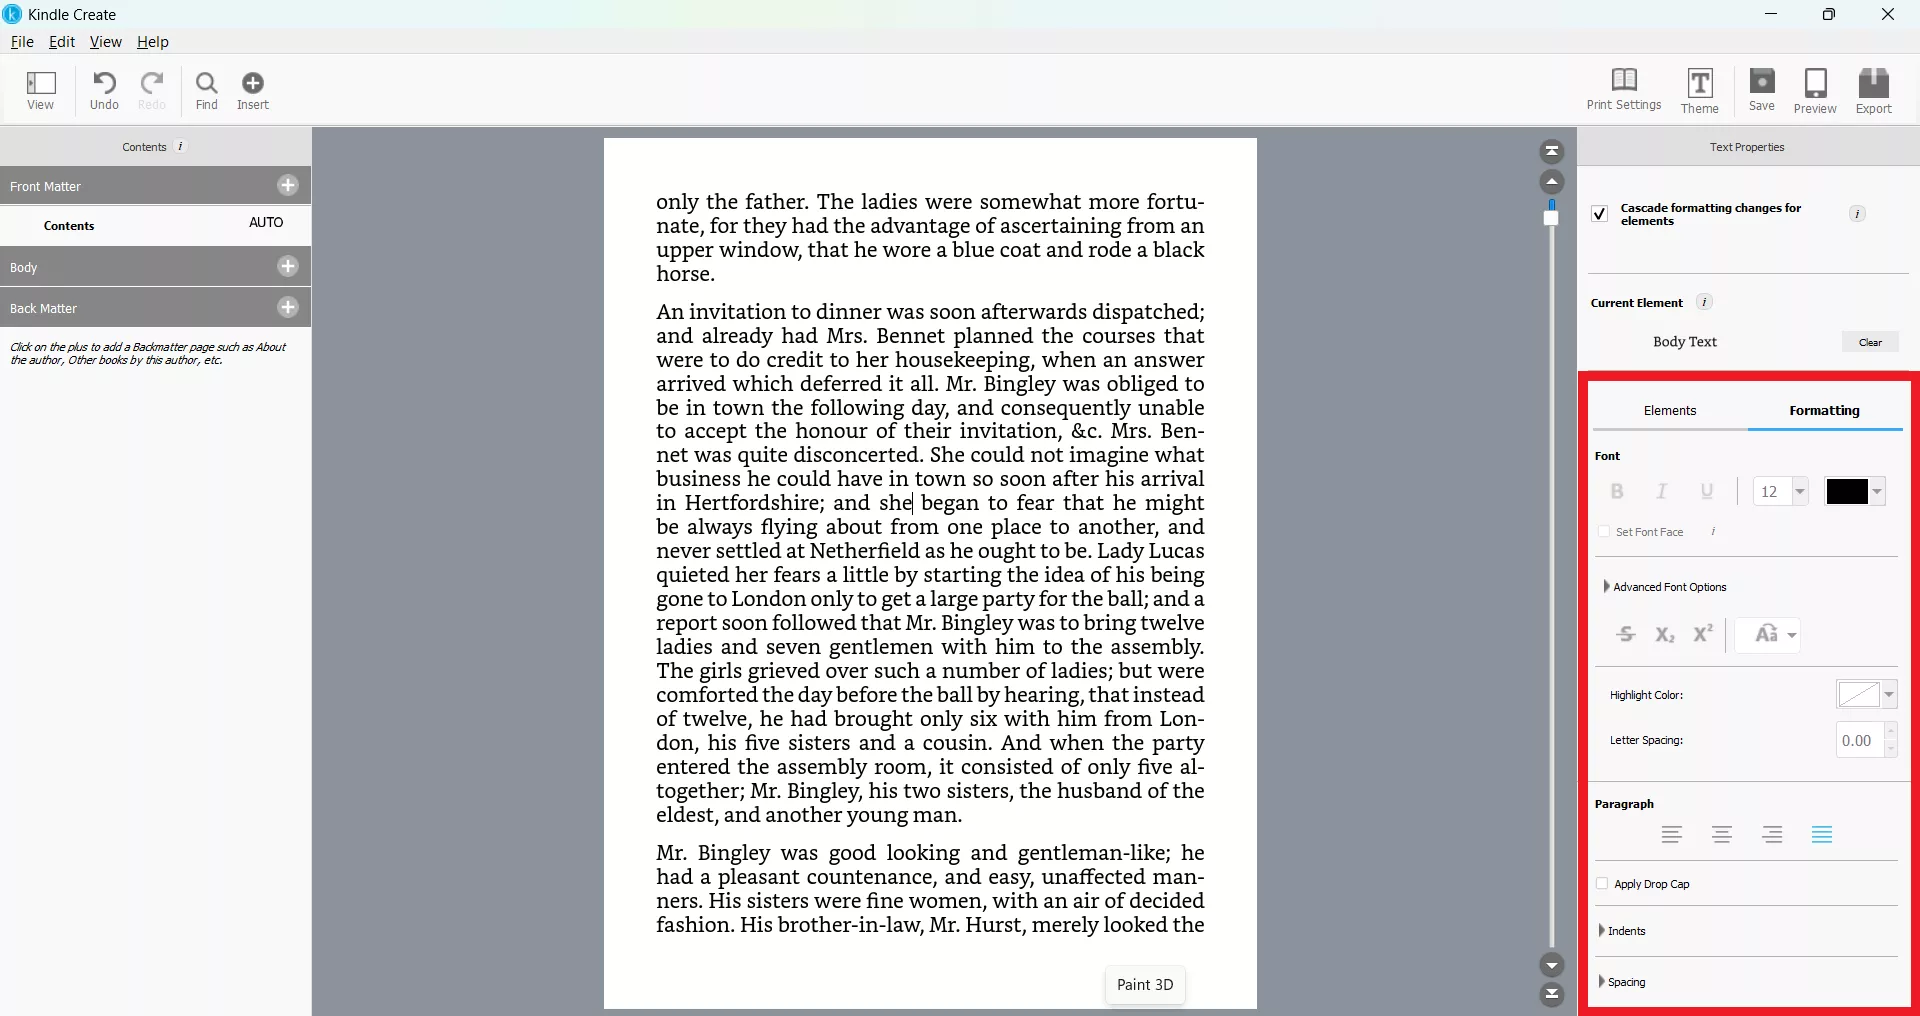
In the Formatting section, you can customize the font, indents, spacing, and more.
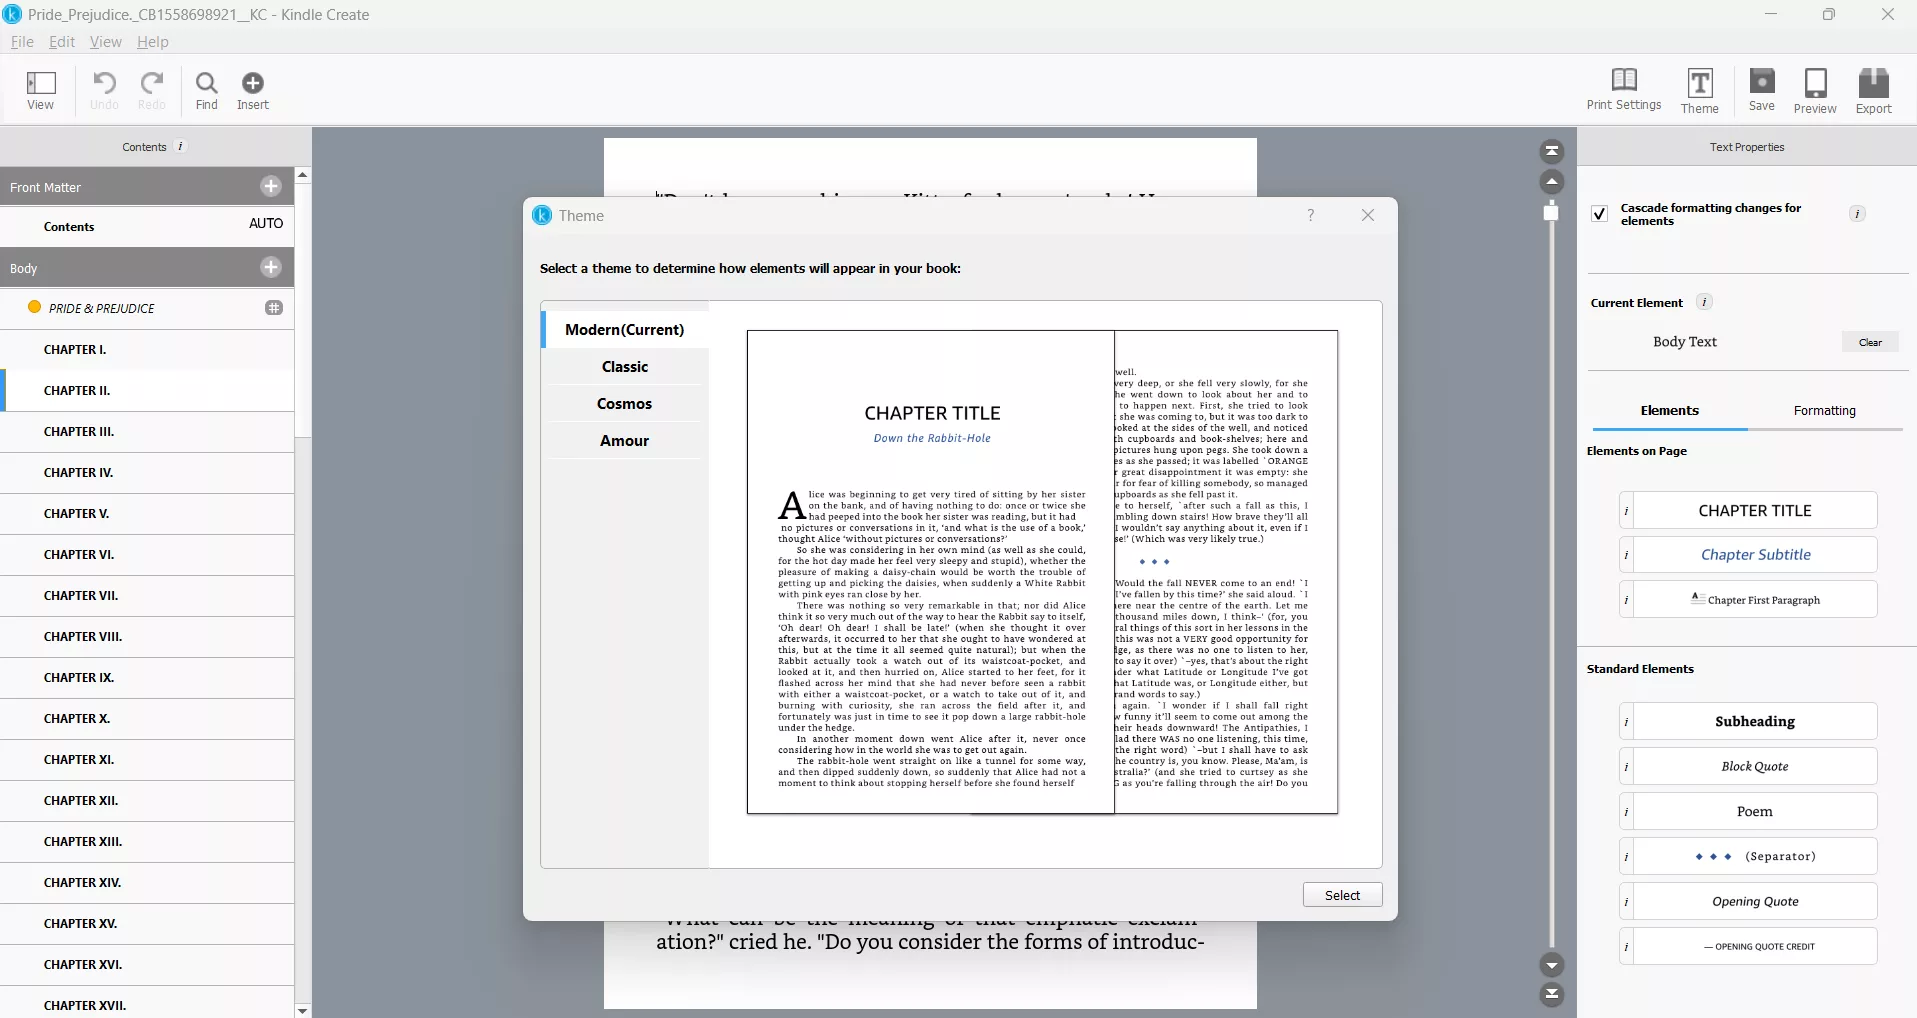
You also get to change the Theme. You can switch between Modern, Classic, Amour, or Cosmos.
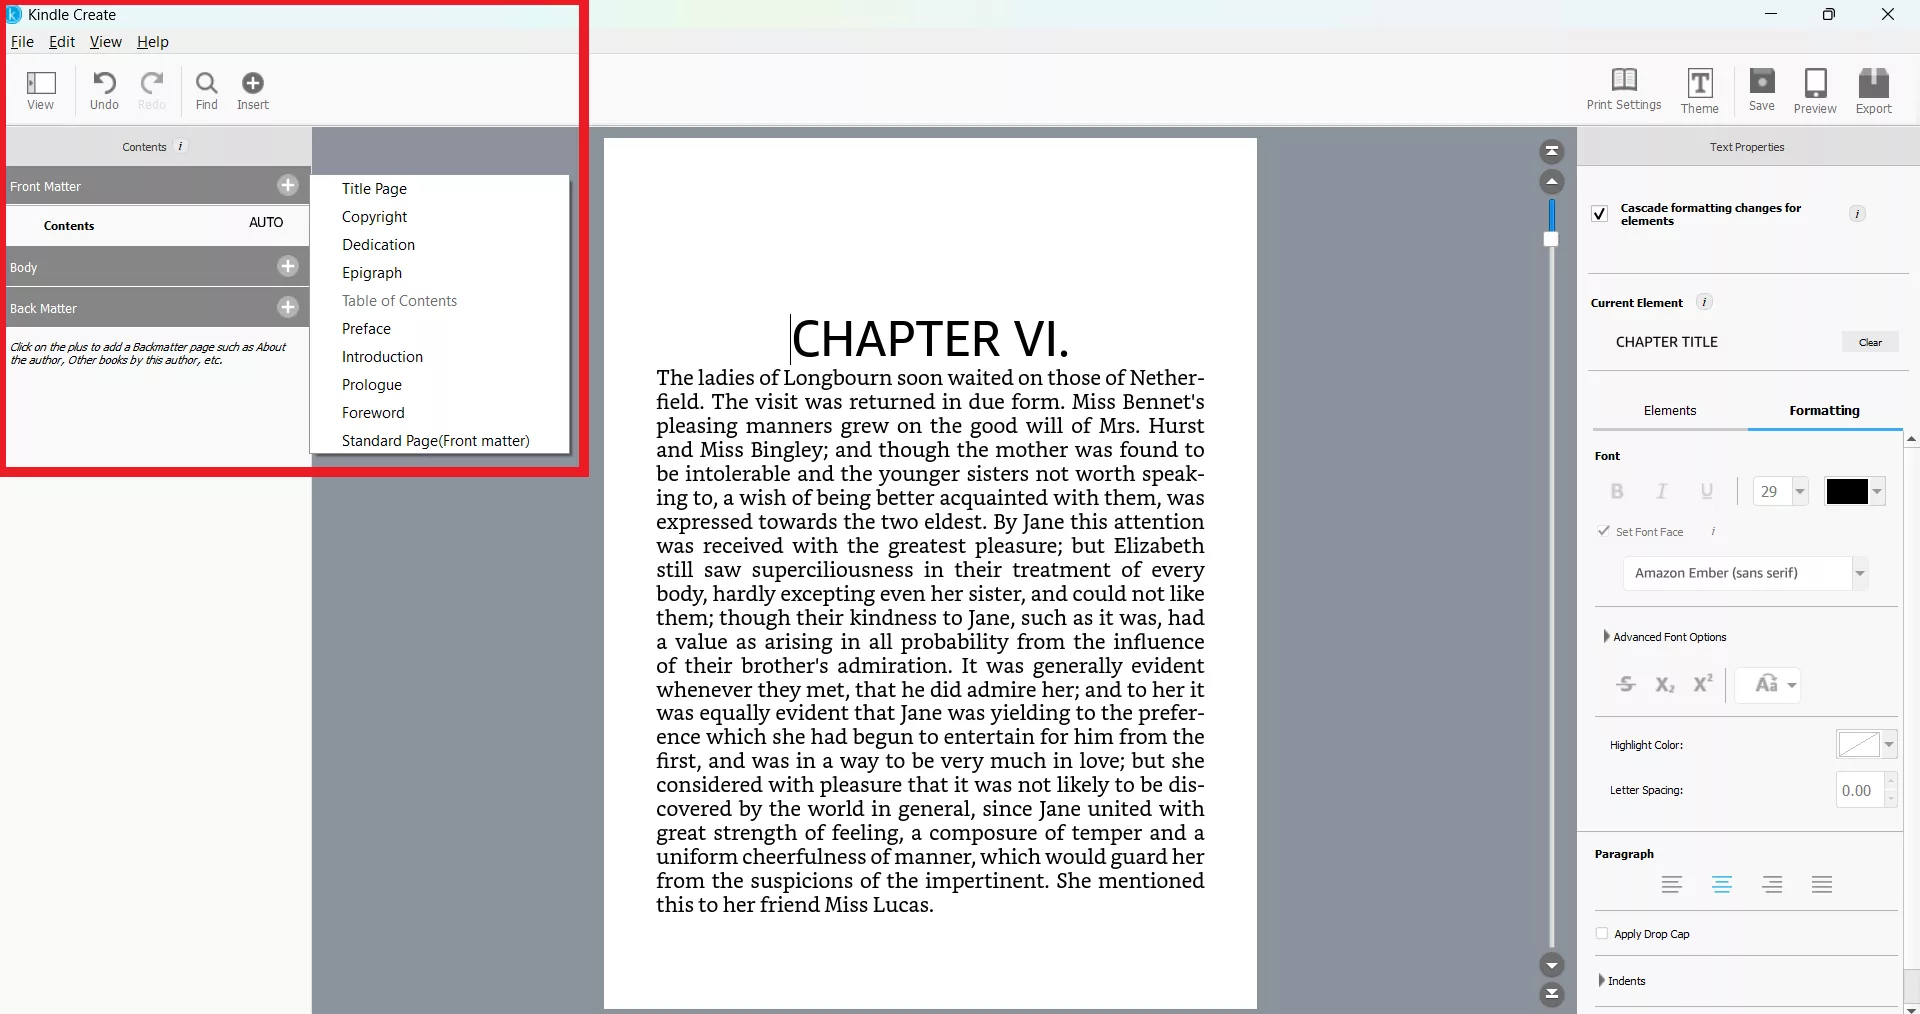
In addition, you can add Front and Back Matter from the left panel. You can insert or edit your table of contents, dedication, and copyright pages from within the tool.
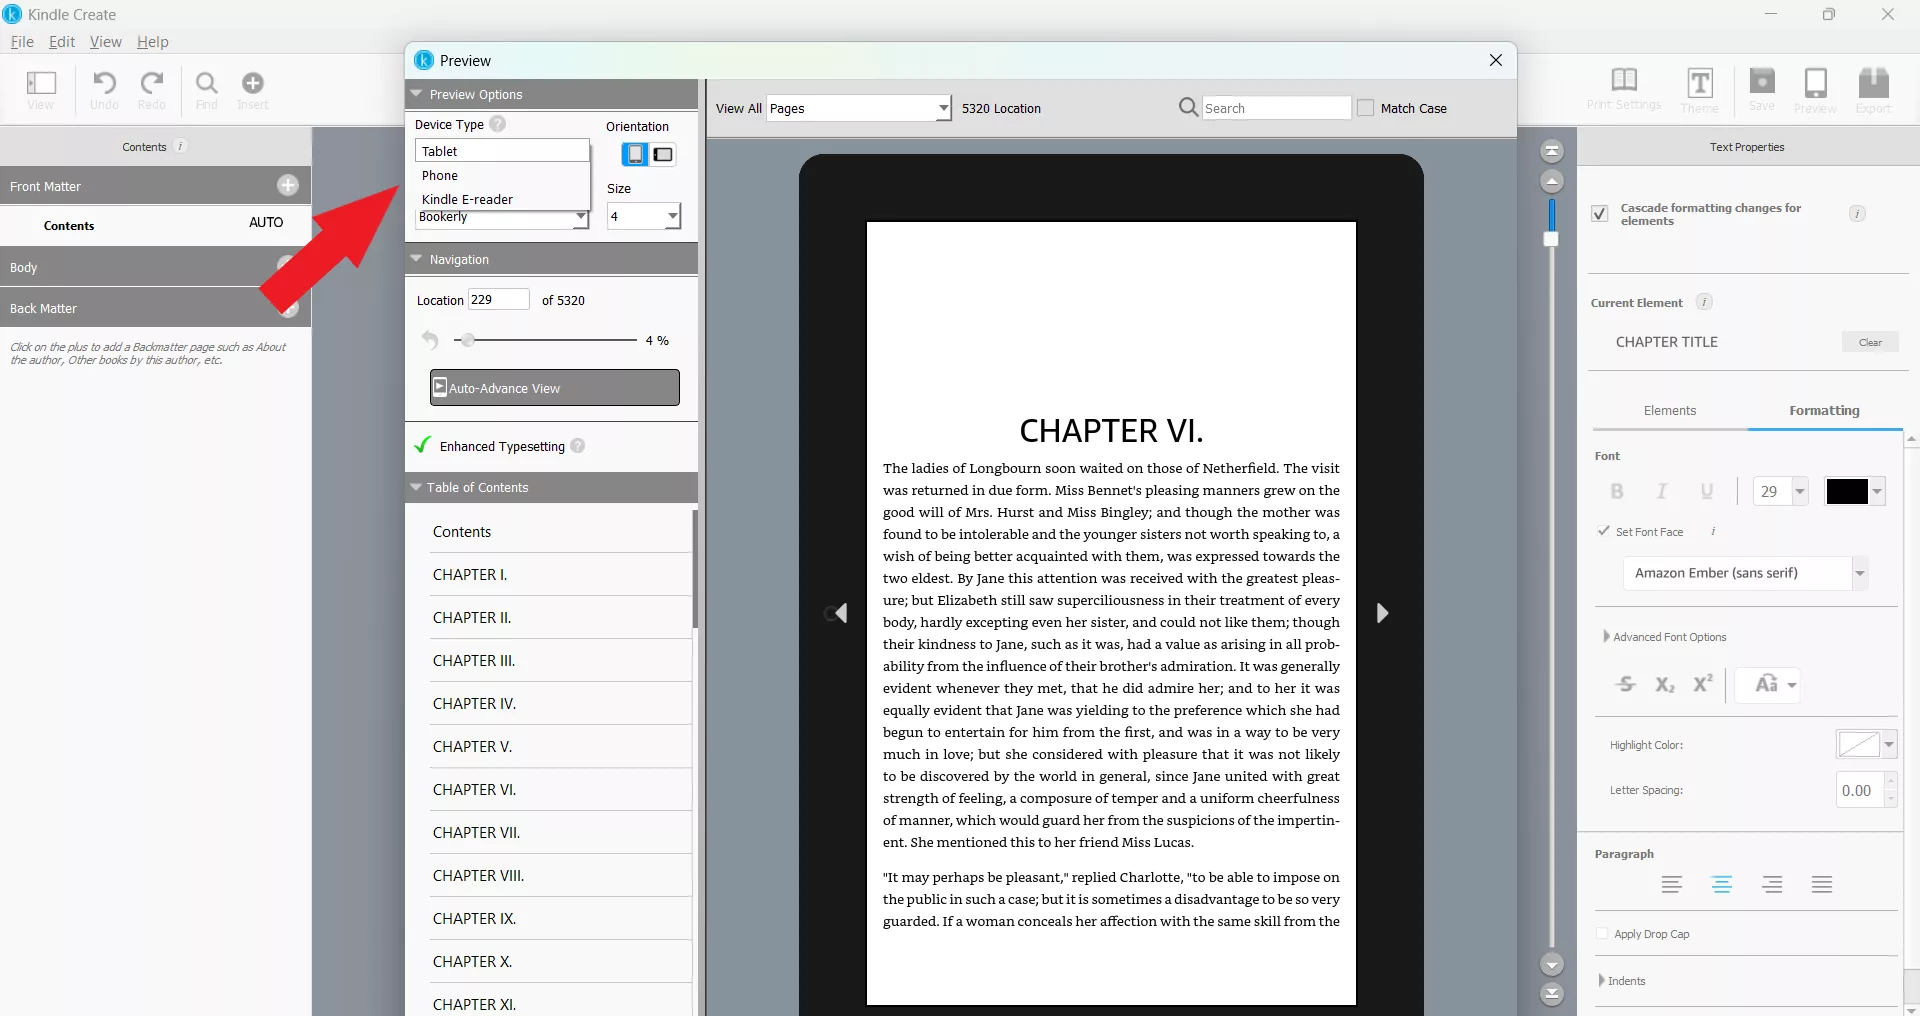
Step 4. Preview Your eBook
Kindle Create gives you the option to preview your eBook before export. The best part is that you can select the device type (tablet, phone, or Kindle E-reader) to preview exactly how the eBook will show in those devices.
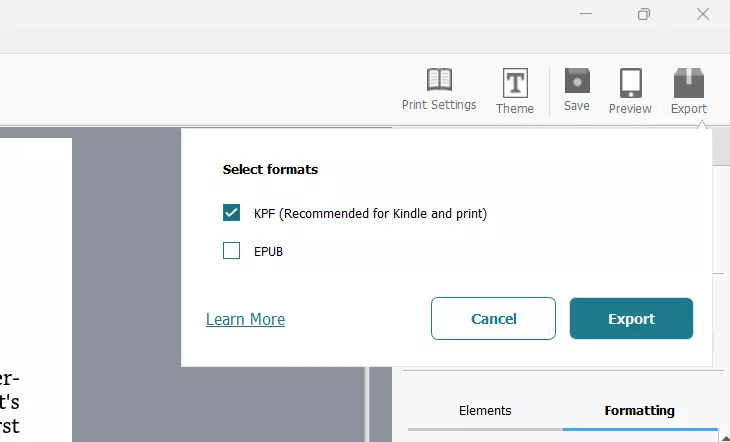
Step 5. Export Your eBook
After you are satisfied with everything, click the Export button in the top right corner. Kindle Create will ask you to choose between KPF and EPUB. If you want to publish with KDP, choose KPF. Alternatively, if you want to distribute the eBook from other platforms, choose the EPUB format.
Part 4. How to Use KDP?
Now that you have the formatted Kindle Create eBook, it's time to upload and publish it on Kindle Direct Publishing (KDP). The steps are as follows:
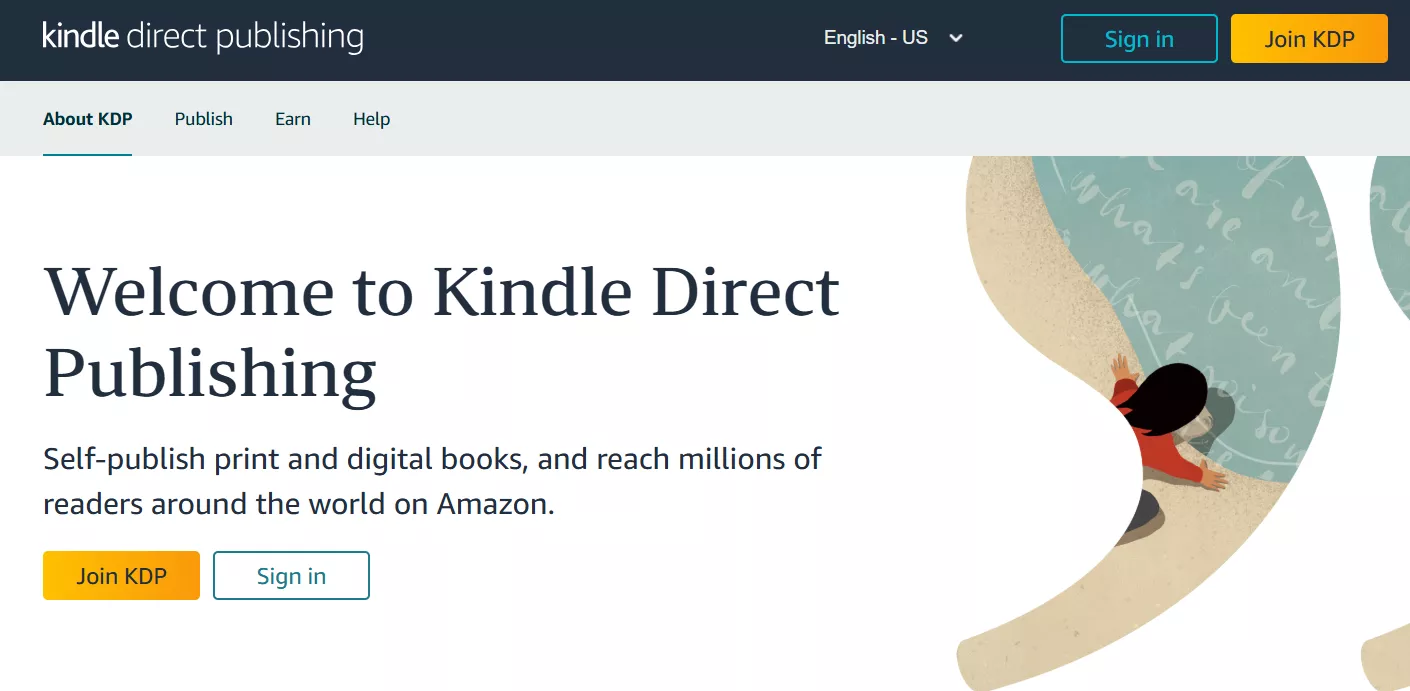
Step 1. Sign Up with KDP
Go to the KDP Amazon website and sign up. If you already have an account, you can sign in directly.
Step 2. Begin Book Creation
From the main dashboard, click Create new title or series.
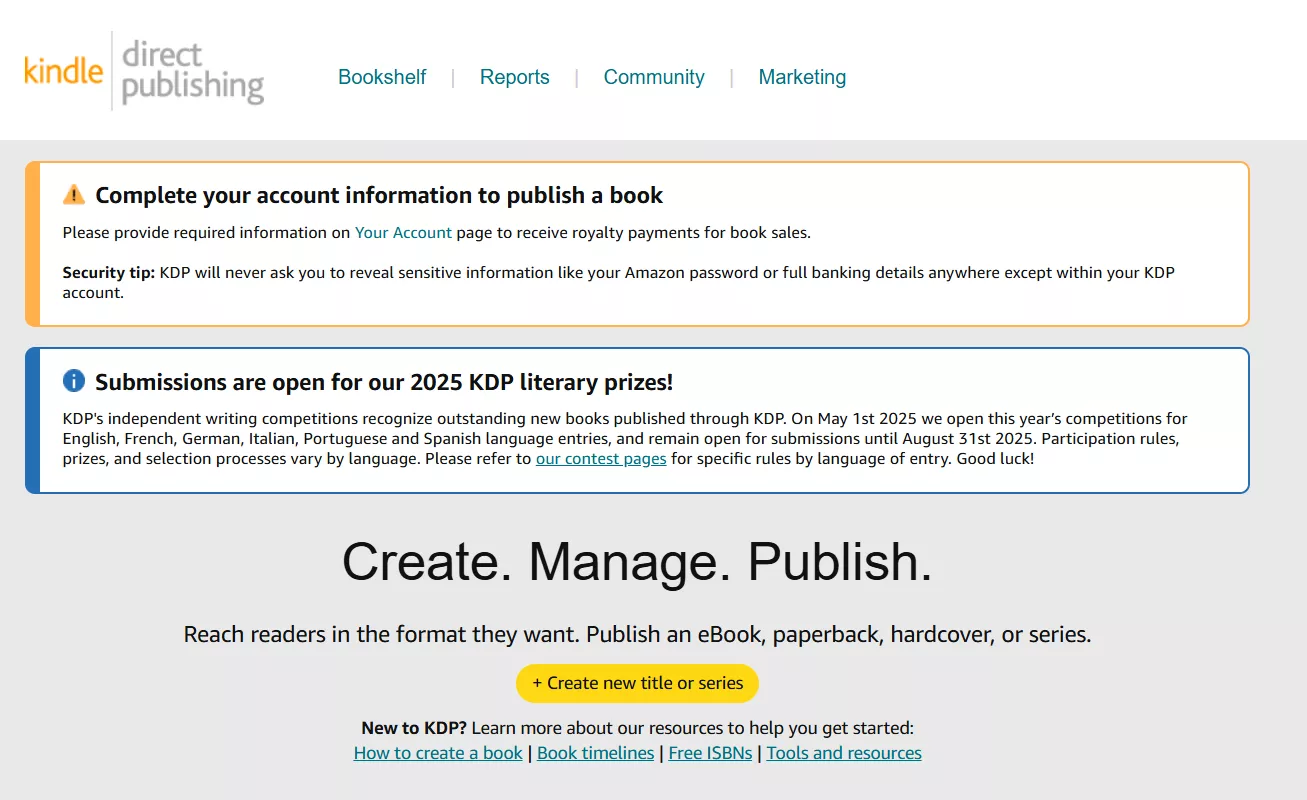
Now, you have to pick an option on what you would like to create. Since our target is to create a Kindle eBook, click the Create eBook button.

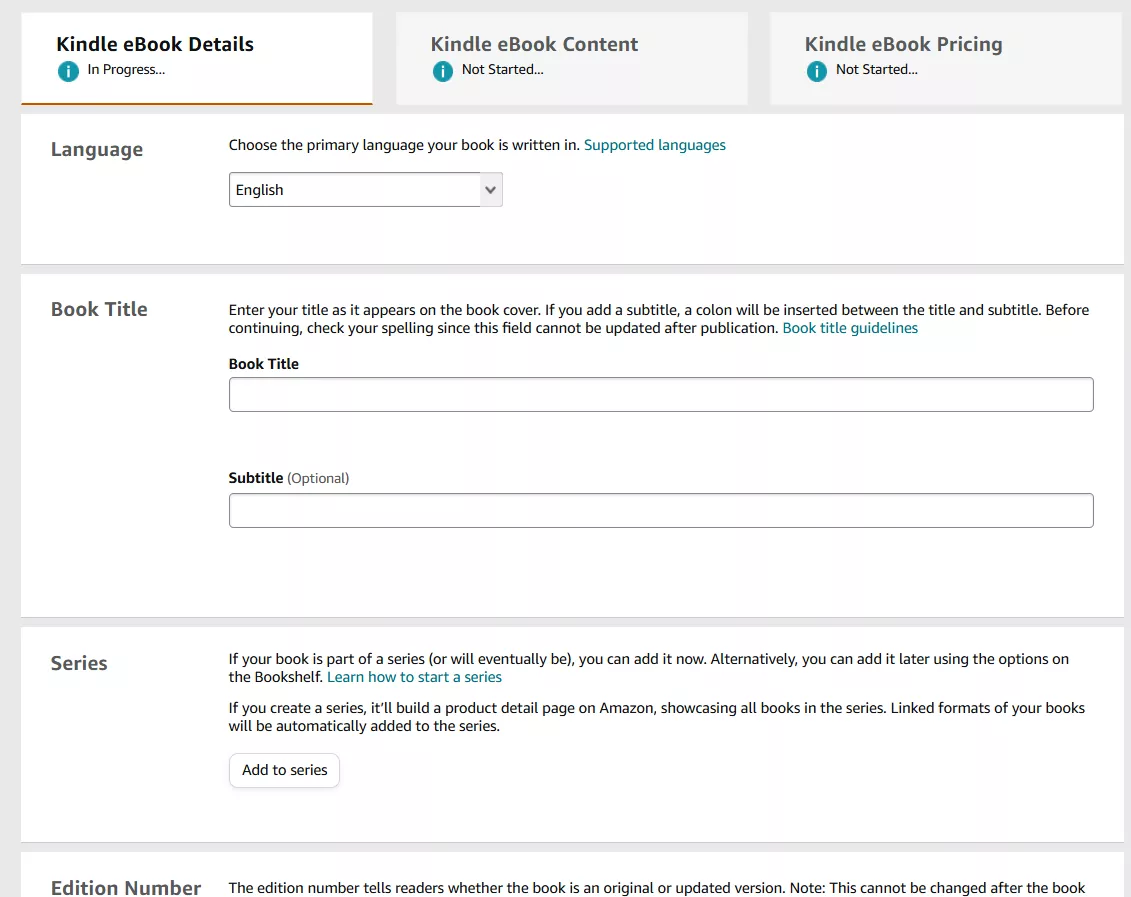
Step 3. Enter Kindle eBook Details
Next, you have to fill out all the required details about your eBook. It includes:
- Language
- Book title
- Series (if applied)
- Edition number
- Author
- Contributors
- Description
- Publishing rights
- Primary audience
- Primary marketplace
- Categories
- Keywords
- Pre-order
Once you have entered all the details, click Save and Continue.
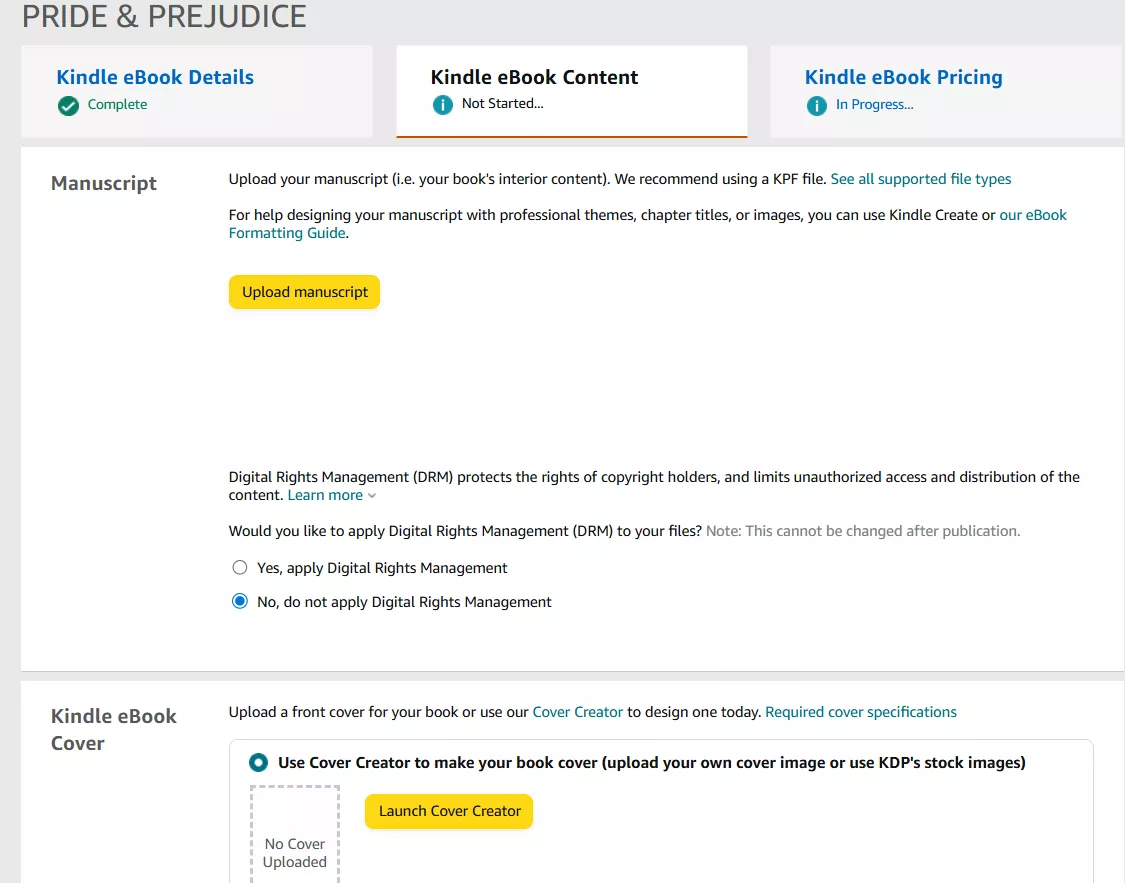
Step 4. Enter Kindle eBook Content
Now, you have to upload the manuscript, which should be the KPF file you generated from Kindle Create. You also have to upload the front cover.
Besides that, you can customize the other settings, such as the preview option, ISBN, accessibility features, and more. Once done, click Save and Continue.
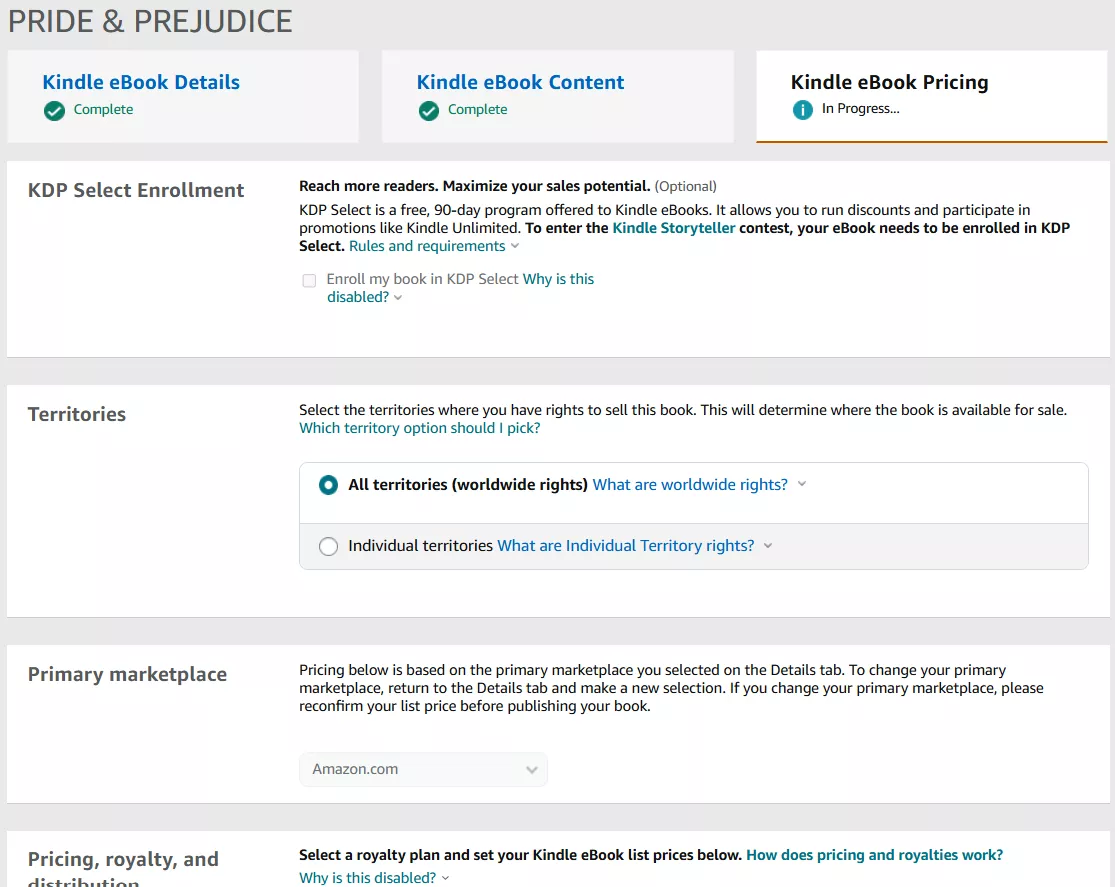
Step 5. Finalize Kindle eBook Pricing
The last stage is to finalize the pricing. First, you have to specify the territories and primary marketplace. Afterward, you can set the pricing, royalty, and distribution. Once done, click Publish Your Kindle eBook.
You will shortly receive confirmation that your eBook has been published. However, it may take up to 72 hours for the book to appear on Amazon.
Part 5. How to Turn eBook to Paper Book in KDP?
If you are like me, who also wants to offer a physical copy of your book, KDP makes it easy to turn your eBook into a paperback. Here are the steps you need to follow:
Step 1. Start the Paperwork
Once you have published the eBook, click the Start your paperwork now button from the pop-up window.
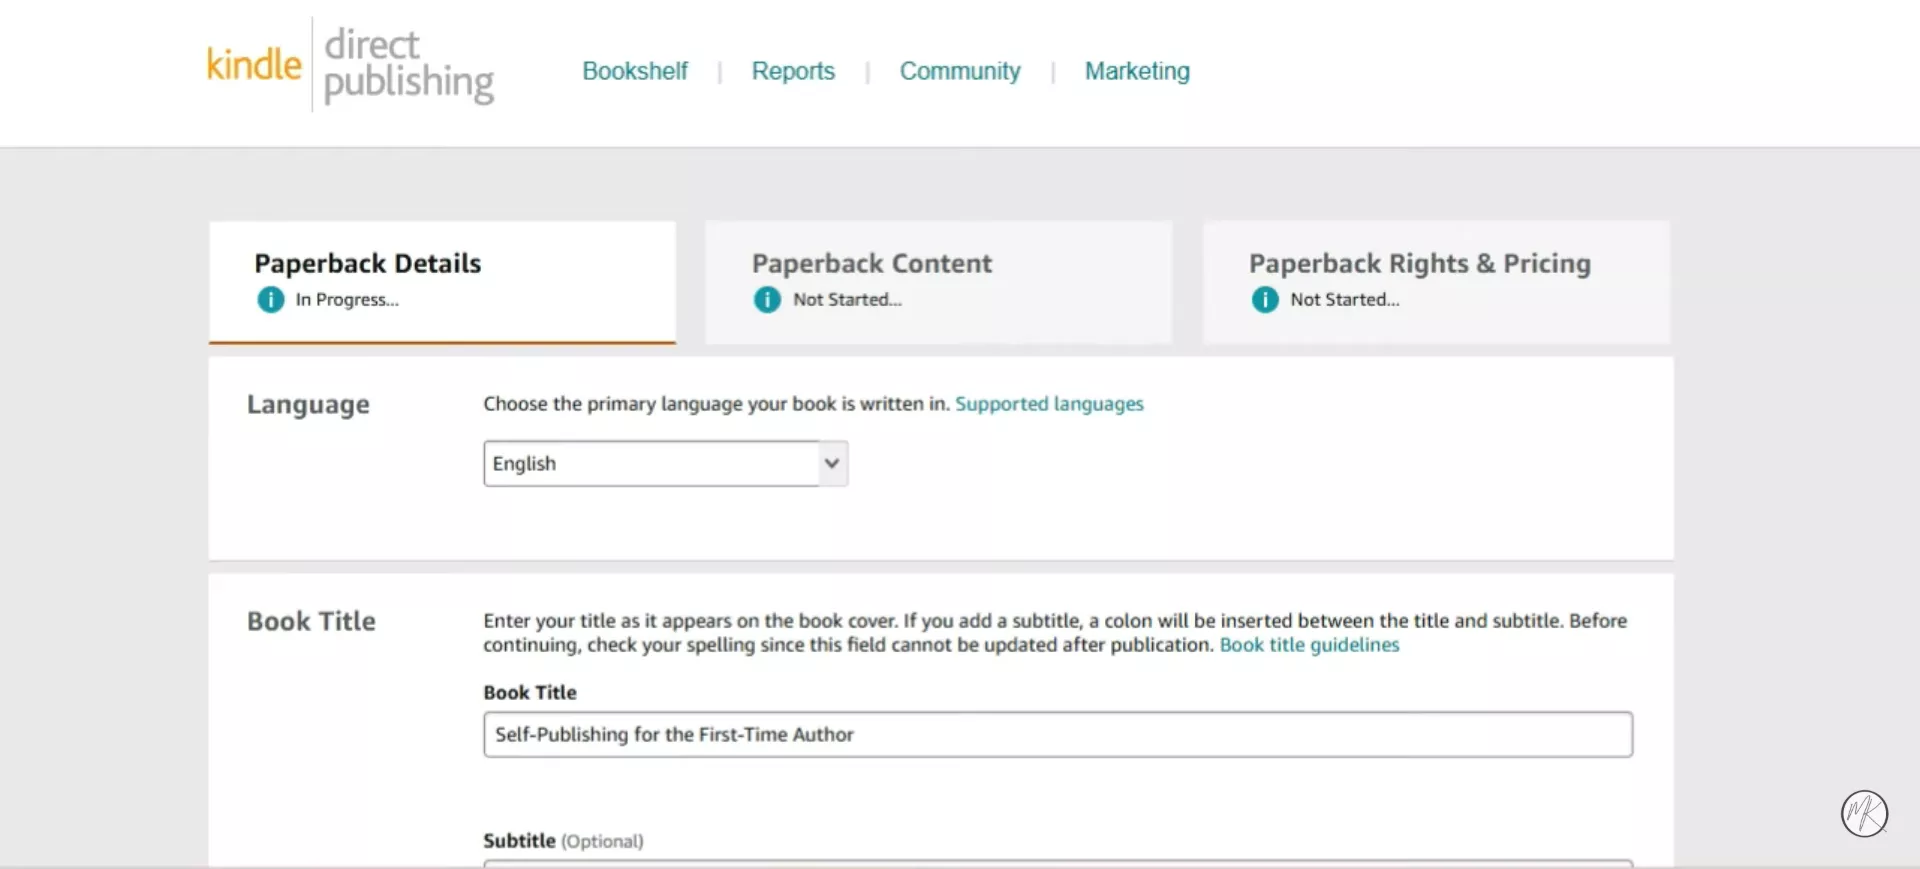
Step 2. Enter Paperback Details
Next, fill out the paperback details just as you did for the Kindle eBook details. This involves adding information like language, book title, author, publishing rights, and more.
Some of the information would be autofilled based on previous records. Once filled, click Save & Continue.
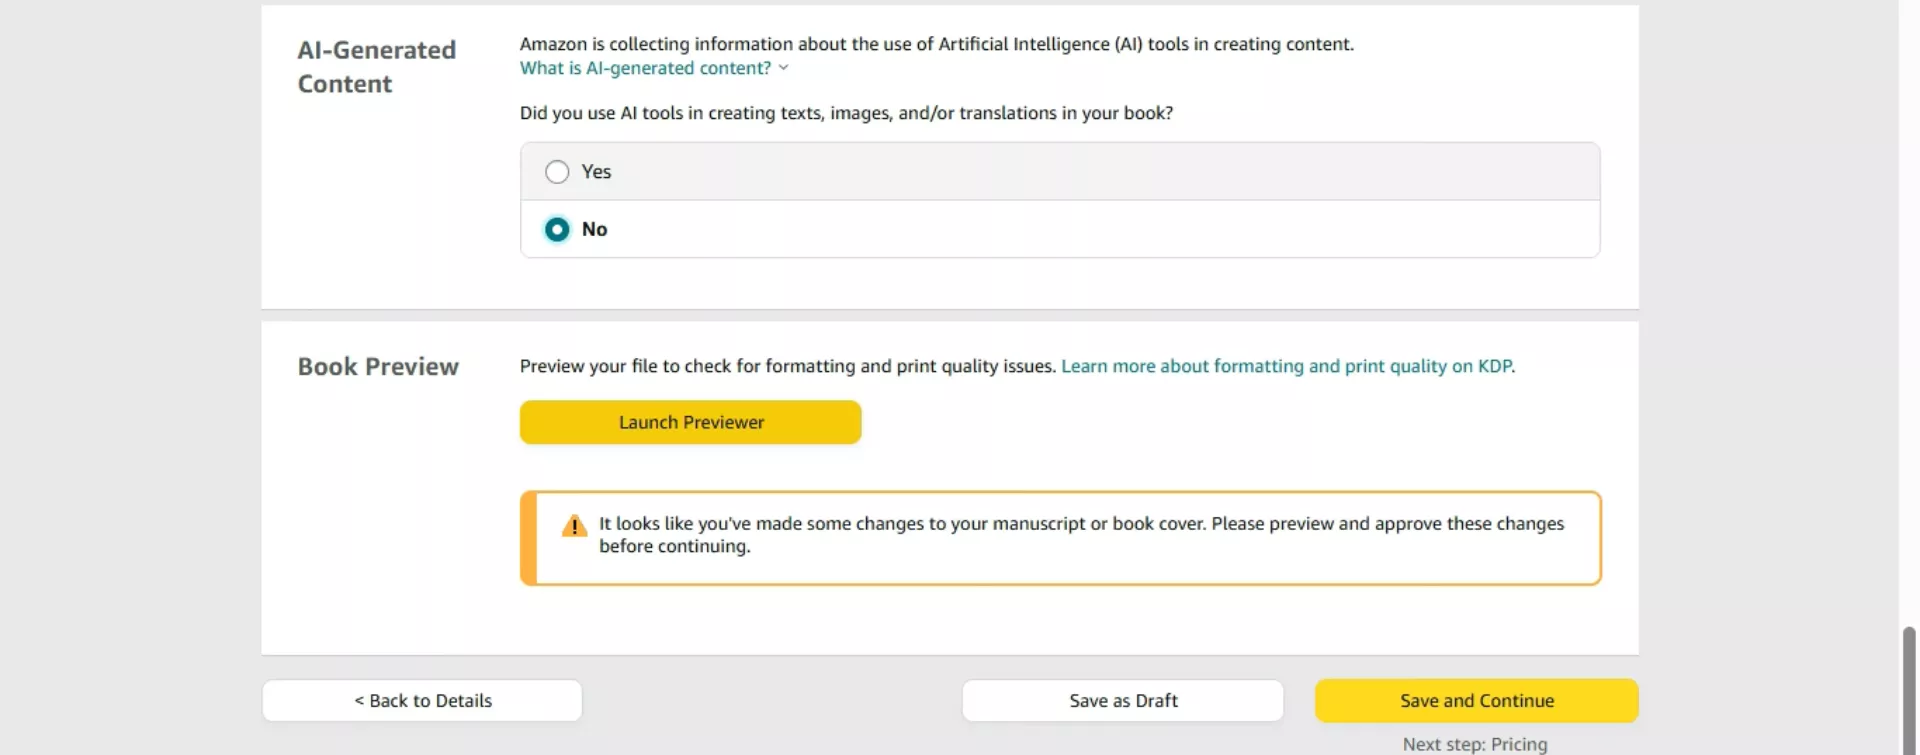
Step 3. Enter Paperback Content
Like before, you now have to enter the paperback content. This involves filling out details about ISPN, print options, uploading the manuscript, and more.

You can click Launch Previewer to preview how your book will look in the physical format. KDP will also provide you with the estimated printing cost based on the number of pages. Afterward, click Save & Continue.
Step 4. Specify Paperwork Rights & Pricing
Lastly, you have to specify the rights and pricing of the physical book. This involves entering details about territories, pricing, royalties, distribution, and more.
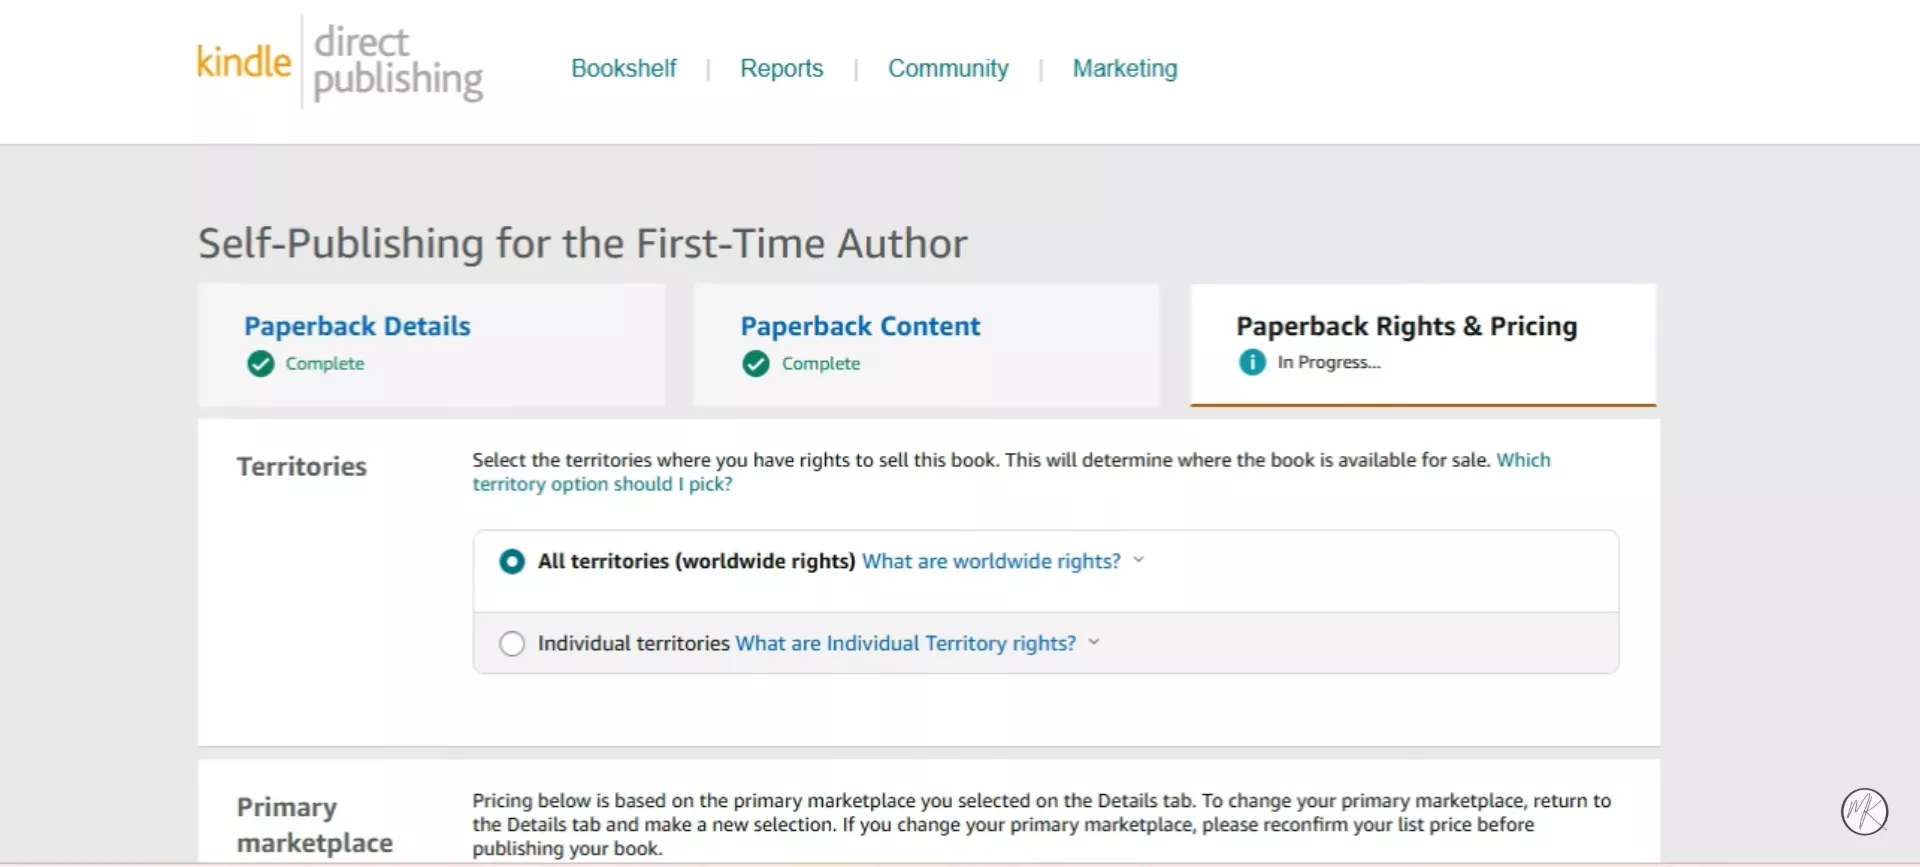
Once all details are added, click Publish Your Paperback Book. You will get the notification that your book is under review and will be made available on Amazon after the review process.
Conclusion
Kindle Create is a useful software for writers to turn their manuscript into KPF format for smooth publishing with KDP. It just requires a few clicks and some manual formatting to get the final eBook version right for publishing.
Ready to publish your masterpiece? Start using Kindle Create today to easily format your eBook for KDP. Don't forget to try UPDF first for intuitive manuscript editing and formatting, and make your publishing journey smoother than ever!
Windows • macOS • iOS • Android 100% secure


 Enrica Taylor

 Lizzy Lozano
 Enid Brown