 UPDF for Windows
 UPDF for Mac
 UPDF for iPhone/iPad
 UPDF for Android
 Nomostar
 UPDF AI Online
 UPDF Sign
 IvyCraft
 Edit PDF
 Annotate PDF
 Create PDF
 PDF Form
 Edit links
 Convert PDF
 OCR
OCR PDF to Word
 PDF to Image
 PDF to Excel
 Organize PDF
 Merge PDF
 Split PDF
 Crop PDF
 Rotate PDF
 Protect PDF
 Sign PDF
 Redact PDF
 Sanitize PDF
 Remove Security
 Read PDF
 UPDF Cloud
 Compress PDF
 Print PDF
 Batch Process
 About UPDF AI
 UPDF AI Solutions
 AI User Guide
 FAQ about UPDF AI
 Summarize PDF
 Translate PDF
 Chat with PDF
 Chat with AI
 Chat with image
 PDF to Mind Map
 Explain PDF
 PDF AI Tools
 Image AI Tools
 AI Chat Tools
 AI Writing Tools
 AI Study Tools
 AI Working Tools
 Other AI Tools
 AI Bookmark Generation
 AI Bookmark Summary
 AI Watermark Generation
 AI Background Generation
 AI Sticker Generation
 AI Stamp Generation
 AI Editing Suite
 UPDF Copilot
 AI Page Management
 AI Semantic Search
 PDF to Word
 PDF to Excel
 PDF to PowerPoint
 User Guide
 UPDF Tricks
 FAQs
FAQs UPDF Reviews
 Download Center
 Blog
Blog Newsroom
 Tech Spec
 Updates
 UPDF vs. Adobe Acrobat
 UPDF vs. Foxit
 UPDF vs. PDF Expert
Whenever the holiday season approaches, I find myself wanting beautiful minted Christmas cards, but I never have the time or patience for complicated DIY tools. If you feel the same, you’re not alone.
That’s exactly why I started designing and customizing my cards digitally. Whether I’m creating a printable version or editing a PDF to email to friends and clients, UPDF makes the whole process surprisingly simple. Stick with me until the end, this guide will help you create festive cards without the usual holiday stress. If you also want to create a printable Christmas cards, please click the button below to download UPDF first.
Windows • macOS • iOS • Android 100% secure
Part 1. Why Minted? The Appeal of Soft, Modern Holiday Cards
Whenever I choose a theme for my holiday greetings, “minted” designs always stand out. They carry a soft, modern charm, think gentle mint-green tones, brushed metallic accents like gold or silver, and minimalist layouts that feel crisp and wintery.
The look reminds me of frosted windows, fresh snowfall, and those cool pastel palettes you see in boutique stationery shops.
Compared to traditional red-heavy or glitter-covered holiday cards, minted Holiday cards feel lighter and more refined. They’re festive without being overly busy, and they work beautifully for both personal and professional greetings.
The clean lines, balanced color palette, and subtle details give them an “elevated yet approachable” feel—stylish enough to impress, but warm enough to send to family.
That’s exactly why minted Xmas cards have become my go-to. They strike the perfect middle ground between classic holiday warmth and contemporary design.
Now you might be thinking designing these minted cards could be a hassle. Well, not anymore. With easy-to-use PDF editors like UPDF, it has become a breeze now. With UPDF, you can edit, share, print any type of minted Christmas cards within minutes.
Part 2. Design Your Minted Digital Christmas Cards with UPDF (Zero Craftiness)
When I’m short on time but still want thoughtful, beautifully designed cards, going digital is always my first choice. It’s fast, efficient, and perfect for anyone who needs to send holiday greetings remotely (clients, coworkers, or family living miles away). Instead of dealing with printing delays or craft materials, I simply create my minted christmas cards directly on my laptop, and it saves me hours.
That’s where UPDF steps in. It’s an all-in-one PDF editor that gives me everything I need in one place. I can start with a simple Minted-style template, drop in my photos, adjust the colors, and add text—all without switching tools.
Its annotation features make customization even easier; I can highlight elements, insert shapes, add handwritten-style notes, or tweak the design until it feels just right. Plus, if I’m working from multiple devices, UPDF keeps everything synced, so I can begin editing on my desktop and finalize the card from my tablet.
What I like most is that UPDF isn’t just for editing. It also makes sharing incredibly convenient. Once my minted holiday cards are ready, I can export them as high-quality PDFs, send them via email, or even generate a secure share link. And for those moments when I want to keep my workflow offline, UPDF works smoothly without an internet connection too.
So, whether you are sending out greeting cards to dozens of contacts or designing a single special message, UPDF keeps the whole process clean and stress-free.
No craft skills needed, no messy tools on the dining table—just a simple, reliable editor that helps me create polished minted Xmas cards in minutes.
Windows • macOS • iOS • Android 100% secure
Step 1: Start With a Template and Set Your Page Size
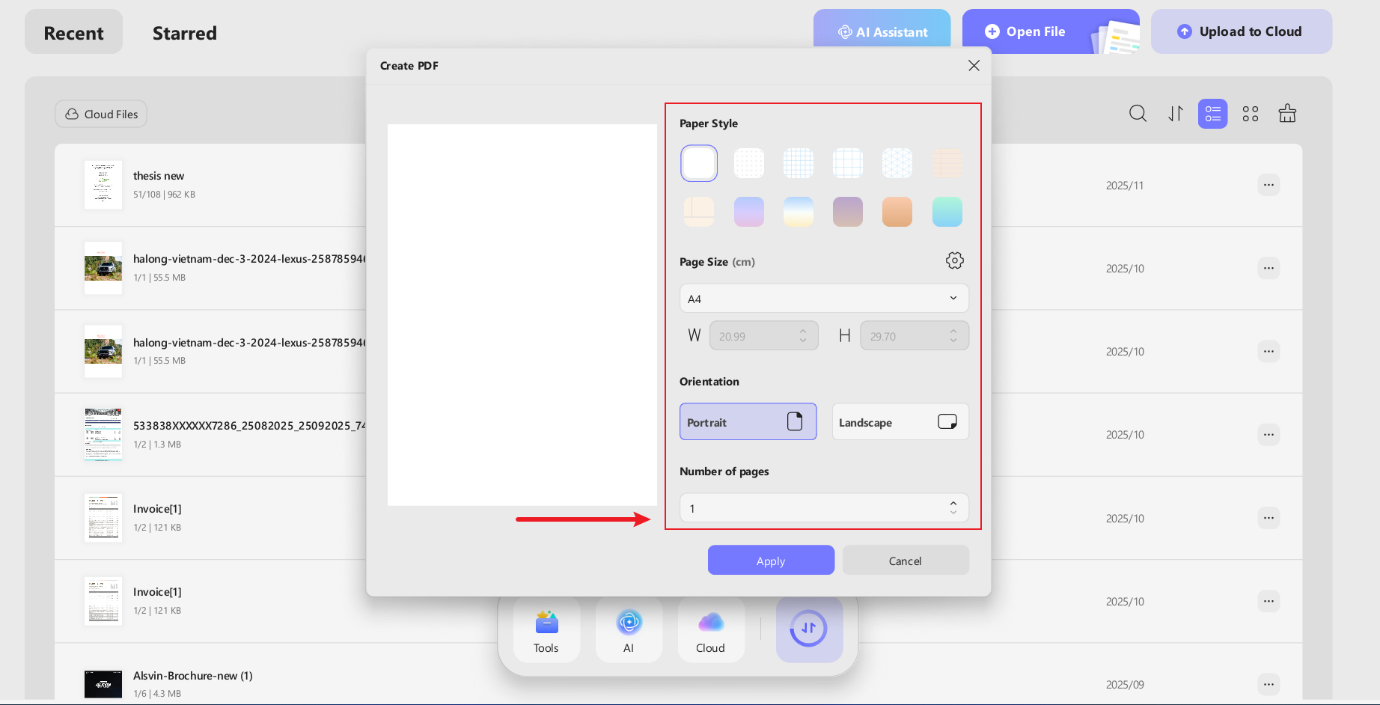
Whenever I begin designing a Minted-style Christmas card, I start by choosing a clean template.
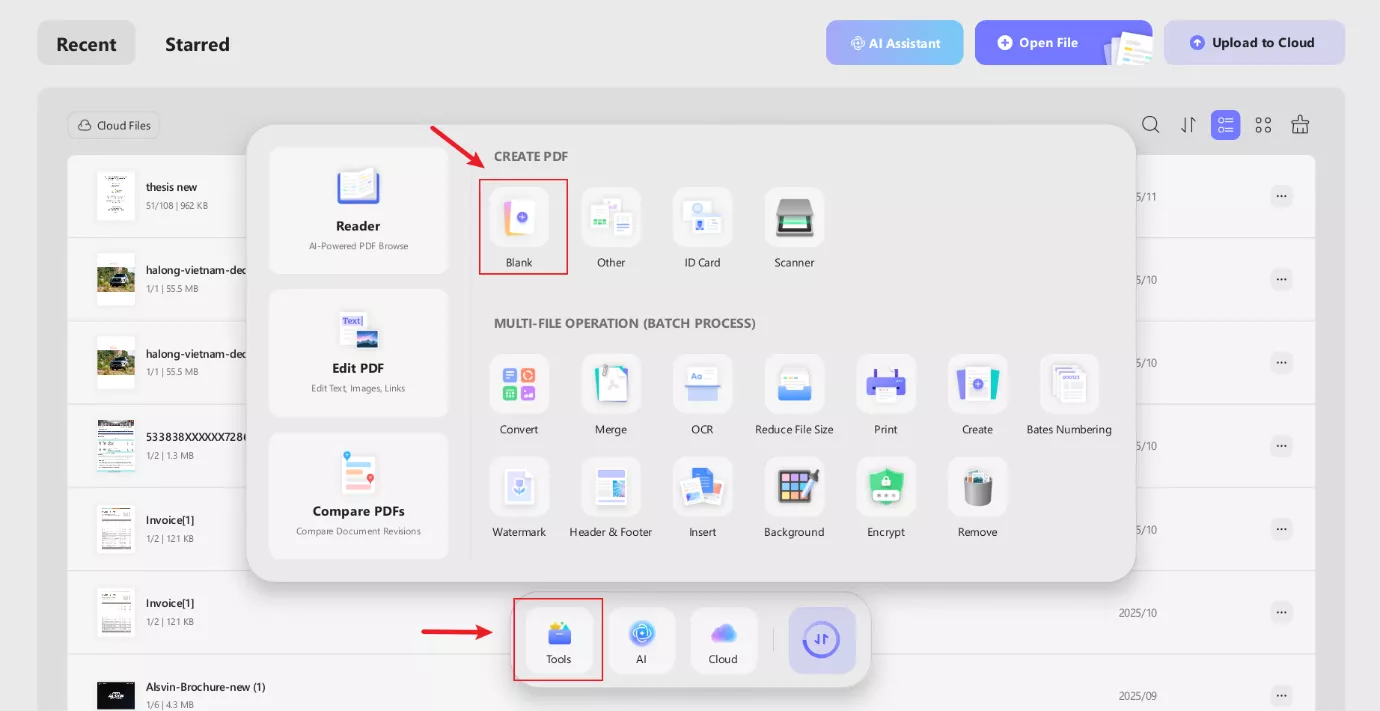
UPDF lets me pick from different page styles, adjust the page size, and switch between portrait or landscape. This gives me the perfect blank canvas for the soft, modern minted look I want. Once I lock in the layout, everything else flows naturally.
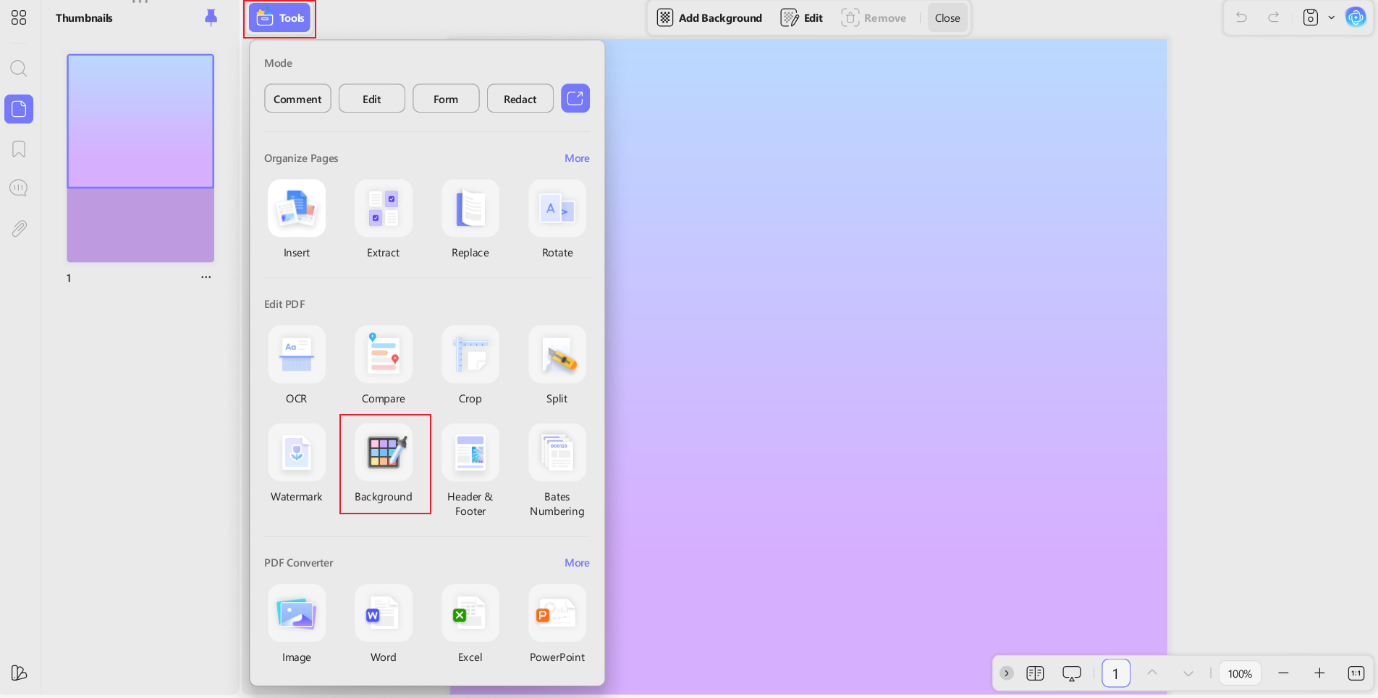
Step 2: Add a Background That Matches the Minted Aesthetic
Next, I set the background. Whether it’s a soft pastel tone, a faint winter texture, or a mint-green wash, UPDF lets me apply it with just a click. I can adjust opacity, choose solid colors, or even add an image background if I want something more artistic. This small detail sets the entire mood of the card.
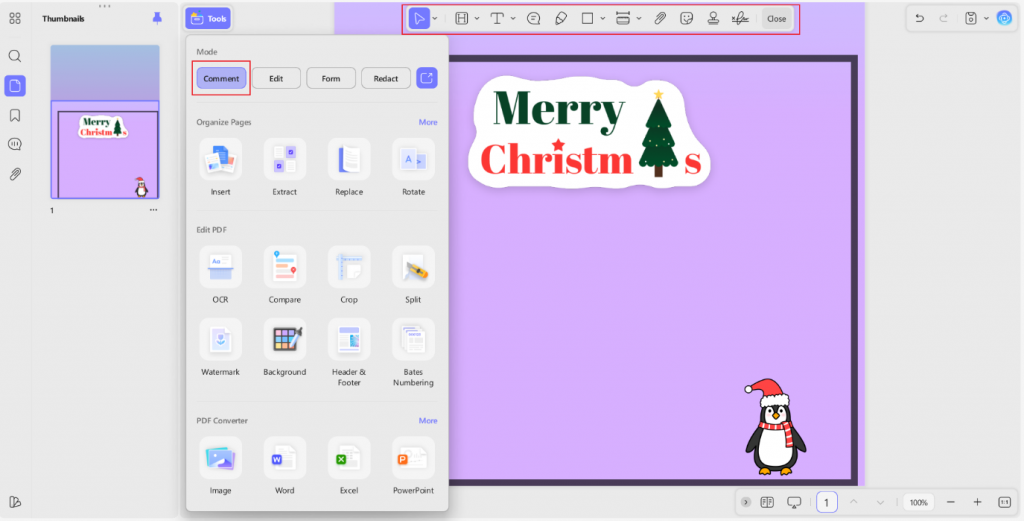
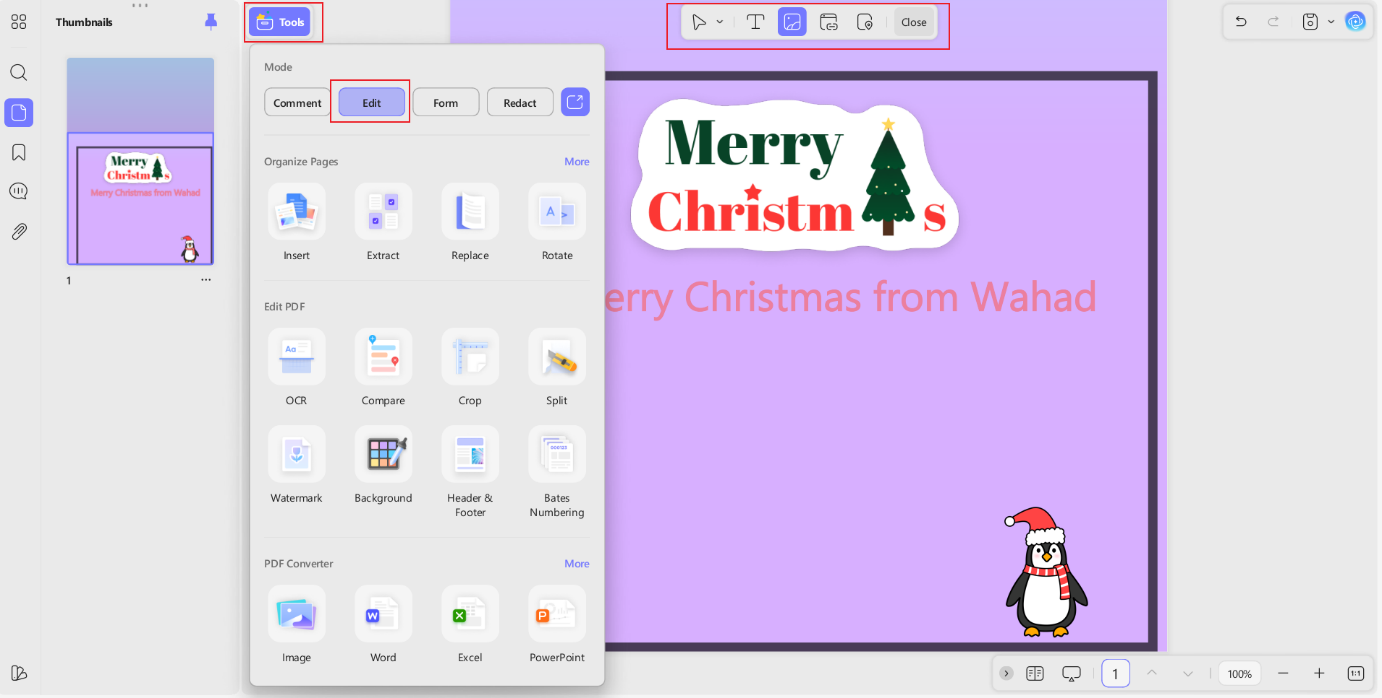
Step 3: Annotate With Signatures, Shapes, Stickers, or Drawings
At this point, I add little personal touches—maybe a hand-drawn snowflake, a simple Christmas doodle, or a digital signature. UPDF gives me tools for shapes, stickers, text boxes, highlights, and freehand drawing.
For example, I added stickers of my choice to make my minted card appear more personalised. In short, these annotations help me build a Minted-style card that feels warm and personal without needing any actual craft supplies.
Step 4: Edit Text and Replace Images Easily
Now I move on to the actual message. I update the holiday greeting, adjust the font, and replace placeholder images with my own photos. UPDF’s editing tools make it easy to resize or crop images and fine-tune text styles so the entire card matches that elegant, minimalist minted vibe.
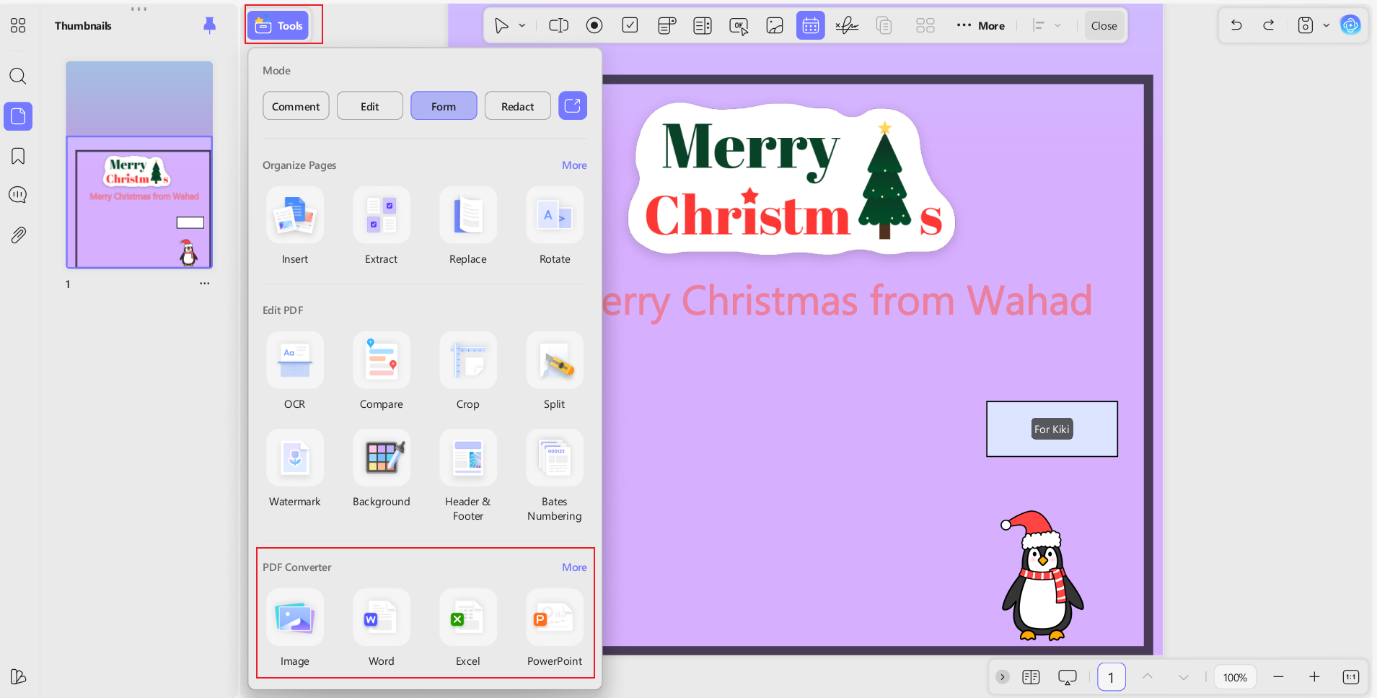
Step 5: Add Form Fields Like Date Selectors or Dropdown Lists
If I’m preparing a card for multiple recipients—like family members, coworkers, or clients, I sometimes add form fields. UPDF lets me insert date fields or dropdown lists, which is surprisingly handy. For example, I can add a dropdown with different family member names or preset holiday messages. It keeps everything neat and organized, especially when I’m sending out many versions of the same Minted card.

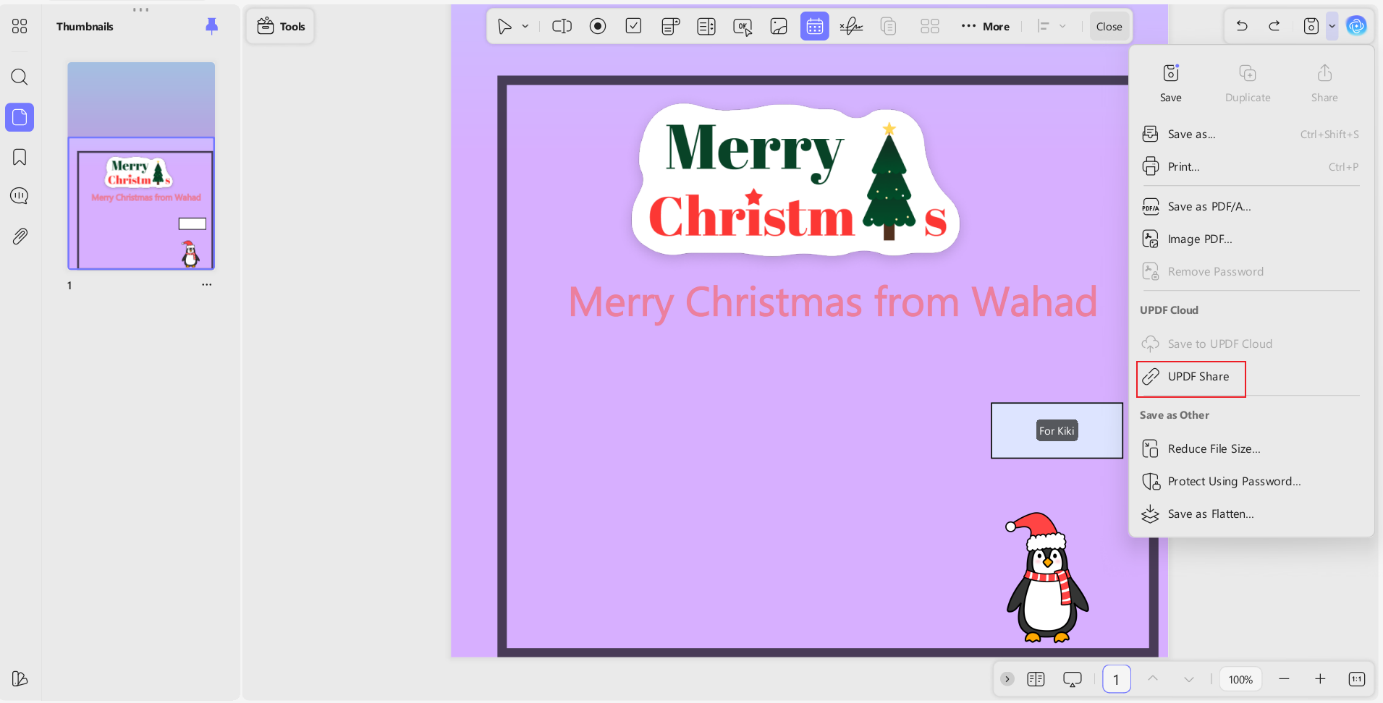
Step 6: Export and Share Your Finished Card Anywhere
Once the design feels complete, I export the card as a PDF, JPG, PNG, or whatever format I need.
UPDF also gives me multiple sharing options—I can create a link, generate a QR code, email the file, or sync it with UPDF Cloud so I can continue editing on my iPhone, Android device, Mac, or Windows PC. This flexibility is exactly why I rely on UPDF for holiday card projects.
Step 7: Print Your Minted Christmas Card
When I’m ready to turn my digital design into a physical card, I open the Print panel in UPDF. What I like most here is how much control I get over the final output. I can filter exactly what elements to print, whether it’s the document only, comments, or form fields.
UPDF also lets me adjust the paper size, orientation, and scaling with a couple of clicks. And if I’m printing multiple cards at once, the “Multiple” and “Booklet” options are incredibly helpful.
I can print several cards on a single sheet, choose the number of pages per sheet, and even switch between vertical or horizontal arrangement depending on the layout I prefer.

Windows • macOS • iOS • Android 100% secure
Part 3. Minimalist Mint & Gold Foil Accents (Kid-Friendly)
Sometimes I want a card that feels handmade but doesn’t require a table full of craft supplies. This minimalist Mint-and-Gold method is perfect for quick designs, and it’s simple enough for kids to join in. The soft mint tones paired with bright gold accents create a look that feels festive, modern, and effortless.
Materials:
White/ivory cardstock, mint green marker or pen, gold foil tape or gold stickers, and a snowflake stencil (optional).
Steps to Create This Minimalist Minted Card
Step 1: Prepare Your Cardstock
Start with a clean sheet of white or ivory cardstock. Fold it in half if you’re making a traditional greeting card.
Step 2: Draw Mint Stripes or a Simple Tree Outline
Use a mint green marker to draw two or three thin horizontal stripes across the card. If you prefer a more festive look, sketch a simple Christmas tree outline instead. Keep the strokes light and minimal for that signature Minted feel.
Step 3: Add Gold Foil Accents
Apply thin strips of gold foil tape to act as ornaments or tree layers. You can also punch out small gold circles or use gold star stickers to add “snowflakes” or decorative dots. The gold contrast instantly elevates the card while still keeping things kid-friendly and easy.
Step 4: Add a Simple Greeting
Write “Merry Christmas” at the bottom of the card using either the same mint marker or a gold pen. Choose whichever balances your design best.
Step 5: Review and Add Final Touches
Lightly adjust placement or add a few more stars if needed. The beauty of this design is its clean, airy look—so keep embellishments subtle.

Part 4. Pressed Mint Leaves & Handwritten Note (Low Difficulty)
When I want a holiday card that feels earthy, calming, and truly personal, I turn to pressed mint leaves. This method is incredibly simple but still gives the card a warm, handcrafted touch.
Moreover, the natural texture adds a bit of visual interest without requiring any artistic skills, and it pairs beautifully with kraft paper or soft mint cardstock. It’s one of those low-effort, high-impact ideas, perfect for anyone who wants something thoughtful without spending a lot of time crafting.
Materials: Fresh or dried mint leaves, a heavy book, glue stick, kraft paper or mint cardstock, black or white pen.
Steps to Create This Card
Step 1: Press the Mint Leaves
Place the mint leaves inside a heavy book and leave them for two to three days. This flattens the leaves completely and removes moisture so they’ll adhere better to the cardstock.
Step 2: Arrange and Glue the Leaves
Once the leaves are pressed, glue them to the front of your card. You can place them in a loose cluster near the center or line them along one edge for a more minimal botanical look. Keep the arrangement light so the card still feels airy and modern.
Step 3: Add a Handwritten Note
Use a black or white pen to write a short message beneath the leaves—something simple like “Merry Christmas” or “Warm Wishes.” The handwritten touch balances the natural greenery and gives the card a heartfelt finish.
Pro Tip:

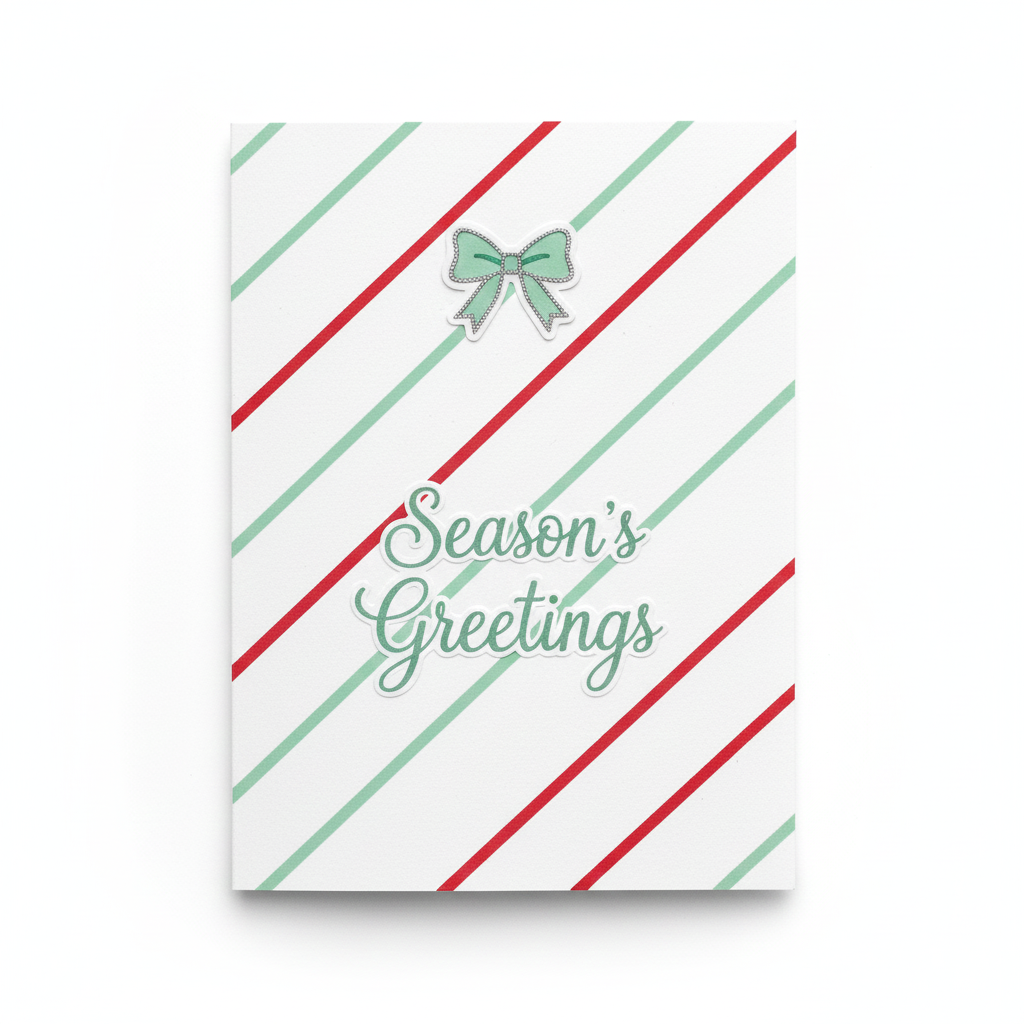
Part 5. Candy Cane Stripes (Mint Twist!)
Sometimes I like making a holiday card that feels playful and bold without being overly complicated. This candy cane stripe method is perfect for that. It takes the classic red-and-white look we all know and gives it a fresh twist by adding mint green.
The result is a cheerful, modern pattern that still feels festive—but it’s simple enough to create in just a few minutes. This is the method I use when I want something bright, fun, and easy to replicate in batches.
Materials: White cardstock, mint green and red markers (or paint pens), ruler (optional).
Steps to Create This Card
Step 1: Draw Diagonal Stripes
Start by drawing three to four diagonal stripes across the front of your cardstock. Alternate between mint green and red for a balanced candy cane look. Thin lines usually work best because they keep the card feeling clean and airy.
Step 2: Add a Small Mint Bow or Star
At the top center of the card, draw a tiny mint bow or a simple star. This small detail ties the whole palette together and adds a cute focal point.
Step 3: Write a Short Cursive Caption
Finish the design by writing a short holiday caption—something like “Merry Christmas” or “Joyful Wishes”—in mint cursive. The soft script complements the stripes without overwhelming them.
Conclusion
So, creating Minted-style Christmas cards doesn’t have to be complicated. With a few simple materials and a bit of creativity, you can design thoughtful, modern cards that feel personal and festive.
And when I want to turn these handmade ideas into polished digital versions—or share them easily with friends and family—UPDF makes the entire process effortless. Whether I’m editing, exporting, or customizing layouts, it keeps everything quick and stress-free.
Windows • macOS • iOS • Android 100% secure


 Engelbert White
 Enola Miller
 Enid Brown
 Lizzy Lozano