 UPDF for Windows
 UPDF for Mac
 UPDF for iPhone/iPad
 UPDF for Android
 UPDF AI Online
 UPDF Sign
 IvyCraft
 Edit PDF
 Annotate PDF
 Create PDF
 PDF Form
 Edit links
 Convert PDF
 OCR
OCR PDF to Word
 PDF to Image
 PDF to Excel
 Organize PDF
 Merge PDF
 Split PDF
 Crop PDF
 Rotate PDF
 Protect PDF
 Sign PDF
 Redact PDF
 Sanitize PDF
 Remove Security
 Read PDF
 UPDF Cloud
 Compress PDF
 Print PDF
 Batch Process
 About UPDF AI
 UPDF AI Solutions
 AI User Guide
 FAQ about UPDF AI
 Summarize PDF
 Translate PDF
 Chat with PDF
 Chat with AI
 Chat with image
 PDF to Mind Map
 Explain PDF
 PDF AI Tools
 Image AI Tools
 AI Chat Tools
 AI Writing Tools
 AI Study Tools
 AI Working Tools
 Other AI Tools
 AI Bookmark Generation
 AI Bookmark Summary
 AI Watermark Generation
 AI Background Generation
 AI Sticker Generation
 AI Stamp Generation
 AI Editing Suite
 UPDF Copilot
 AI Page Management
 AI Semantic Search
 PDF to Word
 PDF to Excel
 PDF to PowerPoint
 User Guide
 UPDF Tricks
 FAQs
FAQs UPDF Reviews
 Download Center
 Blog
Blog Newsroom
 Tech Spec
 Updates
 UPDF vs. Adobe Acrobat
 UPDF vs. Foxit
 UPDF vs. PDF Expert
Adobe PDF is mostly used by the masses to access PDF files. Now, for added convenience, users can create bookmarks in Adobe PDF. This helps them easily view the PDF while. You can go through the various pages of the PDF with just one click.
For some, it is still a hassle to create bookmarks in Adobe PDF. Tools. Don’t worry, we have got your back. Now you can add bookmarks to PDF files using an easier and affordable tool.
UPDF allows users to add bookmarks to their PDFs. It is cheaper than Adobe Acrobat, has a clean UI, and also offers complete PDF editing.
In this guide, we will explore how to create bookmarks in Adobe PDF. Plus, we will also explore some unique features of the UPDF. Let’s jump into the guide.
Windows • macOS • iOS • Android 100% secure
Part 1. Why Is It Useful To Add Bookmarks To A PDF?
Adding a bookmark to a PDF helps you navigate easily. It’s like a clickable table of contents. You click on the section you want to access, and it gets there. So, the main benefit of adding bookmarks to a PDF is the added convenience. This comes in really handy for long PDFs such as manuals, eBooks, and research papers.
Further, adding bookmarks to Adobe Acrobat PDF files is also helpful for students and researchers. That’s because bookmarks help them add references and view them without any hassle. Plus, it helps their instructors review their work easily. In short, bookmarks for a PDF file have become a must-have component.
Apart from tools like Adobe Acrobat Reader, there are other reliable all-in-one PDF solutions too. UPDF is one such tool that helps you not just add bookmarks but also edit PDFs and convert them in different formats.
Windows • macOS • iOS • Android 100% secure
Part 2. How to Create Bookmarks in Adobe Acrobat?
Here is how you can create bookmarks in Adobe Acrobat.
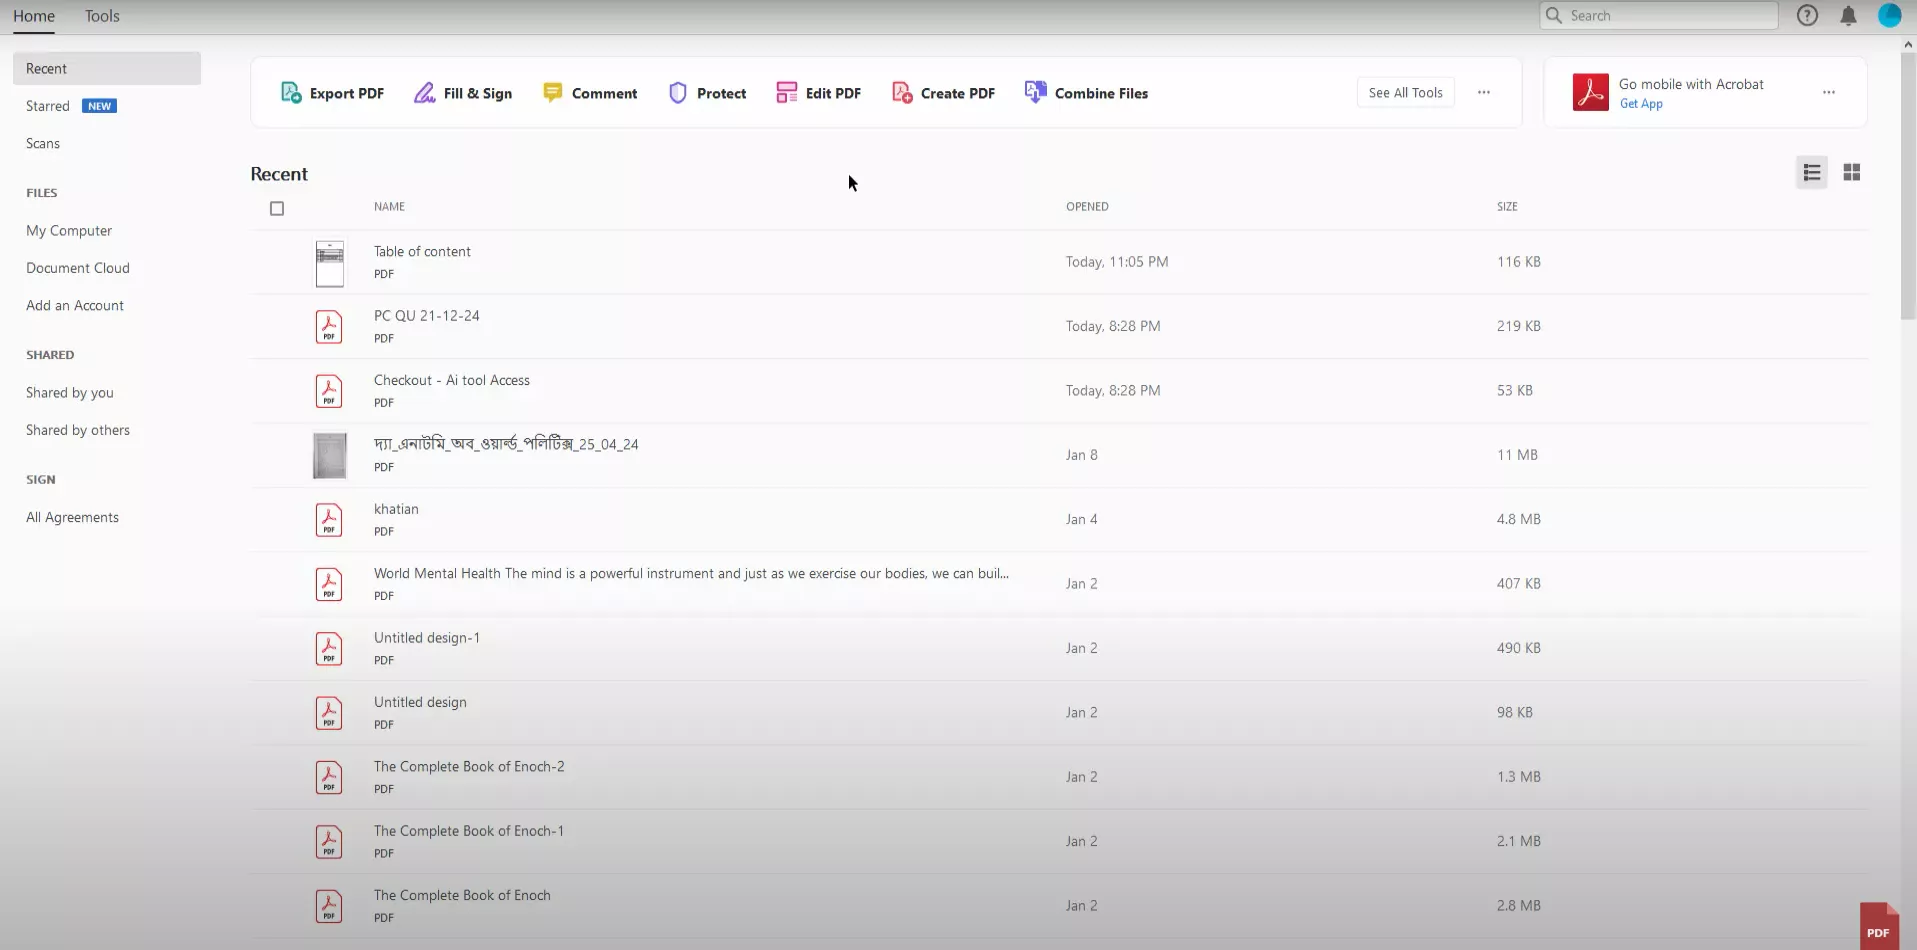
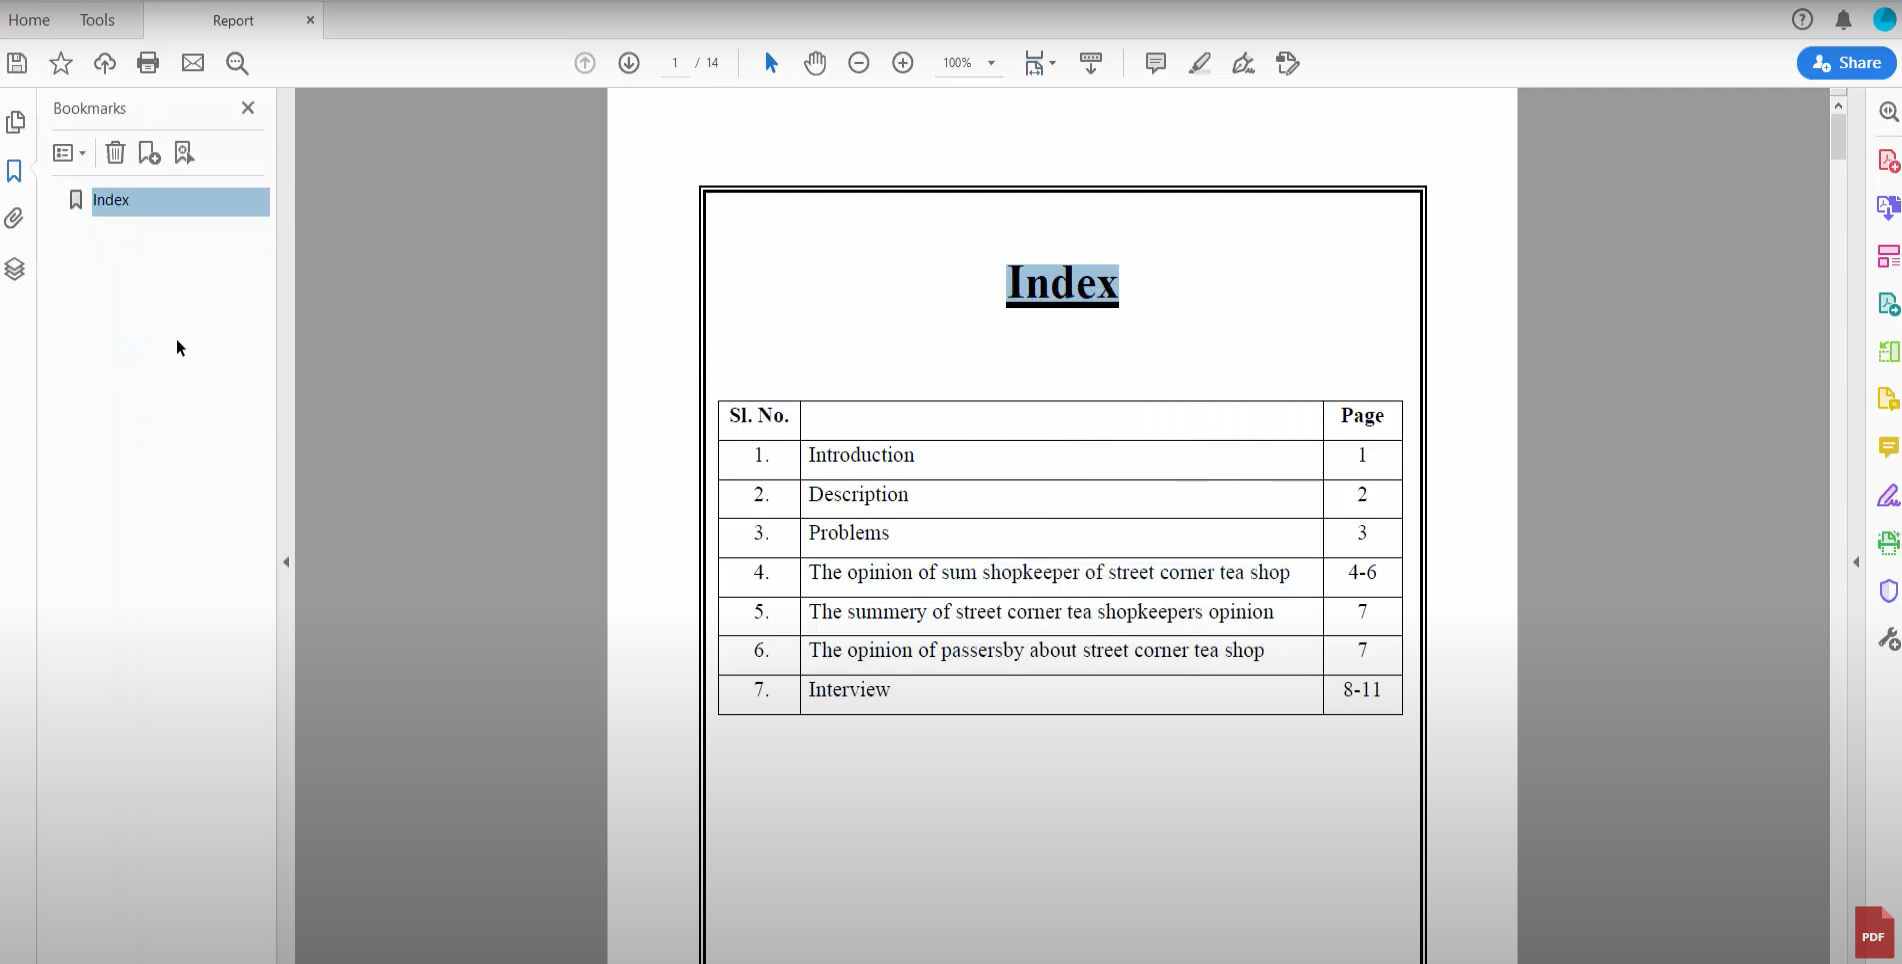
Step 1: Open Adobe Acrobat on Windows or Mac. Now open the document for which you want to create bookmarks.
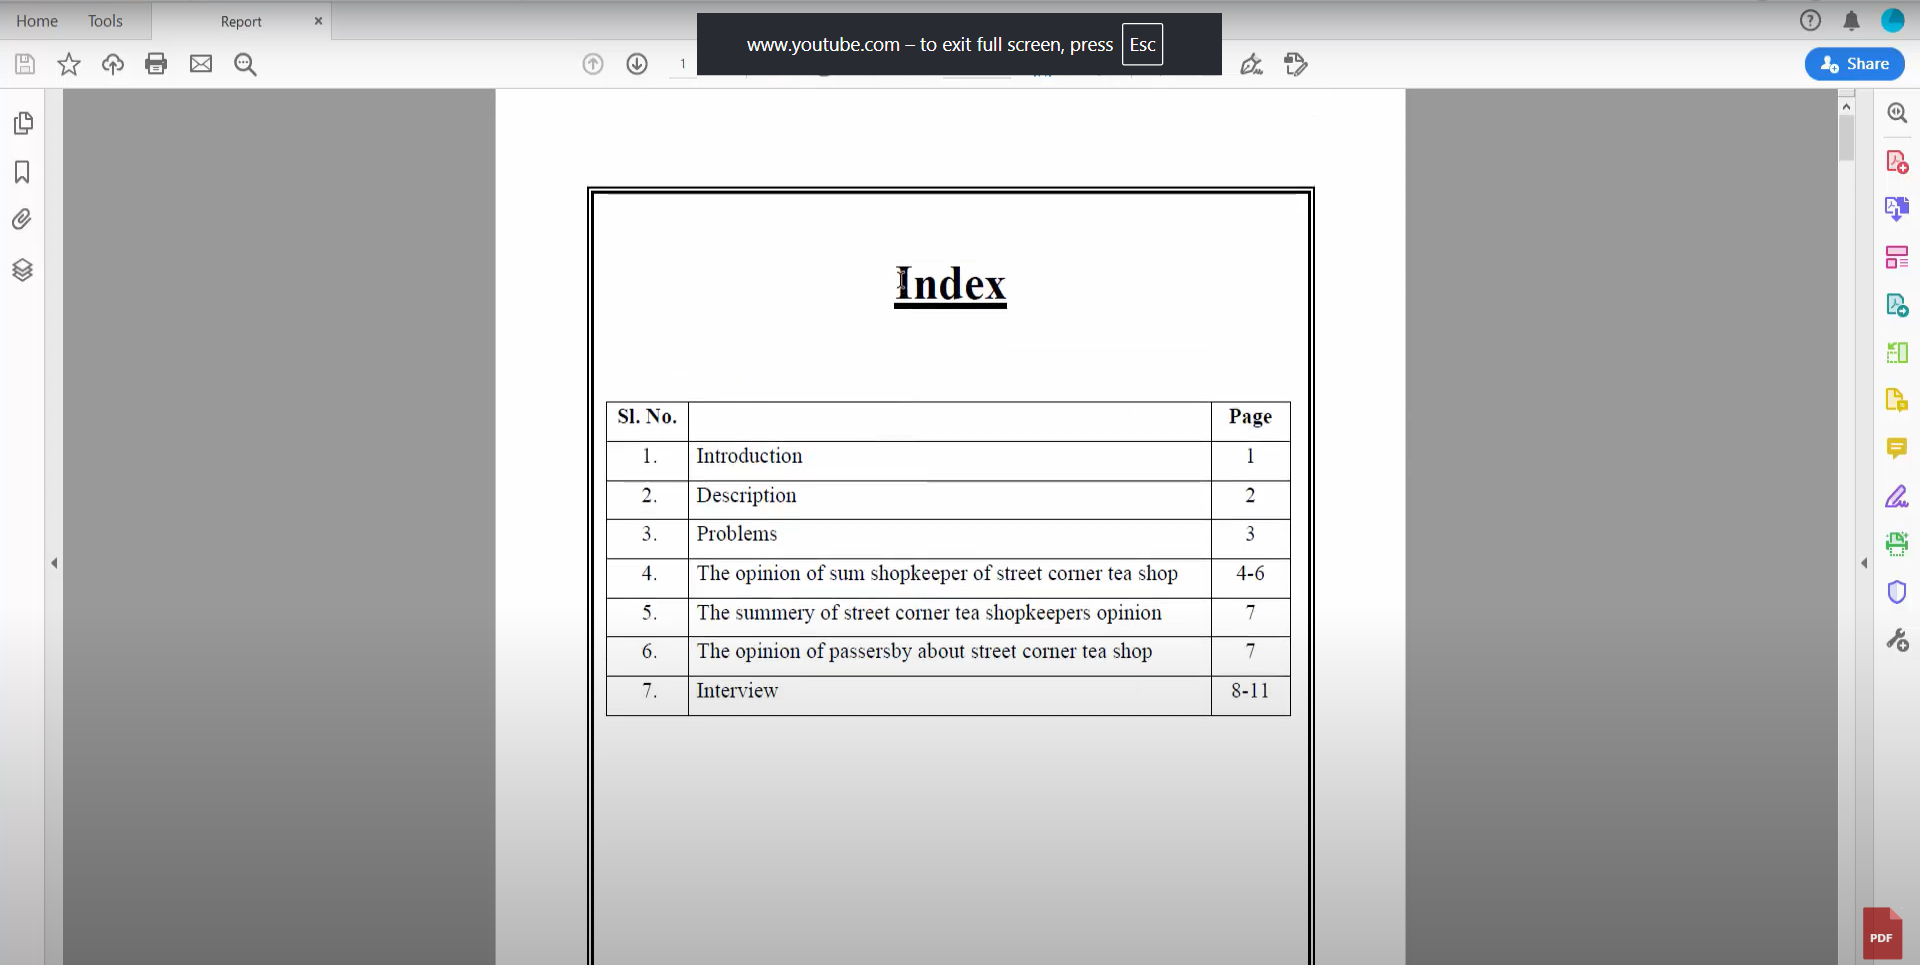
Step 2: Once you have your document opened, click on the text part where you want you add the bookmark.
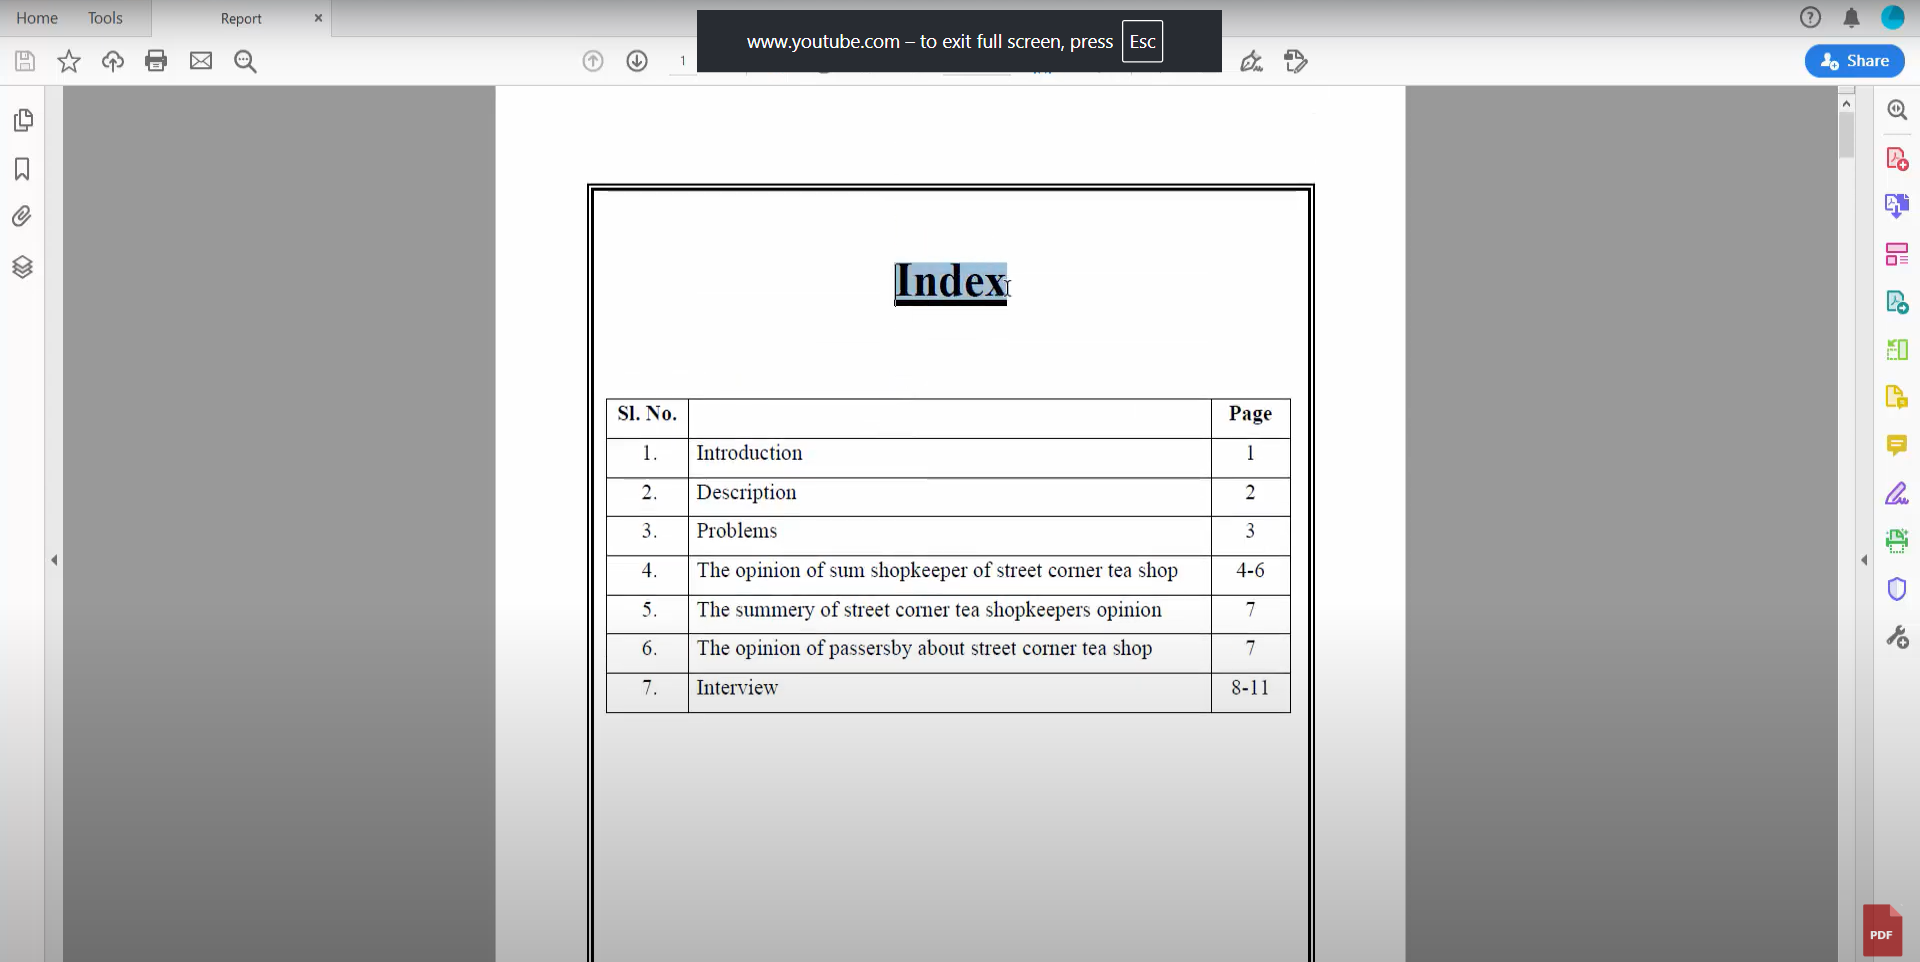
Step 3: Now right-click on the selected text, and choose add bookmarks.
Step 4: On the left side of the screen, you’ll see a new mini window where the bookmark you added will be shown.
Step 5: Following the same step, you can add as many bookmarks as you want. All of them will be shown in the left mini window.
Part 3. How to Create Bookmarks in UPDF?
UDPF is an excellent all in one PDF editor. It allows you to add bookmarks to PDF. Plus, you can edit your PDF the way you want. The best part is that it is an affordable option compared to Adobe Acrobat Reader. UPDF application (available on Mac, Wins, Android and iOS) allows you to edit your PDF documents on the go without any hassle. Here is a step-by-step guide on how to add bookmarks in UPDF.
Windows • macOS • iOS • Android 100% secure
Step 1: Launch UPDF
At first, launch UPDF on your PC or Laptop.
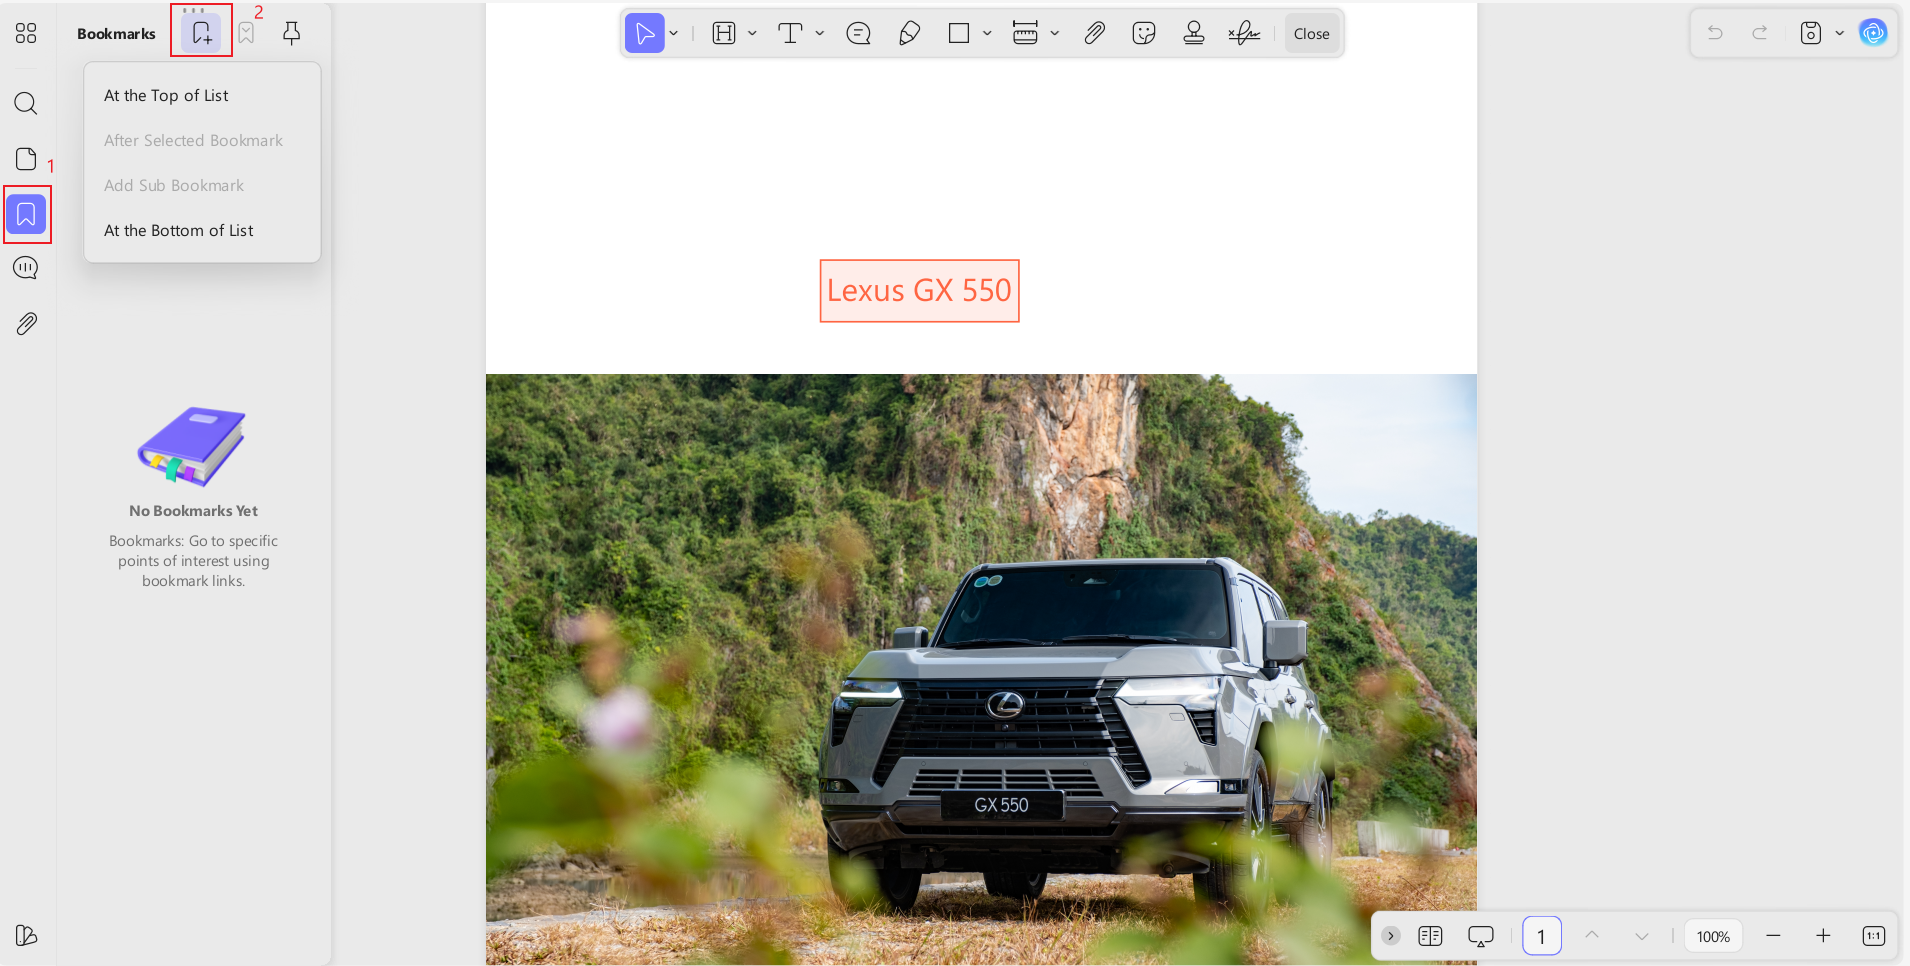
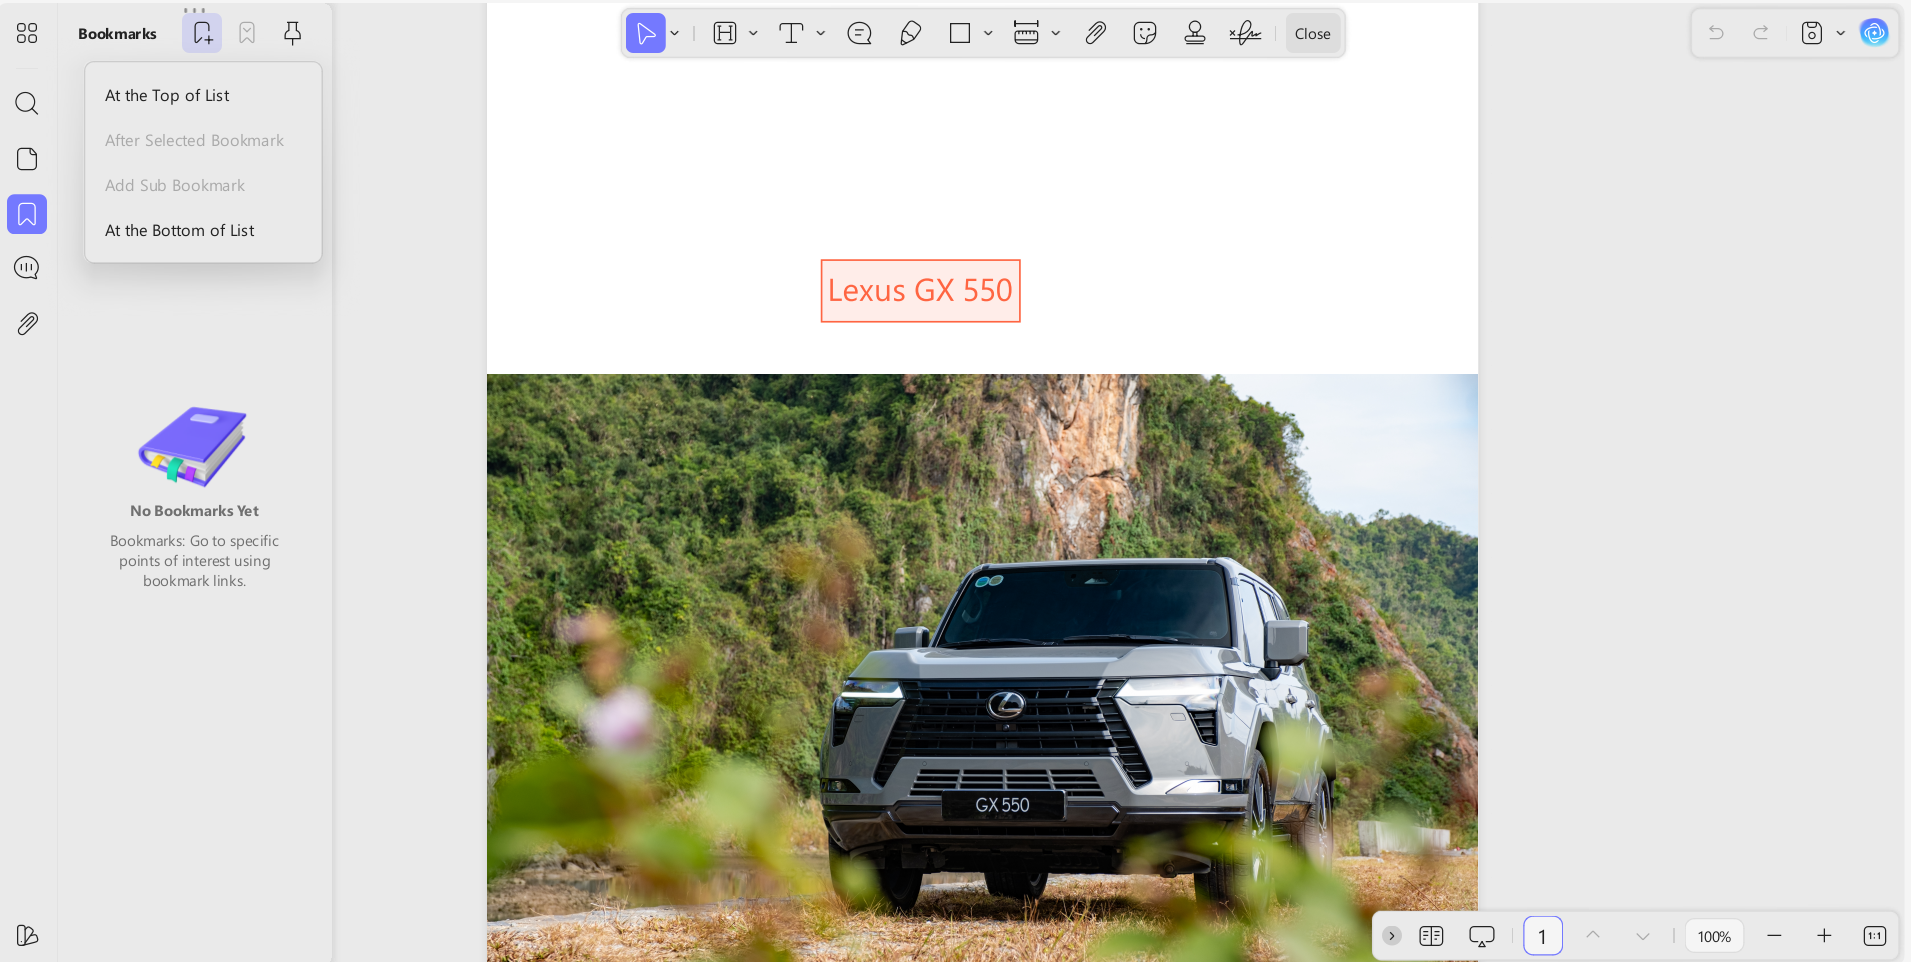
Step 2: On the left side menu, click on “Bookmarks”. From here, you can add bookmarks to your PDF.
Step 3: With UPDF, you get tons of options to customize your PDF files. Even for adding bookmarks, you get plenty of options. For example, you can rename the bookmark and delete it with just one click.
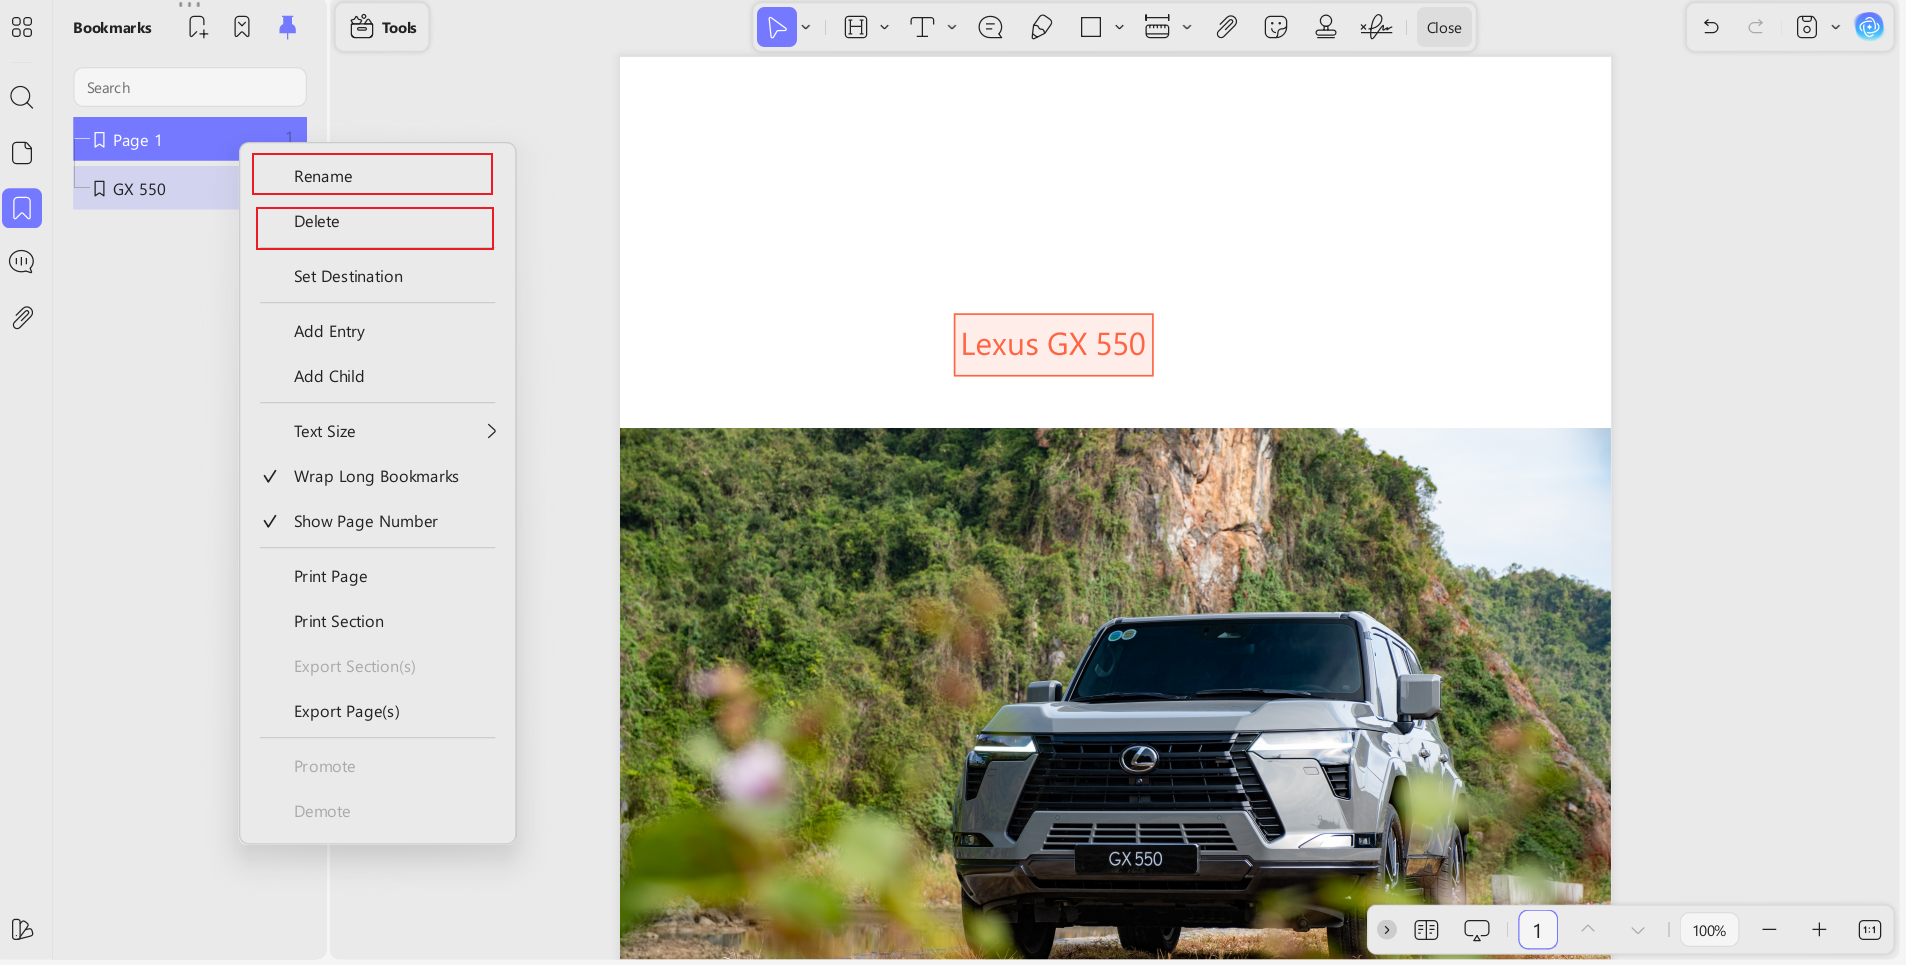
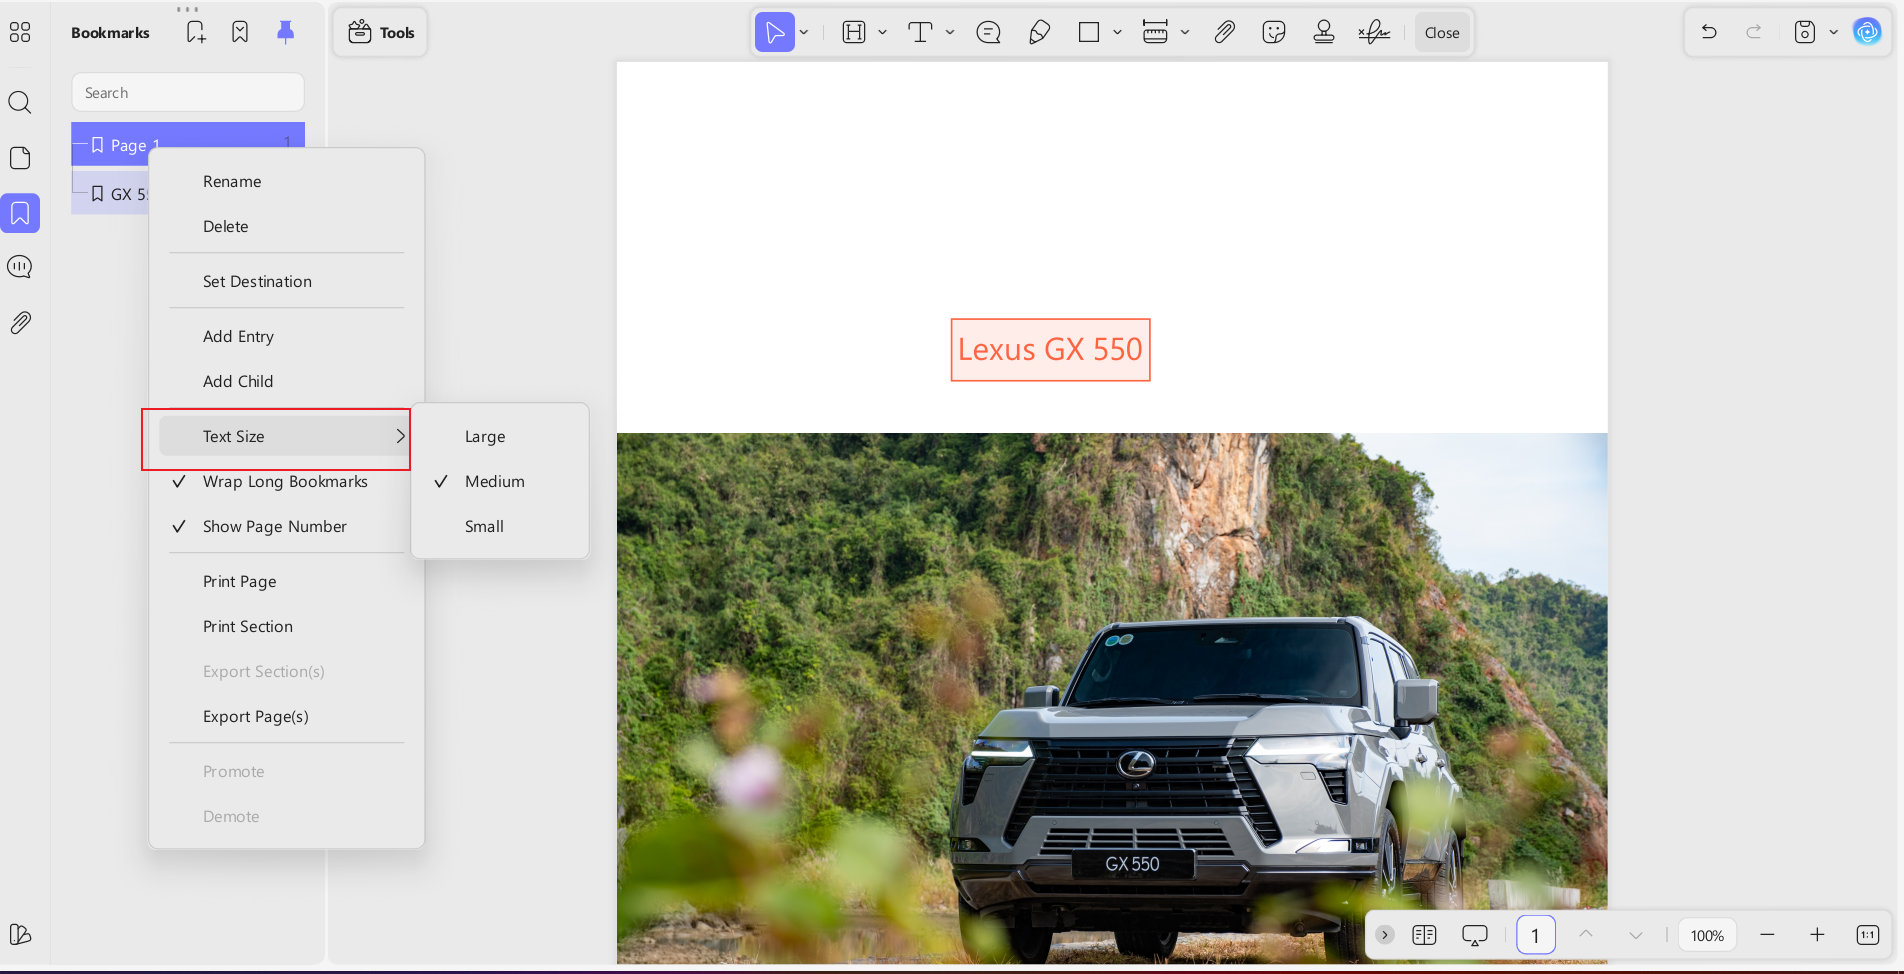
Step 4: Next up, users can explore further editing options. For instance, you can change the size of the text of the bookmark.
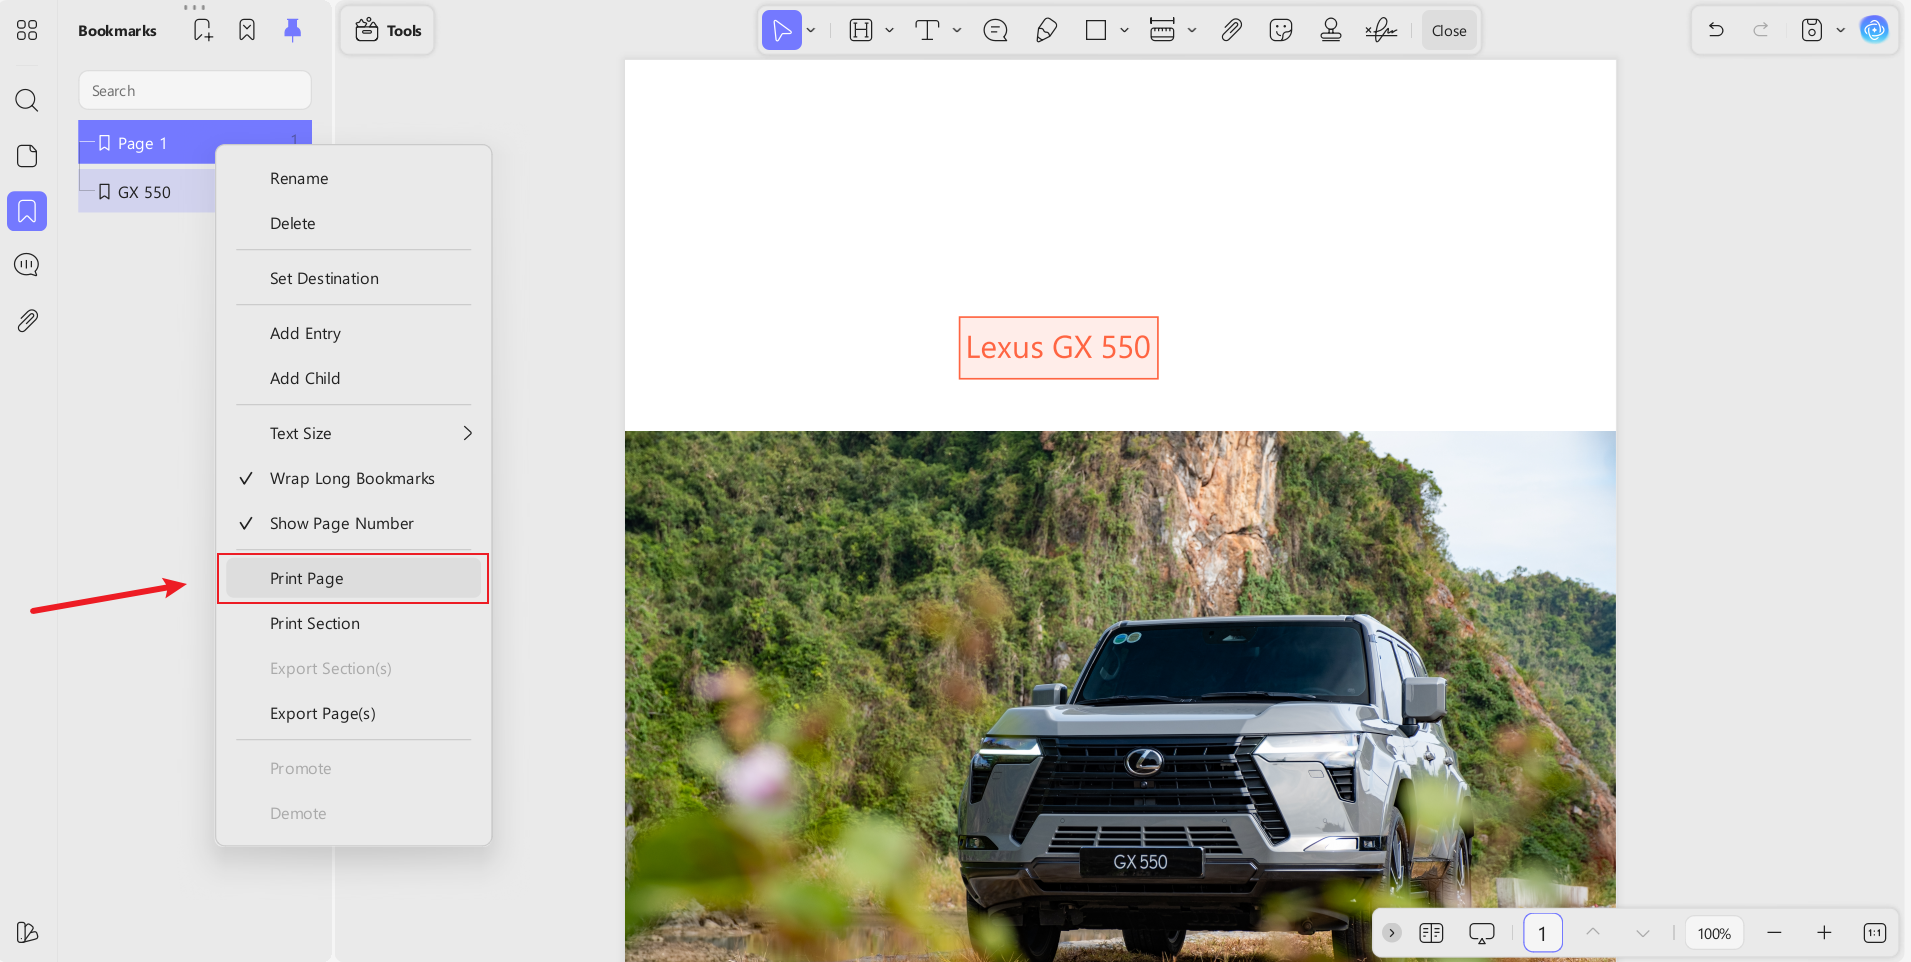
Step 5: Similarly, users can also use bookmarks to print pages from the PDF file directly.
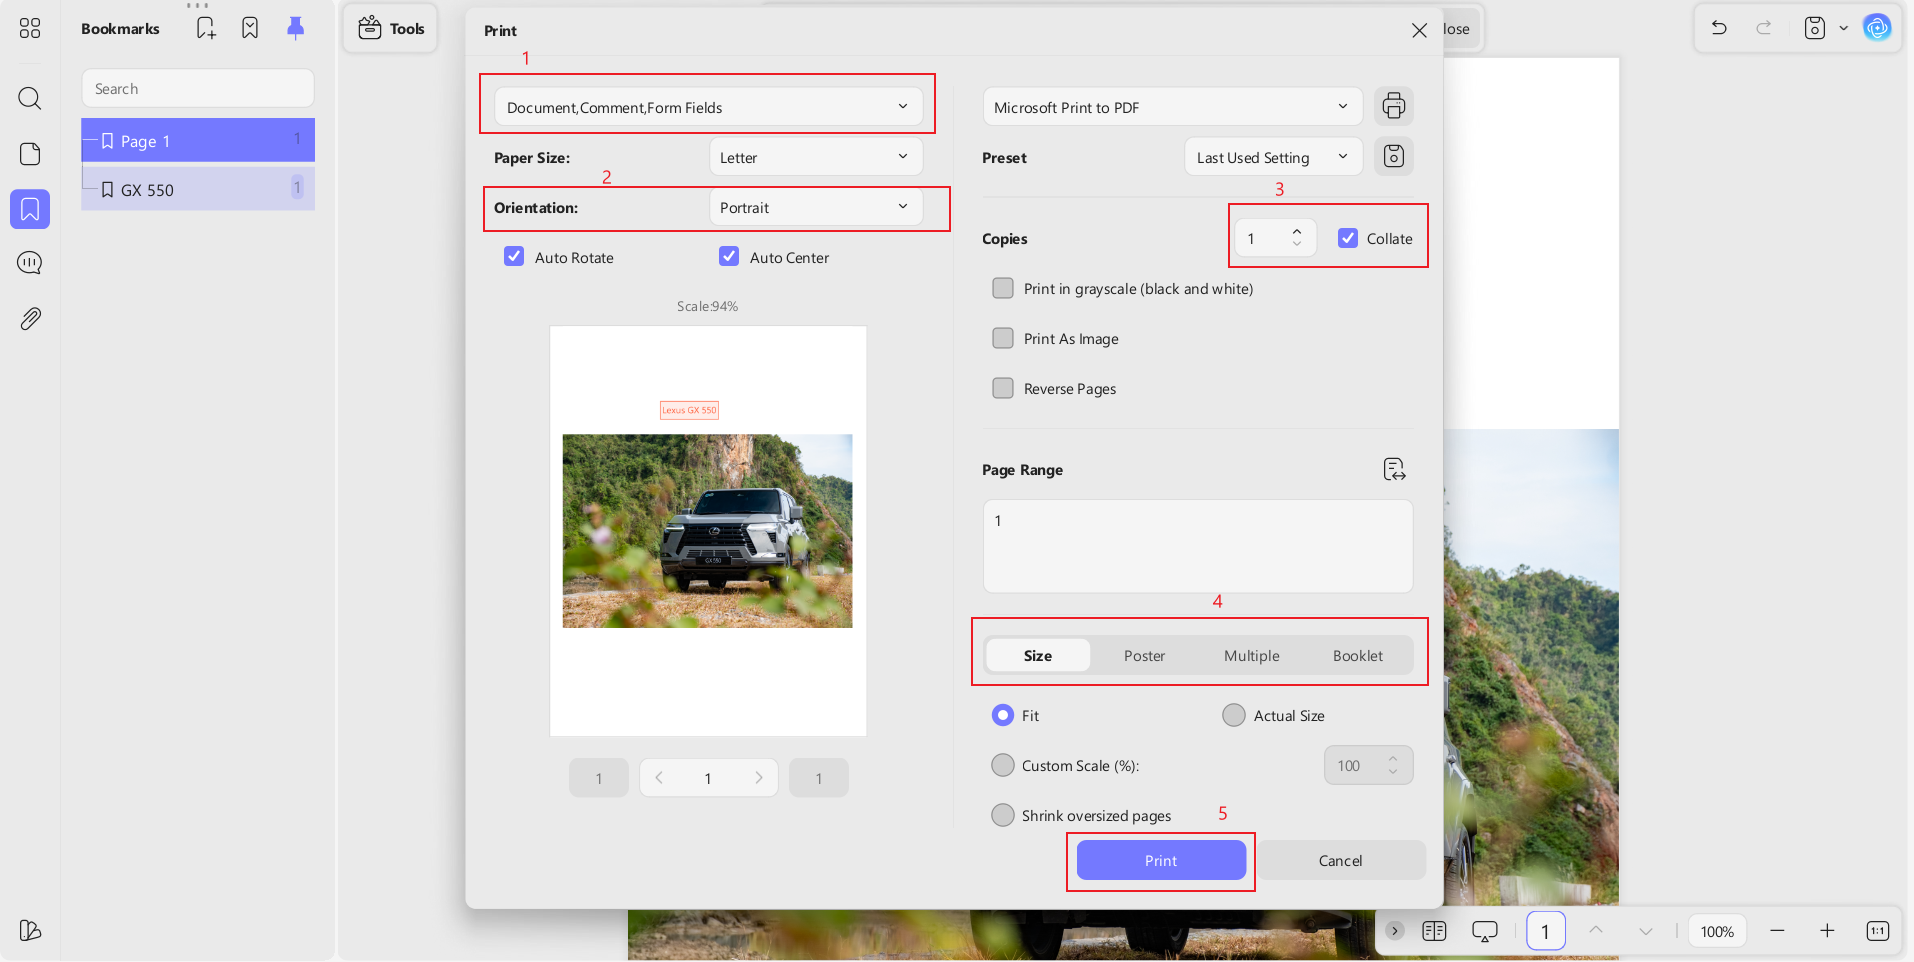
Plus, when you click on “Print Pages”, UPDF allows you to choose from various printing options. Here are a few of them explained:
1: You can choose what you want to include in your printed PDF.
2: Users can choose the desired orientation for their PDF to be printed.
3: Choose the number of copies you want to print.
4: Let UPDF know what you want to print, choose from simple PDF, poster, or Booklet. For each selection, you can also make further adjustments (Page size, etc).
5: Once done with all the customizations, simply “Print” your PDF.
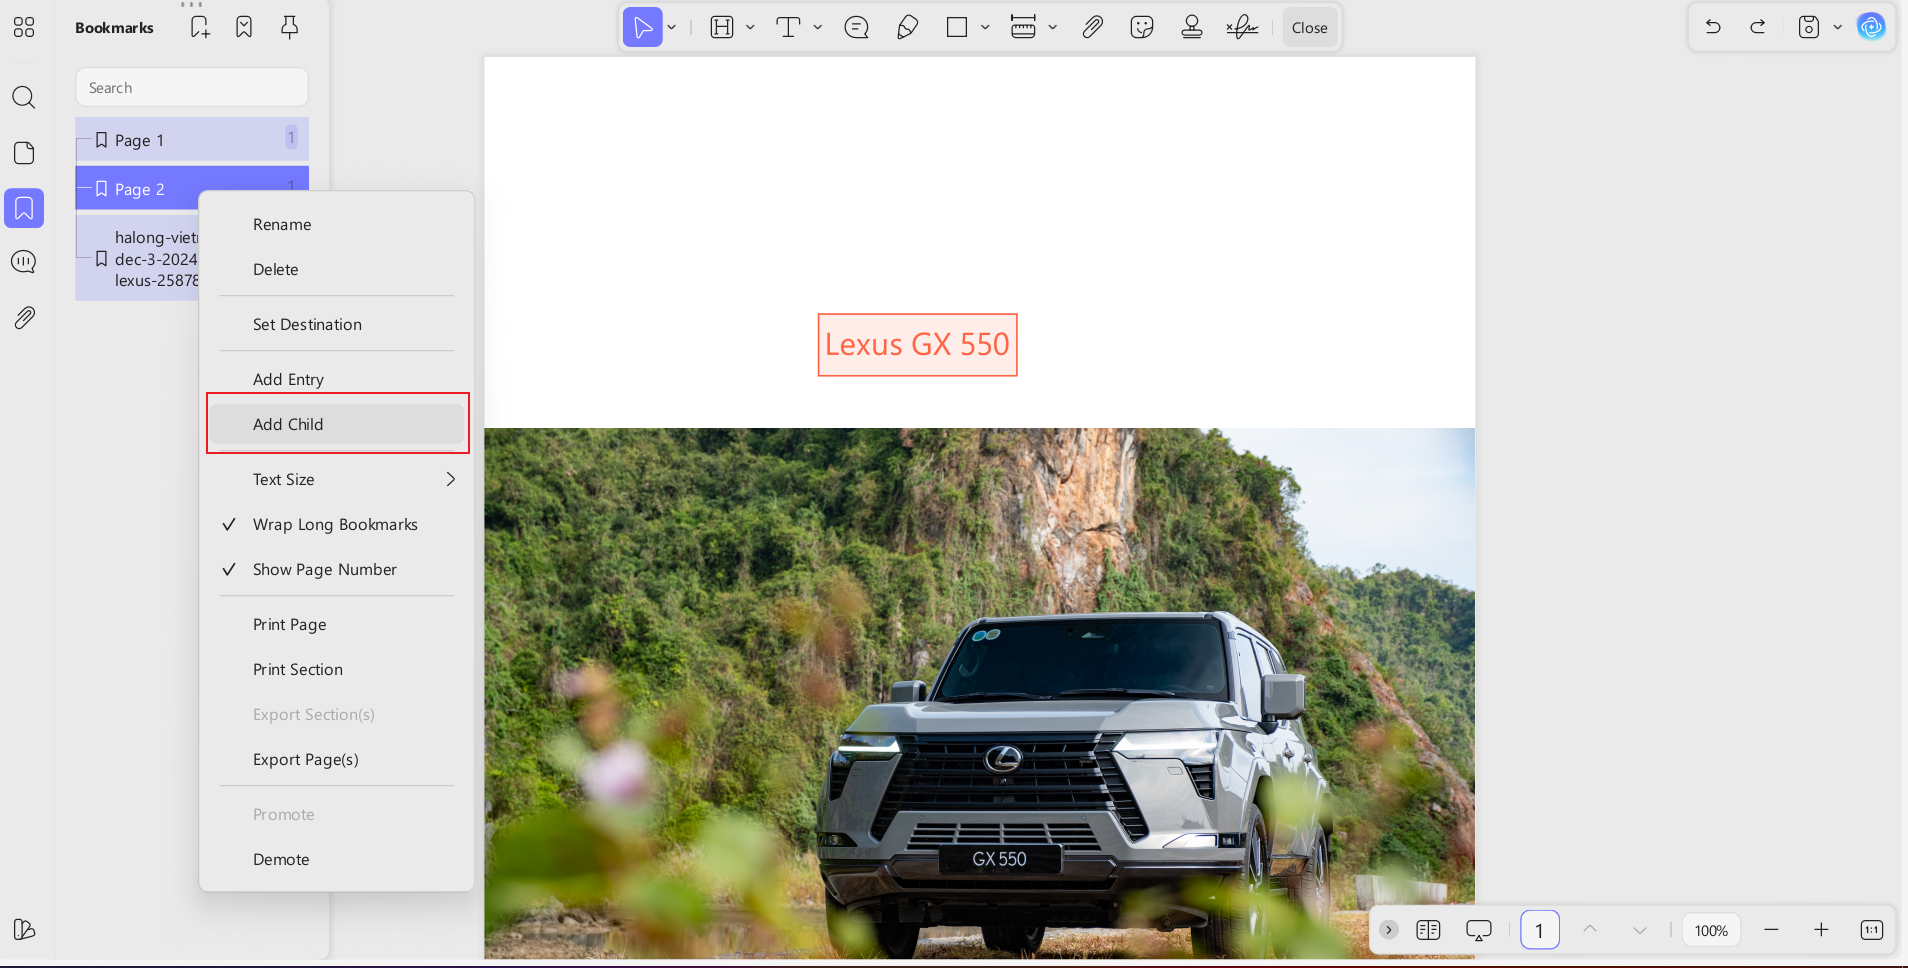
Step 6: To add further bookmarks to your PDF, simply click on “Add Entry”. This will add new bookmark entry to your PDF document.

Step 7: Similarly, users can also add a child bookmark (a sub-entry of a top-level or "parent" bookmark).
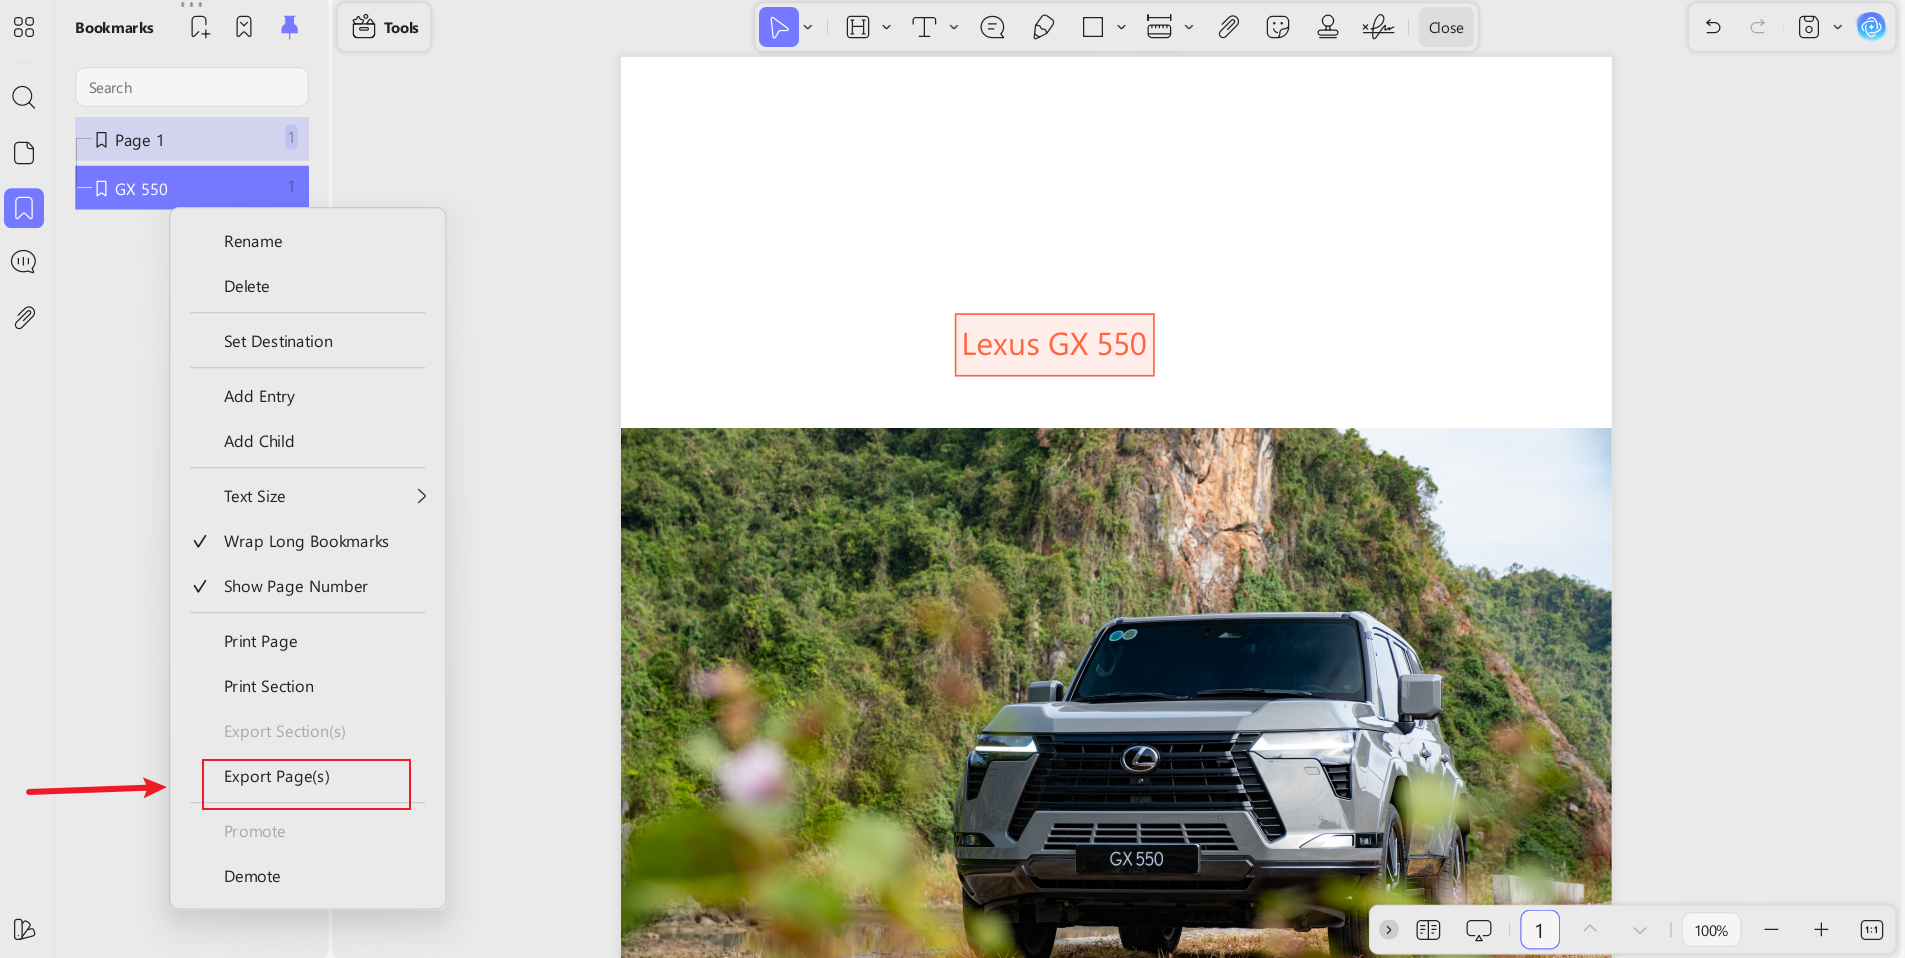
Step 8: In case you don't want to print your PDF directly, you can simply “Export Pages” to your device.
Bonus Tip: AI Generate Bookmarks with UPDF
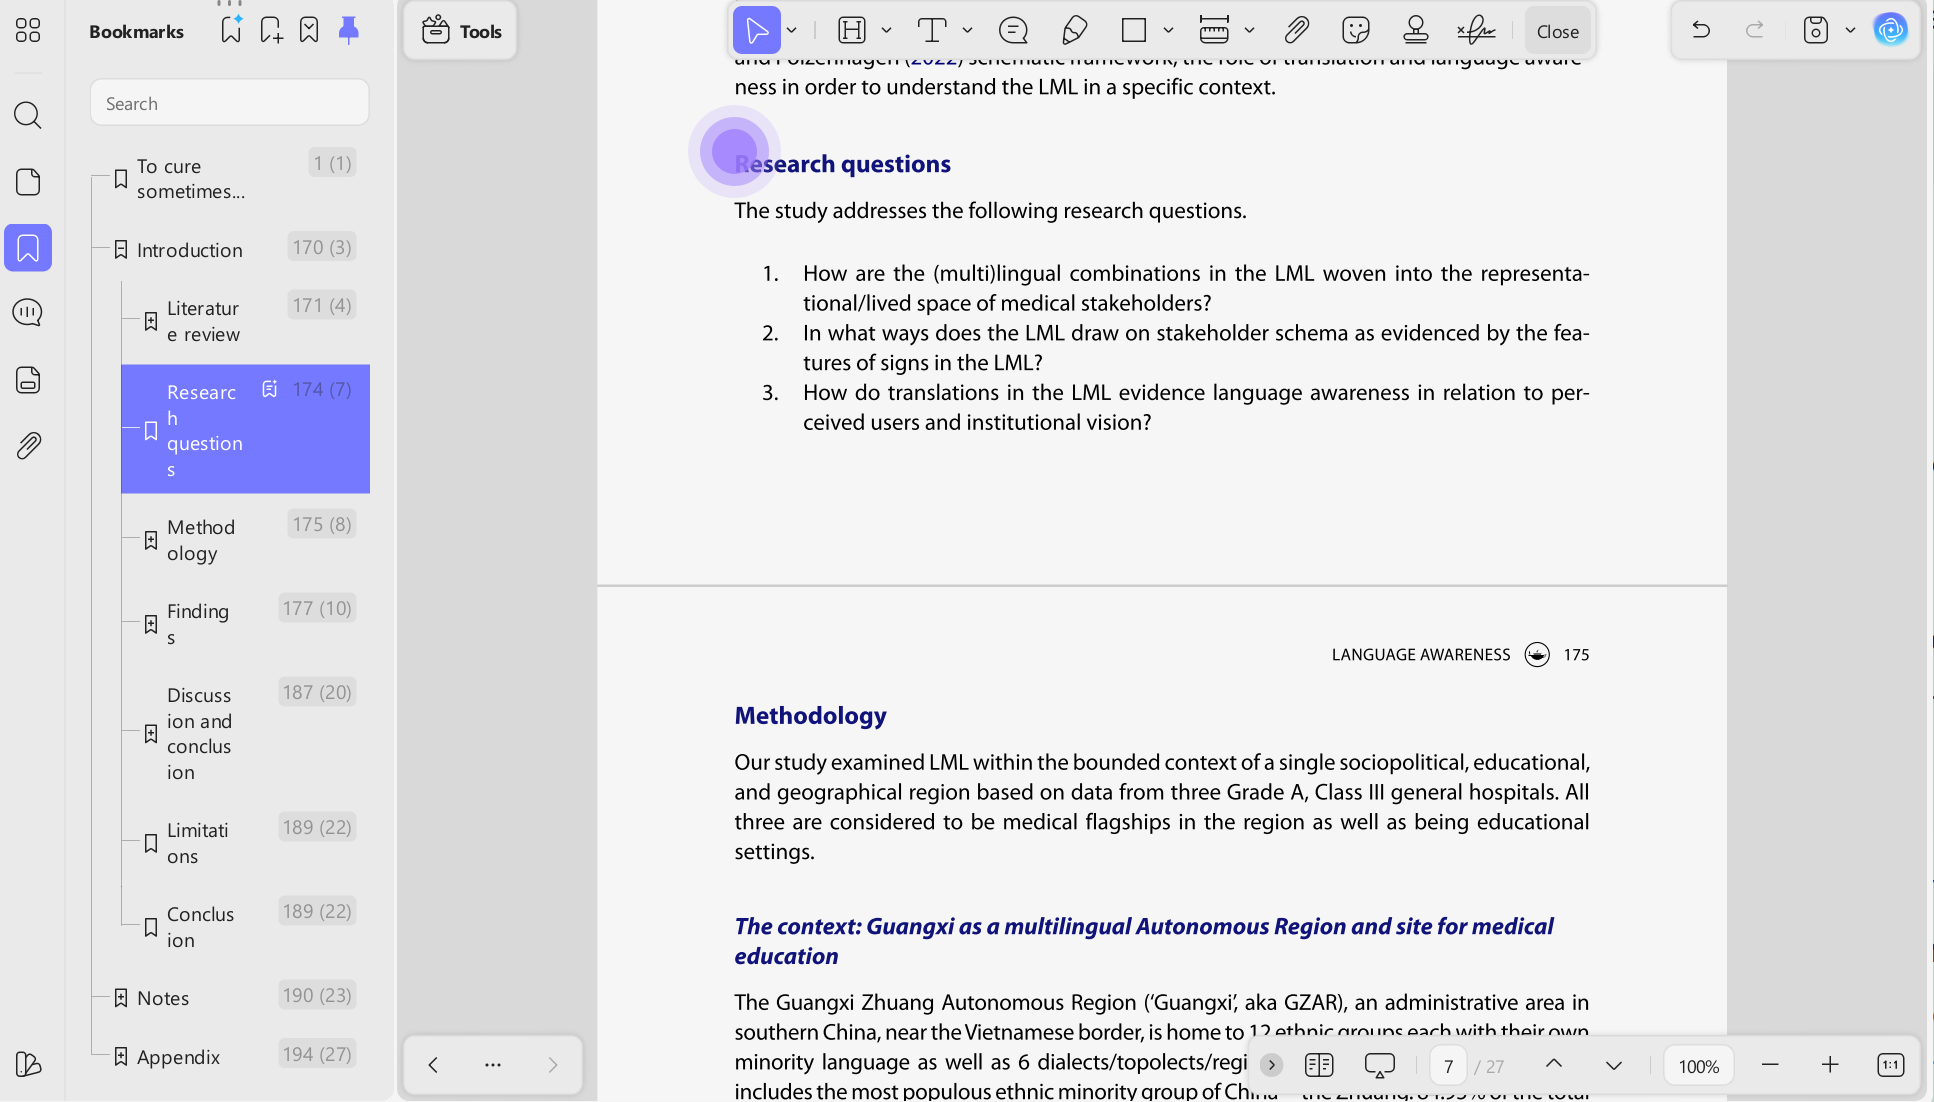
Besides, when you are reading a long academic paper without a table of contents for quick navigation to the corresponding sections, the newly launched "AI Generated Bookmarks" feature of UPDF will be a great help.
In just a few simple steps, AI can automatically generate a hierarchical table of contents tree based on the headings in your paper.
>> Read this guidance and add bookmarks automatically ! >>
Part 4. How to Create Bookmarks in the UPDF Mobile App?
There is also a UPDF application that both Android and iOS users can download. Like any other app, the UPDF app is super easy to use. With just a few clicks, you can customize your PDFs. Here is how you can add bookmarks to your PDF files using the UPDF mobile application.
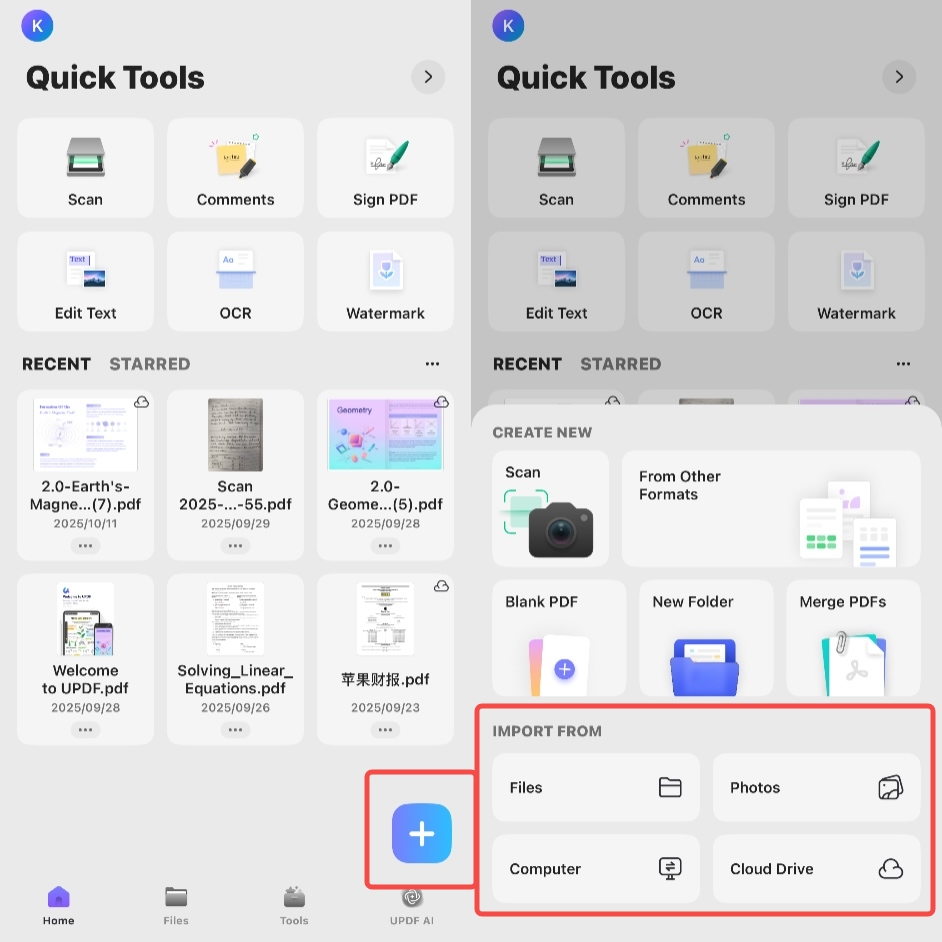
Step 1: Launch the UPDF app on your phone. You will be greeted with a simple and clean interface.
Step 2: Click on the “+” sign to add documents in which you want to add bookmarks. It can be any type of document, picture, or invoice. UPDF also allows you to add documents for editing through cloud storage spaces (Dropbox, for example).
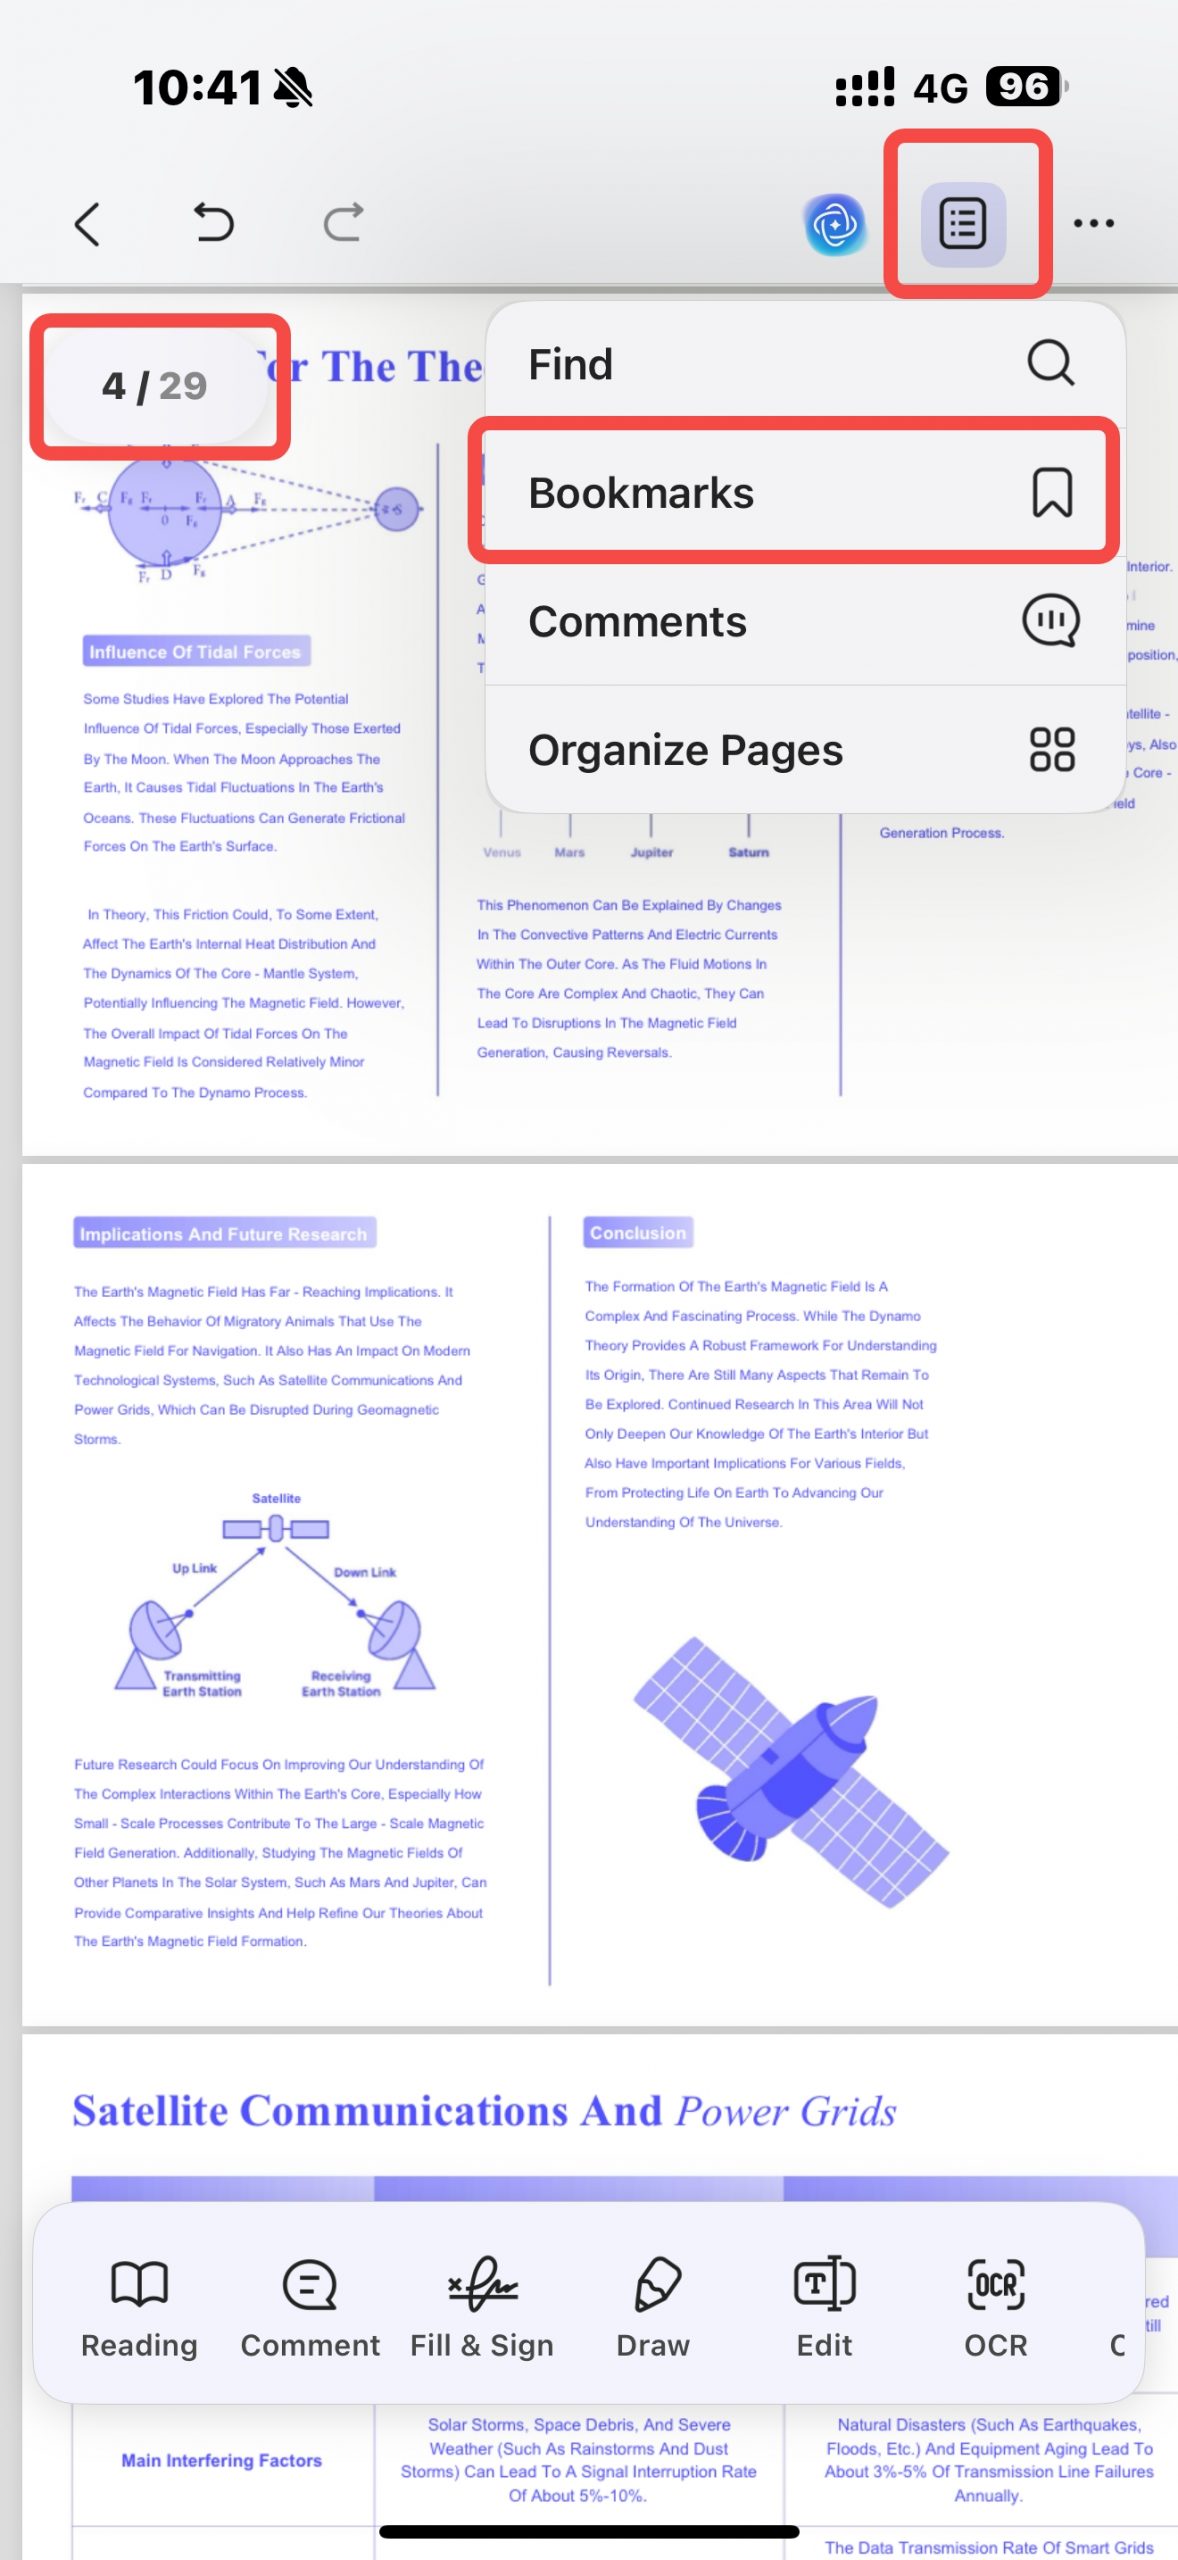
Step 3: Once you have imported the document, open it, swipe to the page where you want to add a bookmark and click on the top right side of the screen to add bookmarks.
Step 4: Rename the bookmark as needed. For an existing bookmark, you can swipe it left with your finger and choose to rename or delete it. To add more bookmarks, tap the triangle button in the upper left corner to go back, and follow the steps above again. Once completed, UPDF allows you to directly share the final PDF from the application.

Part 5. Bonus Tip: Combine Bookmarks with Other PDF Tools in UPDF
UPDF is a lot more than just a tool. It’s a complete PDF editing solution. Users can even combine bookmarks with other PDF tools in UPDF. Also, they can edit their PDF the way they want. Here are some of the notable UPDF features explained:
Windows • macOS • iOS • Android 100% secure
1. Annotate
UPDF allows you to express ideas, highlight key details, or share feedback directly on a document. For this, you can use tools like highlights, comments, drawings, and sticky notes to make your PDF interactive and easy to review. This feature is especially useful for students, professionals, or teams collaborating on the same file.
2. Edit
Not just annotations, with UPDF you can also modify text, change fonts or colors, and even add or remove images without disrupting the document’s layout. It gives you complete control to polish reports, proposals, or study materials directly within the file.
3. Convert
UPDF makes file conversion simple and accurate. You can turn a PDF into Word, Excel, PowerPoint, or image formats while keeping the original structure intact.
4. Organize
Apart from simple editing, you can reorder, rotate, delete, or extract pages to keep your document structured exactly how you want. It’s an ideal feature when preparing reports, eBooks, or lengthy documents that need a clear, logical flow.
5. Merge
The merge feature lets you combine multiple PDFs into one cohesive document in just a few clicks. Whether you’re joining project files, invoices, or presentations, UPDF keeps everything in order and easy to share.
6. Create and Fill a PDF Form
UPDF also gives you the power to create interactive forms from scratch or fill out existing ones digitally. You can add text fields, checkboxes, radio buttons, and signatures, all without printing.
7. OCR (Optical Character Recognition)
The OCR feature in UPDF turns scanned images or documents into editable and searchable text. It recognizes multiple languages and preserves formatting, making it easier to work with scanned files or printed materials.
The Biggest UPDF Advantage
The best aspect of UPDF is the fact that it supports a seamless user experience across all major platforms. You can use it on Windows PC or laptop, Mac devices, and even on Android and iOS devices. This cross-platform functionality makes it one of its own kind of PDF editing solution available on the internet. So, why wait? Try UPDF Now!
Windows • macOS • iOS • Android 100% secure
FAQs
1. How to split a PDF and keep Bookmarks?
Step 1: Open UPDF and load the PDF.
Step 2: Click “Organize Pages” in the left tools panel or the top toolbar.
Step 3: Click “Split” and select “Split by Top-level Bookmarks”.
Step 4:In the pop-up window, make sure you select “Split Document by Top-Level Bookmarks”. You can also choose whether to “keep top-level bookmarks” or not. Click "Split" to start splitting the document.
Step 5: Choose the output folder and filename pattern. UPDF will automatically run the split.
Step 6: Open one resulting file and check the Bookmarks panel to confirm bookmarks were preserved.
2. What is the difference between bookmarks and hyperlinks?
A hyperlink navigates the user out of a certain document to access particular information. Whereas Bookmarks help users navigate certain areas within a document. So both help navigate the reader but in a different way.
Conclusion
So that was all you needed to know on how to create bookmarks in Adobe PDF. It's simple, but with tools like UPDF, it becomes a hassle-free ask. With UPDF, you can add bookmarks to your PDF. Plus, you can fully edit your PDF the way you want.
On top of all its unique features, the cross-platform functionality makes it one of the most complete PDF editing tools on the web. Download UPDF now and experience the next level PDF editing yourself.
Windows • macOS • iOS • Android 100% secure


 Enrica Taylor

 Enid Brown