Batch Insert on Windows
Find the option of adding a specific PDF file in a collection of PDF documents with the help of a single function on UPDF.
1. Find the Batch Insert Option
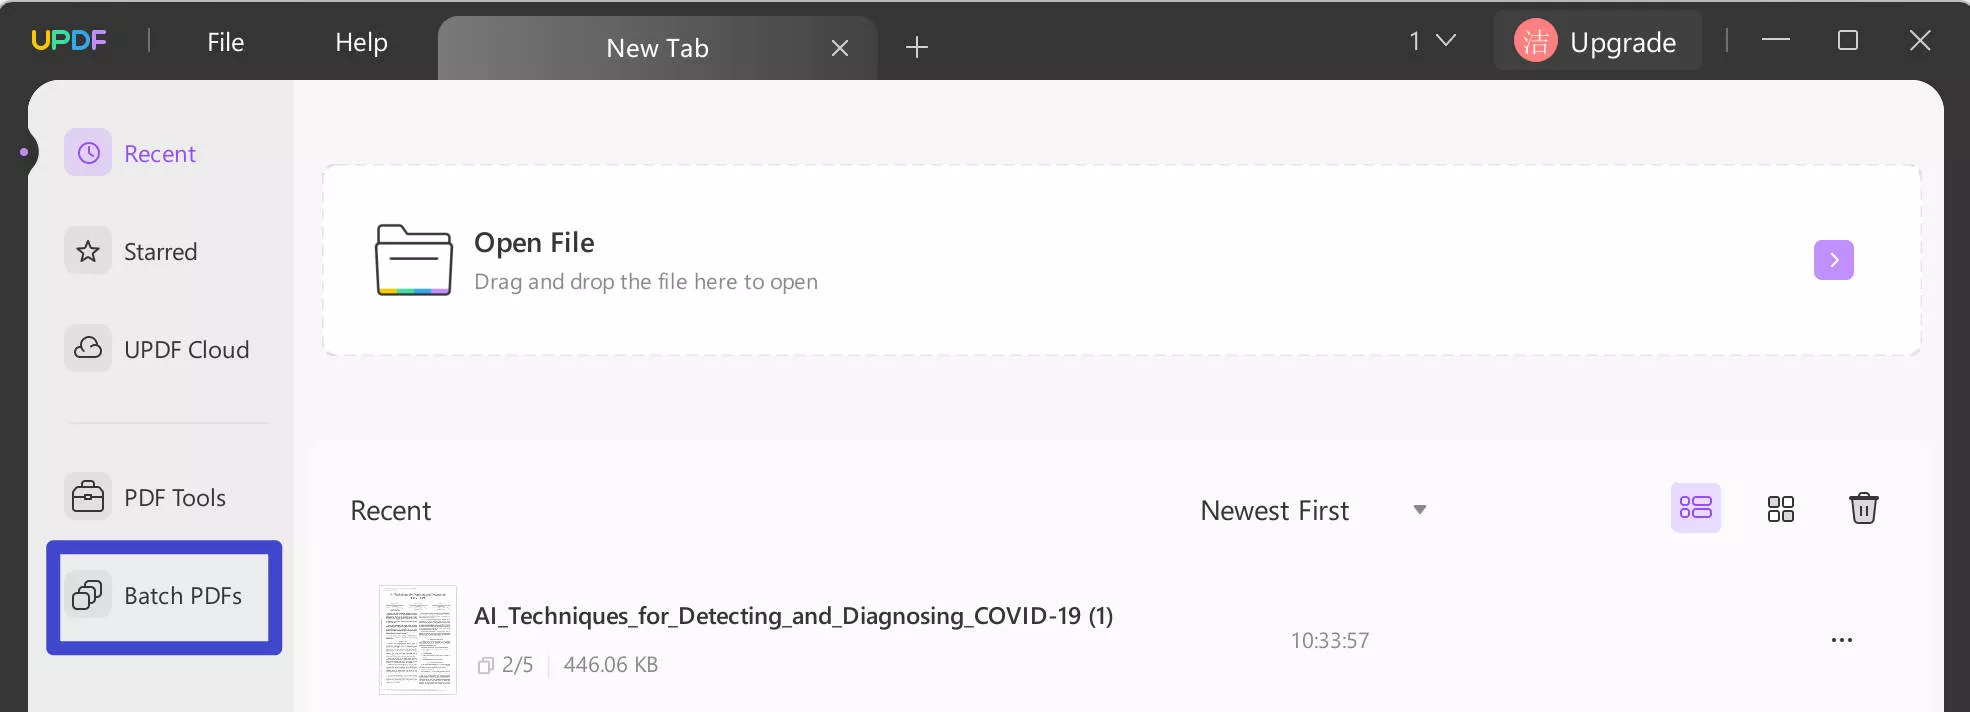
Download UPDF via the below button. Launch it by double-clicking on the desktop icon. Open UPDF and look for the "Batch PDFs" option on the home screen.
Windows • macOS • iOS • Android 100% secure
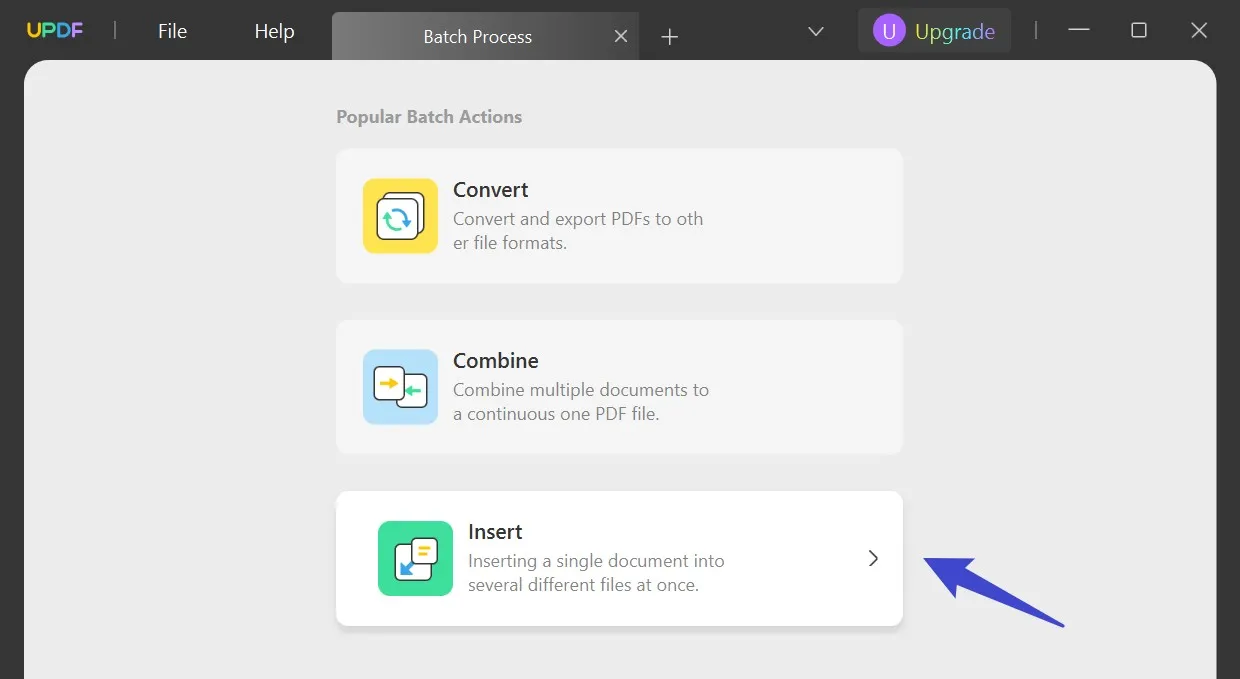
Choose the "Insert" option.
2. Add Multiple PDF Files
In the left panel, select the documents where you want to insert another PDF. In the right panel, choose the PDF you want to insert into the selected files on the left.
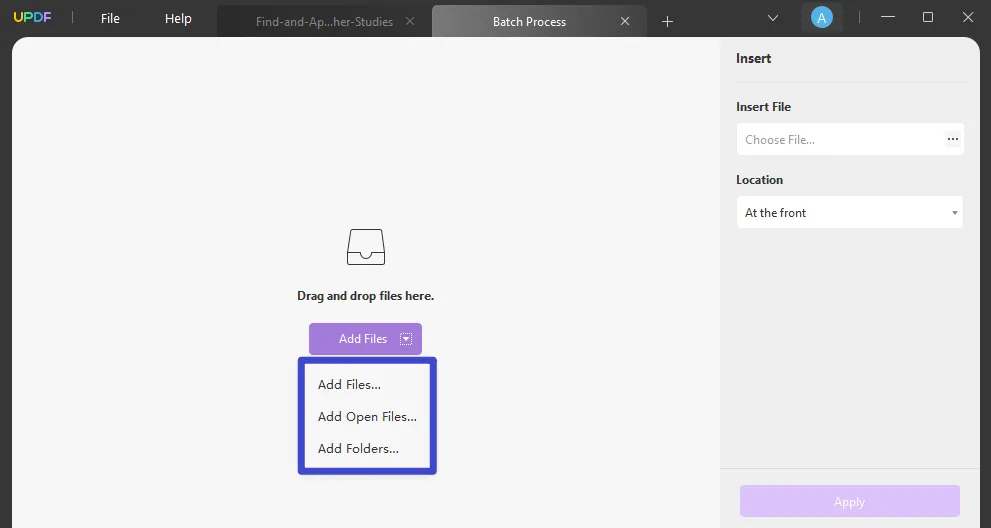
UPDF allows you to add multiple files simultaneously in the left panel, enabling you to insert the same PDF into several documents. Additionally, you can choose both images and PDFs in the left panel for insertion.
- Adding a Specific File from File Explorer
If you select "Add Files…" from the drop-down menu, you will have to browse a file to add it to the platform.
- Adding Opened Files
If some files are currently open on UPDF and you wish to add them in the Batch Insert section, use the "Add Open Files…" button to continue.
- Add Complete Folders
For adding a collection of documents, it is best to use the "Add Folders…" if the files are present in a single folder.
Note: if you are using the free trial version, you can only insert one PDF into two PDF files at one time. If you have bulk PDF files, you can upgrade to UPDF Pro at an affordable price to unlock all limitations.
3. Add the File to Be Inserted
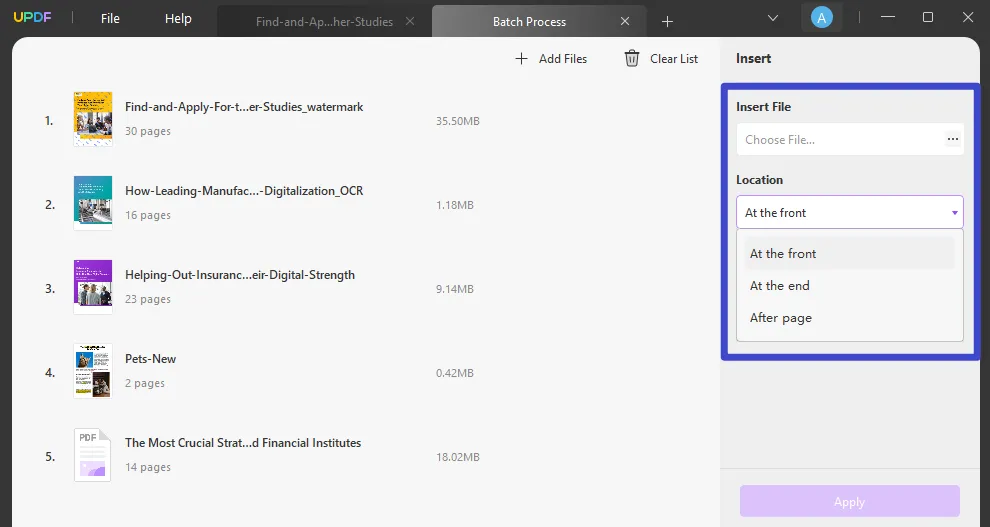
Continue to the right panel to find the "Insert File" section. Browse and add the PDF document that you have to insert on all imported PDFs.
Proceed to set the "Location" where the PDF needs to be inserted. You can select any option out of "At the front," "At the end," and "After page" (where you have to specify the page number).
4. Batch Insert the PDF to Multiple PDFs/Images
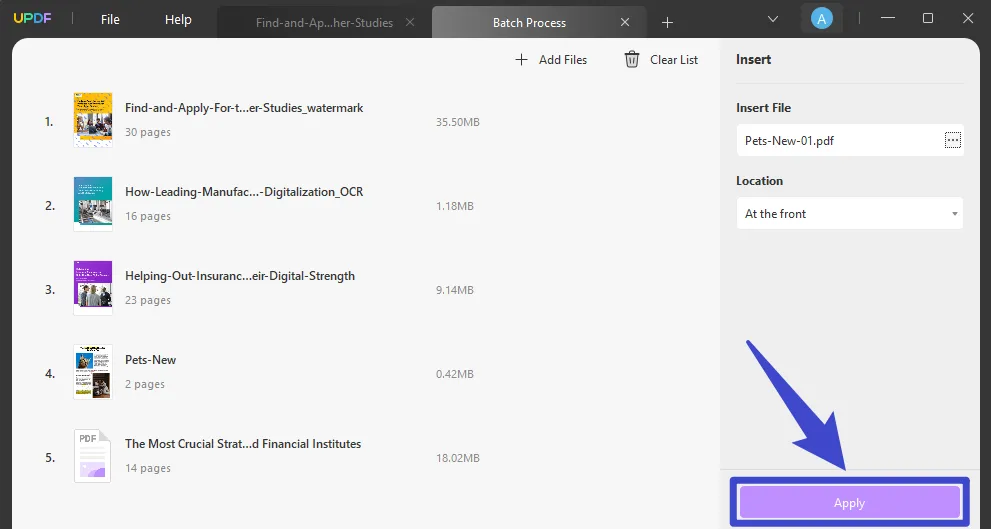
Continue to the "Apply" button on the bottom-right of the screen if you want to conclude the process. Browse the location and continue to save the new PDF document.
5. Removing a File from the List
If you intend to remove a PDF file from the list, navigate the cursor to the particular file and select the "three-dots" icon. Look for the "Remove File" option in the drop-down menu and continue.
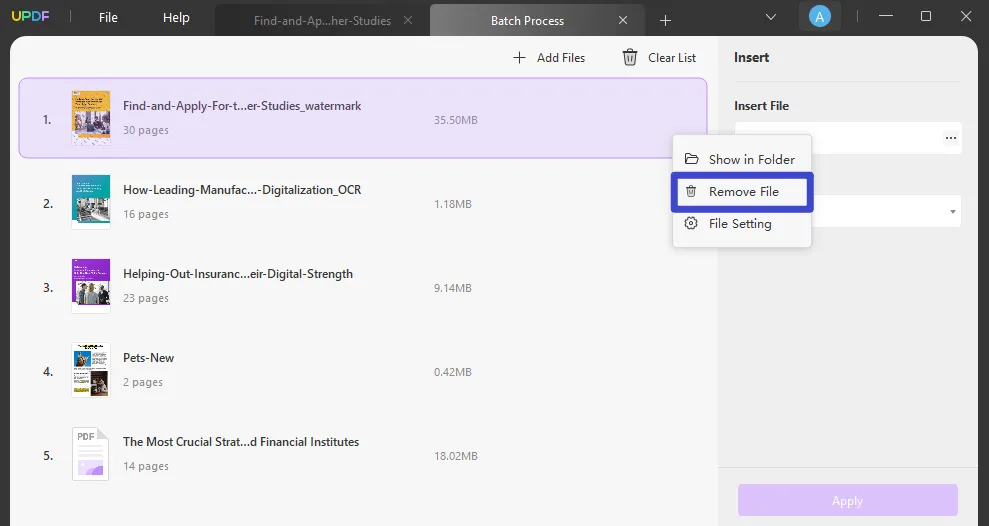
To open the file in its location, you can select the "Show in Folder" option in the same menu. If you want to know the details of the PDF, select the "File Setting" option for more information.
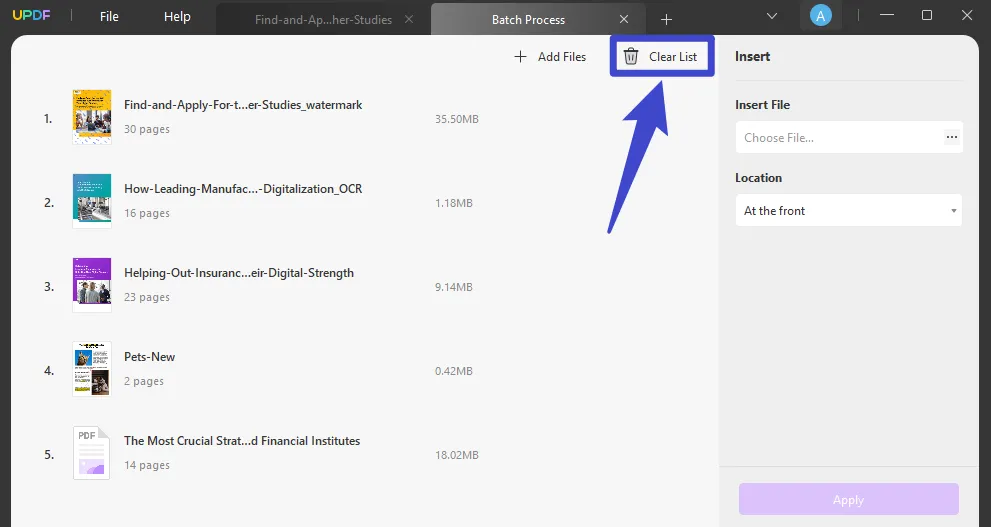
To clear out the complete list of PDFs, use the "Clear List" button on the top.
 UPDF
UPDF
 UPDF for Windows
 UPDF for Mac
 UPDF for iPhone/iPad
 UPDF for Android
 UPDF AI Online
 UPDF Sign
 Edit PDF
 Annotate PDF
 Create PDF
 PDF Form
 Edit links
 Convert PDF
 OCR
OCR PDF to Word
 PDF to Image
 PDF to Excel
 Organize PDF
 Merge PDF
 Split PDF
 Crop PDF
 Rotate PDF
 Protect PDF
 Sign PDF
 Redact PDF
 Sanitize PDF
 Remove Security
 Read PDF
 UPDF Cloud
 Compress PDF
 Print PDF
 Batch Process
 About UPDF AI
 UPDF AI Solutions
 AI User Guide
 FAQ about UPDF AI
 Summarize PDF
 Translate PDF
 Chat with PDF
 Chat with AI
 Chat with image
 PDF to Mind Map
 Explain PDF
 Scholar Research
 Paper Search
 AI Proofreader
 AI Writer
 AI Homework Helper
 AI Quiz Generator
 AI Math Solver
 PDF to Word
 PDF to Excel
 PDF to PowerPoint
 User Guide
 UPDF Tricks
 FAQs
FAQs UPDF Reviews
 Download Center
 Blog
Blog Newsroom
 Tech Spec
 Updates
 UPDF vs. Adobe Acrobat
 UPDF vs. Foxit
 UPDF vs. PDF Expert

