Batch Combine Files on Windows
If you want to merge multiple PDF documents or images into a single file, UPDF's Batch Combine feature makes it simple and efficient.
Note: UPDF also allows you to split a multi-page PDF into separate files or divide a single PDF page into multiple sections as individual pages. If you need step-by-step guidance for these tasks, click the links below:
1. Select the Batch Combine Option
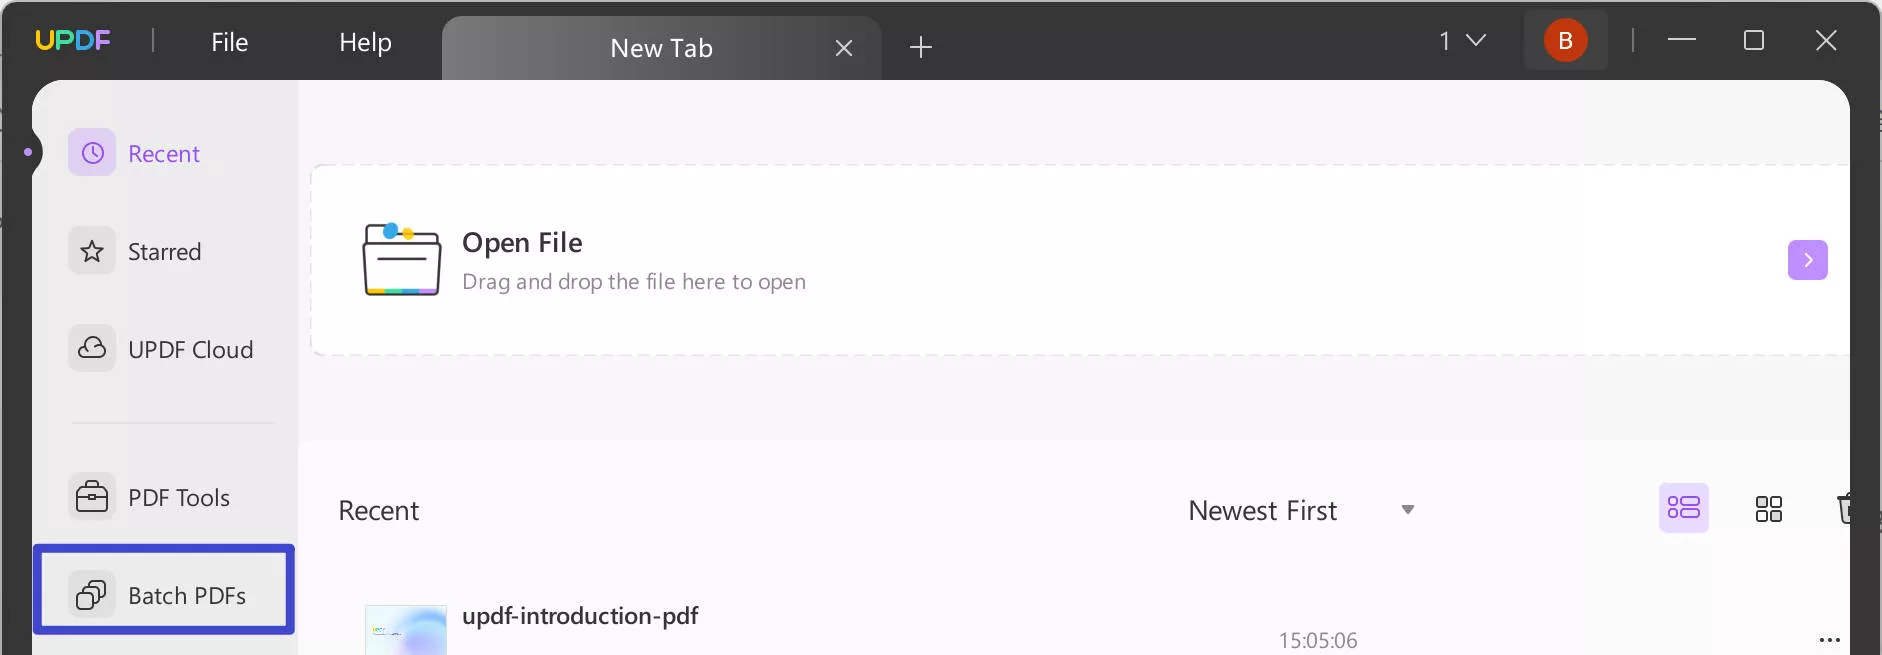
As you launch UPDF on your Windows computer, continue to the "Batch PDFs" feature on the home screen to lead to a new window.
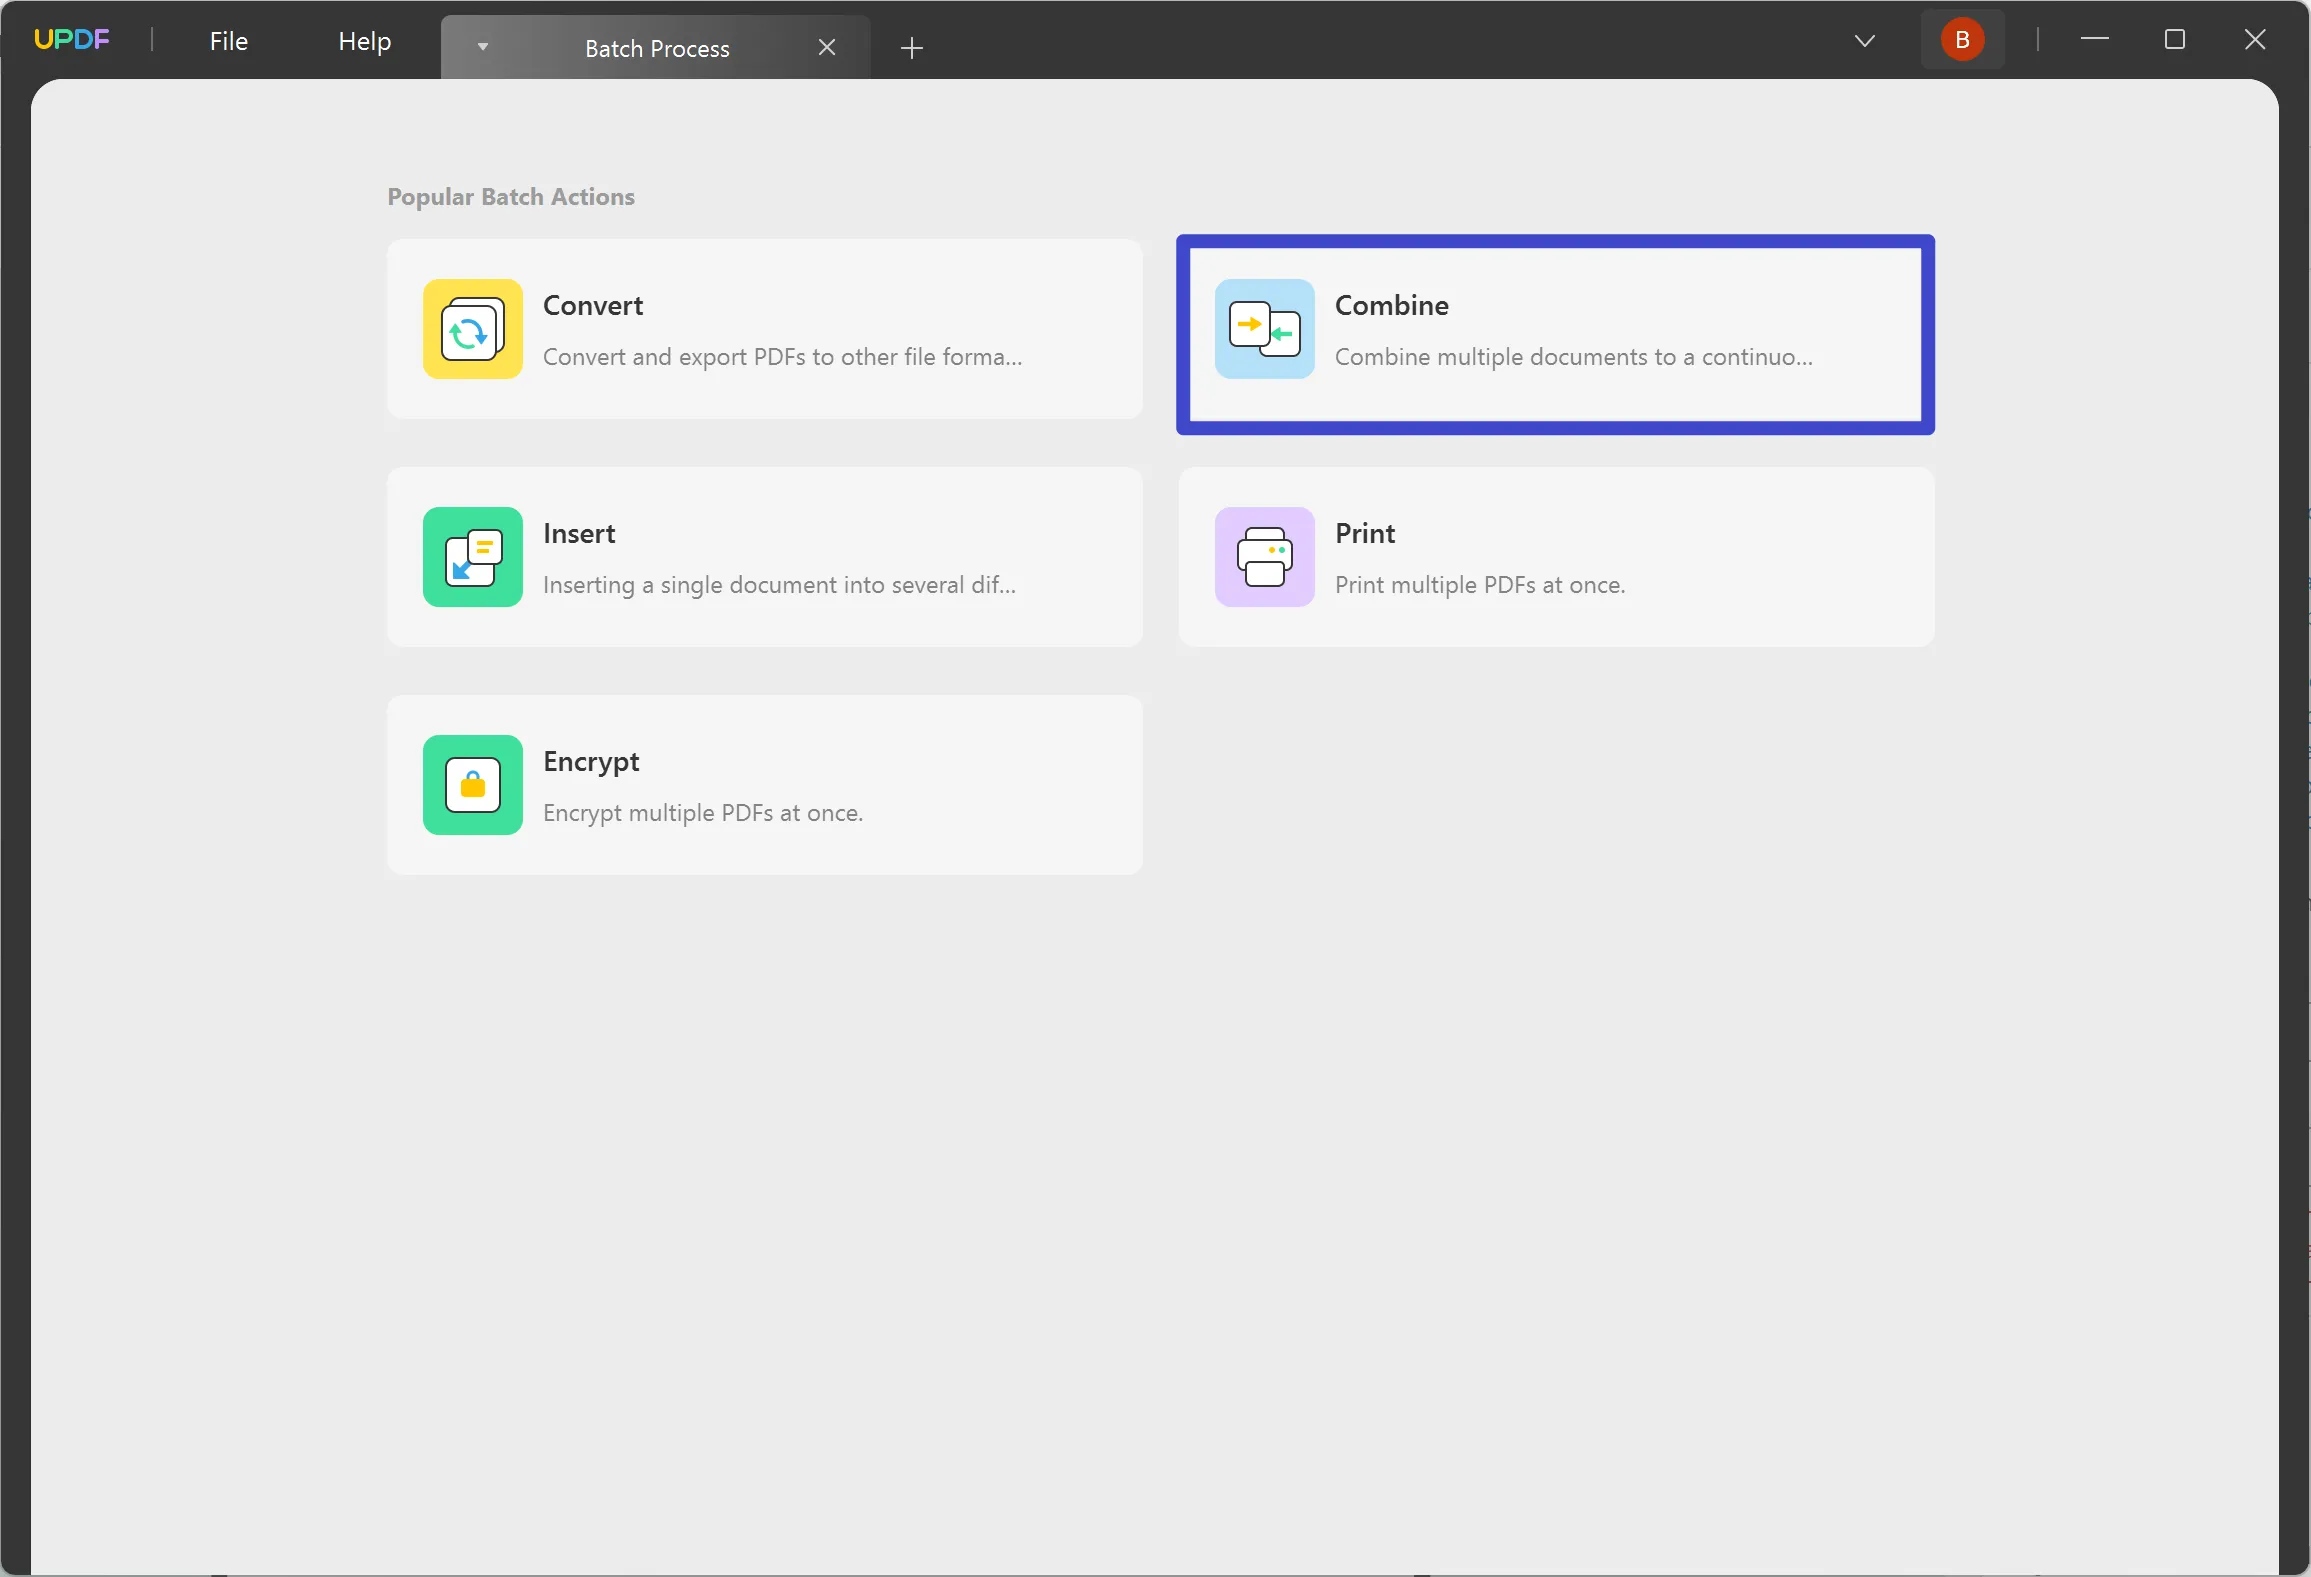
In the new window, select the "Combine" option.
This feature provides the ability to combine PDF documents along with a variety of image formats such as JPG, JPEG, PNG, TIFF, BMP, and GIF into a single PDF.
2. Add Files
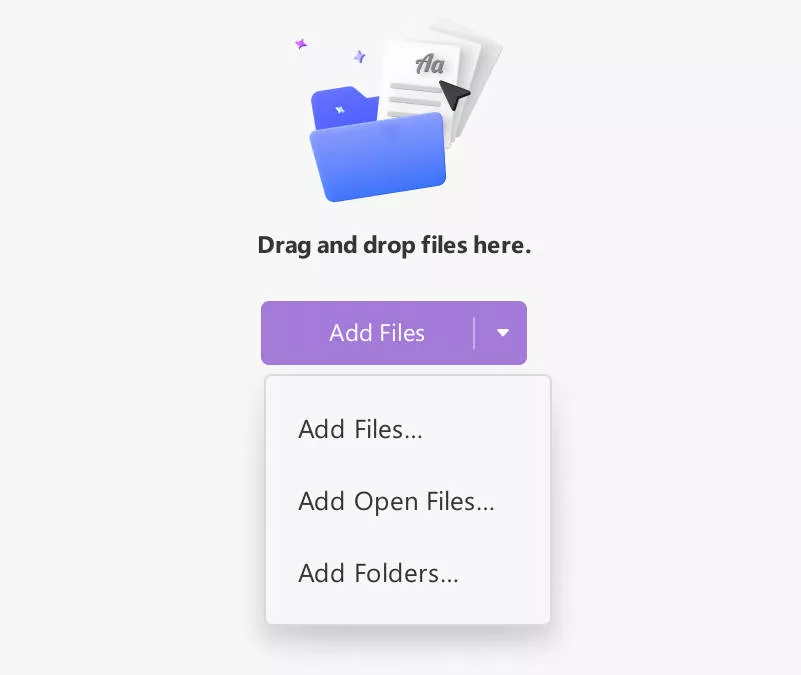
On leading to a new window, you will have to add files to combine, which can be done in a variety of ways:
- Dragging and Dropping
For starters, you can simply drag and drop your potential files into the opened window of UPDF.
- Navigate Files From Folders
As you select the "Add Files" button, you will be led to a drop-down option where you must select the "Add Files…" option. Continue to browse the file from the file explorer and add it into UPDF successfully.
- Adding Pre-Opened Files
You can also find the option of "Add Open Files…" in the drop-down that opens after selecting the "Add Files" button. This will add all files automatically into the section that is currently open on UPDF.
- Add Complete Folders
For adding a collection of PDF documents, you can add a complete folder with the help of the "Add Folders…" option in the drop-down menu.
3. Rearranging Added Documents
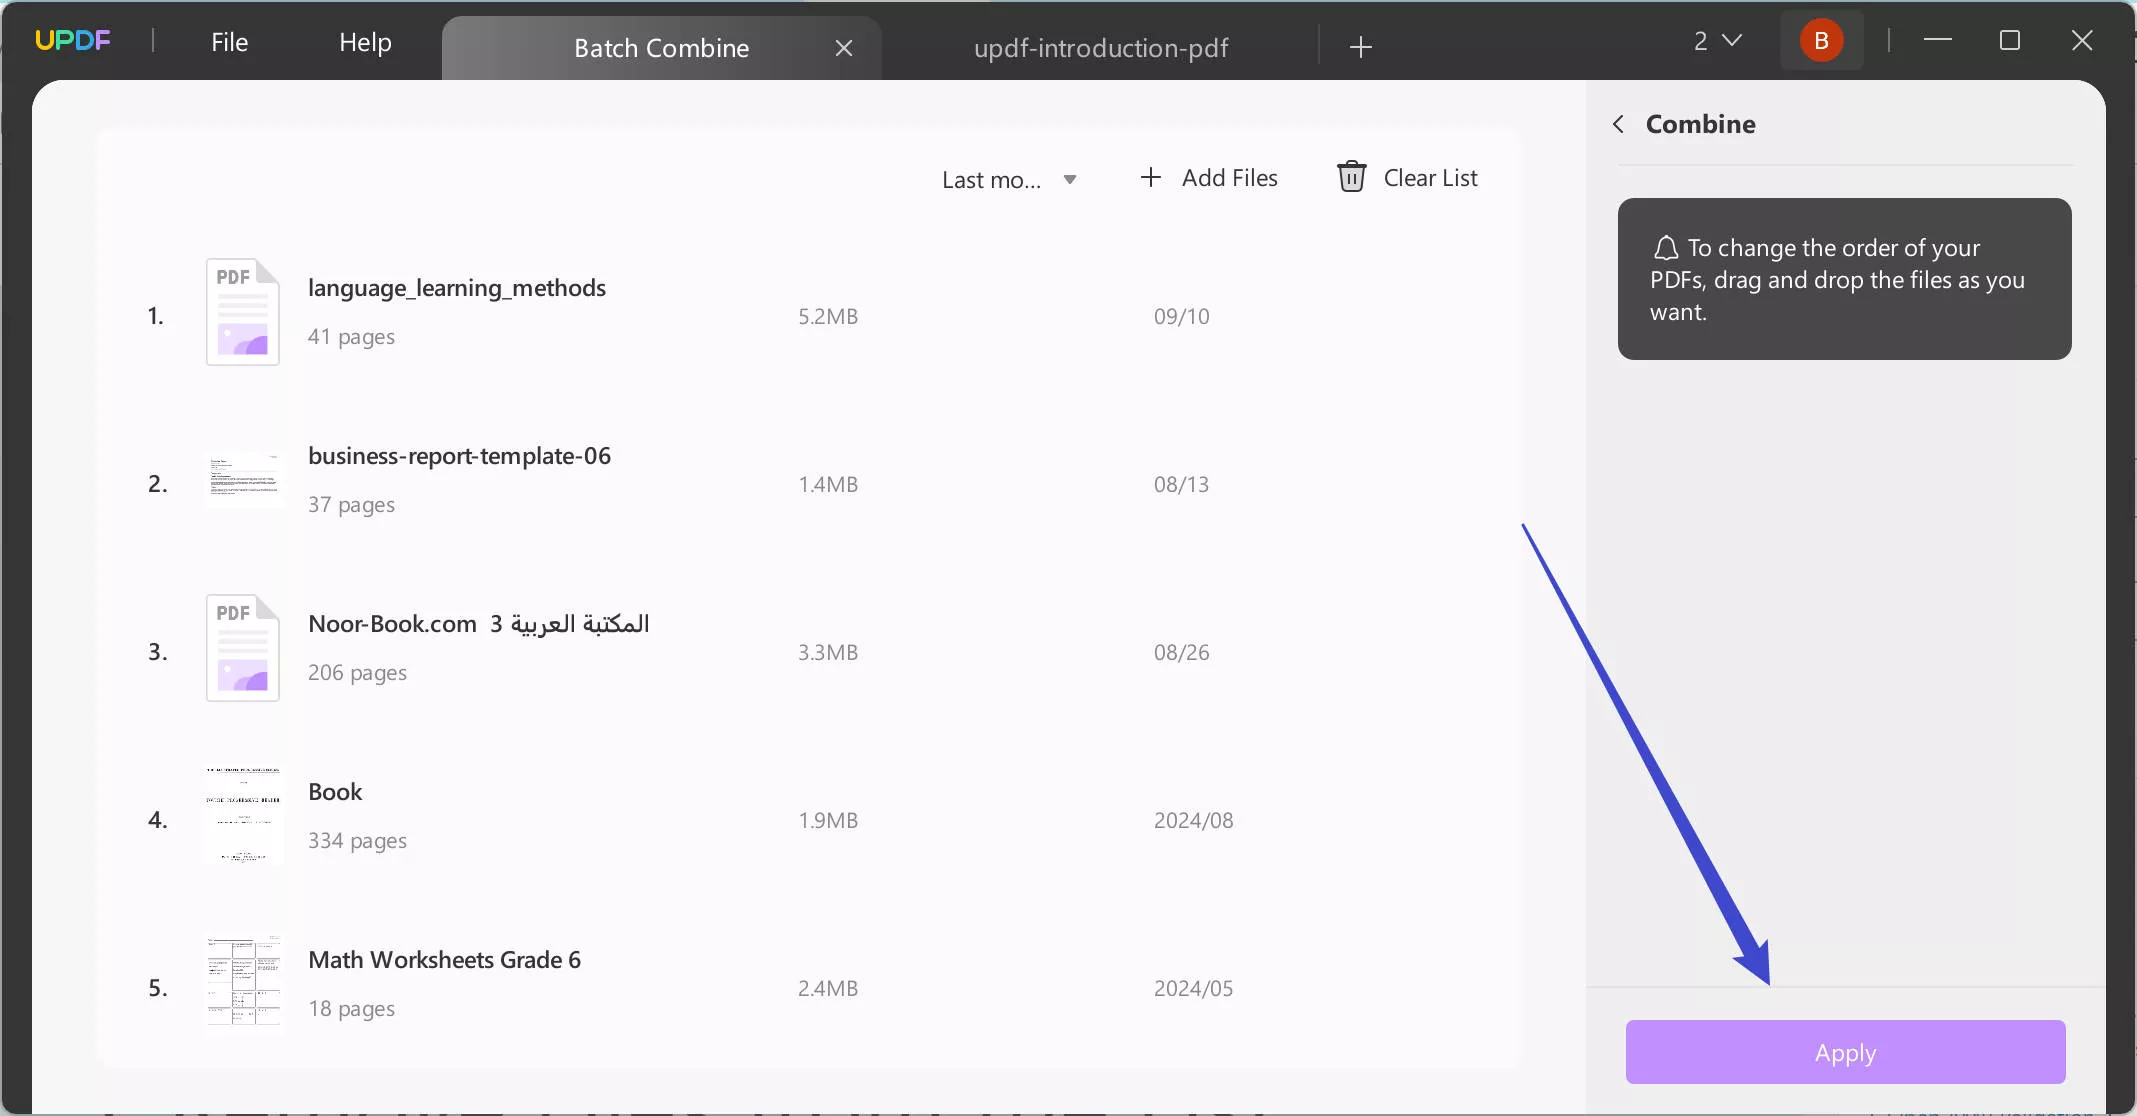
After adding documents to the Batch Combine panel, you can easily rearrange them by dragging them into the desired order.
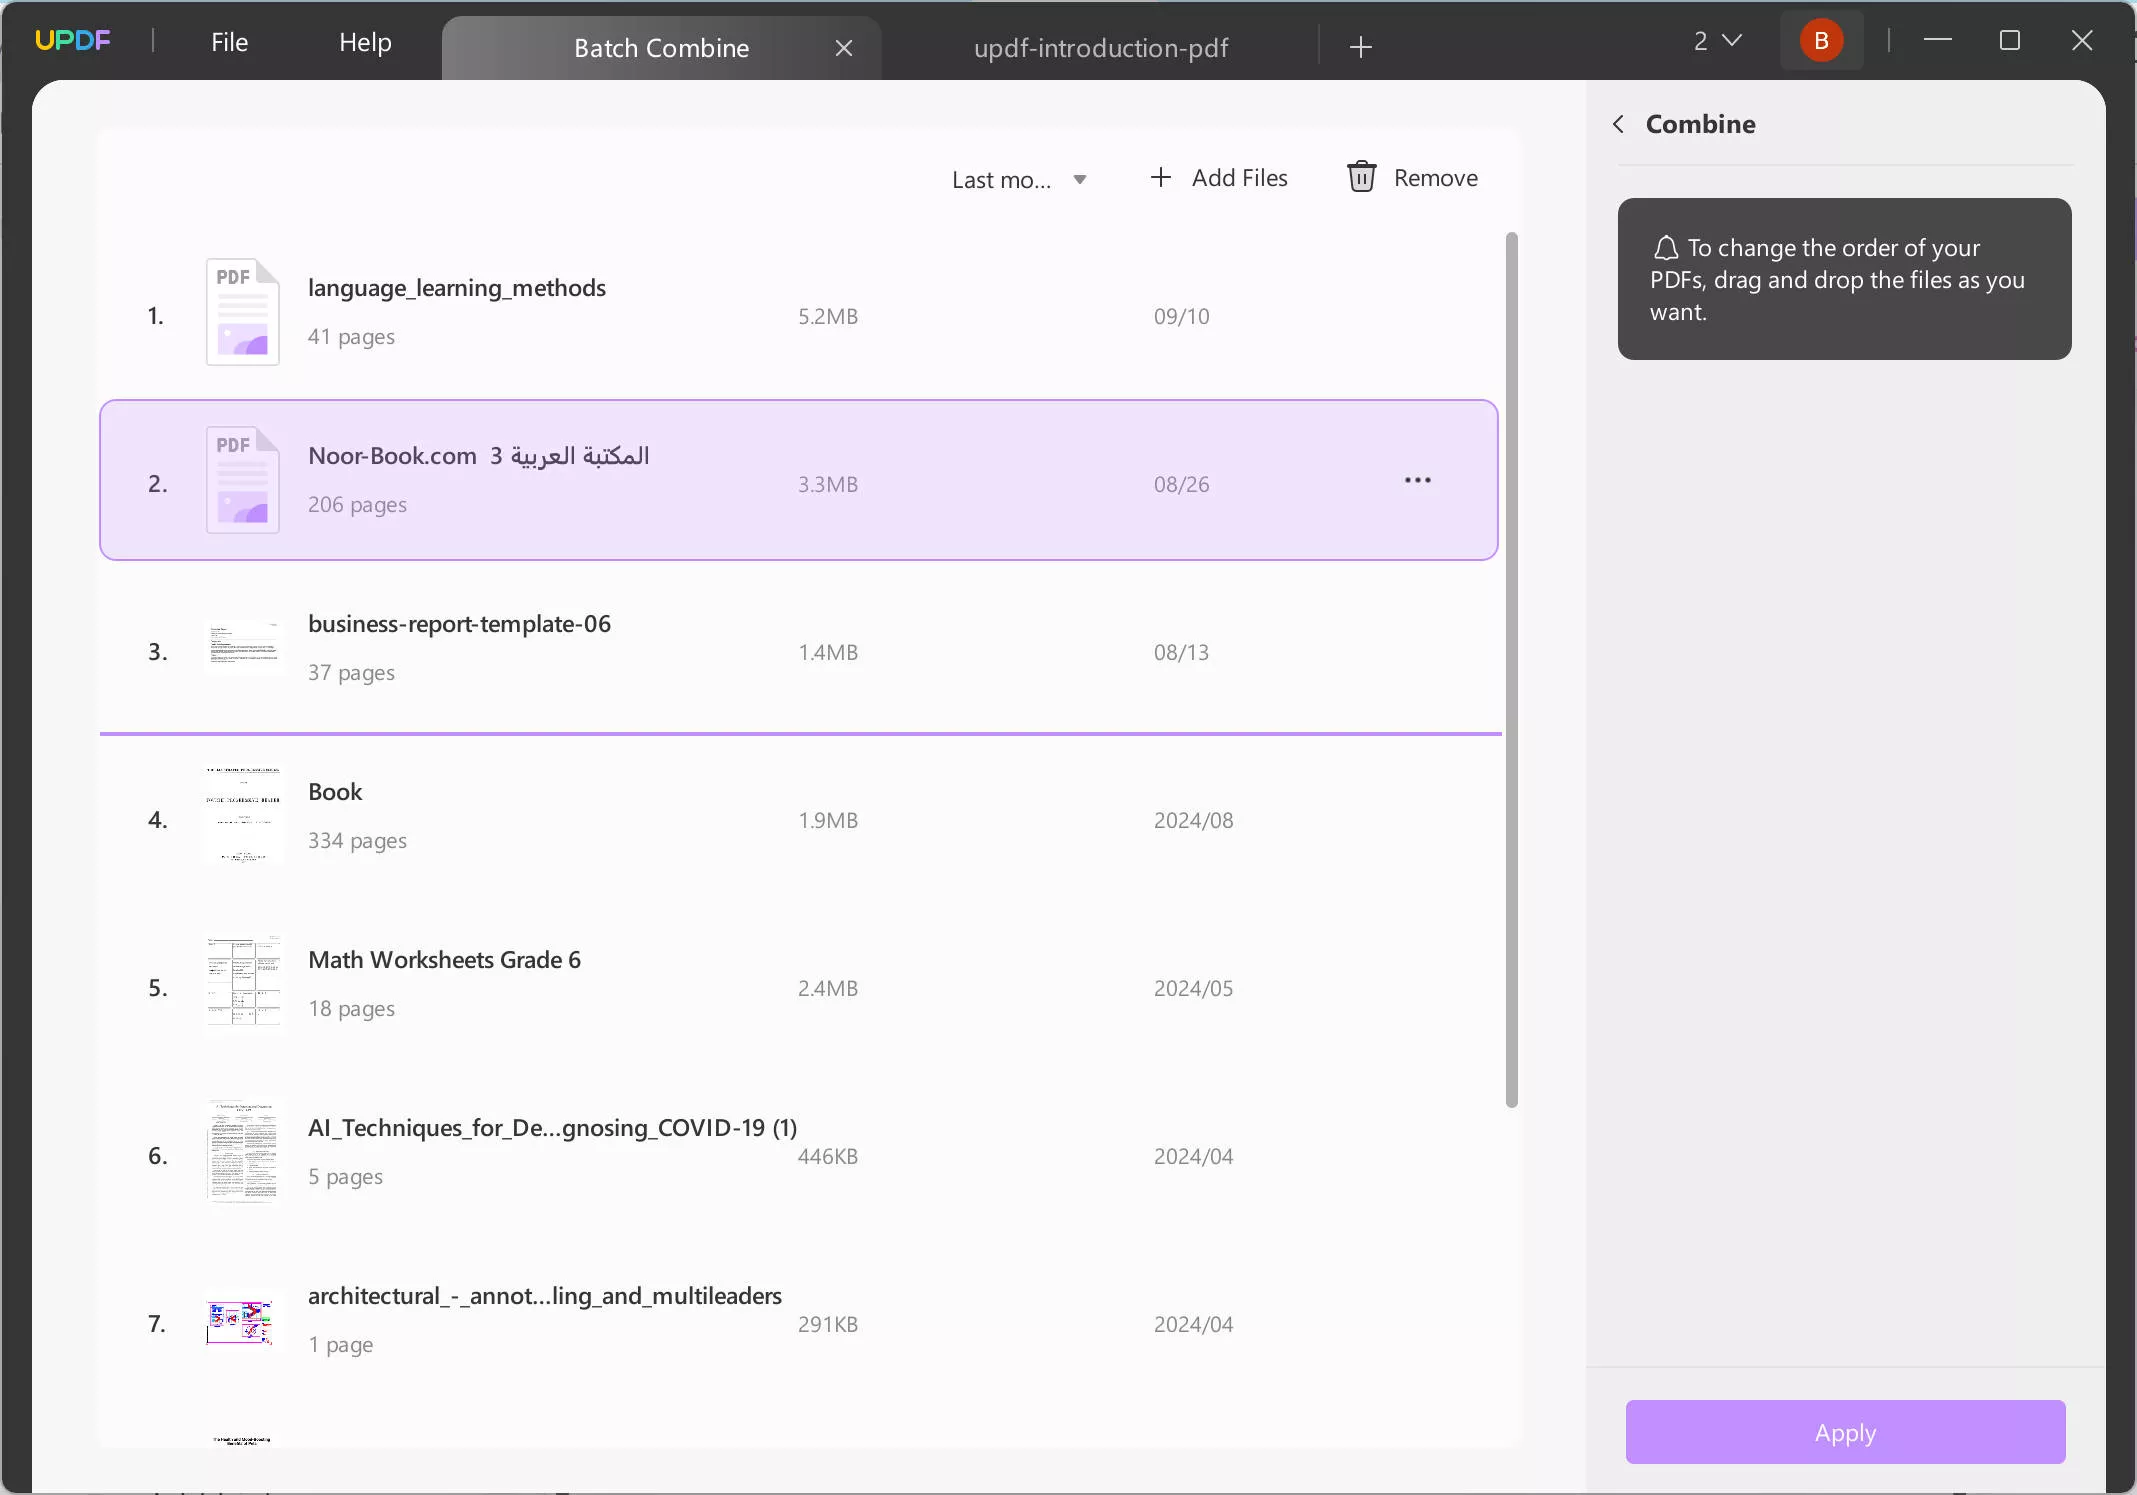
Additionally, UPDF allows you to sort the added files by last modified time, file name, file size, newest first, or oldest first.

4. Combine Files
As you are done with adding all the files and rearranging them, continue to the "Apply" button to save the new document in any particular position you want to.
5. Remove Files from the List
If you intend to remove a specific file, find the "three-dots" icon adjacent to the added document and select the option of "Remove File."
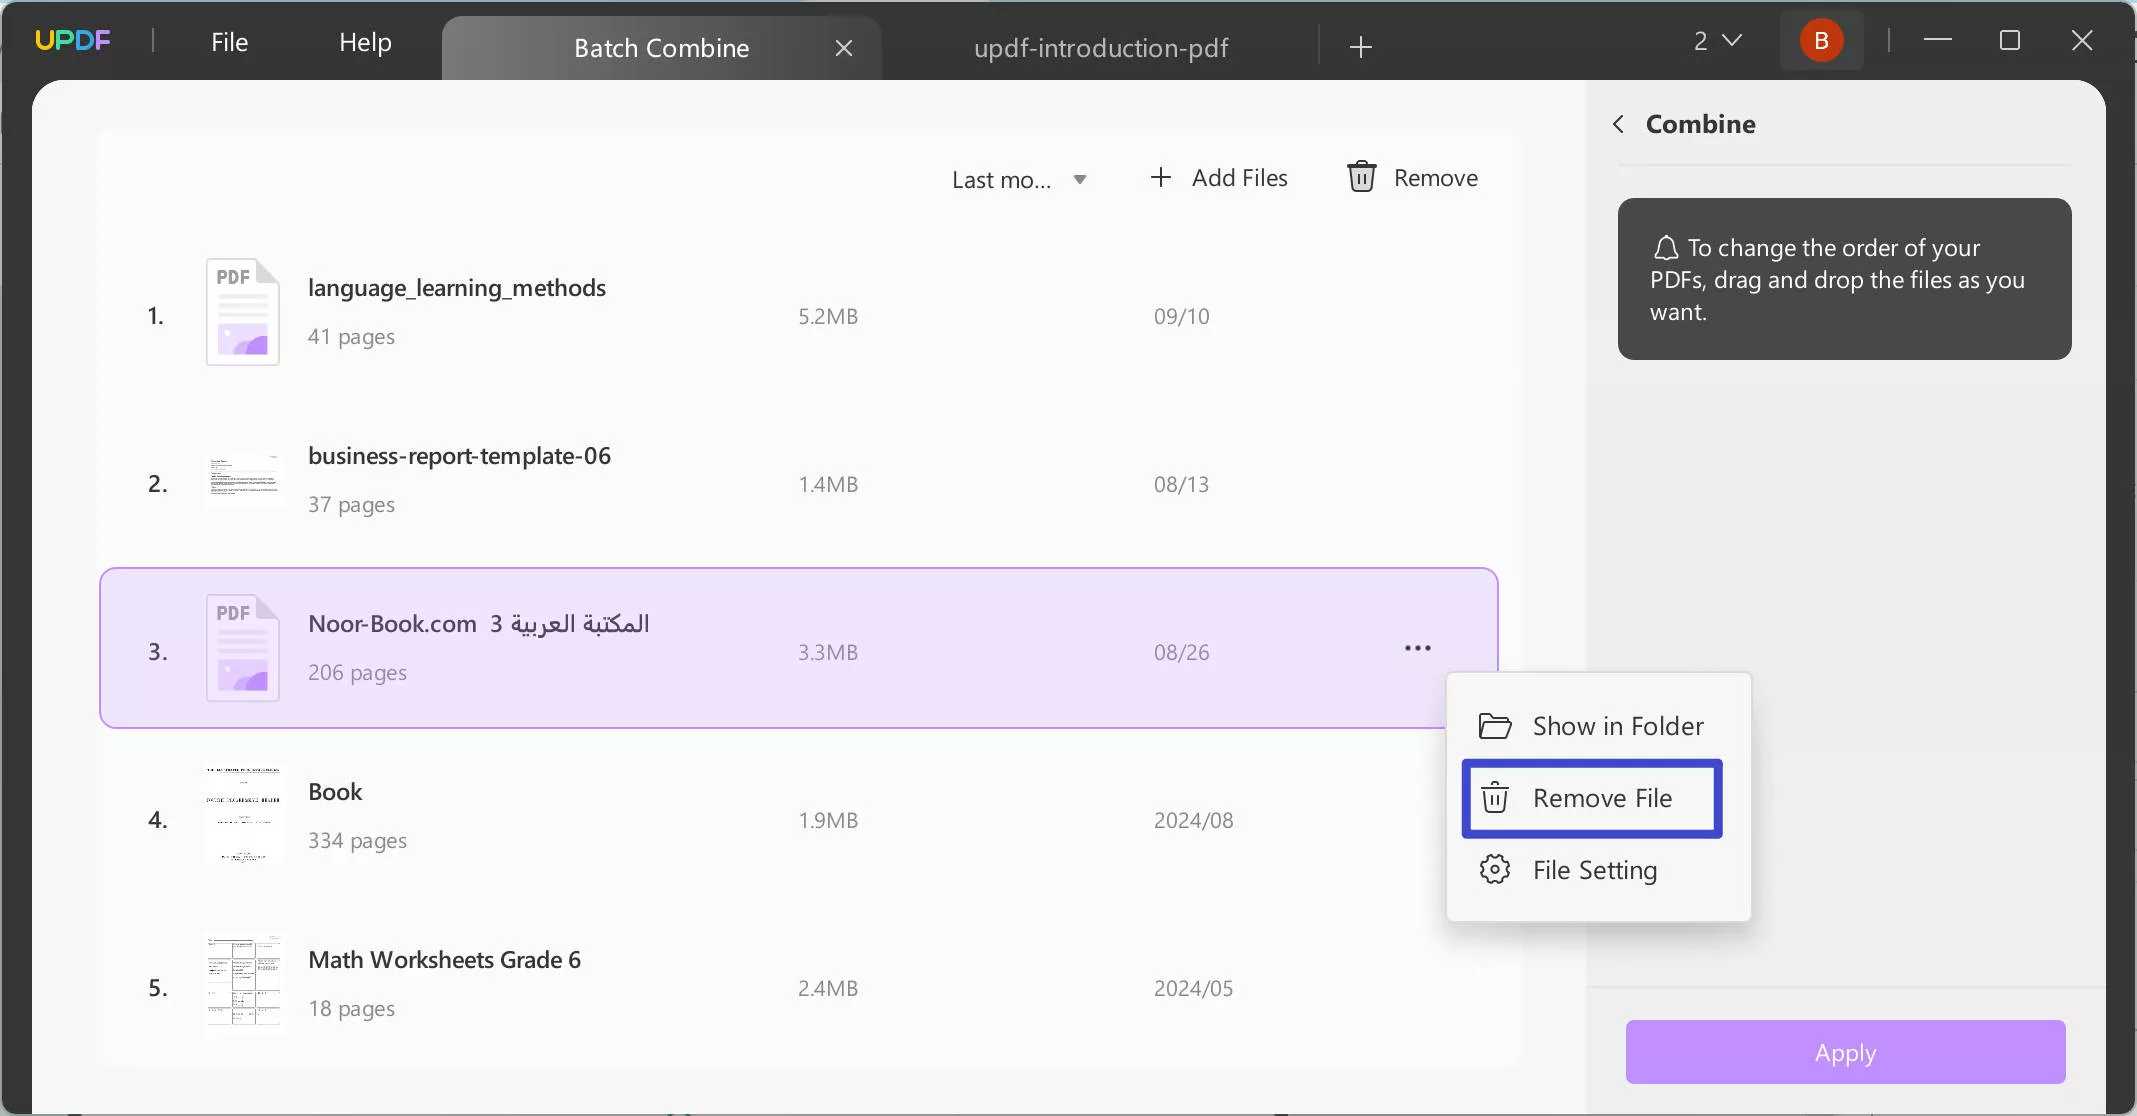
Under the same drop-down, you can also select the option of "Show in Folder" to access the location of the document. To view its properties, use the option of "File Setting."
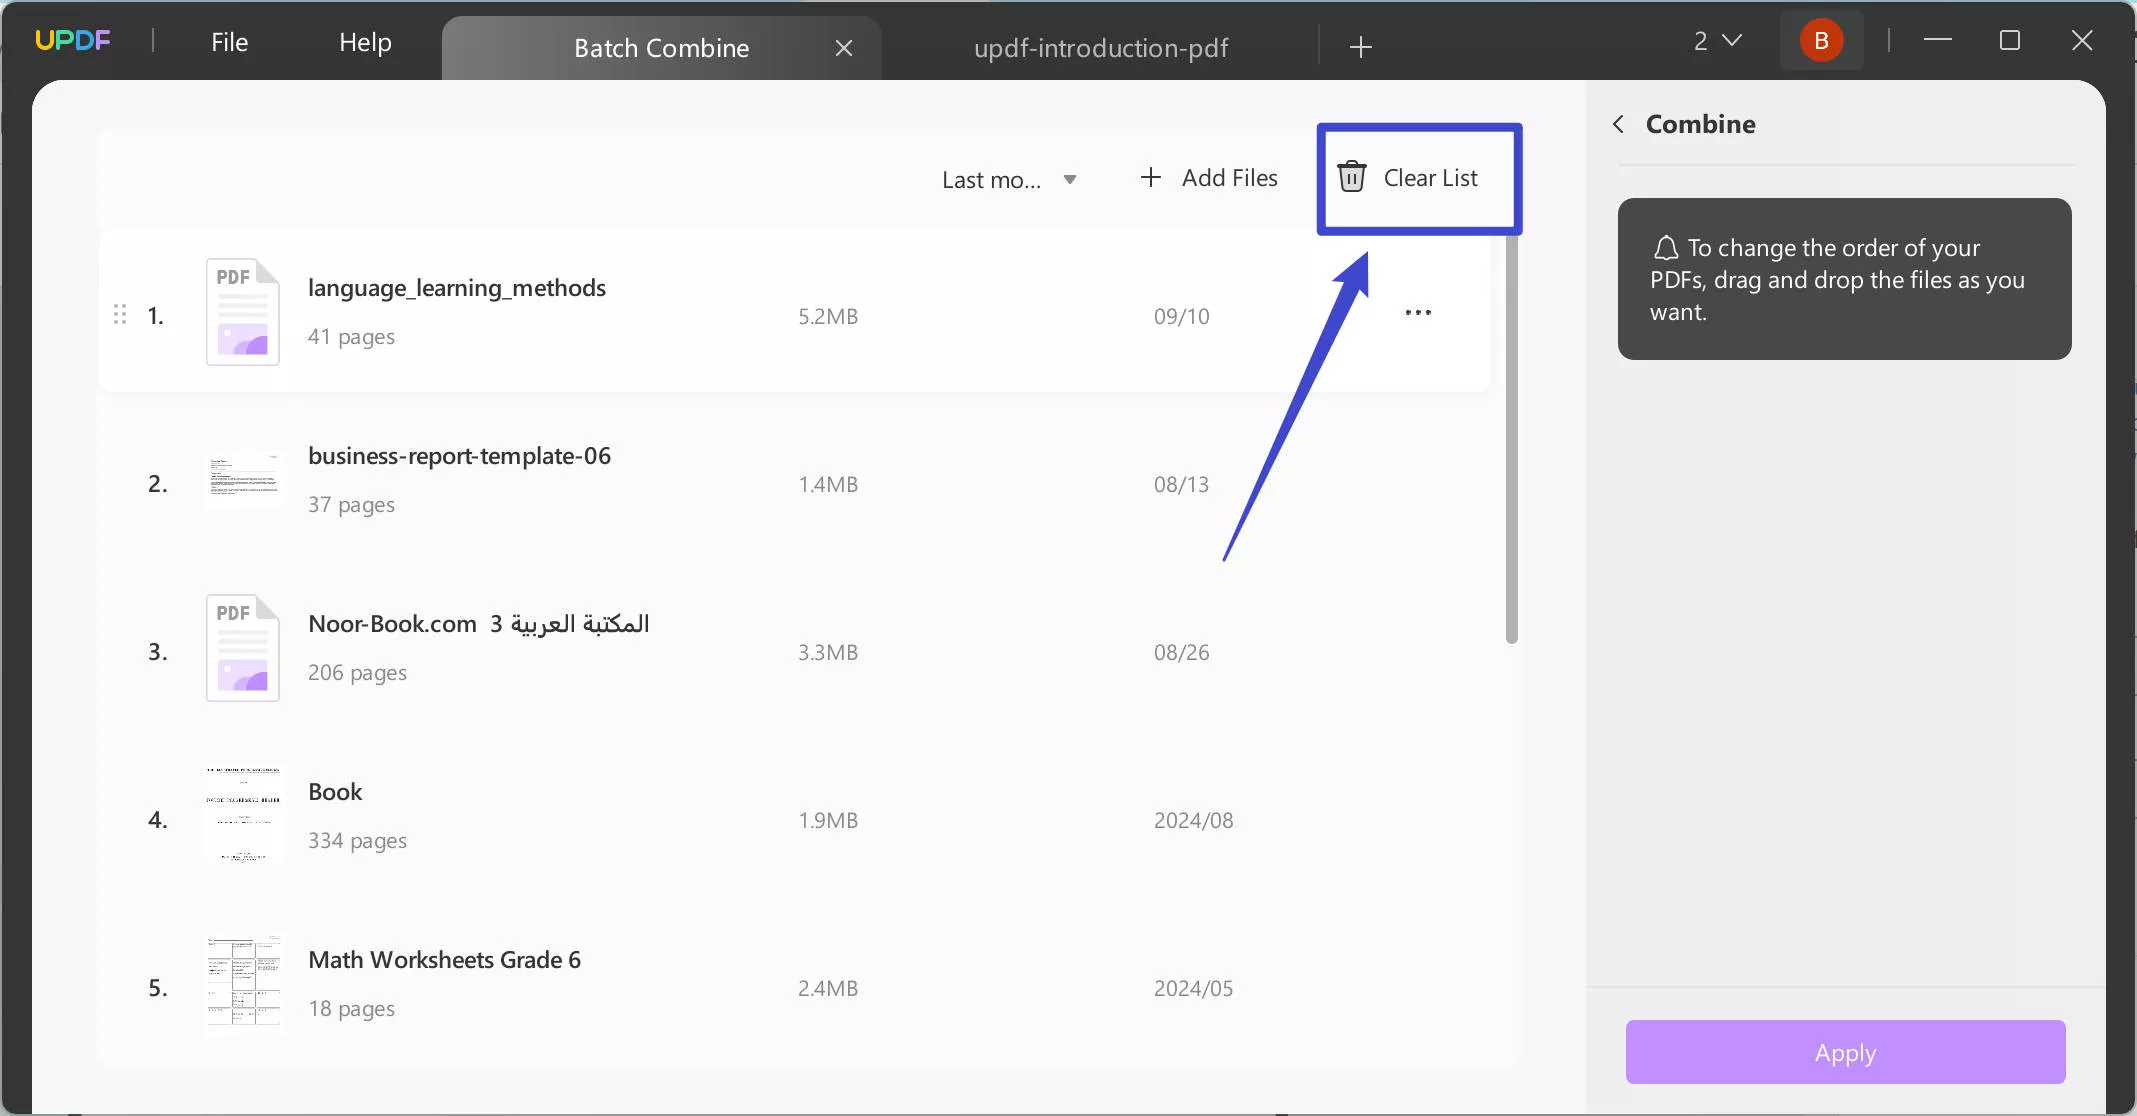
If you intend to clear the complete list of added documents, use the "Clear List" button.
 UPDF
UPDF
 UPDF for Windows
 UPDF for Mac
 UPDF for iPhone/iPad
 UPDF for Android
 UPDF AI Online
 UPDF Sign
 Edit PDF
 Annotate PDF
 Create PDF
 PDF Form
 Edit links
 Convert PDF
 OCR
OCR PDF to Word
 PDF to Image
 PDF to Excel
 Organize PDF
 Merge PDF
 Split PDF
 Crop PDF
 Rotate PDF
 Protect PDF
 Sign PDF
 Redact PDF
 Sanitize PDF
 Remove Security
 Read PDF
 UPDF Cloud
 Compress PDF
 Print PDF
 Batch Process
 About UPDF AI
 UPDF AI Solutions
 AI User Guide
 FAQ about UPDF AI
 Summarize PDF
 Translate PDF
 Chat with PDF
 Chat with AI
 Chat with image
 PDF to Mind Map
 Explain PDF
 Scholar Research
 Paper Search
 AI Proofreader
 AI Writer
 AI Homework Helper
 AI Quiz Generator
 AI Math Solver
 PDF to Word
 PDF to Excel
 PDF to PowerPoint
 User Guide
 UPDF Tricks
 FAQs
FAQs UPDF Reviews
 Download Center
 Blog
Blog Newsroom
 Tech Spec
 Updates
 UPDF vs. Adobe Acrobat
 UPDF vs. Foxit
 UPDF vs. PDF Expert