Sign a Document
1. Steps to Sign a Document as a Recipient
As a recipient, follow the given detailed guide to sign the documents using UPDF Sign:
- Access the email notification on your device and press the Review Document option.
- Doing so will direct you to the UPDF Sign window, where you will enter the Password in a popup menu if a password is provided for the document. After inserting the password key, hit the Continue button.
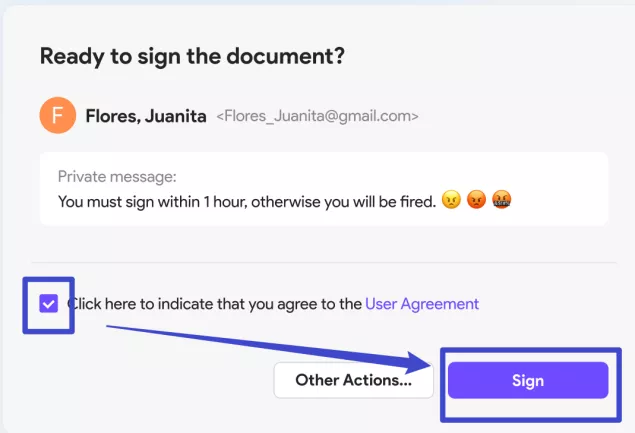
- If you want to sign the document, toggle Click here to indicate that you agree to the User Agreement and hit the Sign option.
Note
- Then, UPDF Sign will open the document.
- Click the signature field and add your signature there.
You can sign agreements without registering or logging in. After signing, you can choose to create an account for future use. Recipients can only view and sign fields specifically created for them.
If you're using UPDF Sign for the first time, you'll need to create or import a signature. For detailed steps, see the next section. If you've signed with UPDF Sign before, you can simply use your previously saved signature.
Create or Import a Signature
When signing documents, you need to utilize the Signature Creation feature offered by UPDF Sign to induce proper signatures:
- Click the signature field and follow the on-screen prompt to enter the signature creation process.
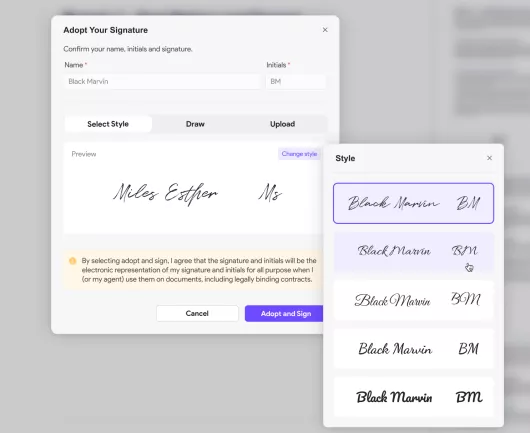
- As the pop-up window opens, you will be provided with three different options to create a signature. Starting from the first, you can use the Select Style tab to choose your appropriate signature style. All you have to do is type your name and initials, after which a specific style for your signature will be automatically generated.
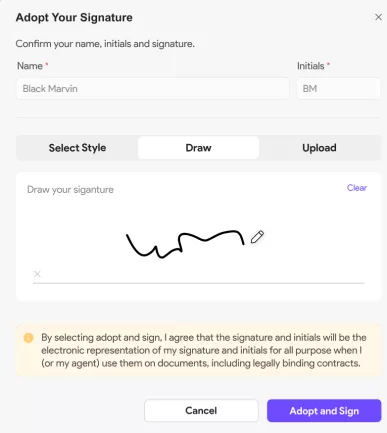
- Continuing with the next option, you can also Draw your signature across the drawing pad provided on the screen.
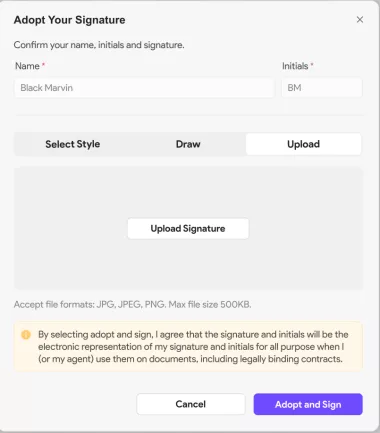
- Meanwhile, you can also Upload an existing signature by accessing the Upload Signature option. Make sure to upload a signature of JPG, JPEG, or PNG format, while keeping its file size below 500KB.
- Regardless of whatever choice you make in the signature, click the Adopt and Sign option once you are done setting it up.
Editing Created Signature
- To edit an existing signature, click on the three dots icon beside it and choose the Edit option. However, to remove it, press the Delete option.
- For editing, choose a new style and hit the Adopt and Sign option to continue.
- Pick the Replace option on the new window to import a new signature on documents.
2. Signature-Request Sender
While inserting signatures in documents, the sender can also add themselves as signees. The steps to sign the documents are the same as those for the recipients mentioned above.
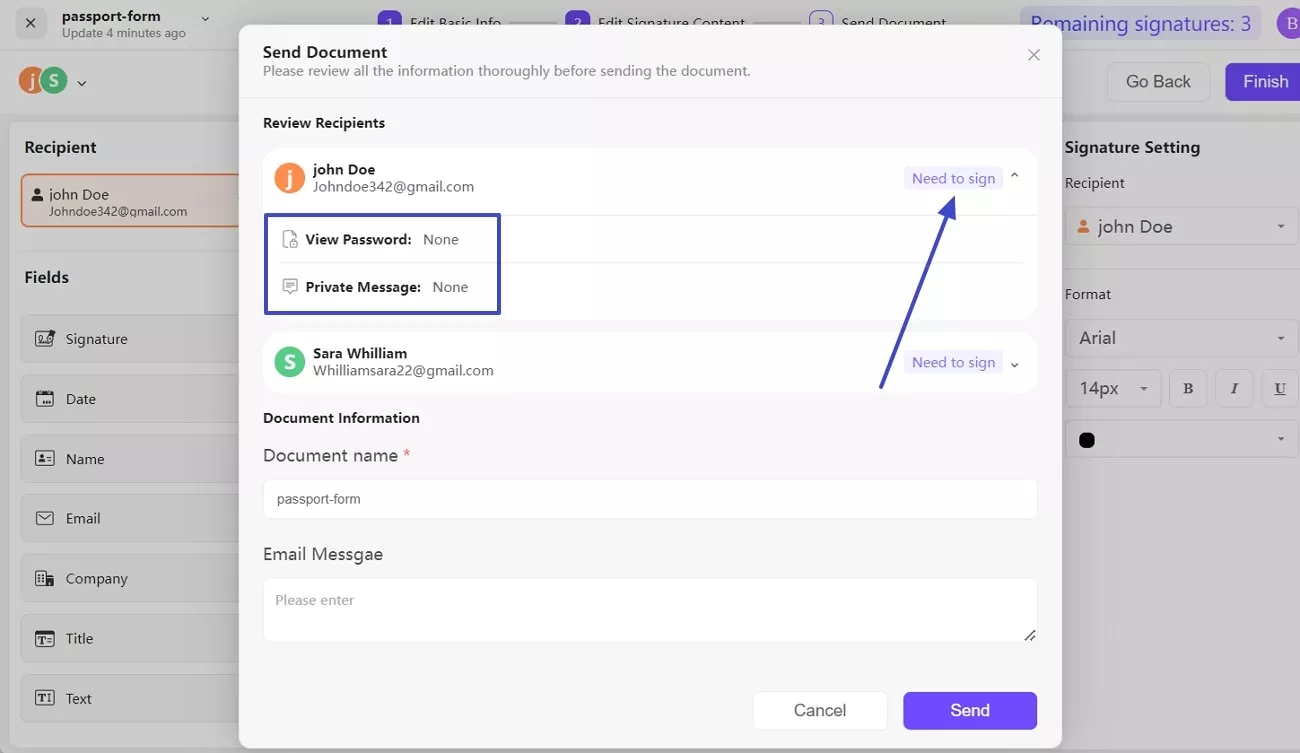
- Enter the Email Message and configure the Document Name in the Document Information section.
- Hit the Send Button and find the signature request successfully sent.
 UPDF
UPDF
 UPDF for Windows
 UPDF for Mac
 UPDF for iPhone/iPad
 UPDF for Android
 UPDF AI Online
 UPDF Sign
 Edit PDF
 Annotate PDF
 Create PDF
 PDF Form
 Edit links
 Convert PDF
 OCR
OCR PDF to Word
 PDF to Image
 PDF to Excel
 Organize PDF
 Merge PDF
 Split PDF
 Crop PDF
 Rotate PDF
 Protect PDF
 Sign PDF
 Redact PDF
 Sanitize PDF
 Remove Security
 Read PDF
 UPDF Cloud
 Compress PDF
 Print PDF
 Batch Process
 About UPDF AI
 UPDF AI Solutions
 AI User Guide
 FAQ about UPDF AI
 Summarize PDF
 Translate PDF
 Chat with PDF
 Chat with AI
 Chat with image
 PDF to Mind Map
 Explain PDF
 Scholar Research
 Paper Search
 AI Proofreader
 AI Writer
 AI Homework Helper
 AI Quiz Generator
 AI Math Solver
 PDF to Word
 PDF to Excel
 PDF to PowerPoint
 User Guide
 UPDF Tricks
 FAQs
FAQs UPDF Reviews
 Download Center
 Blog
Blog Newsroom
 Tech Spec
 Updates
 UPDF vs. Adobe Acrobat
 UPDF vs. Foxit
 UPDF vs. PDF Expert