Sending Documents for Signature
In educational, legal, and other business settings, accessing digital signatures of documents, especially on PDFs, has become more crucial than ever. Therefore, UPDF Sign comes into play to ease the process with an innovative perspective. To show you how UPDF Sign works, this guide provides stepwise instructions below to streamline the digital signatures adding process.
Add Basic Information
To begin, you need to upload your document on the UPDF Sign website after setting up your account. Then, delve into the guides below, which reveal how to add basic information and proceed to eSign:
1. Add Documents
Users can upload up to 10 PDFs at once to speed up the signature-request process. Multiple PDFs will be combined into one for signature requests, and signature fields must be added to each document. Once signatures are collected, the PDFs will be separated back to their original files for download. Currently, only PDF files are supported, which can be uploaded from a local device or dragged into the designated area.
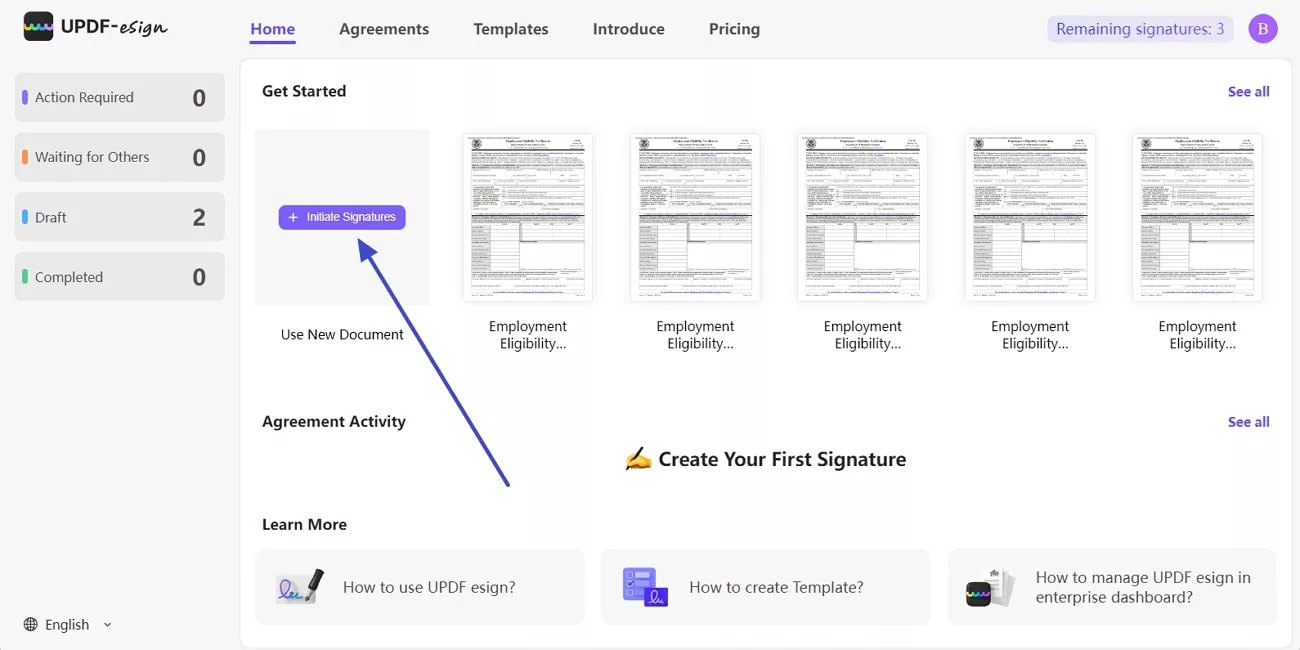
- Log in to the UPDF Sign website using your credentials, hover over Use New Document, and click the +Initiate Signatures button.
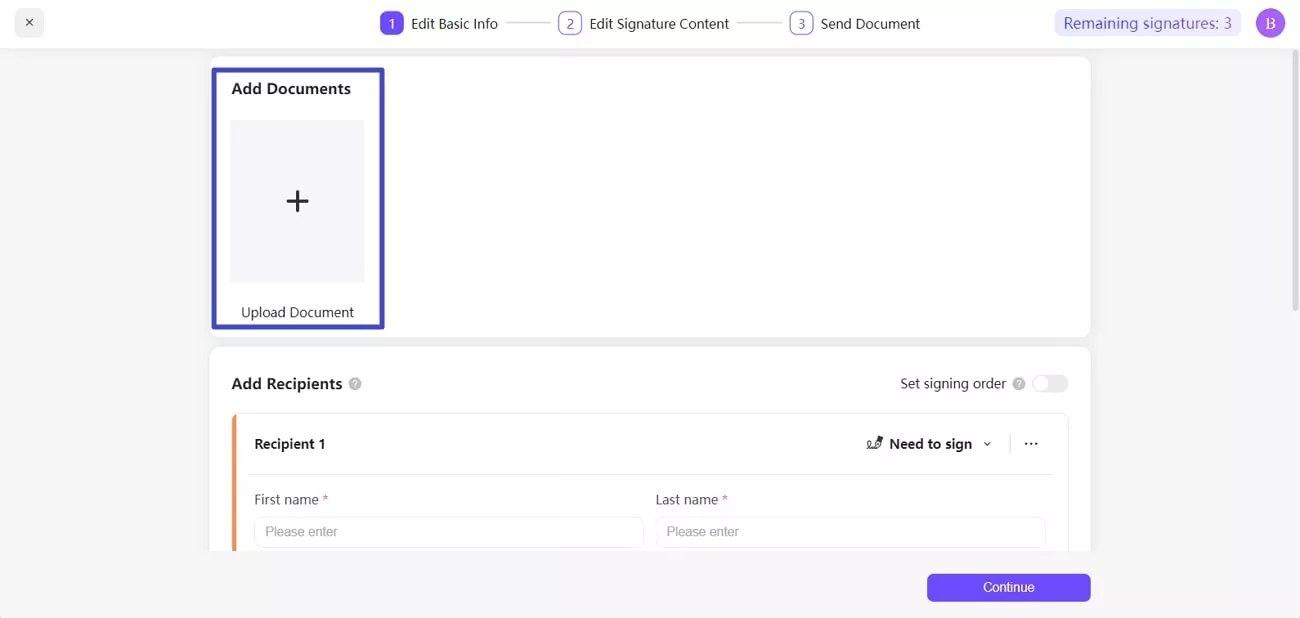
- Next, tap the Upload Document tab under the Add Documents section and upload your PDF document.
2. Add Recipients
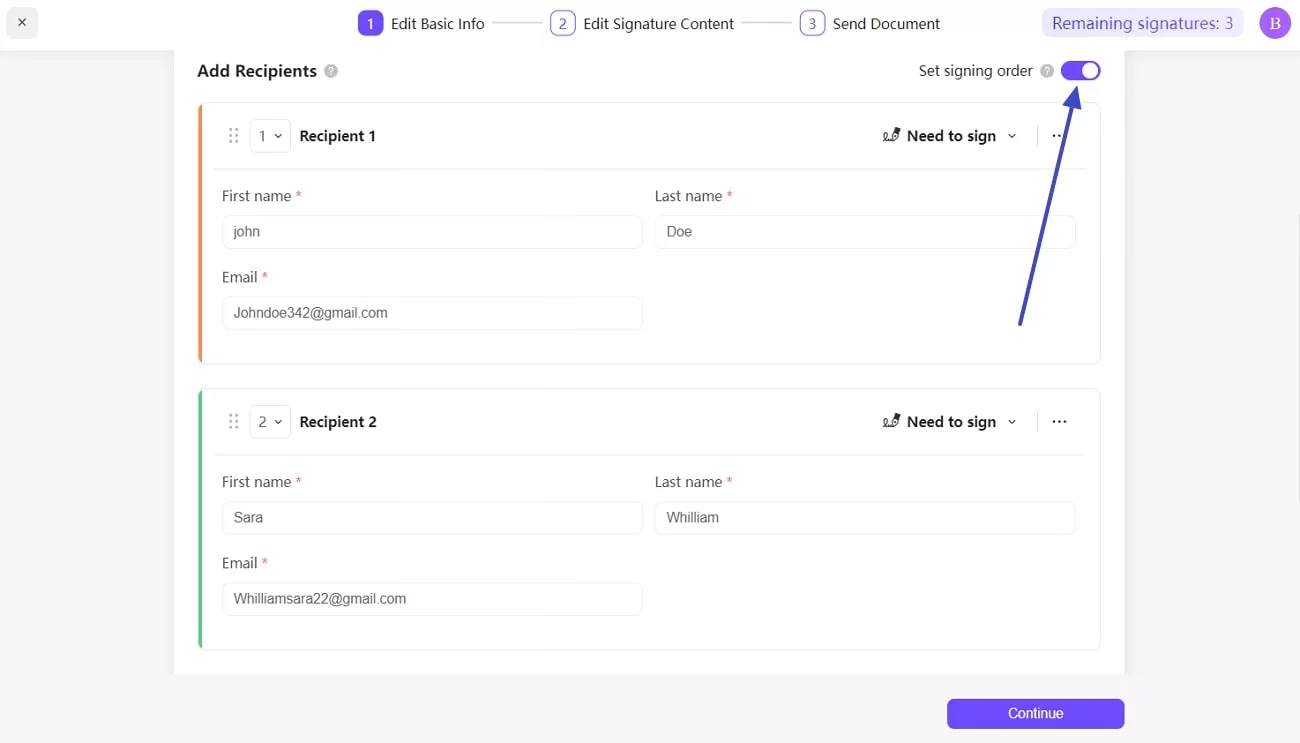
Upon uploading a PDF, users can add up to 50 recipients for signature requests. Besides, they can toggle the Set Signing Order option if they want the signers to receive the document sequentially. If you select this option, when the first signer completes the signature, the second signer will receive the email notification. Conversely, if you didn't enable this option, all the recipients will get the email notifications at the same time.
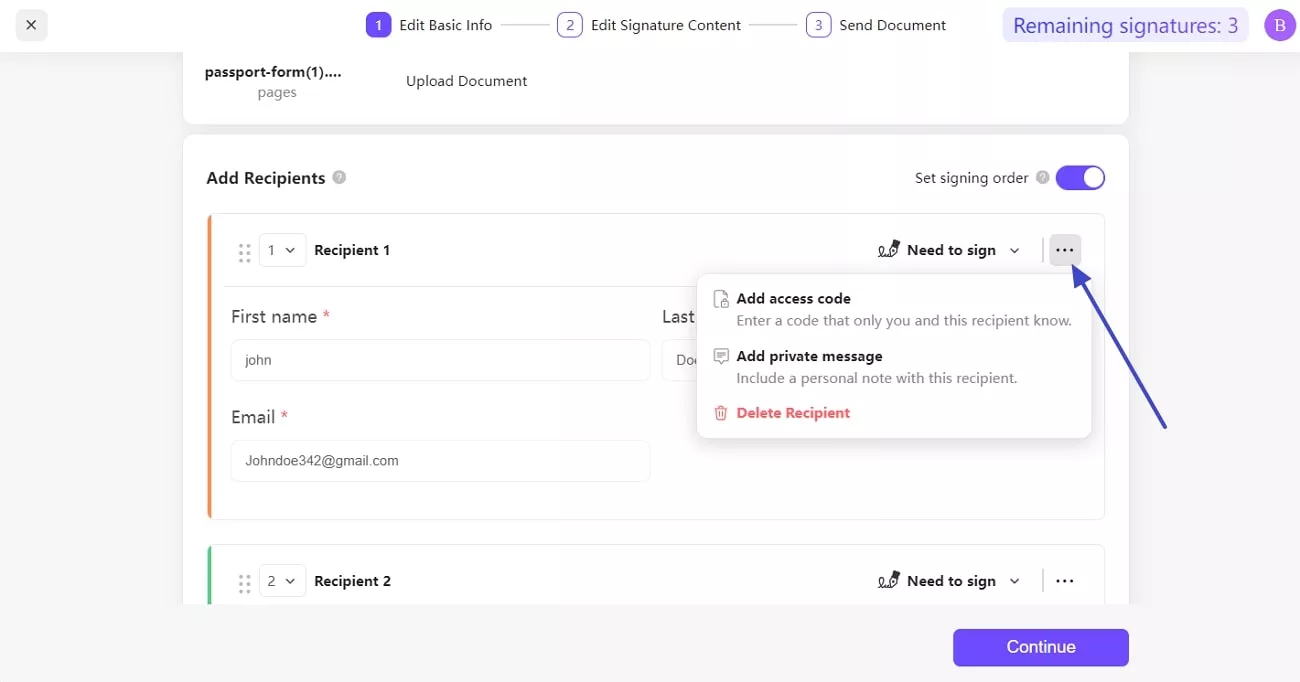
The system also lets you add a private message or a code that only you and the recipient know to ensure the security of confidential files. If the recipient's email address is entered incorrectly, the sender must request signatures again with the correct address input. Conversely, if one of the recipient addresses has expired, you can replace it with a valid one without affecting the other two recipients.
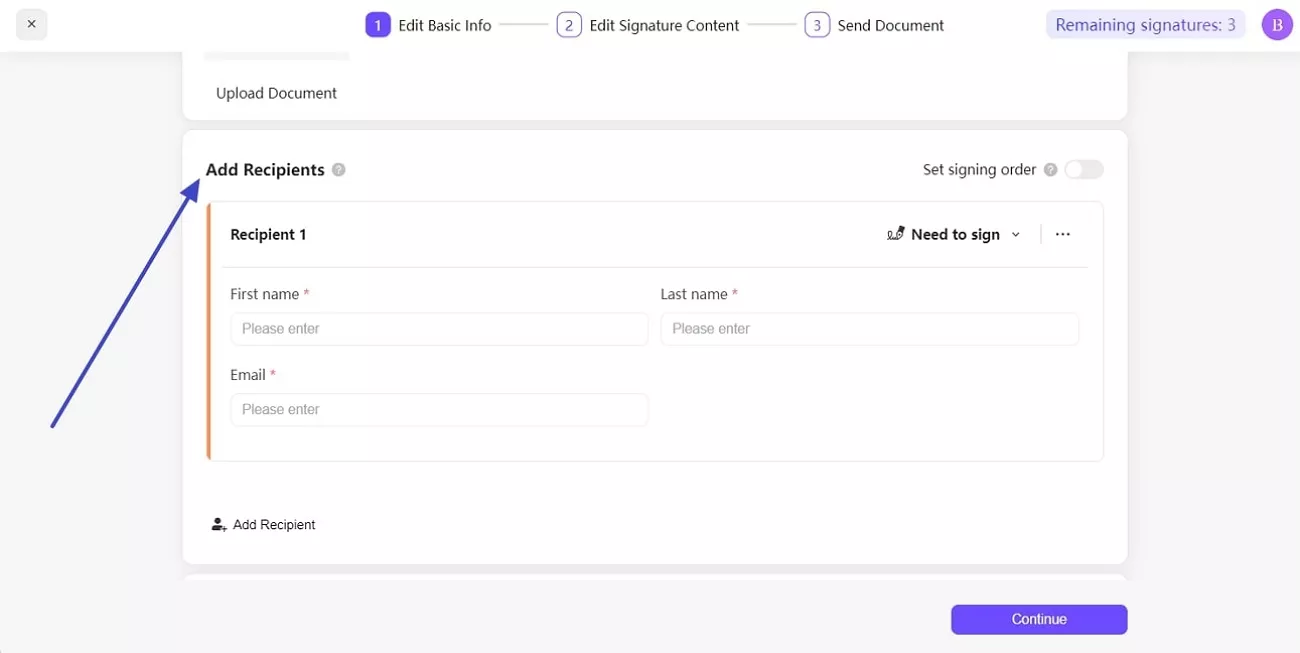
- After uploading the PDF file on UPDF Sign, access the Add Recipients section below Add Documents.
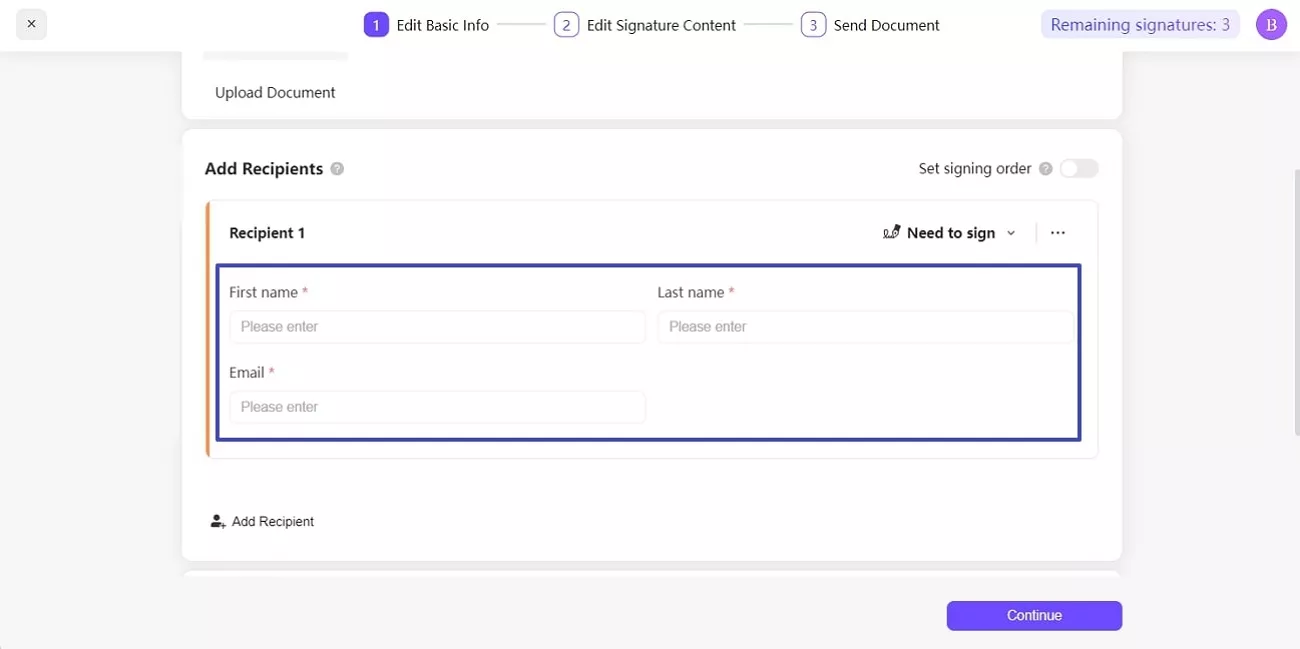
- Enter the First Name, Last Name, and Email of Recipient 1 in the designated text boxes.
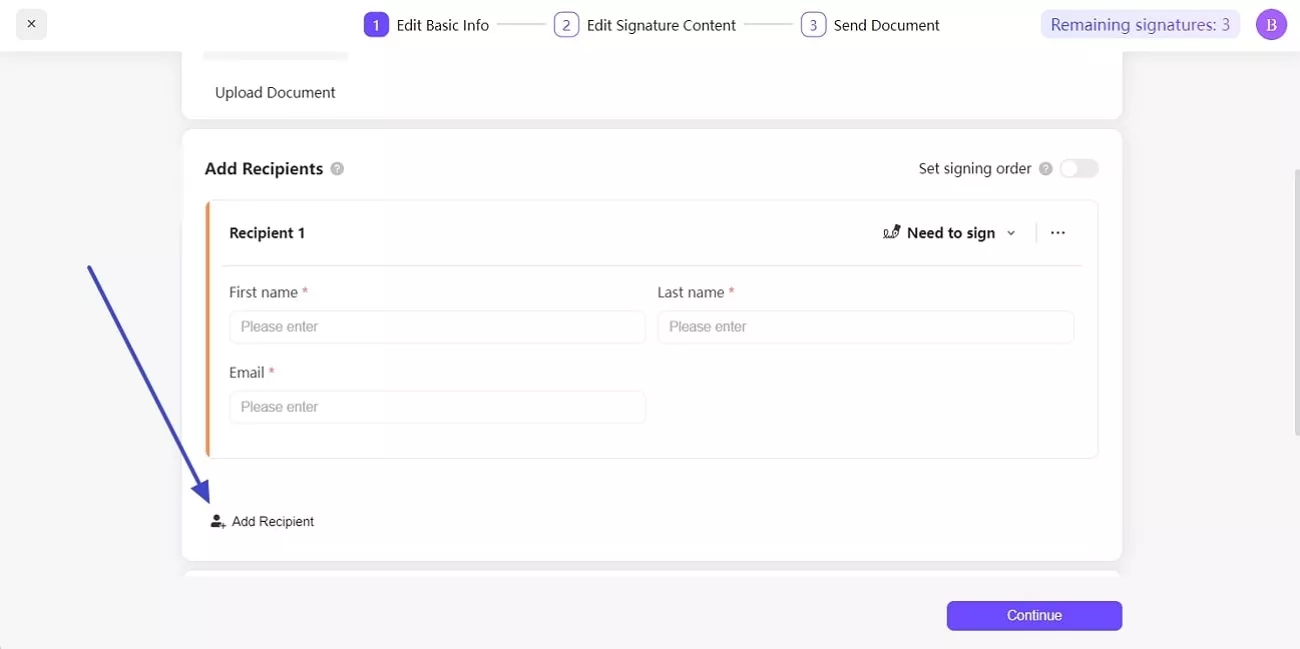
- Click the Add Recipient option at the bottom of the Add Recipients section and add Recipient 2 if needed.
- You can toggle the Set Signing Order option to ensure recipient 2 receives an email for signature when recipient 1 completes the job. Based on your needs, users can keep it disabled so everyone receives the signature request simultaneously.
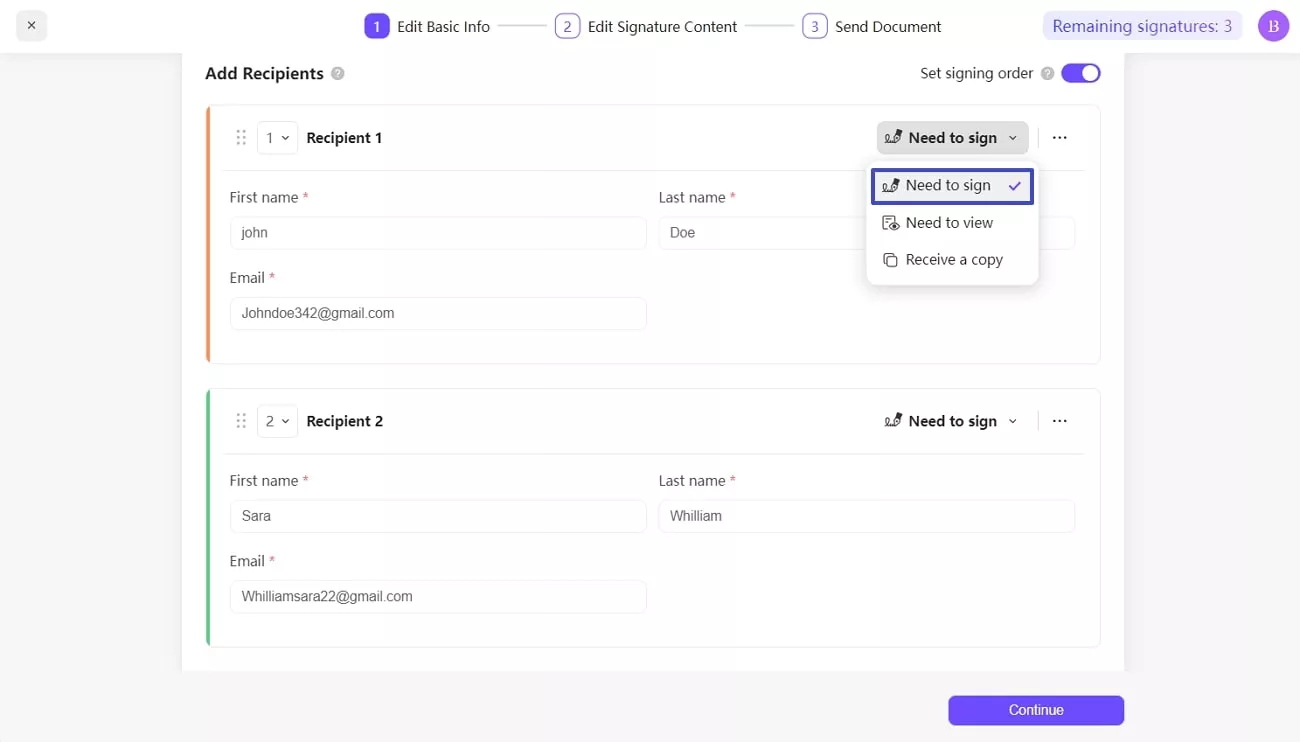
- Expand the menu on the right of the recipient window using the downward icon next to it and choose the Need to sign. You can also assign other roles, such as 'Need to View' or 'Need to Copy.' UPDF Sign offers various recipient role options
- Use the three-dot icon next to the same menu and proceed with either Add access code or Add private message, as needed.
3. Add Messages
- As you upload the document and add the recipient, scroll down to locate the Add Message section at the bottom.
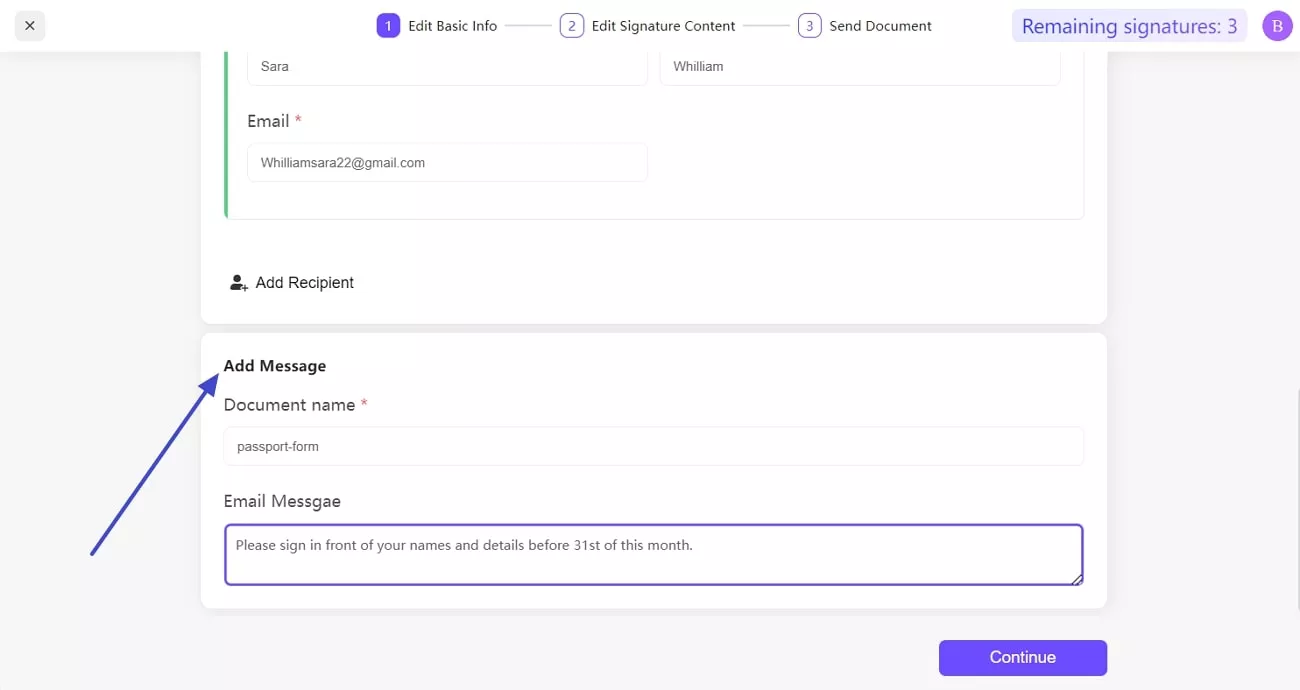
- Type text in the Email Message textbox and ensure a Document name is assigned.
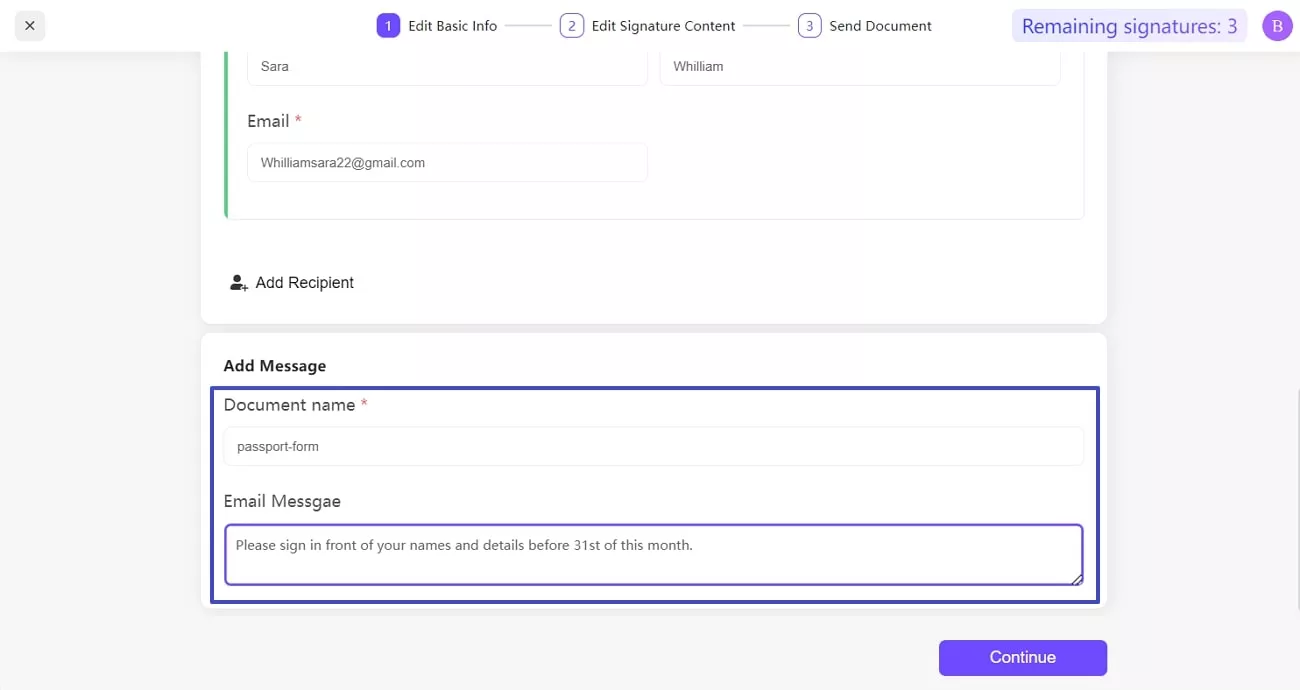
- Finally, press the Continue button at the bottom-right to enter the Signature Content editing interface.
 UPDF
UPDF
 UPDF for Windows
 UPDF for Mac
 UPDF for iPhone/iPad
 UPDF for Android
 UPDF AI Online
 UPDF Sign
 Edit PDF
 Annotate PDF
 Create PDF
 PDF Form
 Edit links
 Convert PDF
 OCR
OCR PDF to Word
 PDF to Image
 PDF to Excel
 Organize PDF
 Merge PDF
 Split PDF
 Crop PDF
 Rotate PDF
 Protect PDF
 Sign PDF
 Redact PDF
 Sanitize PDF
 Remove Security
 Read PDF
 UPDF Cloud
 Compress PDF
 Print PDF
 Batch Process
 About UPDF AI
 UPDF AI Solutions
 AI User Guide
 FAQ about UPDF AI
 Summarize PDF
 Translate PDF
 Chat with PDF
 Chat with AI
 Chat with image
 PDF to Mind Map
 Explain PDF
 Scholar Research
 Paper Search
 AI Proofreader
 AI Writer
 AI Homework Helper
 AI Quiz Generator
 AI Math Solver
 PDF to Word
 PDF to Excel
 PDF to PowerPoint
 User Guide
 UPDF Tricks
 FAQs
FAQs UPDF Reviews
 Download Center
 Blog
Blog Newsroom
 Tech Spec
 Updates
 UPDF vs. Adobe Acrobat
 UPDF vs. Foxit
 UPDF vs. PDF Expert

