 Windows版UPDF
 Mac版UPDF
 iPhone/iPad版UPDF
 Android版UPDF
 UPDF AI オンライン
 UPDF Sign
 PDF編集
PDF編集 PDF注釈付け
 PDF作成
PDF作成 PDFフォーム
 リンクの編集
 PDF変換
PDF変換 OCR機能
OCR機能 PDFからWordへ
 PDFから画像へ
 PDFからExcelへ
 PDFのページ整理
 PDF結合
PDF結合 PDF分割
PDF分割 ページのトリミング
 ページの回転
 PDF保護
PDF保護 PDF署名
PDF署名 PDFの墨消し
 PDFサニタイズ
 セキュリティ解除
 PDF閲覧
PDF閲覧 UPDF クラウド
 PDF圧縮
PDF圧縮 PDF印刷
PDF印刷 PDFのバッチ処理
 UPDF AIについて
 UPDF AIソリューション
 AIユーザーガイド
 UPDF AIによくある質問
 PDF要約
PDF要約 PDF翻訳
PDF翻訳 PDF付きチャット
 AIでチャット
 画像付きチャット
 PDFからマインドマップへの変換
 PDF説明
PDF説明 PDF AIツール
 画像AIツール
 AIチャットツール
 AIライティングツール
 AI学習ツール
 AI業務ツール
 その他のAIツール
 PDFからWordへ
 PDFからExcelへ
 PDFからPowerPointへ
 ユーザーガイド
 公式ブログ
公式ブログ UPDF 活用術
 UPDF vs Adobe Acrobat
 UPDF vs Foxit
 UPDF vs PDF Expert
 よくある質問(FAQ)
 ダウンロードセンター
 動作環境・仕様
 お問い合わせ
 ニュースルーム
 アップデート履歴
 ユーザーレビュー
 会社概要
会社概要
UPDFは、ほぼすべてのPDF機能を備えたオールインワンの PDFエディターとして知られています。
UPDFを使用して、編集、注釈、変換、圧縮、要約、翻訳などを行うことができます。
より良い体験を提供するために、UPDFの隠れた機能は多く用意されています。それについてまだ存じない場合は、この記事をご覧ください。
まず、UPDF をダウンロードして始めましょう。
Windows • macOS • iOS • Android 100%安全
ここで紹介するUPDFの隠れた機能は、生産性の向上に役立ちます。これらの機能を詳しく見てみましょう。
1. 手間を省く隠したホットキー7つ
UPDFには、使用できるホットキーが多数用意されて、多くのホットキーは機能名の後に表示されています。
そのため、直接は見つからないが重要なホットキーのみを紹介します。
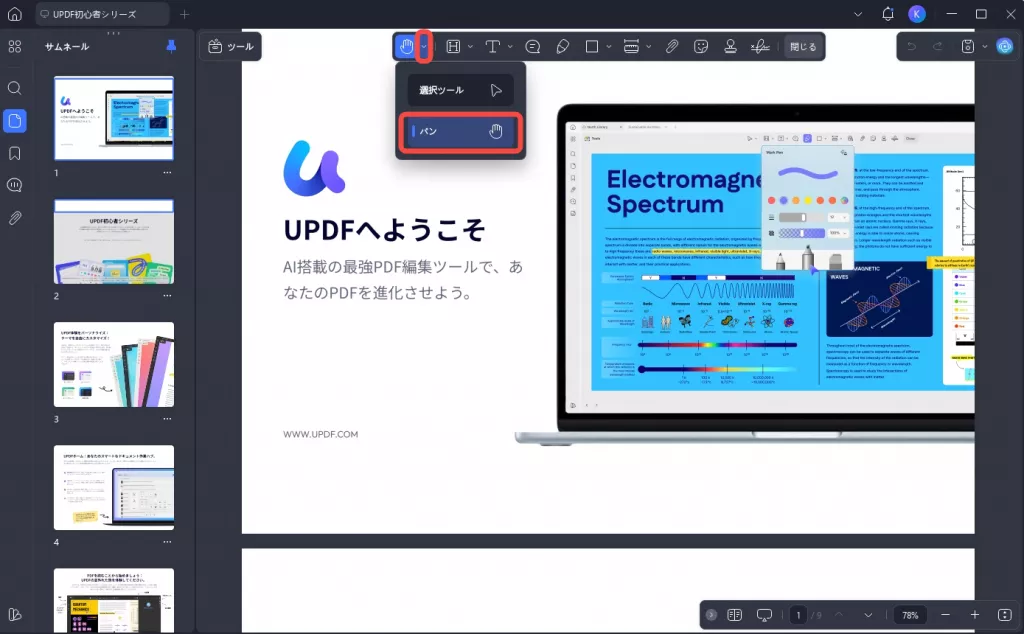
1. 「スペース」ホットキーでPDFページをパン
UPDFの使用中に「スペース」キーを押すと、カーソルが手の形に変わり、PDF ページ上で上下左右にドラッグして、画面に表示されない部分を確認したり、より詳しく確認したりできます。
これは、PDF ファイルに注釈を付けたり編集したりするときに非常に便利です。

または、上部メニューの「パン」アイコンをクリックして、パン機能を使用することもできます。
ボーナス
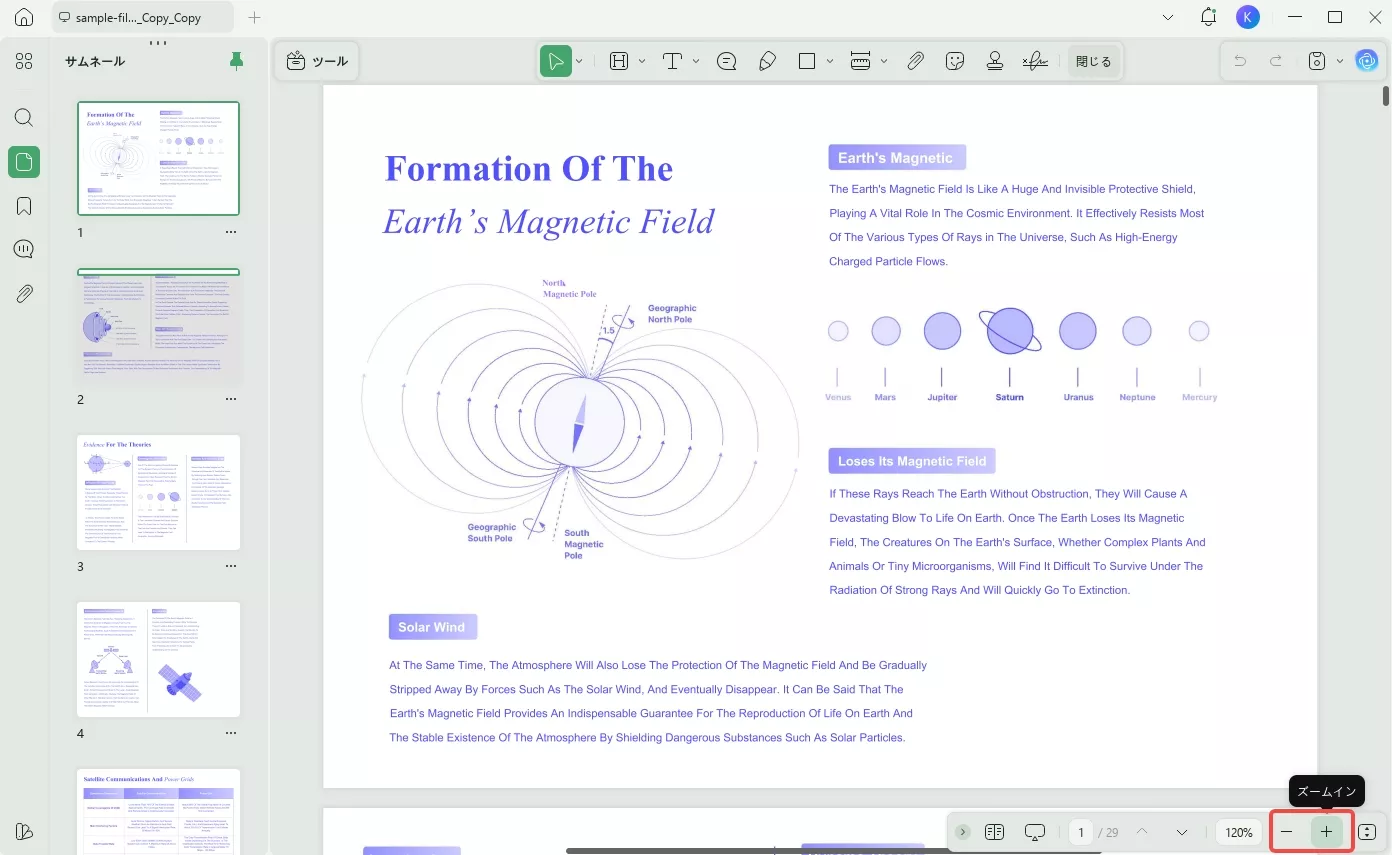
2. 「CTRL/Command」ホットキーまたはトラックパッドを使用して、すばやくズームインおよびズームアウト
「CTRL」キーまたは 「Command」キーと「+」、「-」、またはマウスのスクロール ホイールを押したままにします。
または、トラックパッド上で 2 本の指を使用して、PDF ドキュメントをズームインおよびズームアウトします。
テキストが小さすぎて読んだり編集したりできない場合は、ズームインする必要があります。リーダー モードに切り替えてズームイン ボタンとズームアウト ボタンを探す時間を無駄にする代わりに、ホットキーを直接使用できます。
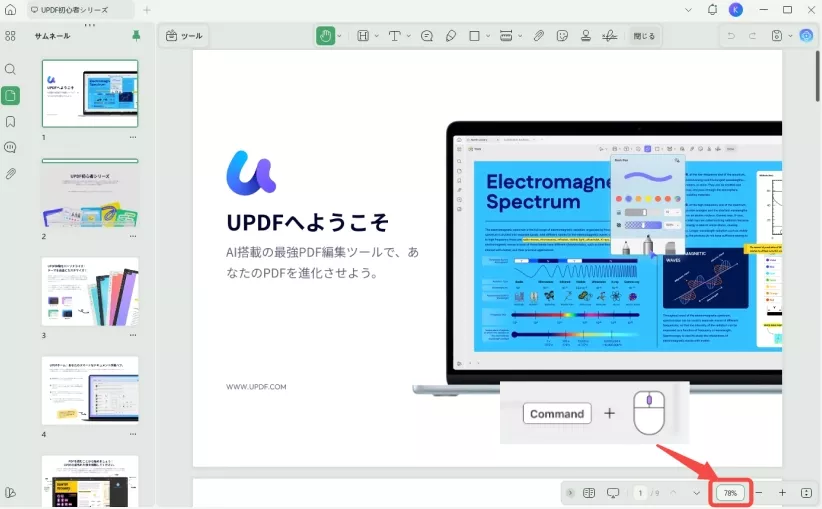
このホットキーは、「ページの整理」でページのサムネイルをズームインおよびズームアウトするためにも使用できます。または、右下にある「ズームイン」や「ズームアウト」をクリックすることもできます。
3. マウスの左側をダブルクリックしてテキストコメントを追加 (Mac限定)
リーダー・コメントモードのときにマウスの左側をダブルクリックすると、PDF に新しいテキストコメントを追加できます。
PDF を読んでいるときに PDF にテキストコメントをすばやく追加したり、PDF に他の要素を追加したりする必要がある場合に役立ちます。
4. アイコンをダブルクリックしてコメントを連続して追加
コメントツールアイコンをダブルクリックして、PDF ドキュメントにコメントやマークアップを追加する連続モードをオンにします。
コメントを連続して追加する方法
ステップ 1:UPDF を起動し、コメントを追加するドキュメントを開きます。
ステップ 2:開いたウィンドウで、左パネルの「コメント」タブに進みます。
任意のマークアップツールを選択し、クリックしてそのプロパティをカスタマイズします。
完了したら、ダブルクリックすると連続モードになり、マークアップを連続して追加できます。

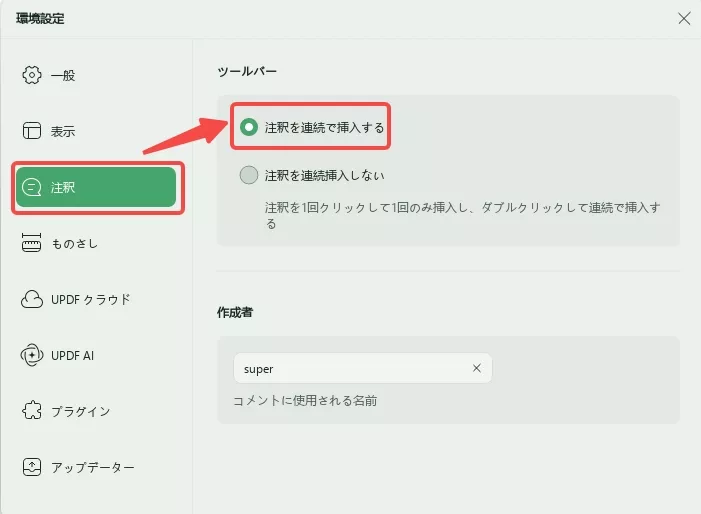
また、頻繁にコメントを連続して追加する必要がある場合は、「ファイル」> 「設定」 >「コメント」に移動して、「コメントツールを選択したままにする」をチェックすることもできます。そのため、コメント部分でオプションをクリックして選択するたびに、機能を連続して使用できます。
このような素早く操作により、ユーザーはメニューを何度も繰り返して時間を無駄にせず、PDFにコメントを追加できます。この機能は、すぐに複数のコメントを追加する必要がある状況で非常に役立ちます。
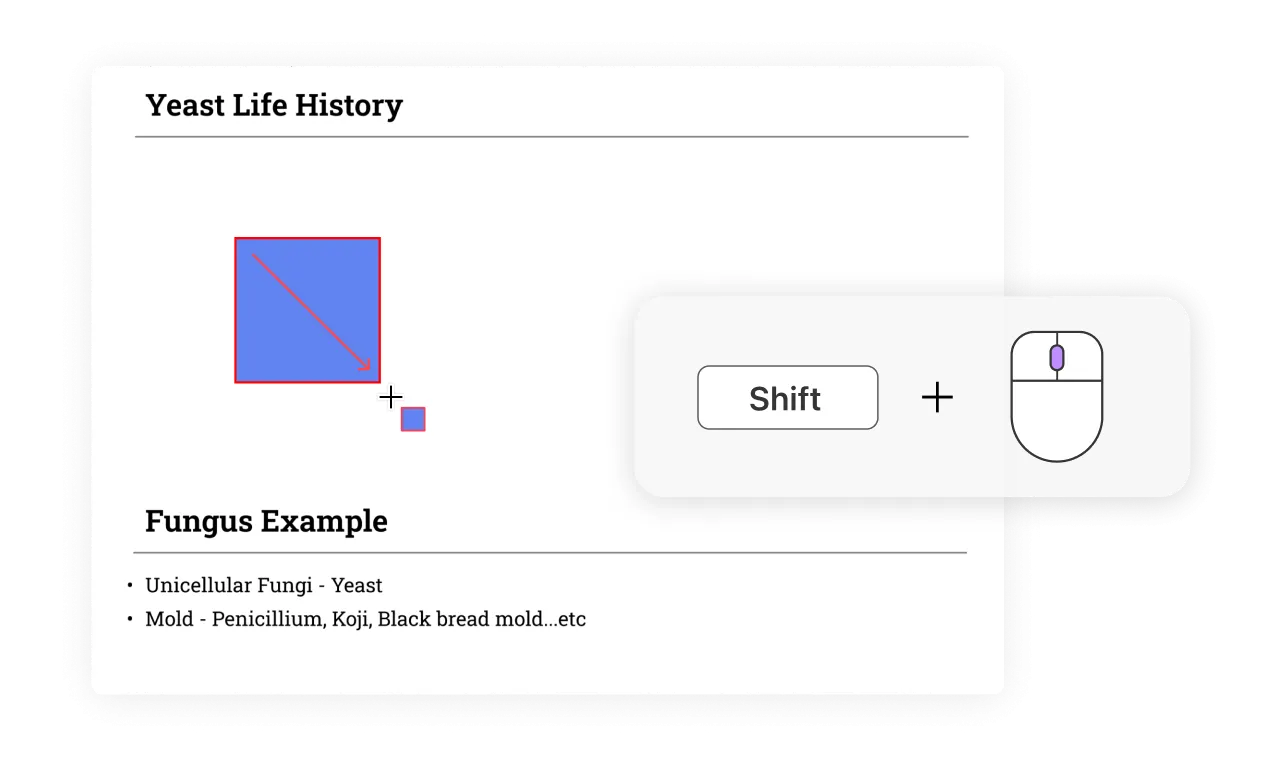
5. 「Shift」ホットキーを押したままにして完全な正方形と円を描く
図形を追加するときに、長方形と円の図形を選択し、「Shift」を押したままにして完全な正方形と円を描くことができます。
図形を描くために「Shift」ホットキーを使用する方法
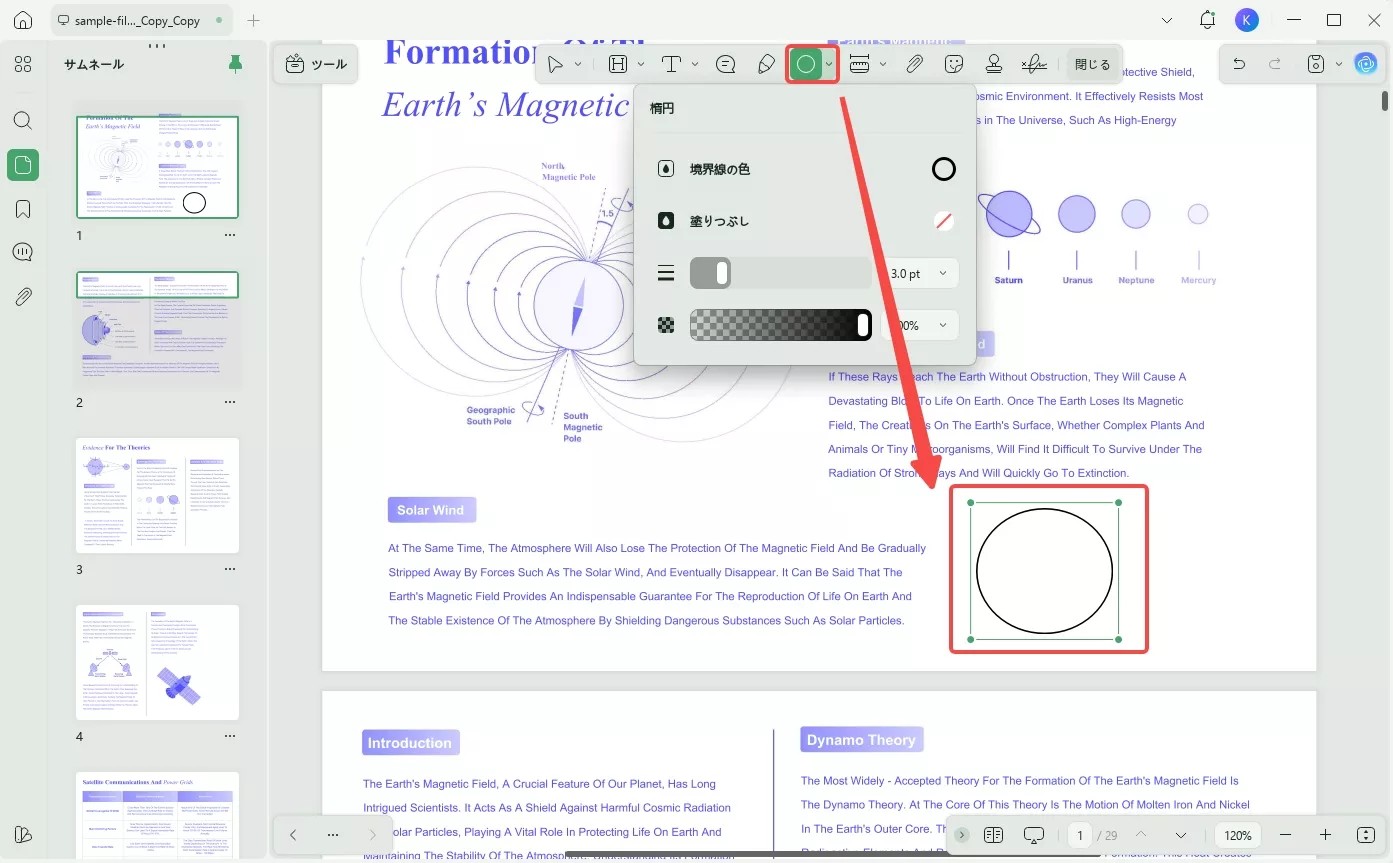
手順 1: 左側の「コメント」タブに移動し、上部のバーから「図形」オプションを選択します。表示されるメニューから適切な図形とそのプロパティを設定します。
手順 2: PDF に図形を描くときは、「Shift」キーを押したまま描きます。これにより、PDF ドキュメントに比例した図形が描画されます。
UPDF をコンピューターにダウンロードして、これらのホットキーを自分で試してみませんか?
Windows • macOS • iOS • Android 100%安全
6. 「Shift」キーを押しながら PDF 内の領域をハイライトする (Mac限定)
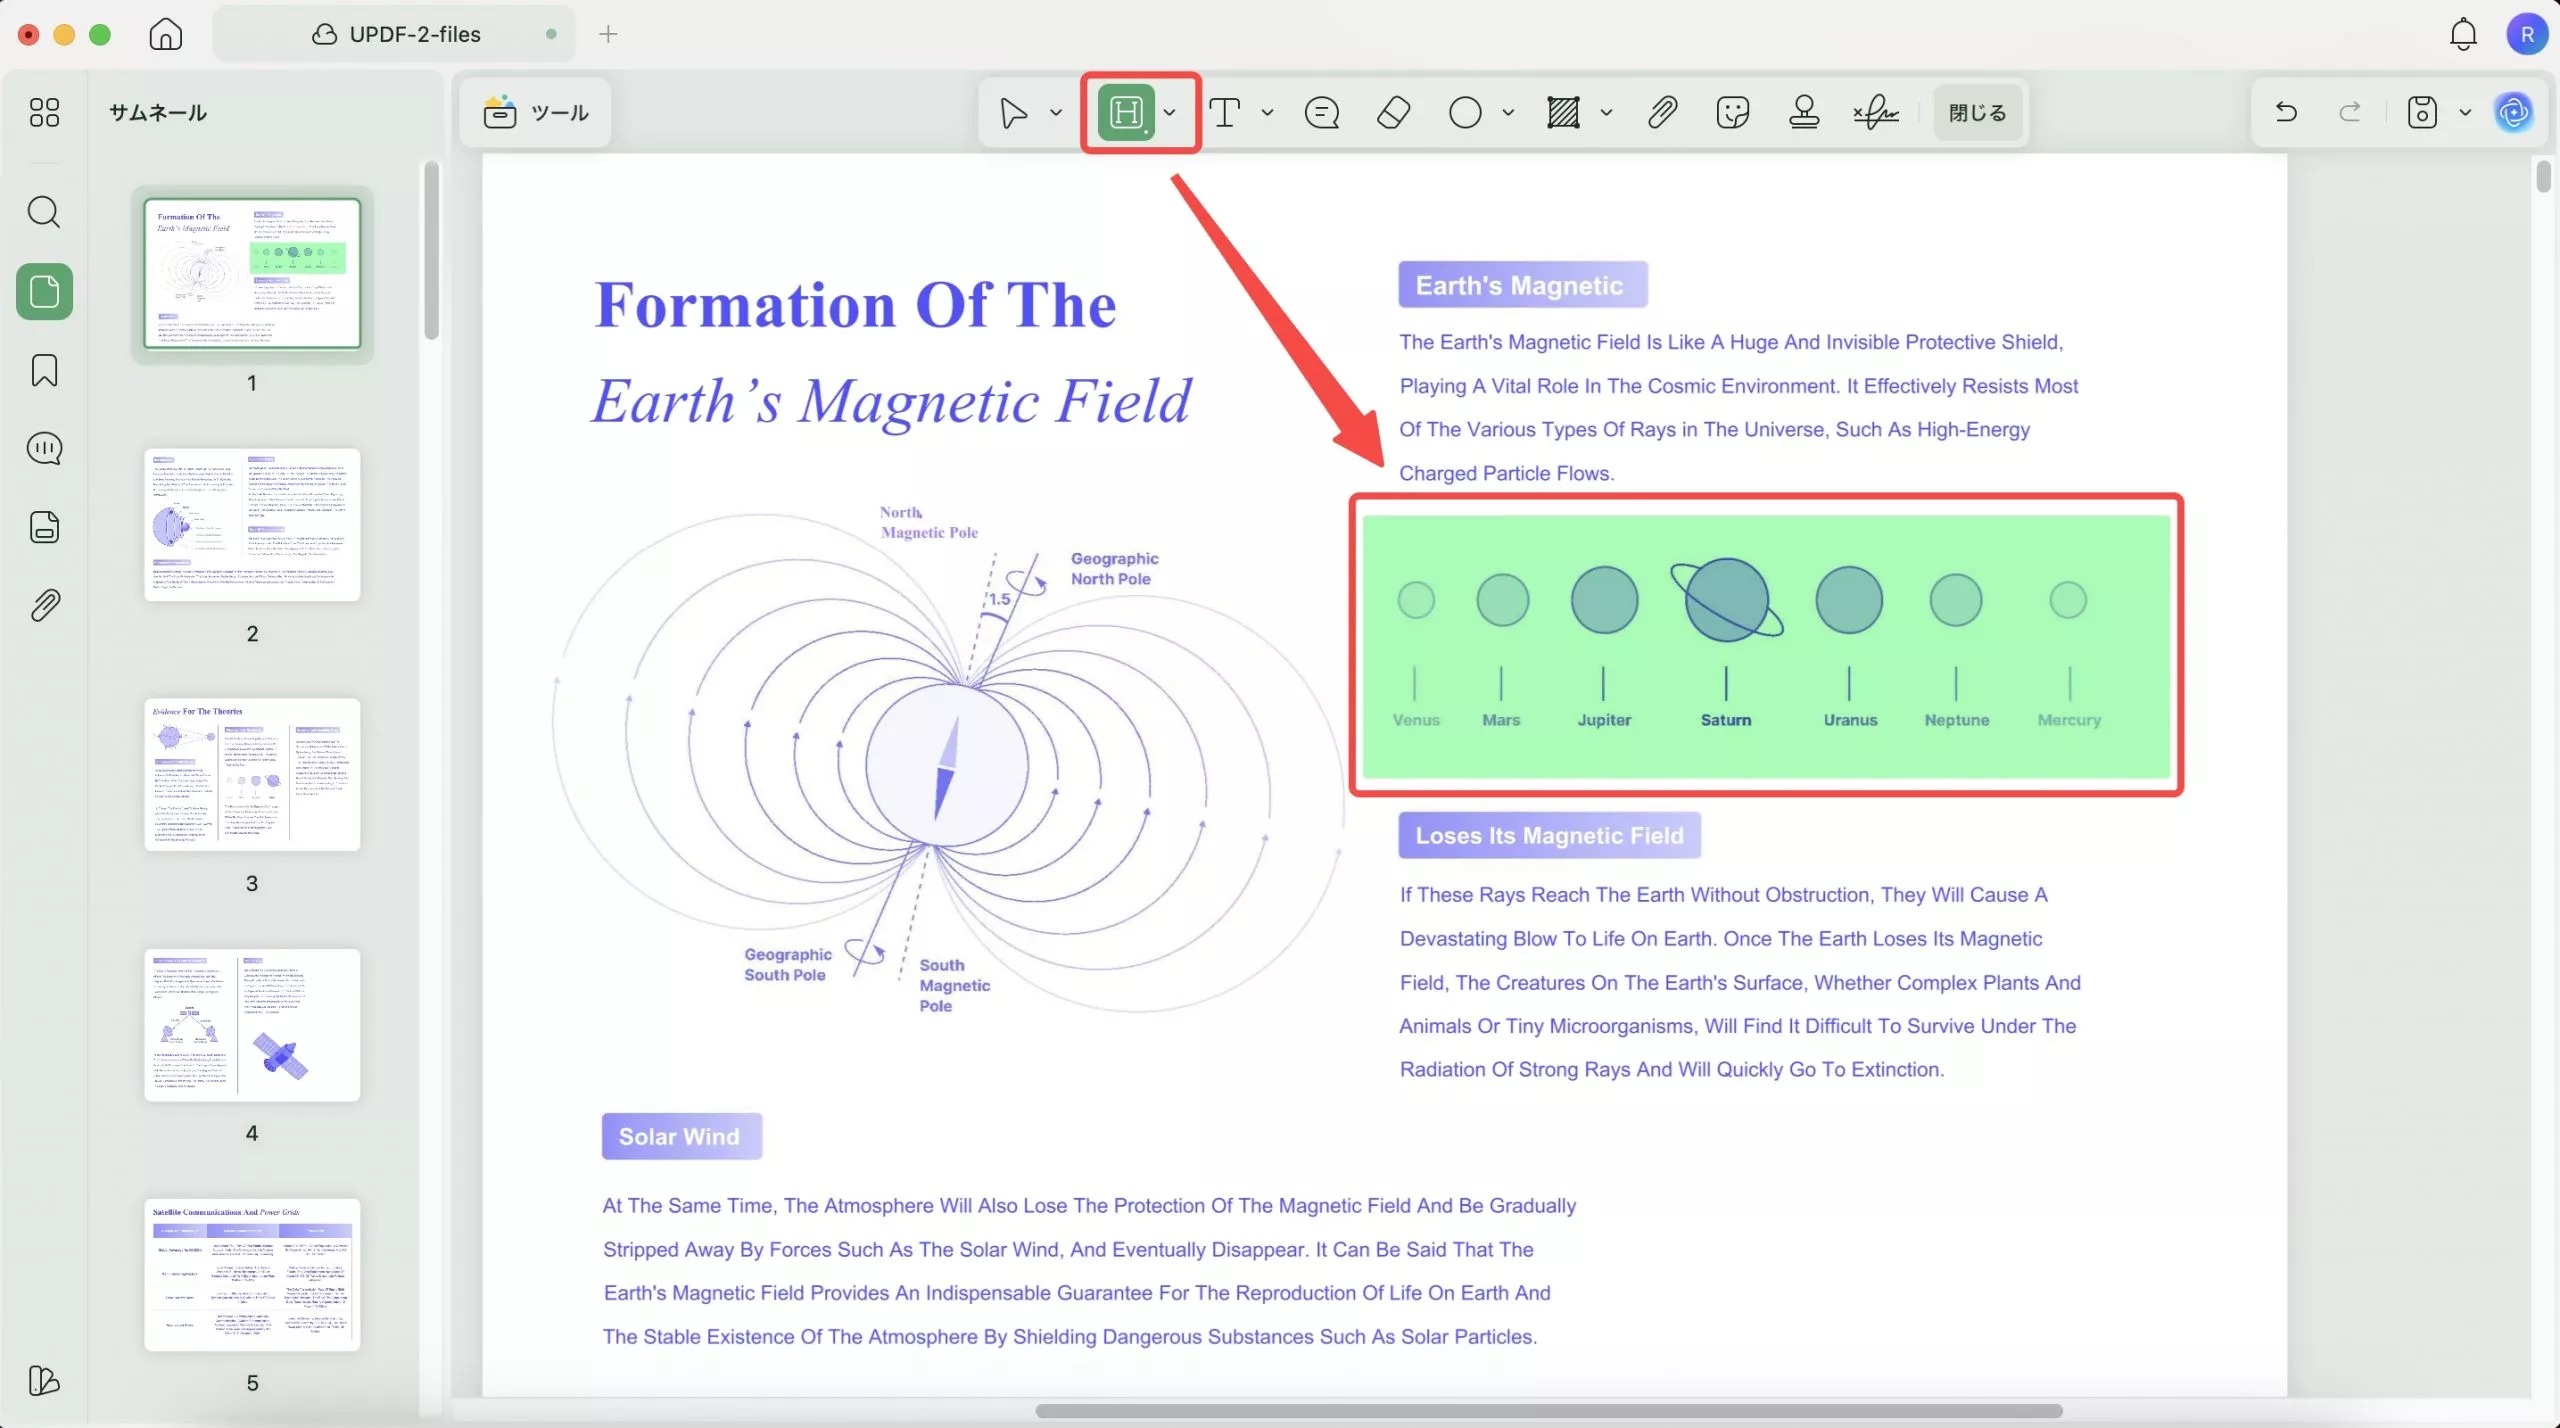
PDF内の領域をハイライトするには、「コメント」→「ハイライト」を選択し、「 Shift 」キーを押しながら必要な部分を描画します。この機能は現在Macでのみご利用いただけます。
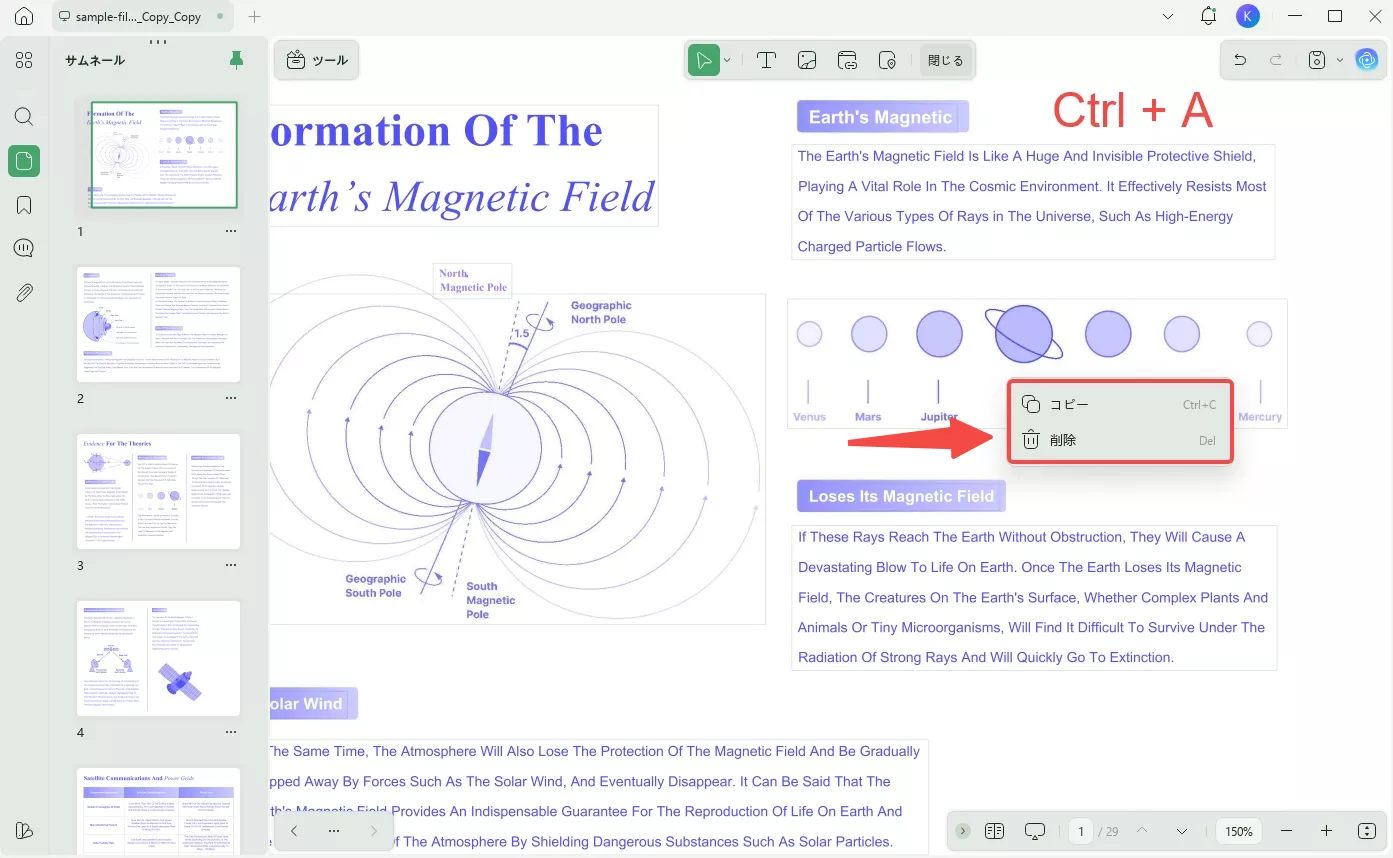
7. 編集モードで「Ctrl/CMD + A」を使用してすべてを選択する
PDF ファイルの 1 ページ内の要素を「コピー」、「削除」、「移動」などの一括編集を行う場合は、「Ctrl+A」または「CMD +A」を使用してすべての要素を選択できます。
この機能は、「PDF 編集」モードに入った場合にのみ機能します。
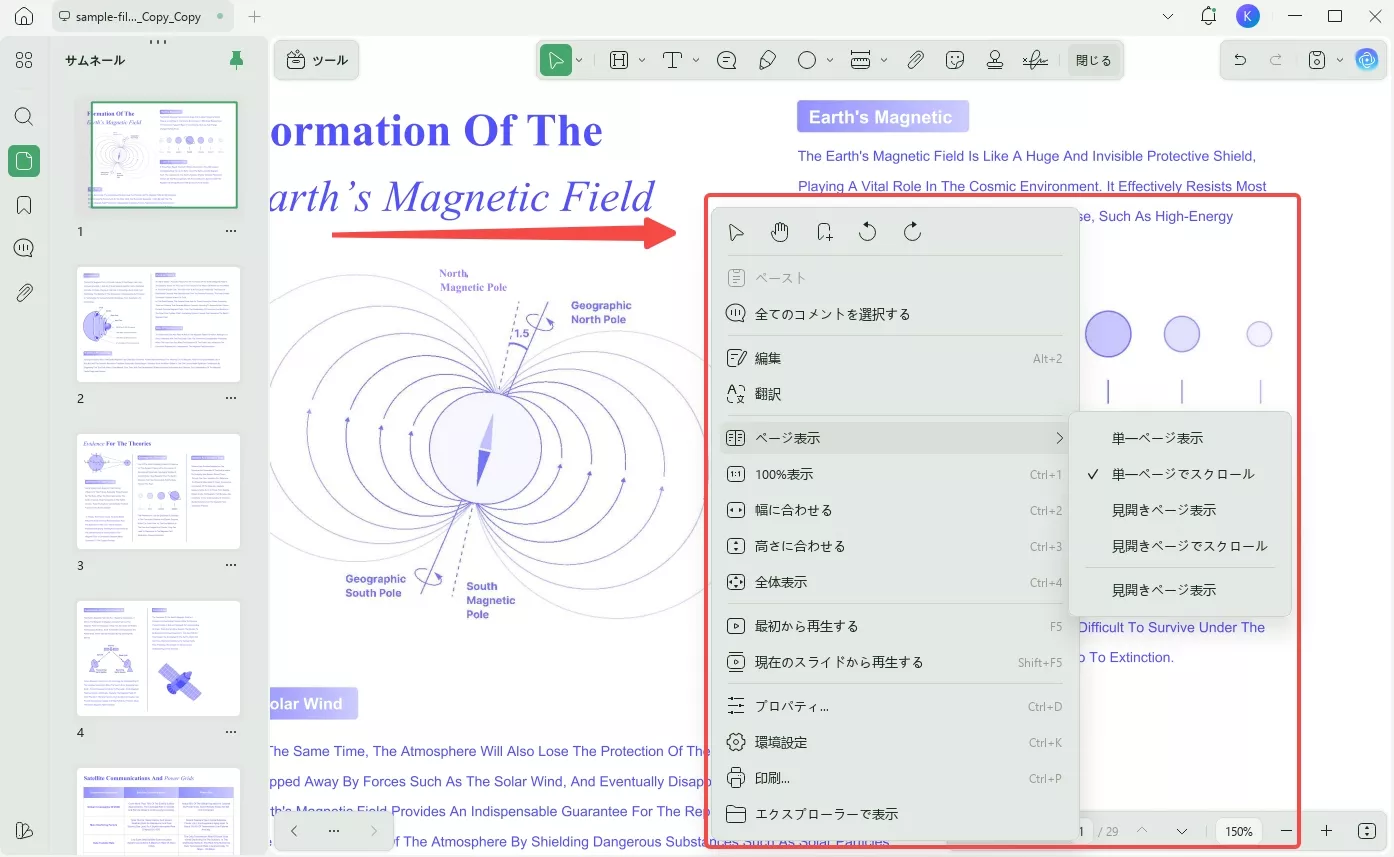
2. 右クリックでオプションを見つける
ファイルまたは要素を右クリックすると、多くのオプションが表示されます。
ページを右クリックすると、回転、ページ表示の変更、幅の調整など、ページを管理するための多くのオプションが表示されます。
モードによって、右クリック後にさまざまなオプションが表示されます。
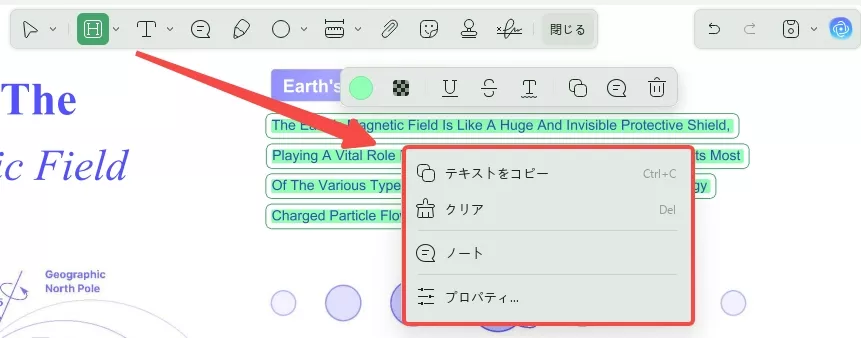
要素を右クリックすると、要素を編集するためのオプションが表示されます。たとえば、強調表示された部分を右クリックすると、「テキストをコピー」、「クルア」、「ノート」、「プロパティ」オプションが表示されます。
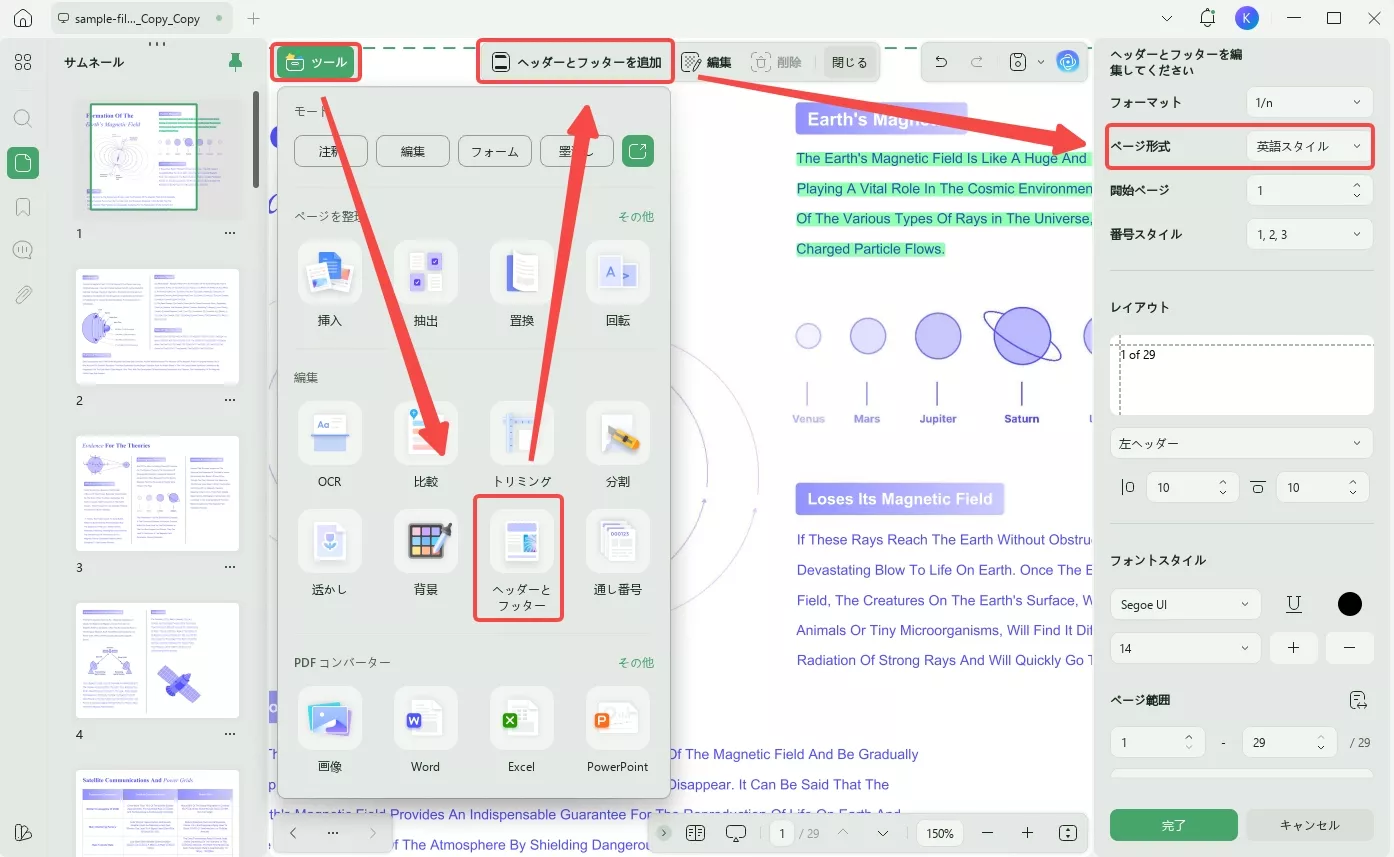
3. 選択した言語スタイルごとにヘッダーとフッターを追加
ヘッダーとフッターに必要な言語とともに、さまざまな形式のページ番号を設定できます。
UPDF で多言語ヘッダーとフッターを使用する方法
- ステップ1:UPDF にヘッダーとフッターを追加するには、PDF ドキュメントを開き、左側の「ツール」タブに進みます。上部から「ヘッダーとフッター」を選択して、特定の要素の追加を続行します。
- ステップ2:右下の「ヘッダーとフッターを追加」ボタンに進みます。レイアウトを設定し、ページ番号のプリセットを選択します。
- ステップ3:右側のパネルでコンテンツ セクションを見つけて、処理する言語に応じてそれぞれのオプションを選択します。
このセクションでは、ドロップダウン メニューから選択できる 12 種類の言語オプションが提供されます。「保存」ボタンをクリックして、PDF のヘッダーとフッター テンプレートの保存に進みます。
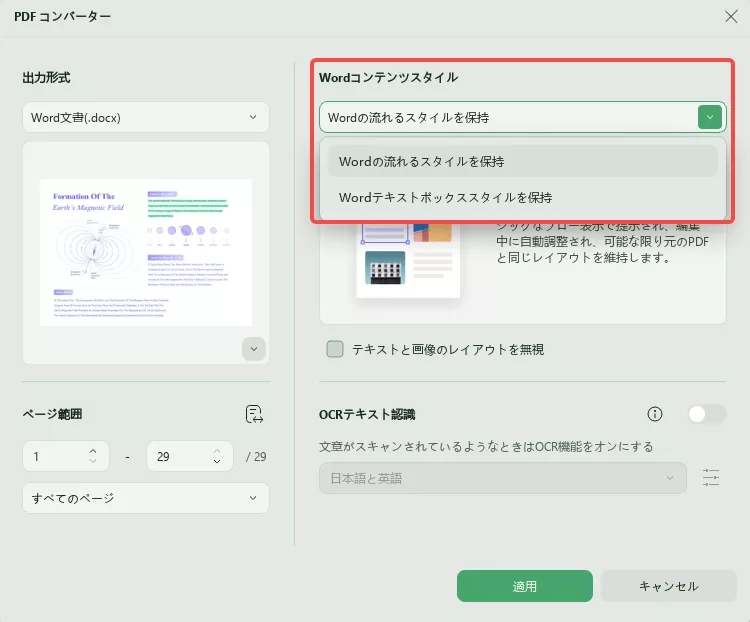
4. レイアウトオプションで変換結果を制御
UPDFには、ユーザー向けに文書をWordに変換する際の2つの異なるレイアウトオプションがあります。
Word フロー形式を保持:変換されたコンテンツはWordのフローをそのまま使用し、編集中に元のPDFレイアウトと一致するように自動調整されます。
Wordテキストボックスのスタイルを保持:変換されたコンテンツは、レイアウトを自動調整せずにテキストボックスに表示されます。元のPDFの書式が保持されます。
このようなオプションを使用すると、PDFファイルの品質と書式を失うことなく、数回のクリックでそれらを保持できます。
PDF変換中に変換レイアウトを設定する方法
ステップ 1:変換したいPDFを開き、左上隅にある「ツール」をタブします。「PDFコンバーター」から「Word」形式を選択して PDFに変換し、画面にウィンドウを開きます。
ステップ 2:ウィンドウが開いたら、「Wordコンテンツスタイル」セクションをクリックします。
ステップ 3:他のオプションを続行し、「適用」オプションをタップして、ドキュメントを必要なファイル形式に正常に変換します。
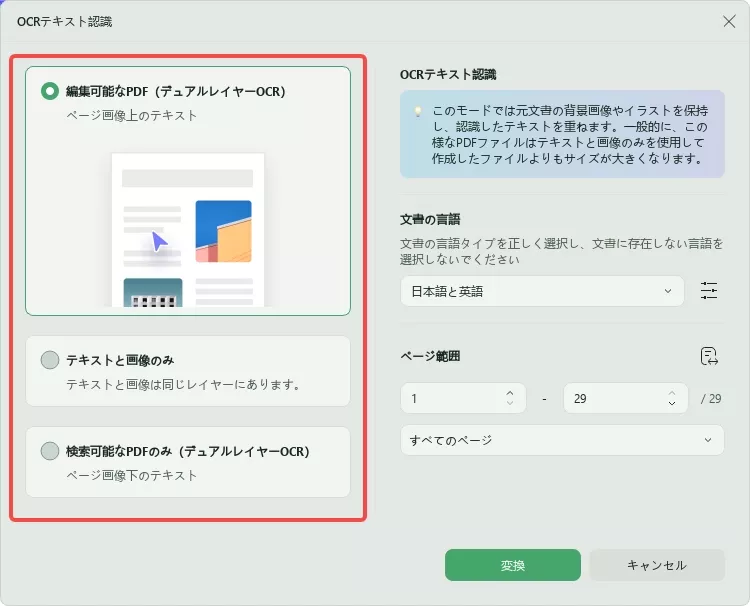
5. OCRレイアウト設定でドキュメント編集機能を制御
UPDF には、スキャンした PDF ドキュメントで OCR 機能を実行する際に、3つの非表示レイアウトオプションがあります。これらの3つのレイアウト オプションについて詳しくは、次の点を確認してください。
- 編集可能なPDF:このモードでは、元の文書の背景画像とイラストが保持され、認識されたテキストが上に配置されます。
そのため、ファイルサイズは通常、「テキストと画像のみ」モードで作成されたPDFよりも大きくなります。出力結果は元のPDFとは若干異なる場合があります。 - テキストと画像のみ:このモードでは、認識されたテキストと画像のみが保存されるため、PDFファイルのサイズは小さくなります。
ただし、元の文書とは見た目が若干異なる場合があります。 - 検索可能なPDFのみ:このモードでは、ページ画像は保持され、認識されたテキストはその下の非表示レイヤーに追加されます。
これにより、文書の見た目は元の文書とほぼ同じになります。
OCRレイアウトを使用してスキャンしたPDFを編集・検索可能なファイルに変換する方法
- ステップ1: UPDFを起動し、「ファイルを開く」オプションで対象のPDFファイルを開きます。「ツール」>「OCR 」をクリックします。
- ステップ 2:開いたら、スキャンした PDF を編集可能な PDF に変換する場合は、「編集可能な PDF」を選択してください。
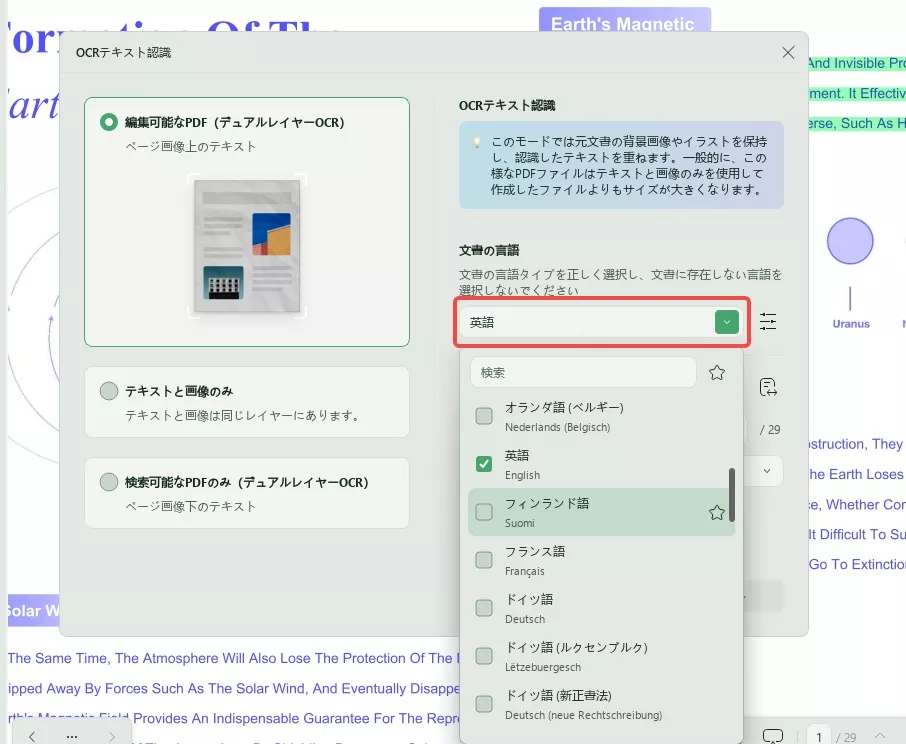
- ステップ3:文書の言語を選択してください。例えば、この文書は英語なので、「英語」を選択する必要があります。ページ範囲を選択します。「変換」ボタンをクリックします。
ドキュメント ワークフローを合理化することを体験したい方は、 今すぐUPDFをダウンロードしてください。UPDF の OCR 機能の詳細については、以下のビデオをご覧ください。
Windows • macOS • iOS • Android 100%安全
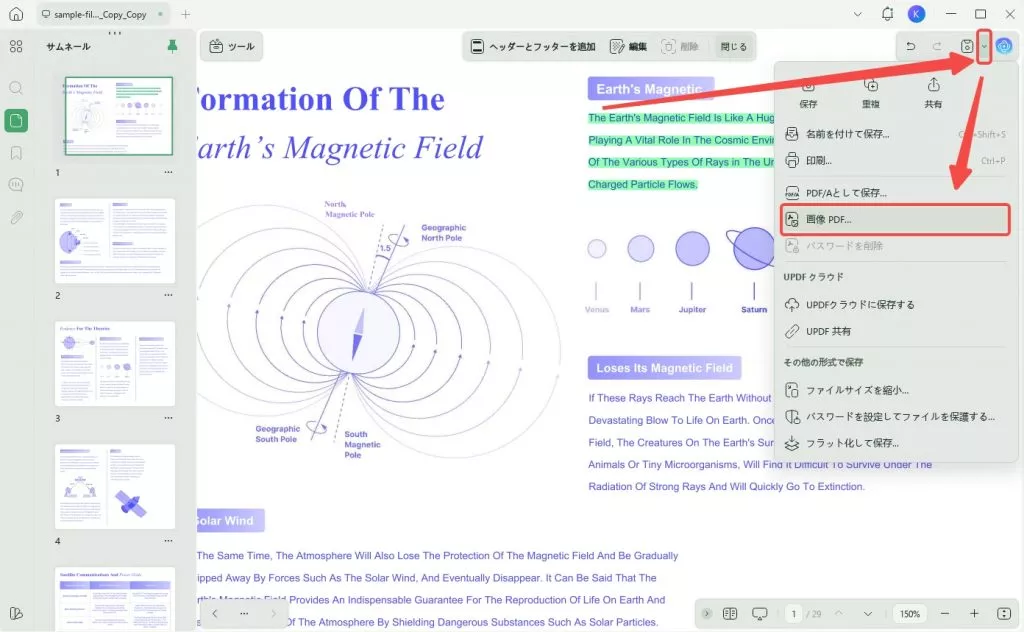
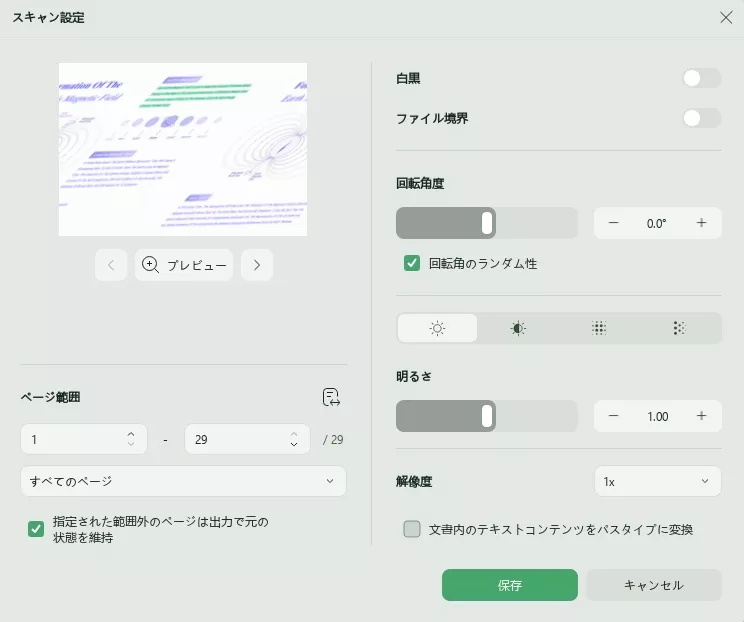
6. 不要な編集を避けるためにPDFを画像のみにする
PDFを画像のみのPDFに変換することで、編集可能なPDF文書を画像のみのPDFファイルに変換できます。この機能を利用することで、テキストと画像を不正アクセスから保護できます。
PDF を画像のみの PDF に変換する方法
- ステップ 1:このプロセスでは、「保存」ボタンの近くにある「下向き矢印」アイコンをクリックした後、「画像 PDF」オプションにアクセスする必要があります。
- ステップ 2:ポップアップ ウィンドウで、「白黒」、「ファイルの境界線」を有効にしたり、回転角度や明るさを変更したりできます。
- ステップ 3:「保存」をクリックして、PDF を画像のみの PDF に変換します。
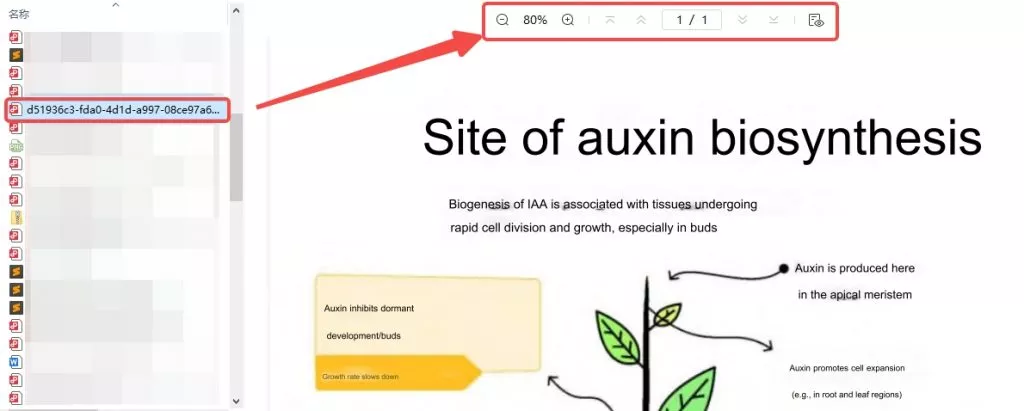
7. 希望の言語へのクイック翻訳
PDF を読むときに頻繁に 1 つの言語に翻訳する必要がある場合は、UPDF に選択した言語を記憶させることができます。これにより、いつでも言語を選択する必要がなくなります。以下の手順に従ってください。
ステップ1. PDFを開き、翻訳したいコンテンツを選択し、「下矢印」アイコンをクリックして「翻訳」を選択し、希望の言語を選択します。
例えば、ここでは「イタリア語」を選択します。すると、AIが選択したコンテンツの翻訳を開始します。そして、UPDF AIは「イタリア語」を翻訳のデフォルト言語として設定します。
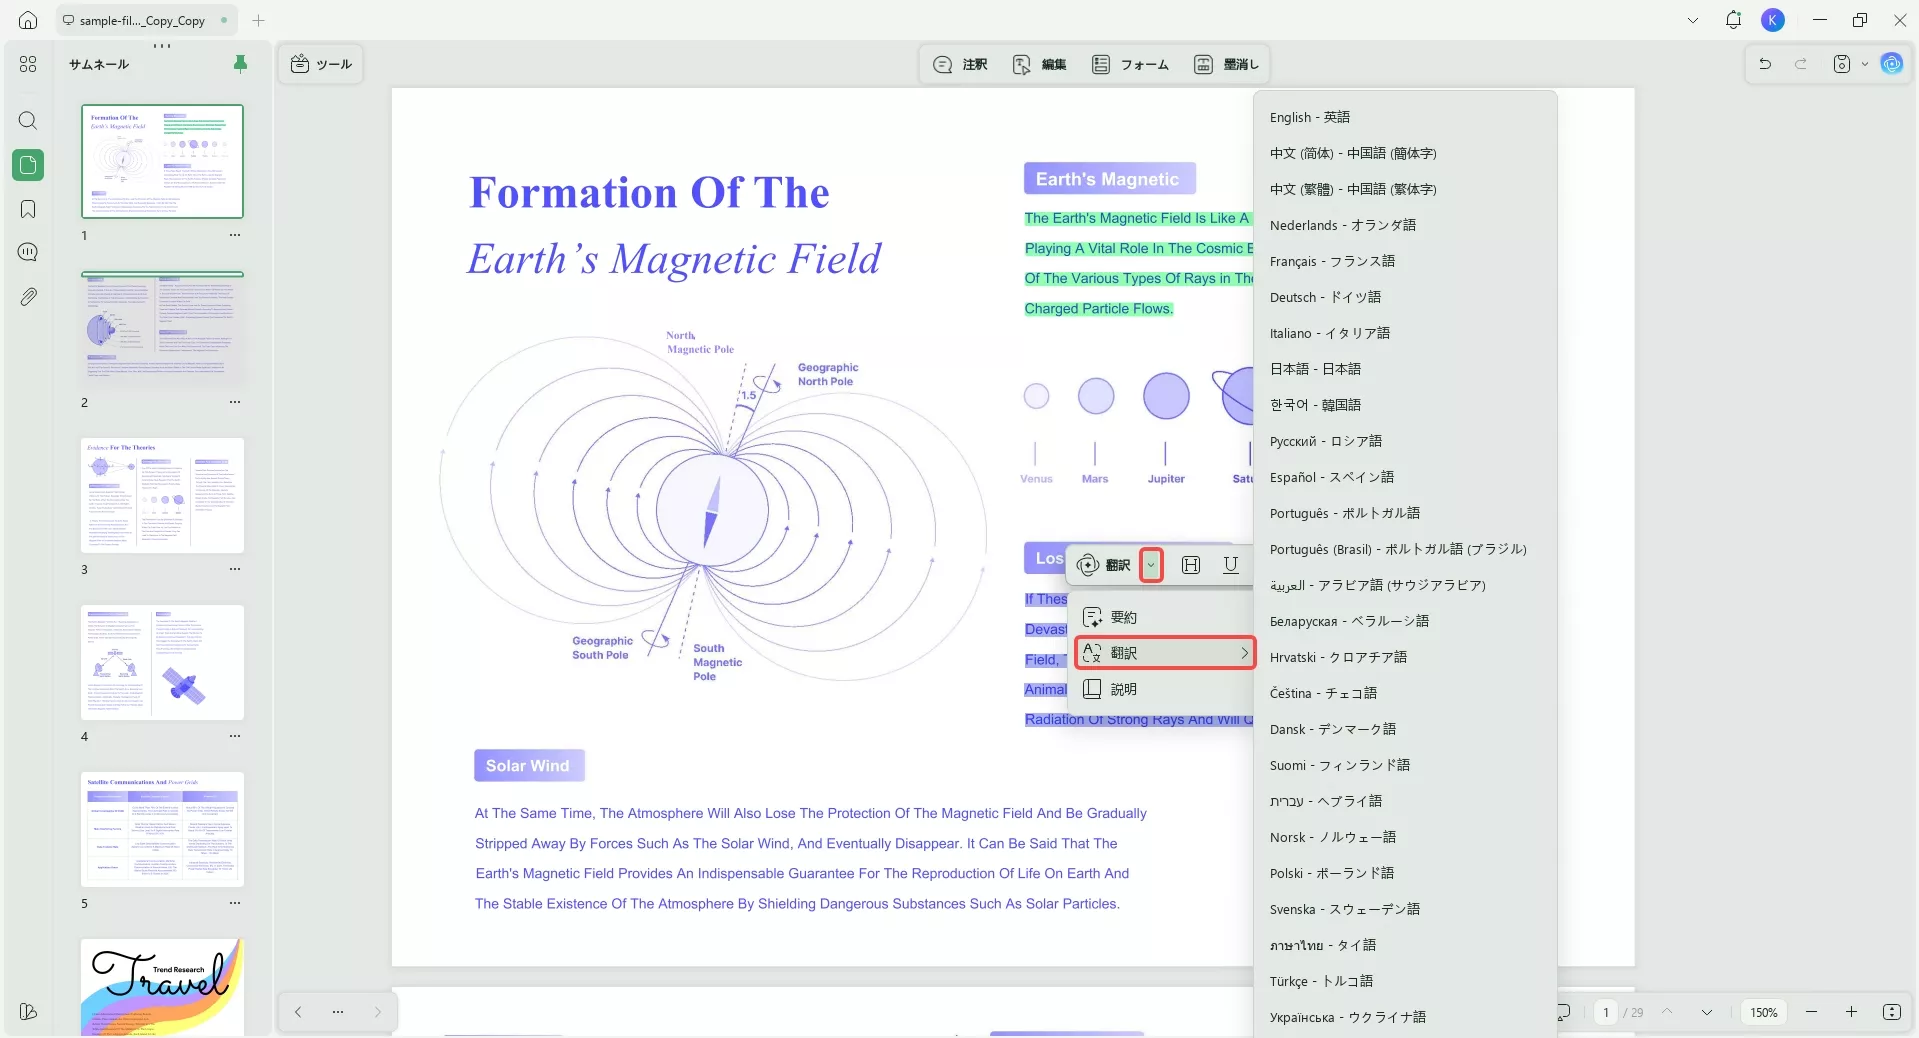
ステップ2.任意のコンテンツを選択し、「翻訳」アイコンをクリックします。いつでも「日本語」に翻訳できます。

8. ファイル エクスプローラーで UPDF を使用して PDF をプレビュー (Windows限定)
Windows用UPDFにはPDFプレビュープラグインが1つあります。ファイルエクスプローラーでズーム インとズーム アウトを使用して PDF をプレビューしたり、UPDF で開かずにページにジャンプしたりできます。使い方は次のとおりです。
ステップ1. 「プロフィール」>「設定」に移動します。
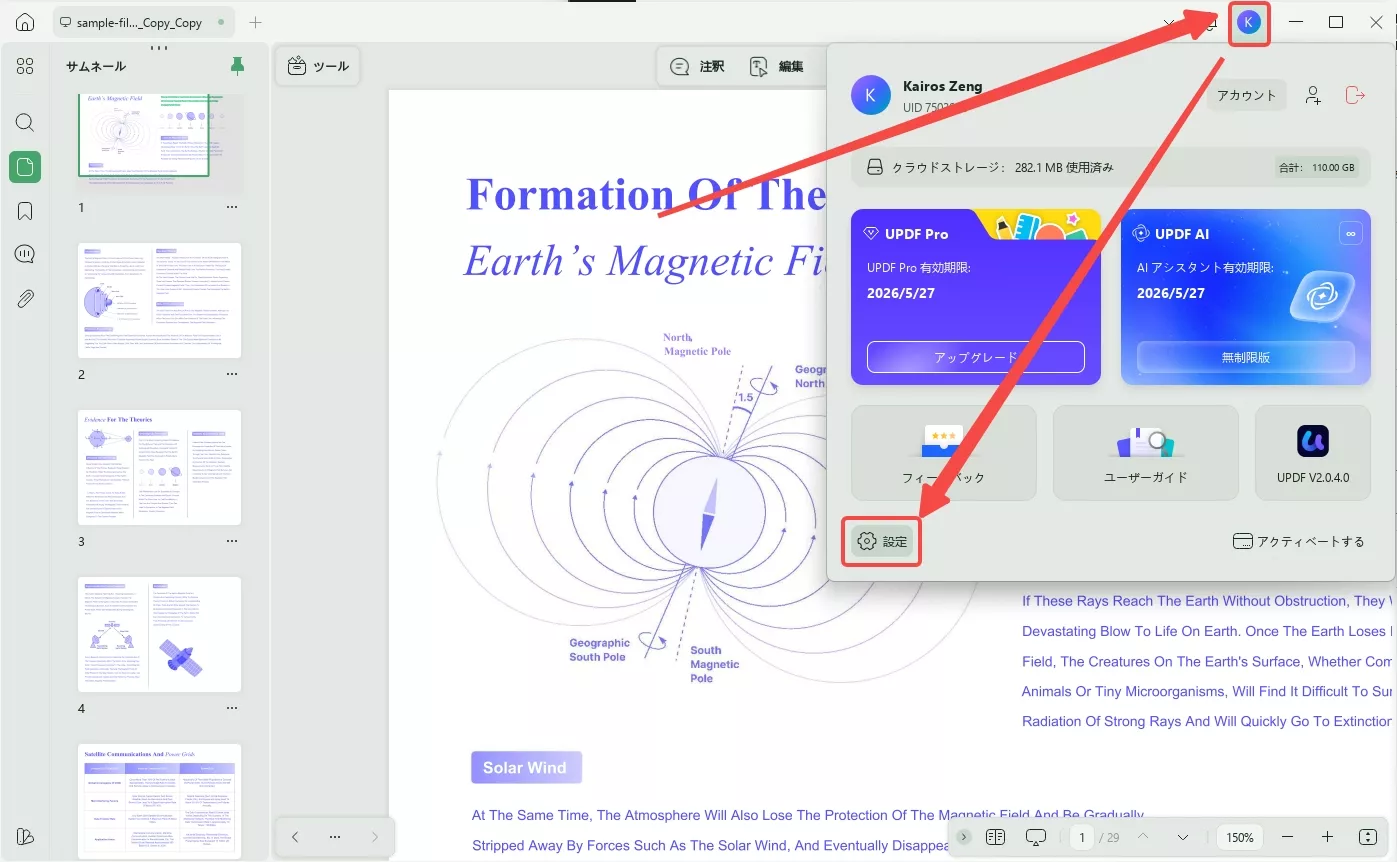
ステップ 2:「一般」セクションを下にスクロールし、「システムリソースマネージャーでPDFのプレビューツールにはUPDFがデフォルトで使用されます」をオンにします。
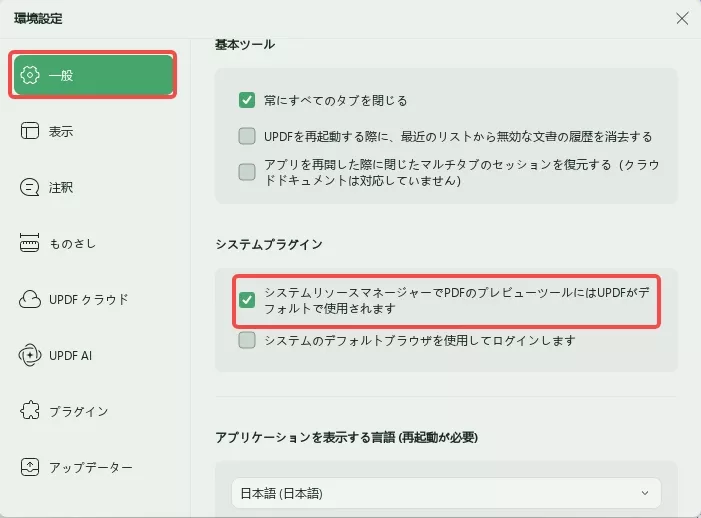
ステップ 3. 任意のファイル フォルダーに移動し、PDF をクリックして選択すると、右側に PDF プレビュー パネルが表示されます。
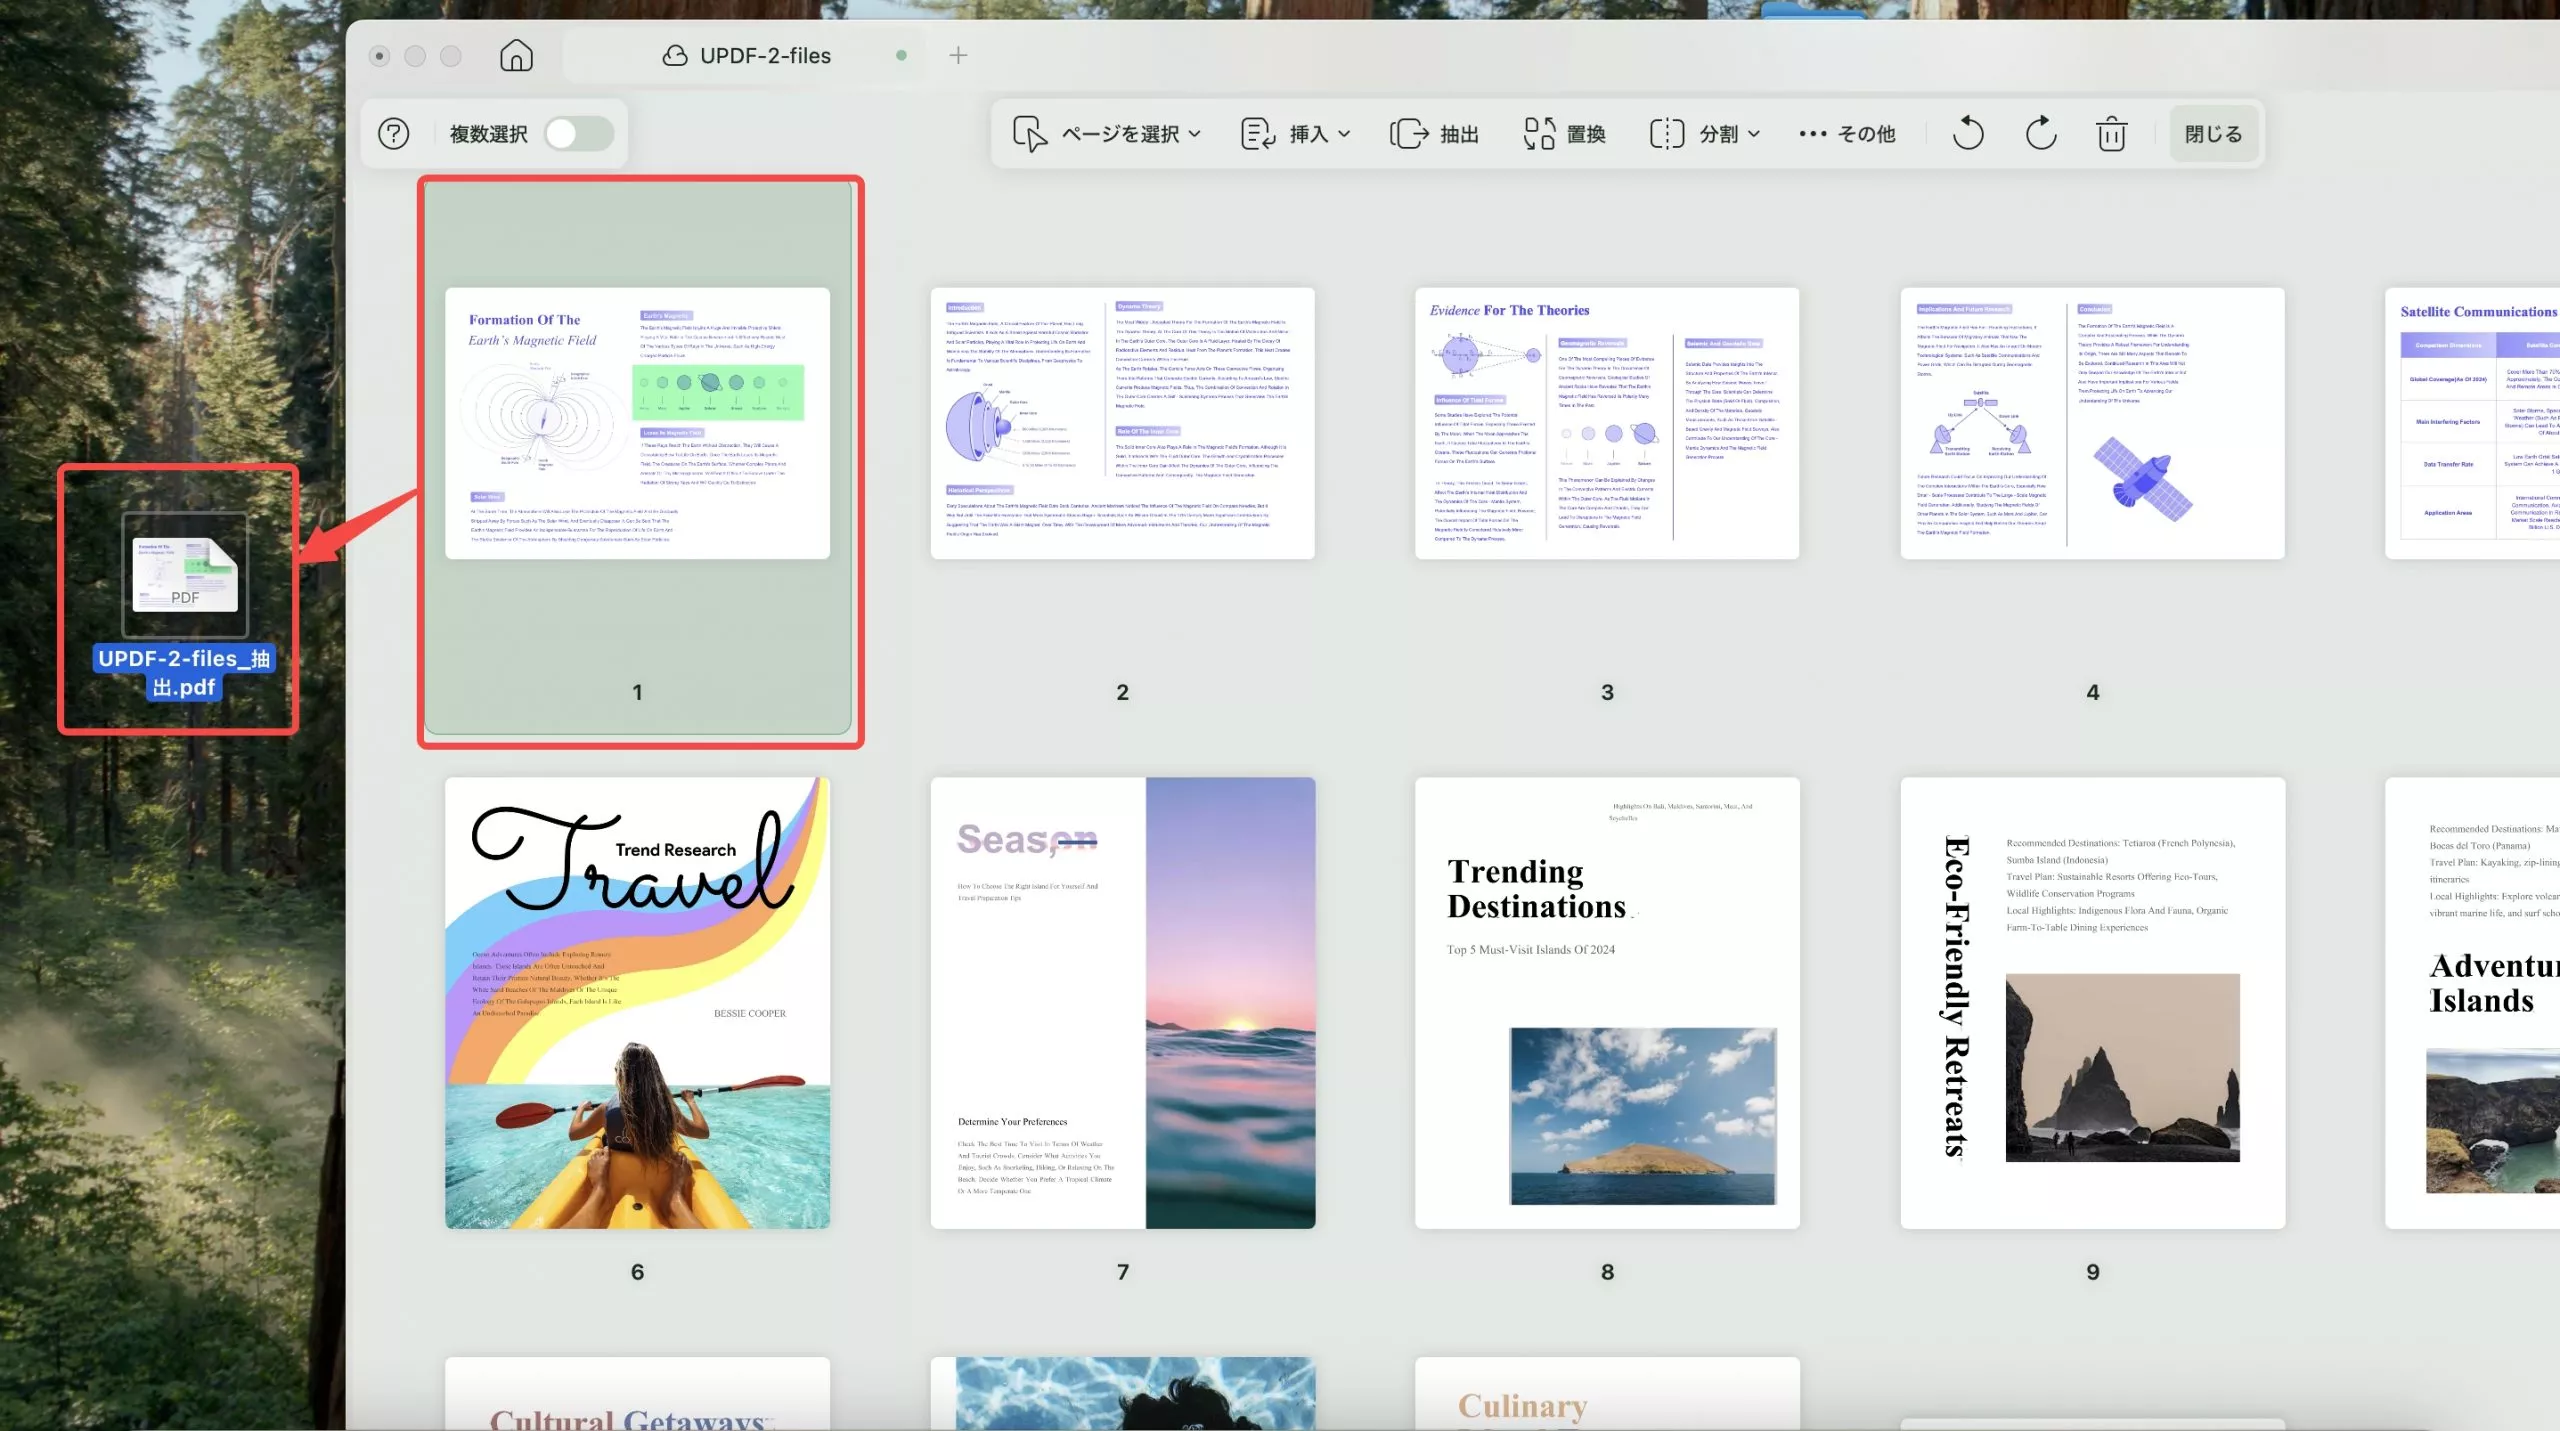
9. ドラッグアンドドロップで選択したページを抽出「Mac限定」
ページを1つの PDFにすばやく抽出するには、サムネイルでページを選択するか、ページを整理してページを選択し、デスクトップにドラッグ アンド ドロップします。
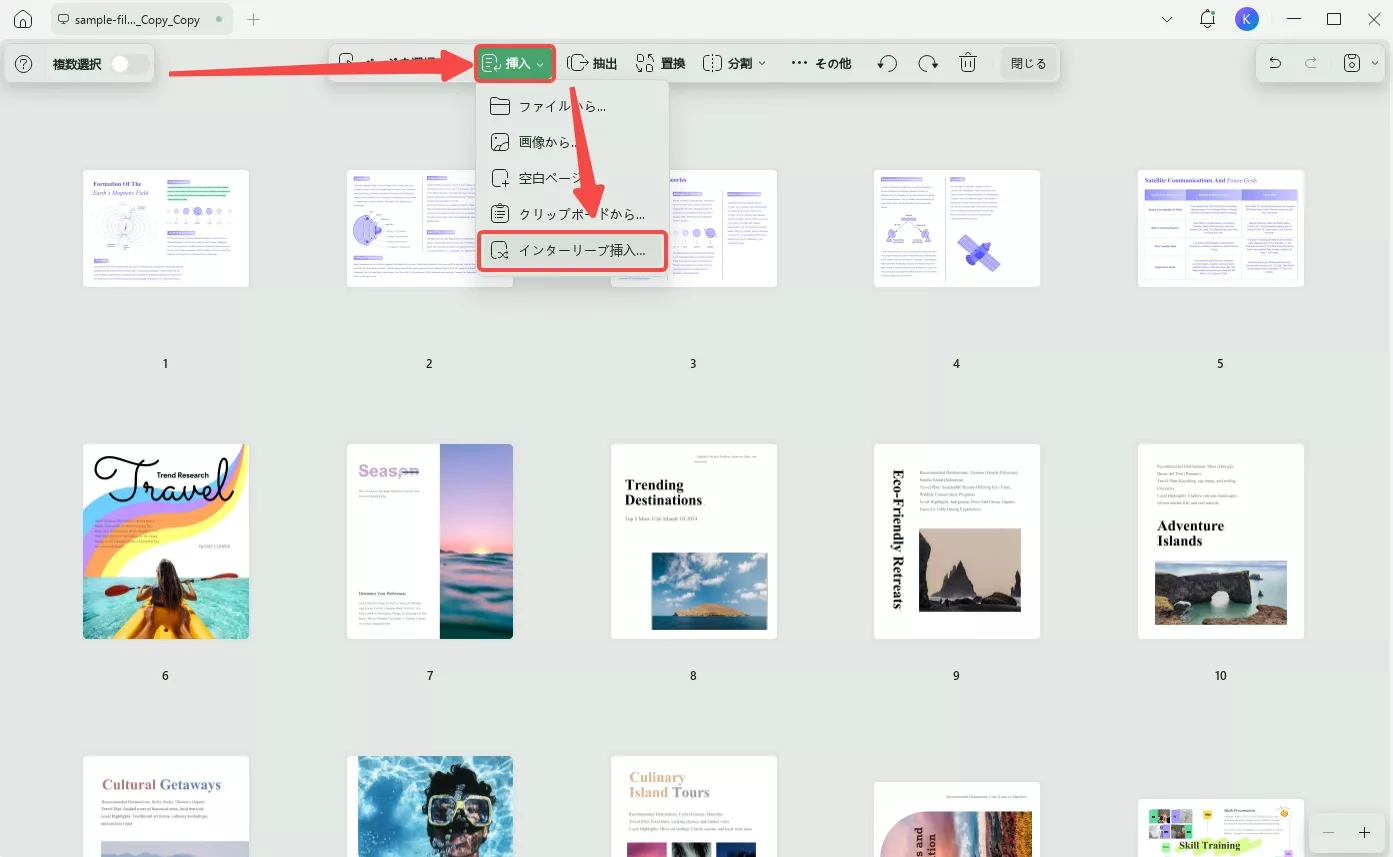
10. インターリーブ挿入
インターリーブ挿入は、書籍などのファイルを2つのファイルに分割してスキャンする場合に非常に便利です。
1つは奇数ページのみ、もう1つは偶数ページのみのファイルです。
UPDFをダウンロードし、片方のPDFファイルを開き、「ページ整理」>「挿入」>「インターリーブ挿入」を選択して、もう片方のファイルを選択し、正しい順序で1つのPDFに結合します。
Windows • macOS • iOS • Android 100%安全
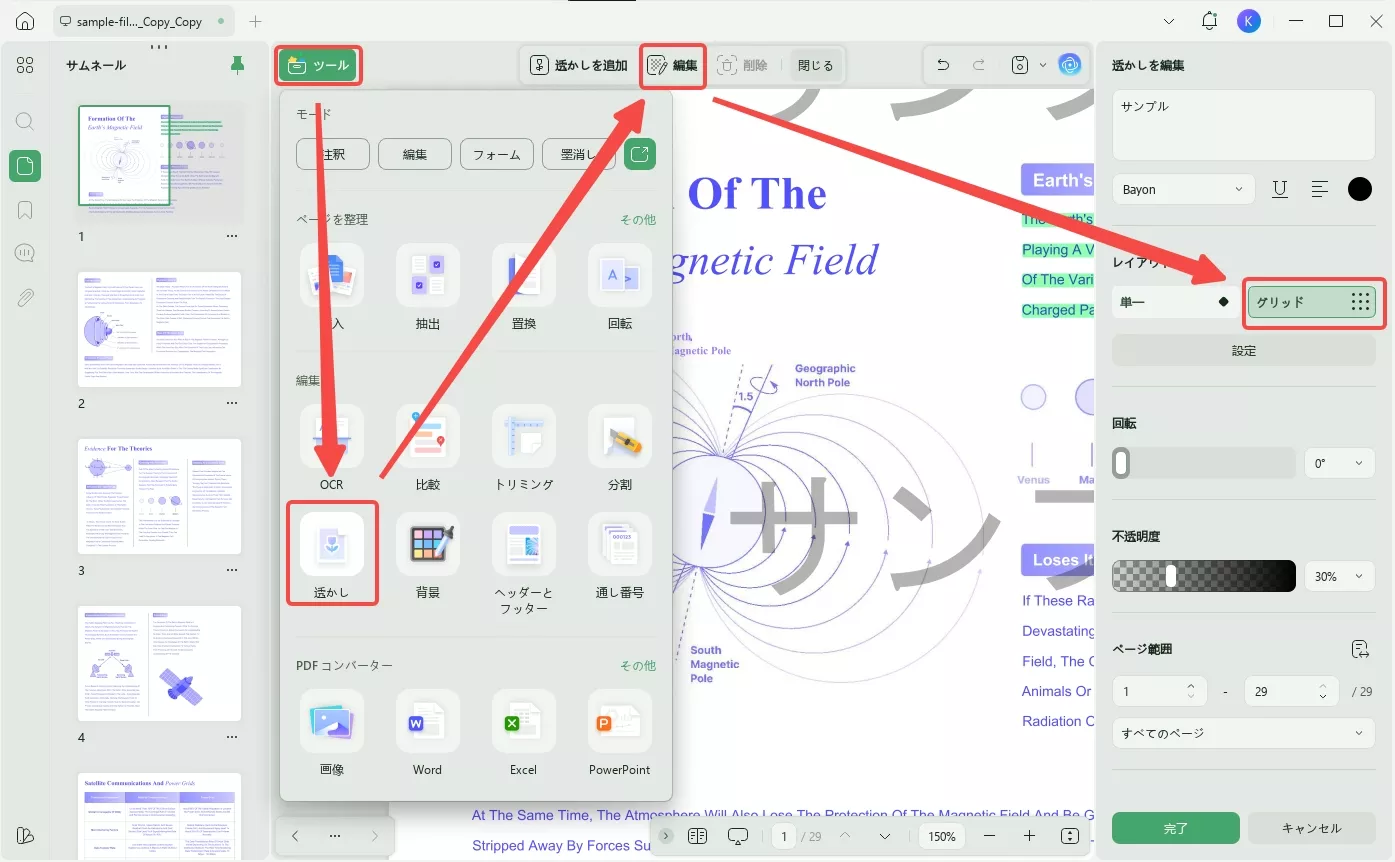
11. PDFにグリッド透かしを追加する
多くの場合、PDF を保護するためにタイトル付き透かしを追加する必要があります。多くの PDF ツールにはこの機能がありませんが、UPDFには追加されています。UPDF で PDF を開き、「ページ ツール」>「透かし」>「追加」に移動します。透かしを追加し、「タイトル付き透かしの追加」を選択します。
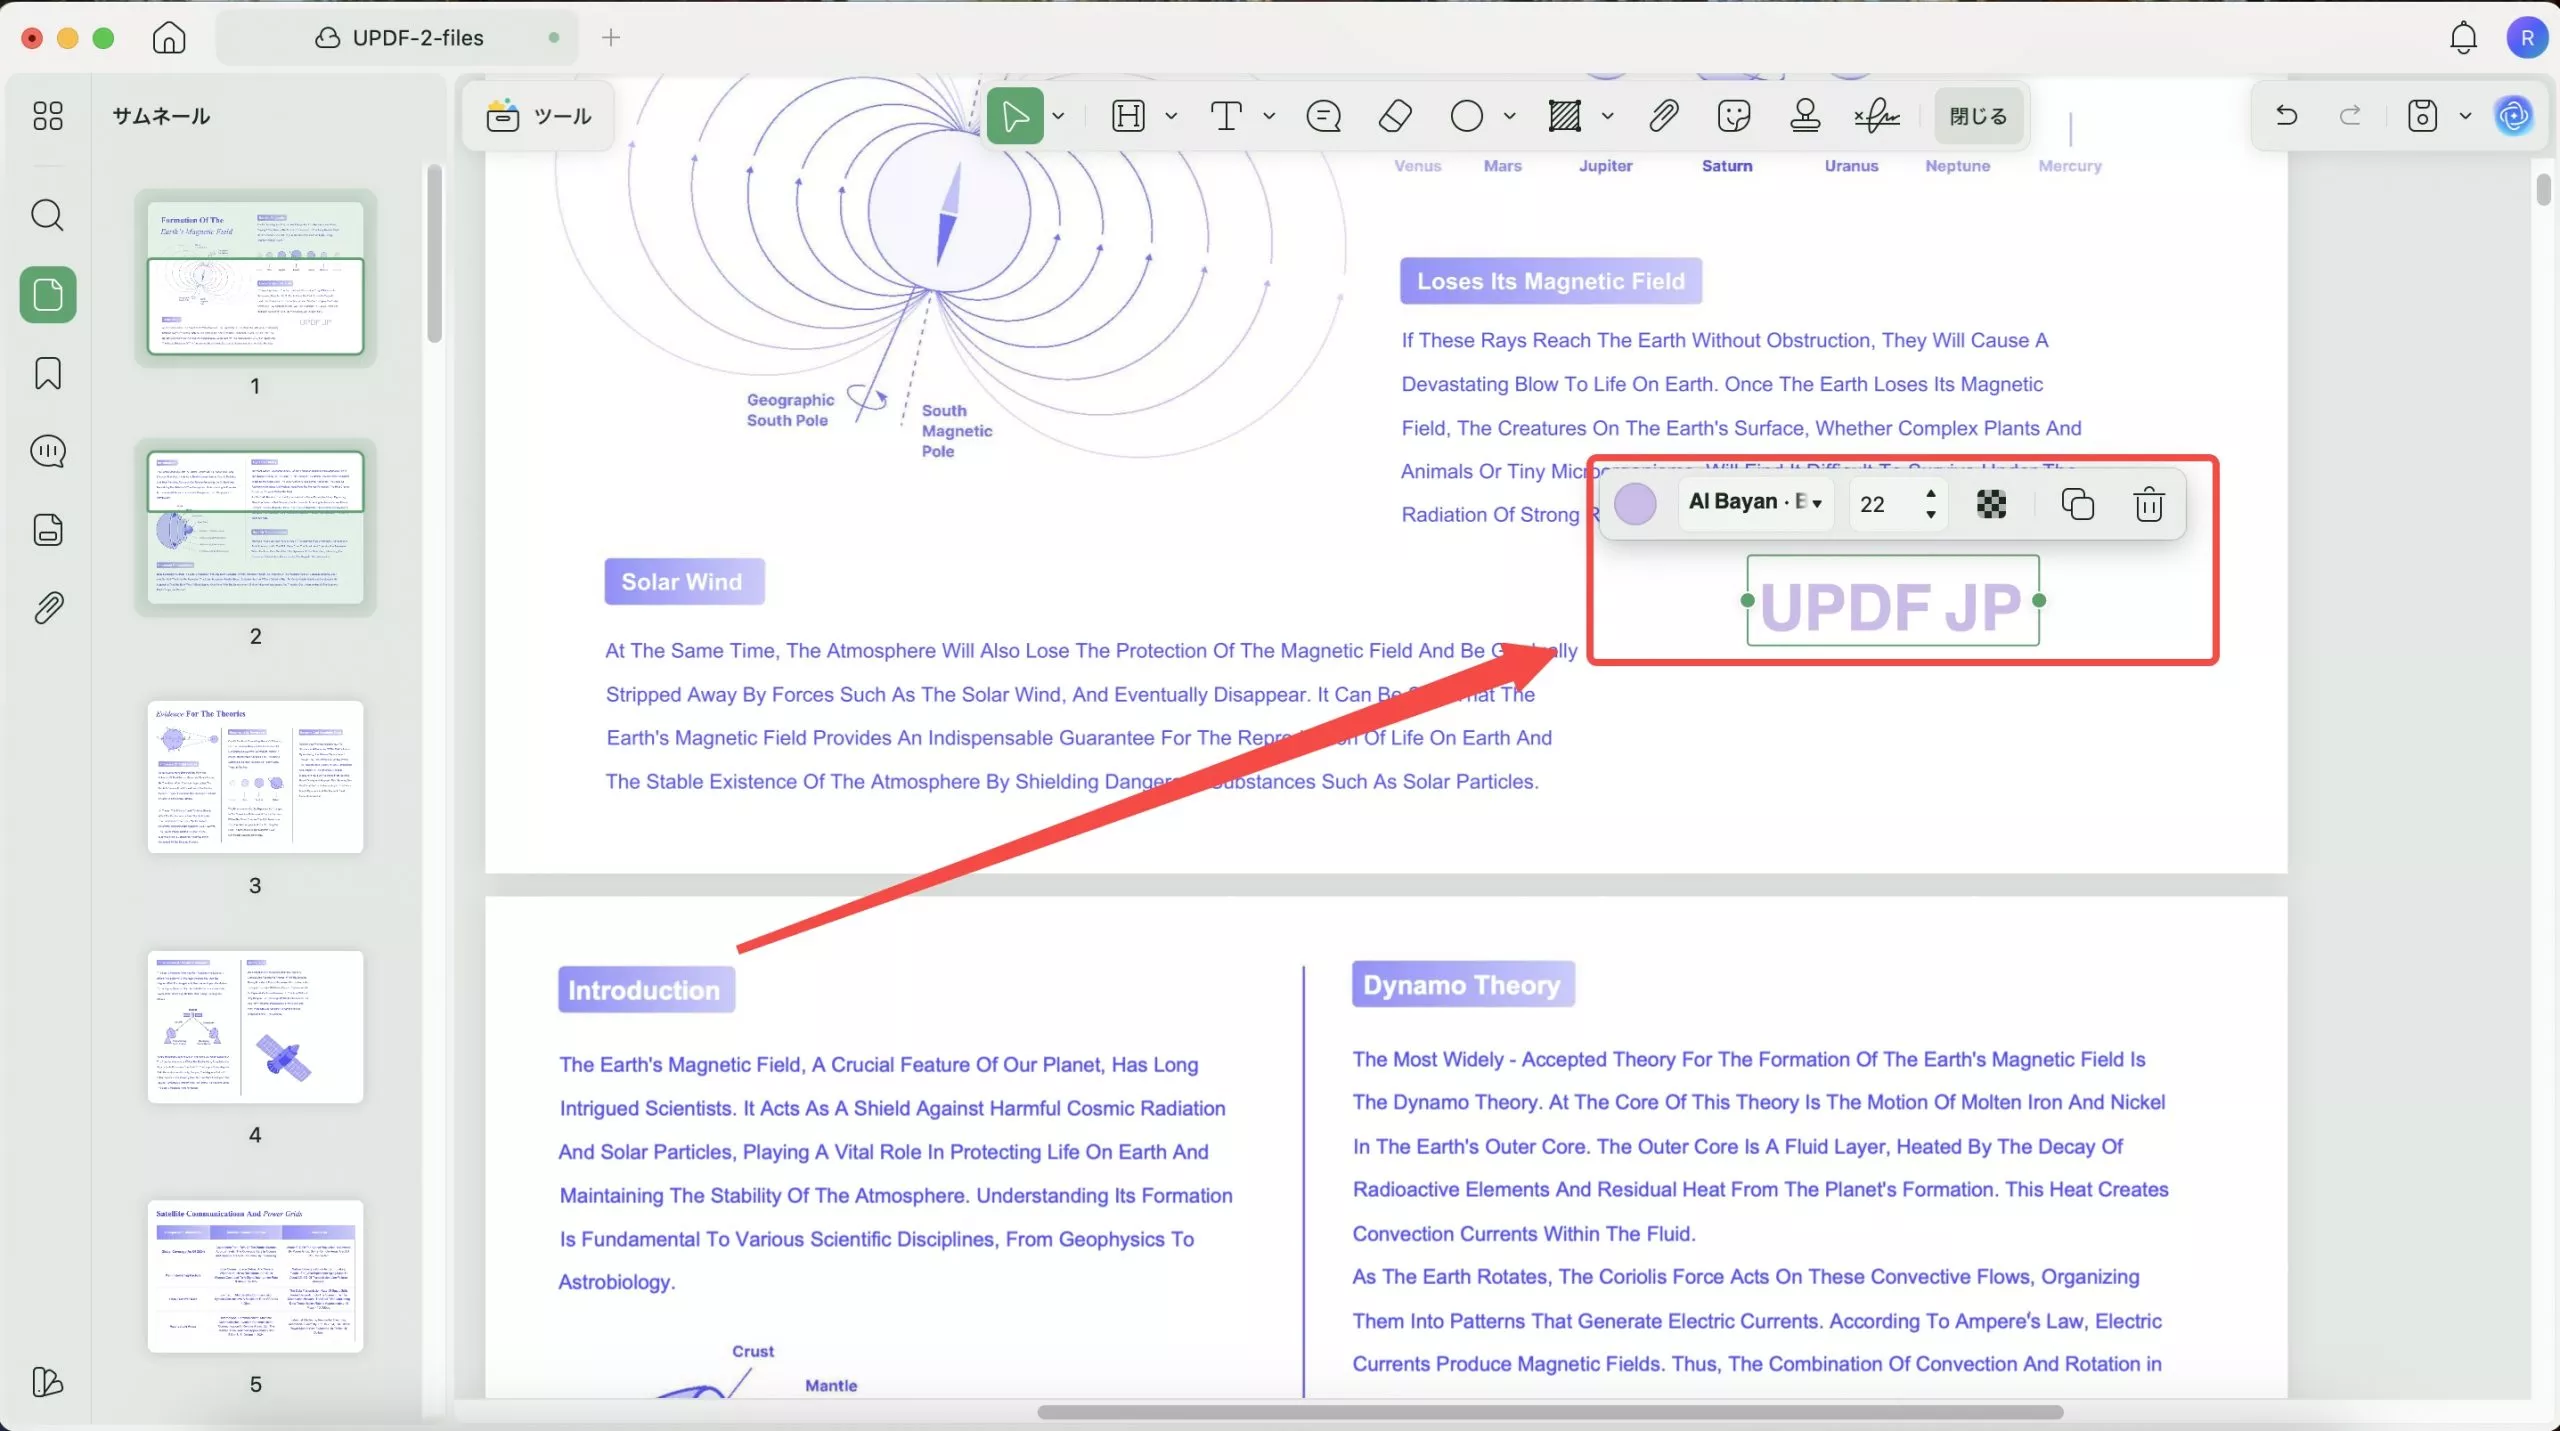
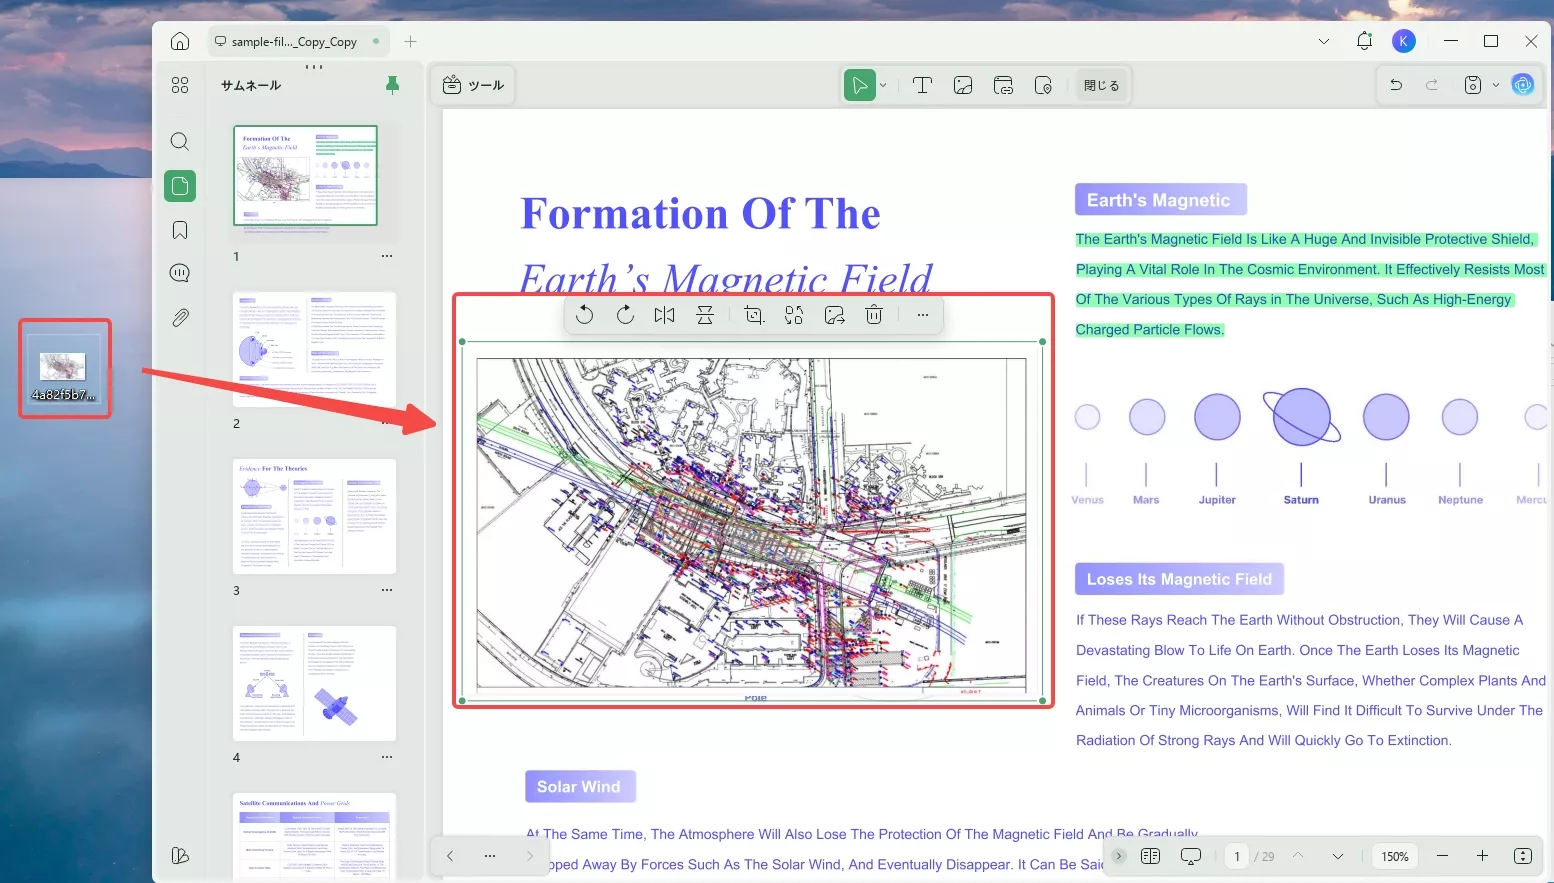
12. ドラッグ アンド ドロップで PDF に画像を追加
画像をPDFにドラッグするだけで、簡単にPDFに追加できます。手順は以下のとおりです。
UPDFでPDFを開き、「ツール」リストの「編集」をクリックします。
次に、コンピューター上の画像をクリックして選択し、UPDFで開いたPDFにドラッグします。
これで、PDFに画像を追加できます。
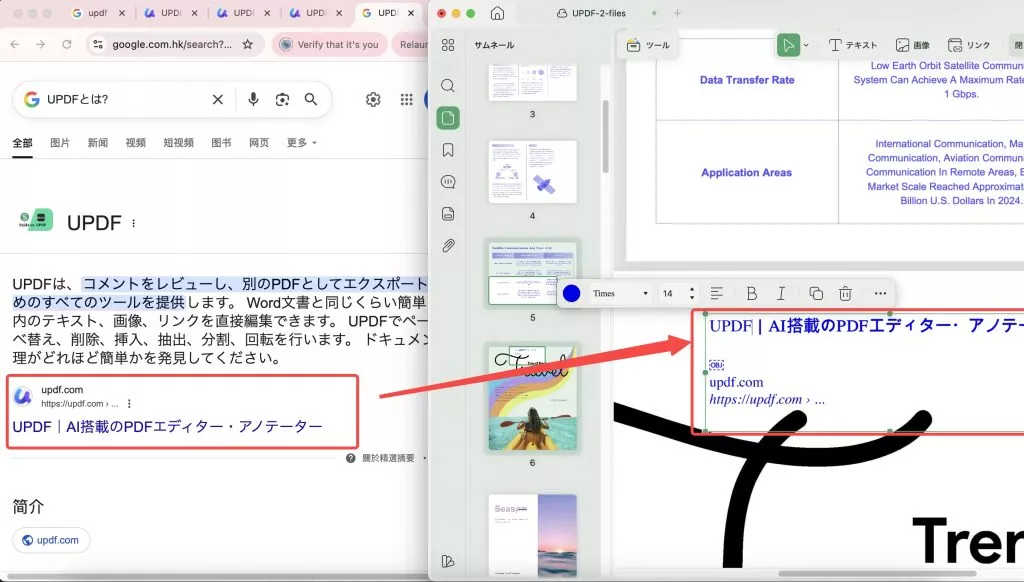
13. ドラッグ アンド ドロップでリッチ テキストを PDF に追加 (Mac限定)
リンク付きのテキストなどのリッチテキストを選択し、PDFにドラッグするだけで追加できます。
「編集」モードに切り替え、リッチテキストを含むファイルを開き、すべてのリッチテキストを選択してPDFにドラッグするだけです。
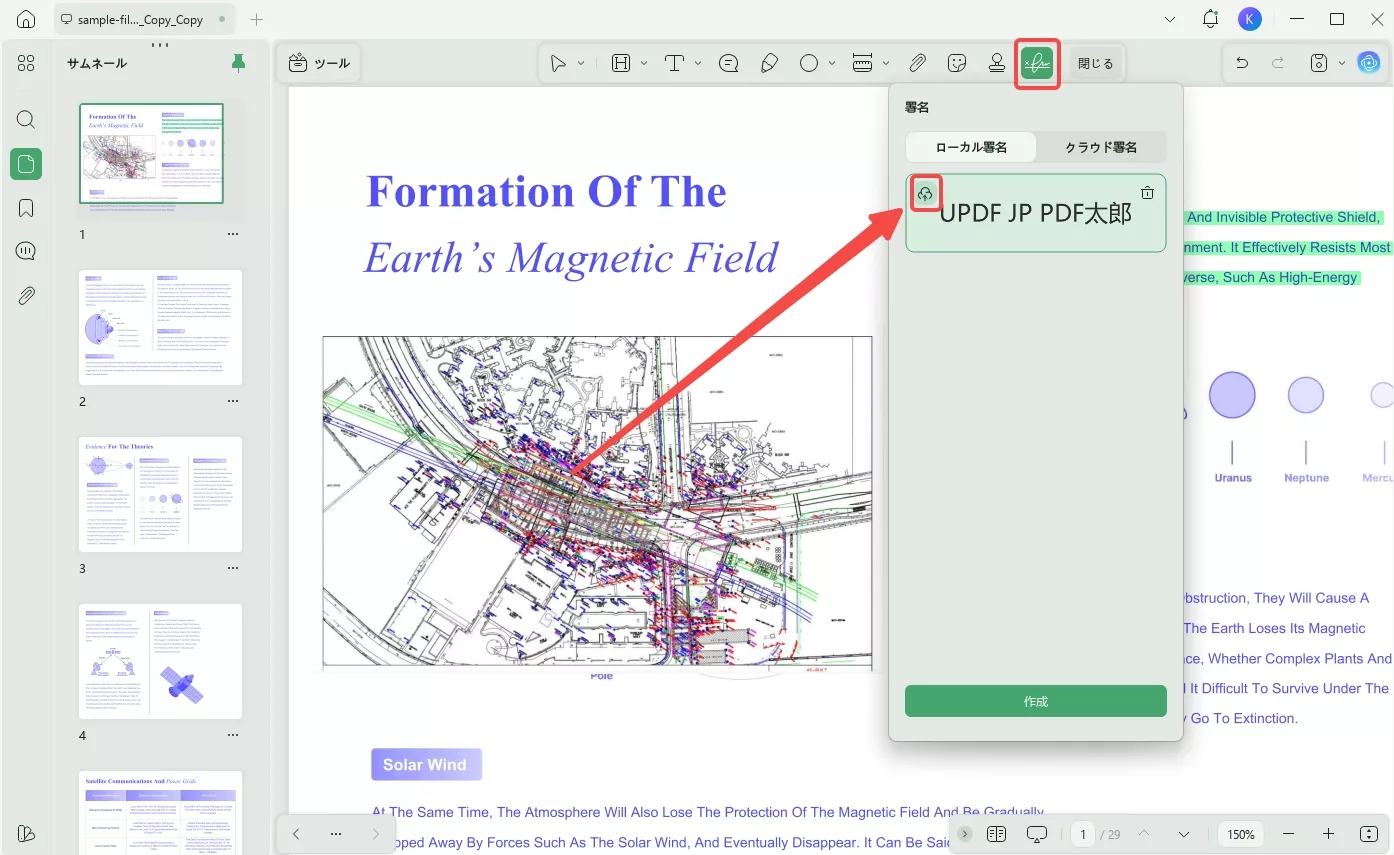
14. デバイス間で署名を同期
UPDF を使用すると、署名を作成してクラウドにアップロードし、いつでもどこでもアクセスして使用できます。
こちらがガイドです。
ステップ1. UPDFでPDFを開きます。「コメント」「署名」「作成」の順に進み、必要な署名を作成するためのオプションを選択します。
ステップ2.もう一度「署名」をクリックし、「クラウド」アイコンをクリックしてクラウドにアップロードします。
その後、どのデバイスでも同じアカウントでログインすれば、UPDFを開くことができます。
これで、この署名を見つけて使用できるようになります。
15. スキャンしたPDFや画像からAIでテキストを抽出する
スキャンしたPDFファイルまたは画像ファイルにUPDF OCRでサポートされていない言語が含まれており、テキストのみを抽出したい場合は、UPDF AIを使用してスキャンしたPDFからテキストを画像に抽出できます。手順は以下のとおりです。
ステップ 1.スキャンした PDF または画像を UPDF にドラッグし、「UPDF AI」をクリックして「チャット」モードに移動し、「スクリーンショット」を選択してスクリーンショットを描きます。
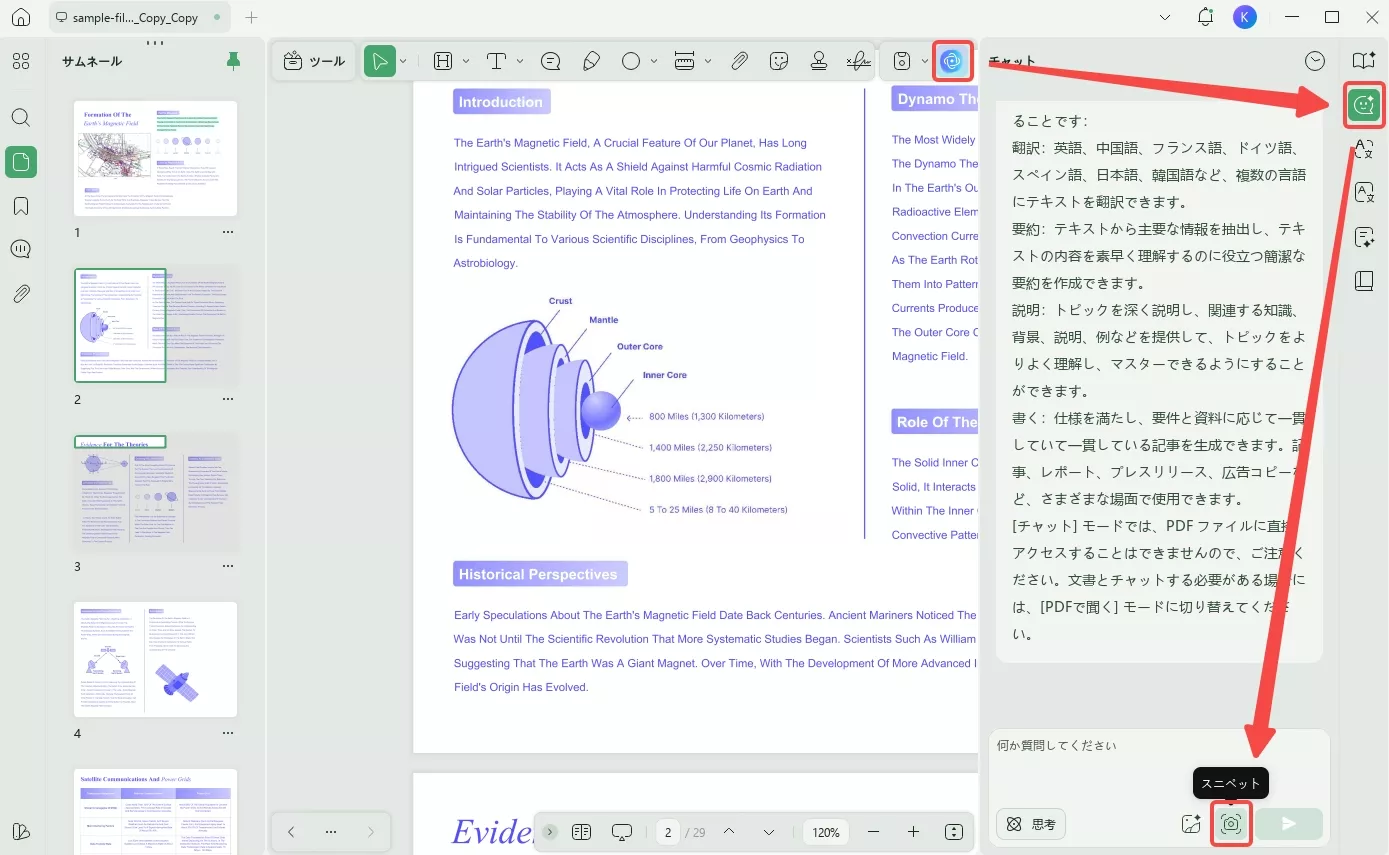
または、「PDF をエクスポート」>「画像」をクリックして、スキャンしたすべての PDF を画像ファイルに変換し、「UPDF AI」>「チャット」>「画像の追加」に移動して UPDF AI にインポートすることもできます。
ステップ2 :「この画像からテキストを抽出」というプロンプトを入力し、「送信」をクリックします。これでUPDF AIがすべてのテキストを抽出し、その内容を任意の場所にコピーできるようになります。
16. その他のヒント4つ
上記のUPDFの隠れた機能はとても便利ですが、他にも知っておくと便利なヒントが4つあります。
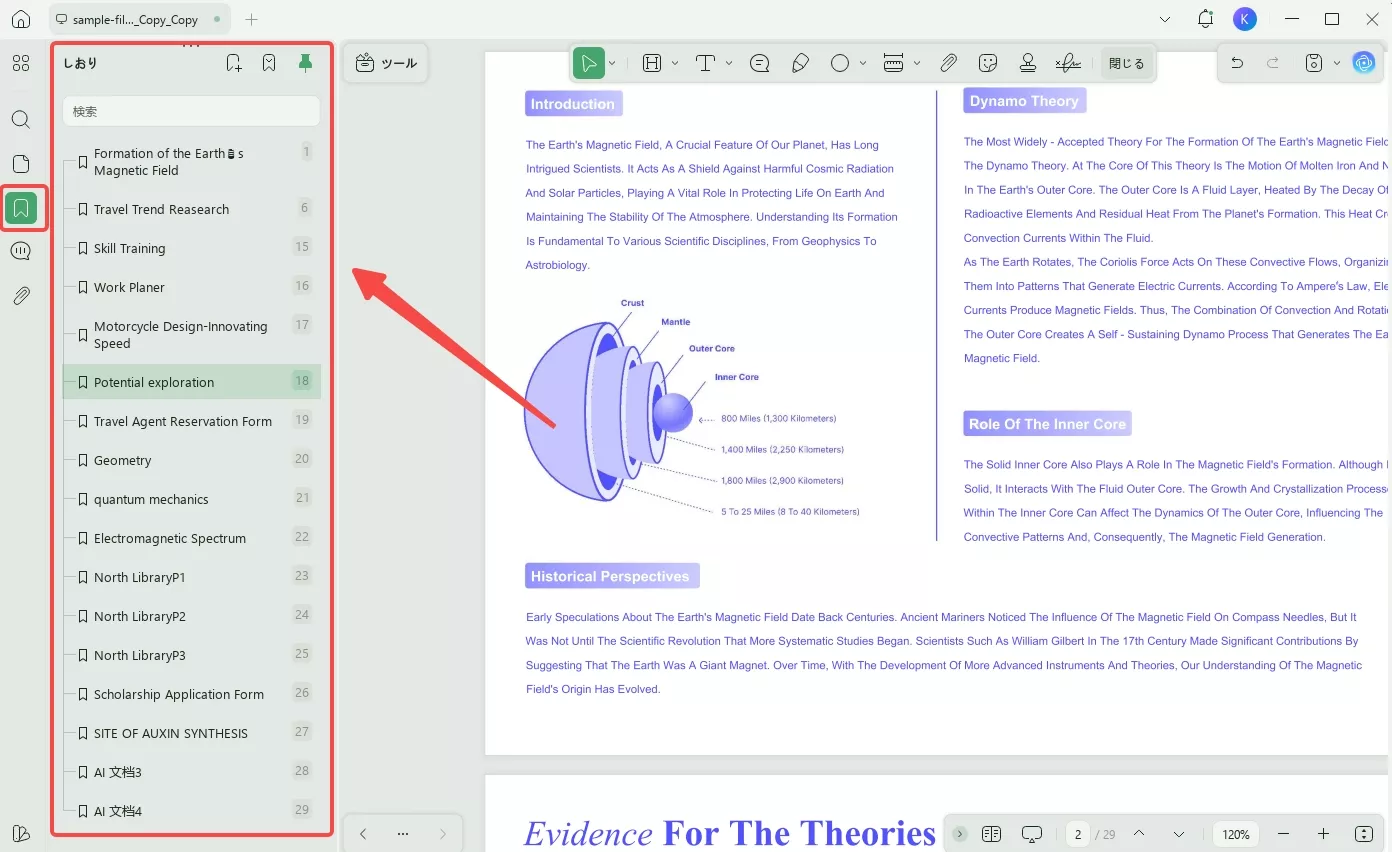
1. 結合時にファイル名をブックマークとして設定する
PDF ファイルを結合すると、ファイル名が自動的にブックマークとして設定されます。特定の部分にすばやく移動する必要がある場合に役立ちます。
「ツール」>「結合」を選択し、結合するファイルを追加します。結合したPDFを開き、「ブックマーク」をクリックすると、結合したPDF内のすべてのファイル名がブックマークとして表示されます。
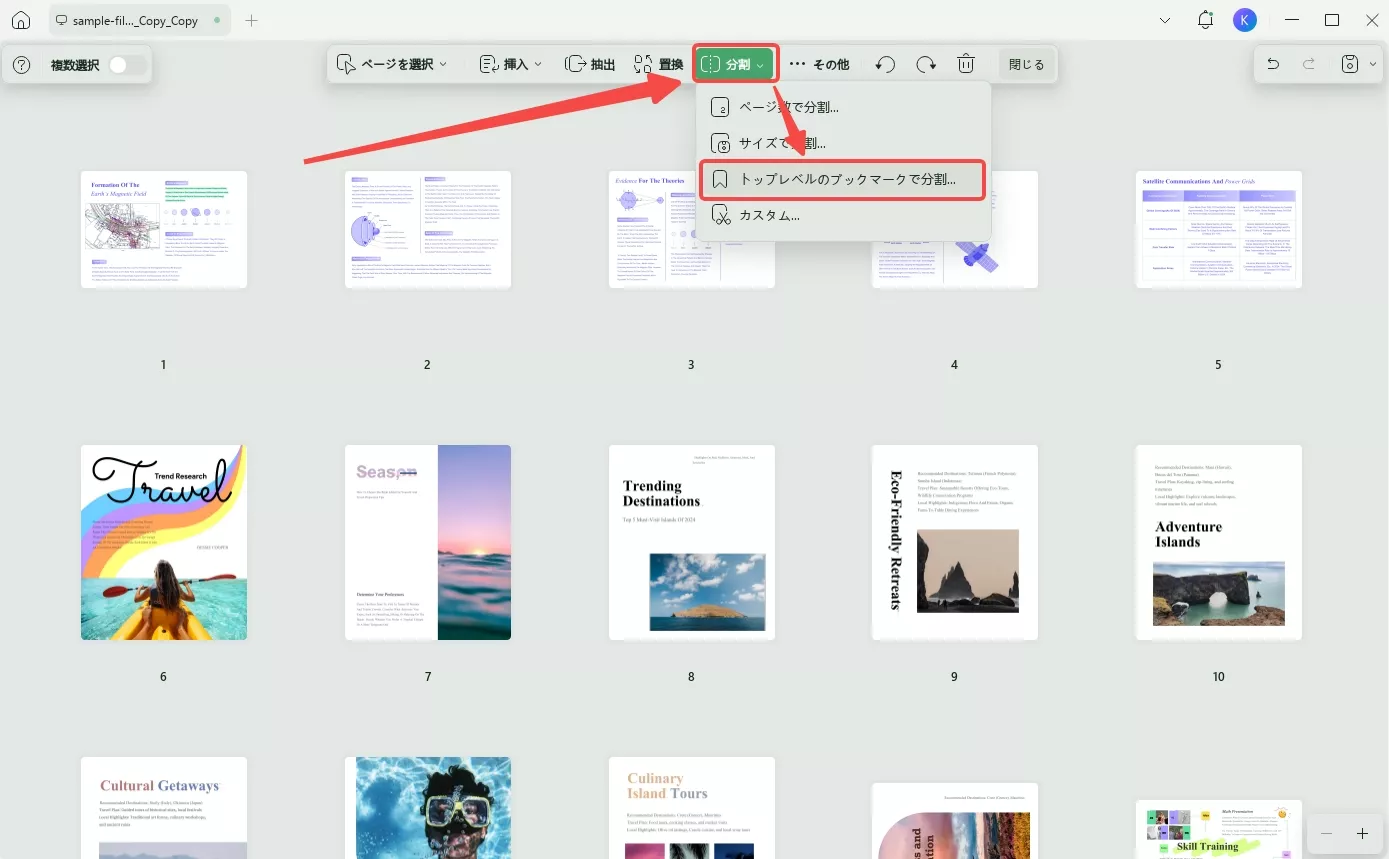
2. 分割時にブックマークをファイル名として設定する
トップレベルのブックマークによる分割を使用している場合、ブックマークは自動的にファイル名として設定されます。
「ページを整理」>「分割」>「トップレベルのブックマークで分割」に進んでください。分割後、すべてのブックマークがファイル名になります。
3. UPDFクラウドでの同期編集:
PDFファイルをUPDF クラウドに保存すると、UPDFクラウドで直接PDFを開き、変更を加えることができます。UPDFクラウドはデバイス間で変更を同期します。手順は以下のとおりです。
ステップ 1. 「UPDFクラウド」をクリックし、1つのPDFをクリックして開きます。
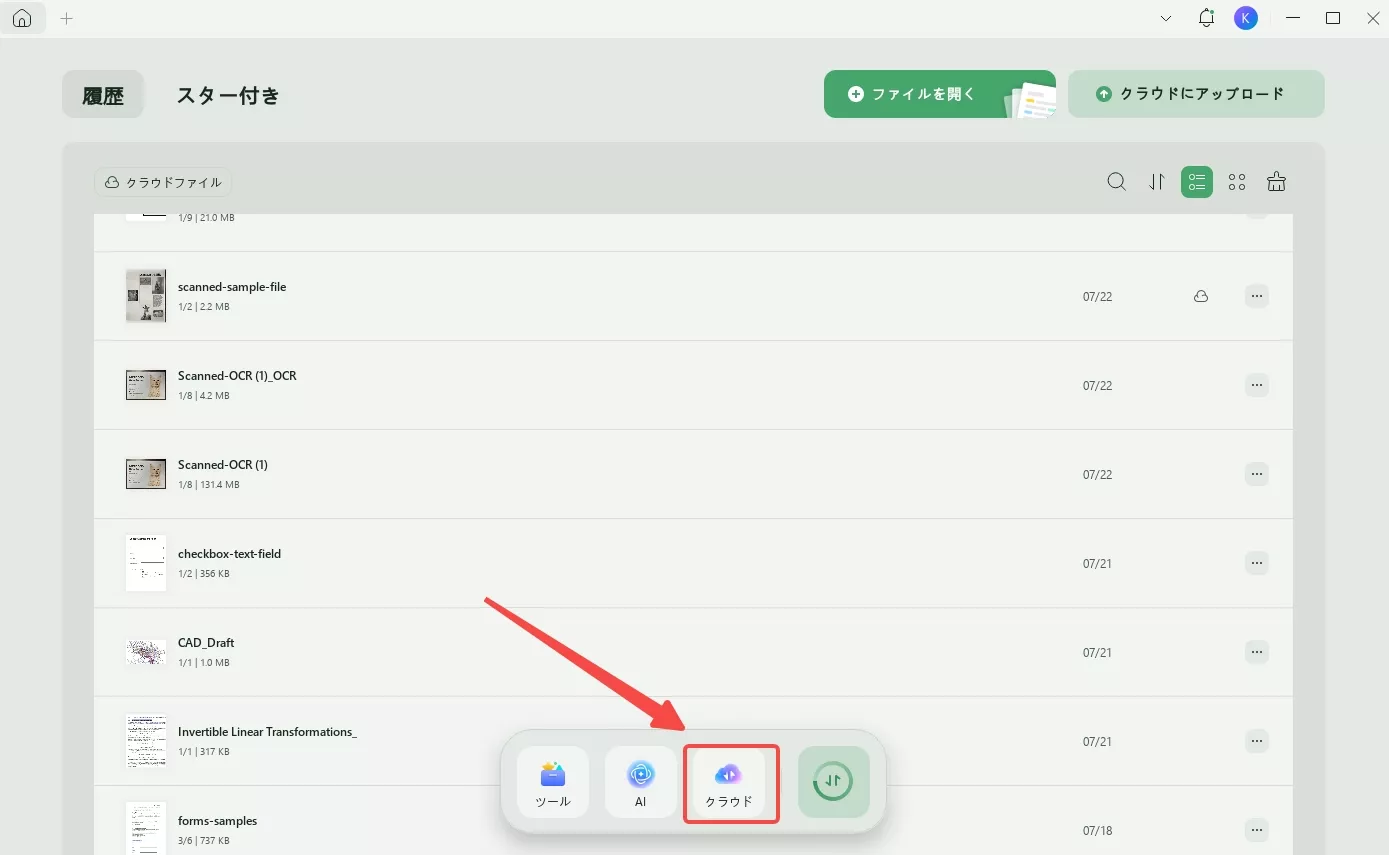
ステップ2:これで、必要に応じてPDFを編集できます。「Ctrl+S」を押して変更を保存します。その後、別のデバイスでUPDF Cloudで編集したPDFを開きます。変更内容は同期されているはずです。
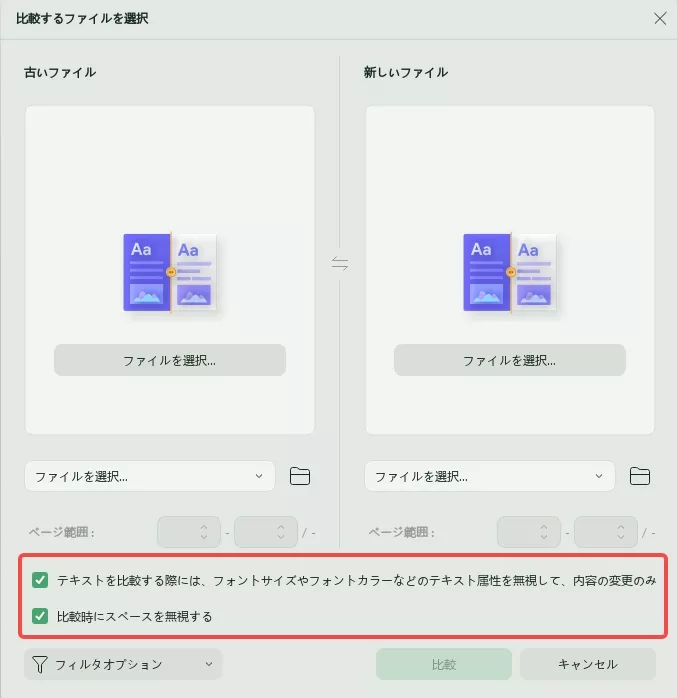
4. PDFを比較する際にテキスト属性とスペースを無視する
PDFファイルを比較するときに、テキスト属性とスペースを無視することを選択できます。
「ツール」>「 PDFの比較」をクリックしてください。2つのPDFファイルを選択し、 「テキストを比較する際に、フォントサイズやフォントカラーなどのテキスト属性を無視して、内容の変更のみ」と「比較時にスペースを無視する」の2つのオプションにチェックを入れます。これで、テキストや画像などを比較して、正確な結果を得ることができます。
結論
以上でUPDFの隠れた機能を全部紹介しました。これらの隠れた機能を使えば、PDFファイルの操作を簡単にマスターできます。
UPDFは、 AppleInsiderをはじめとする著名なメディアサイトからも高く評価されています。UPDFの隠れた機能を含めた豊富な機能群が、UPDFをPDFエディターの領域において際立たせています。
下のボタンからUPDFをダウンロードし、気に入ったらプロ版にアップグレードしてみてはいかがでしょうか?
Windows • macOS • iOS • Android 100%安全


 文原悟司
文原悟司