UPDF untuk Windows
 UPDF untuk Mac
 UPDF untuk iPhone/iPad
 UPDF untuk Android
 UPDF AI Online
 UPDF Sign
 Edit PDF
 Anotasi PDF
 Buat PDF
 Formulir PDF
 Edit Tautan
 Konversi PDF
 OCR
OCR PDF ke Word
 PDF ke Gambar
 PDF ke Excel
 Atur PDF
 Gabung PDF
 Pisah PDF
 Potong PDF
 Putar PDF
 Lindungi PDF
 Tanda Tangan PDF
 Redaksi PDF
 Sanitasi PDF
 Hapus Keamanan
 Baca PDF
 UPDF Cloud
 Kompres PDF
 Cetak PDF
 Proses Massal
 Tentang UPDF AI
 Solusi AI UPDF
 Panduan Pengguna AI
 Tanya Jawab tentang UPDF AI
 Ringkasan PDF
 Terjemahkan PDF
 Ngobrol dengan PDF
 Ngobrol dengan AI
 Ngobrol dengan gambar
 PDF ke Peta Pikiran
 Penjelasan PDF
 Alat AI untuk PDF
 Alat AI untuk Gambar
 Alat Chat AI
 Alat Penulisan AI
 Alat Belajar AI
 Alat Kerja AI
 Alat AI Lainnya
 Generasi Penanda AI
 Ringkasan Penanda AI
 Generasi Tanda Air AI
 Generasi Latar Belakang AI
 Generasi Stiker AI
 Generasi Stempel AI
 Paket Penulisan AI
 UPDF Copilot
 Manajemen Halaman AI
 Pencarian Semantik AI
 PDF ke Word
 PDF ke Excel
 PDF ke PowerPoint
 Panduan Pengguna
 Trik UPDF
 Tanya Jawab
 Ulasan UPDF
 Pusat Unduhan
 Blog
Blog Ruang Berita
 Spesifikasi Teknis
 Pembaruan
 UPDF vs. Adobe Acrobat
 UPDF vs. Foxit
 UPDF vs. PDF Expert
Beri anotasi pada PDF
Alat Komentar memungkinkan pengguna untuk menambahkan komentar ke PDF dengan mudah. Tujuan dari komentar tertulis adalah untuk menggambarkan sudut pandang, ilustrasi, contoh, atau pengungkapan realitas, terutama untuk menunjukkan reaksi atau sikap pribadi. Anda dapat dengan mudah menambahkan, mengedit, dan menghapus komentar.
- 1. Tambahkan Komentar Teks (Mesin Ketik/Kotak Teks/Catatan)
- 2. Catatan Tempel
- 3. Markup Teks (Sorot/Coret/Garis Bawah)
- 4. Alat Pensil dan Penghapus
- 5. Tambahkan Bentuk
- 6. Alat Ukur
- 7. Alat Lampiran
- 8. Tambahkan Stiker
- 9. Sisipkan Prangko
- 10. Properti Komentar
- 11. Batalkan/Hapus Anotasi
Selanjutnya, mari selami cara Anda dapat menggunakan alat anotasi ini di UPDF.
Windows • macOS • iOS • Android 100% aman
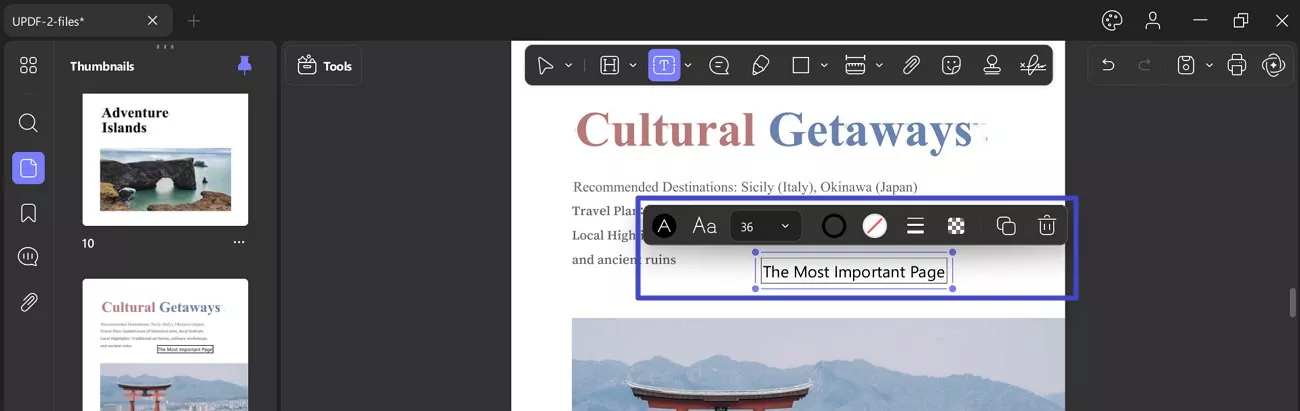
1. Tambahkan Komentar Teks
Fitur Komentar Teks di bilah Anotasi memungkinkan Anda menambahkan 3 jenis teks: Komentar Teks , Kotak Teks, dan Keterangan Teks .
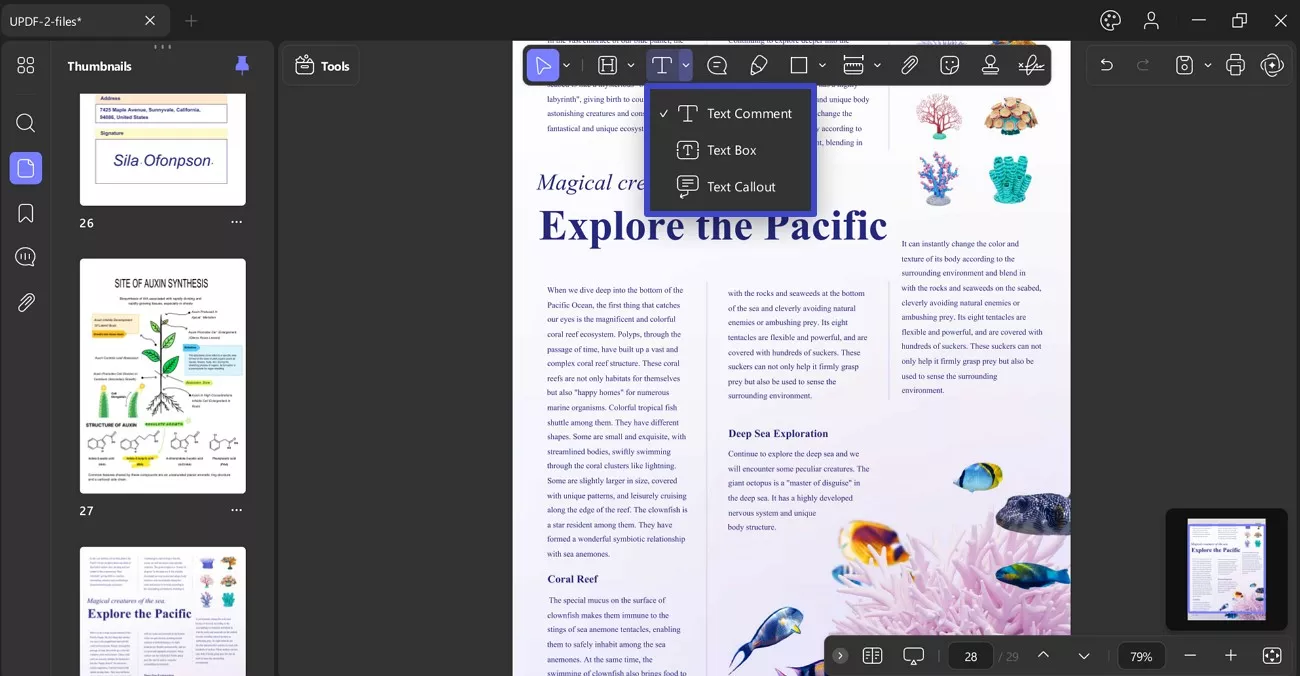
Komentar Teks
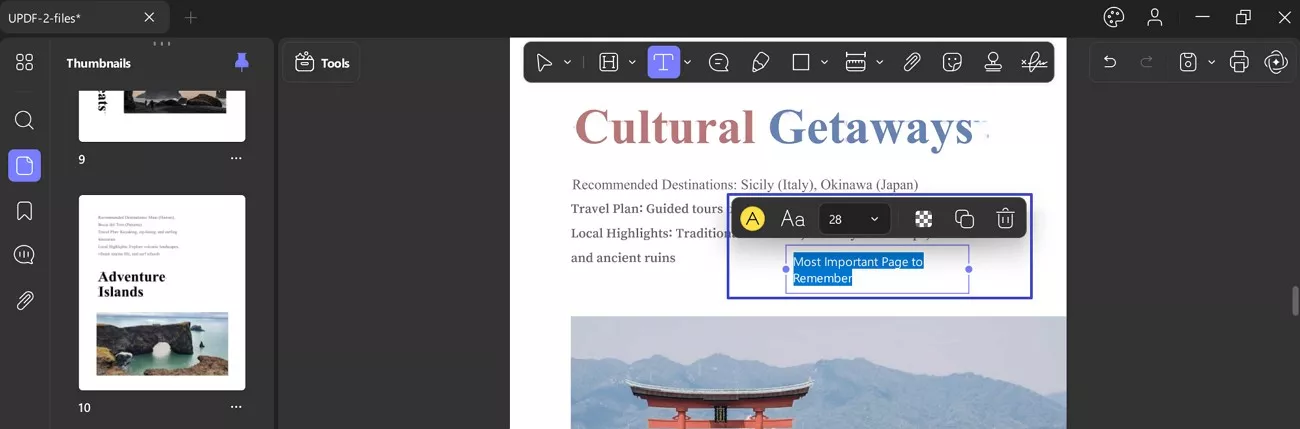
- To add a typewriter, press the T icon and click anywhere on the PDF where you want to place the typewriter comment. Once placed, start writing a comment in the text box.
- After writing a comment, a floating bar appears that provides options like changing opacity, font, text size, and text color.
Text Box
- To insert a Text Box, Press the T icon and choose the Text Box option. After this, click anywhere on the PDF to add a text box.
Text Callout
- This Text Callout feature can be added when you press the T icon and choose Text Callout option from annotation bar.
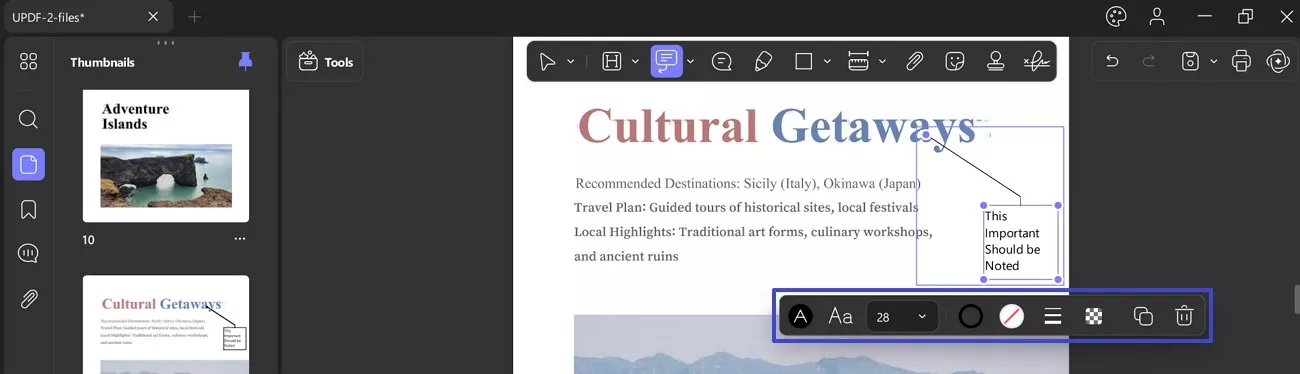
- After adding the comment, you can select it to copy, delete, or view/change the properties.
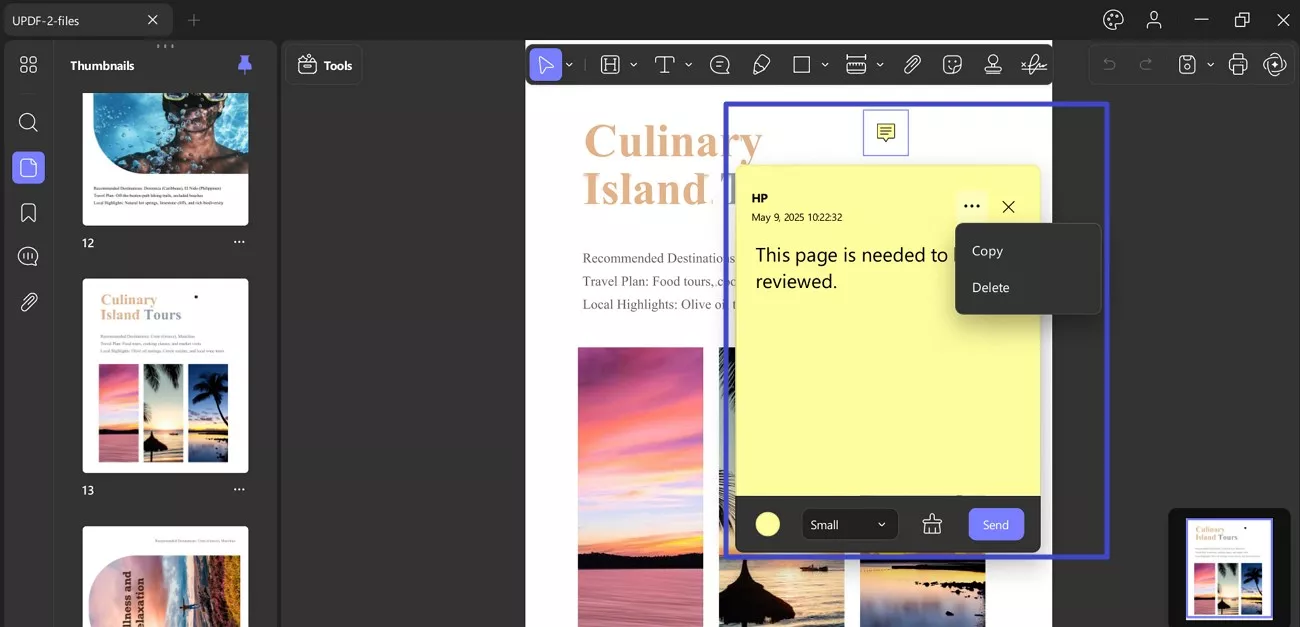
2. Sticky Note
- To add a Sticky Note, navigate to the Annotation bar and choose the Sticky Note icon.
- Once done, it will provide possibilities like fill color, font size (small, medium, and large), a Clear icon, and a Send button.
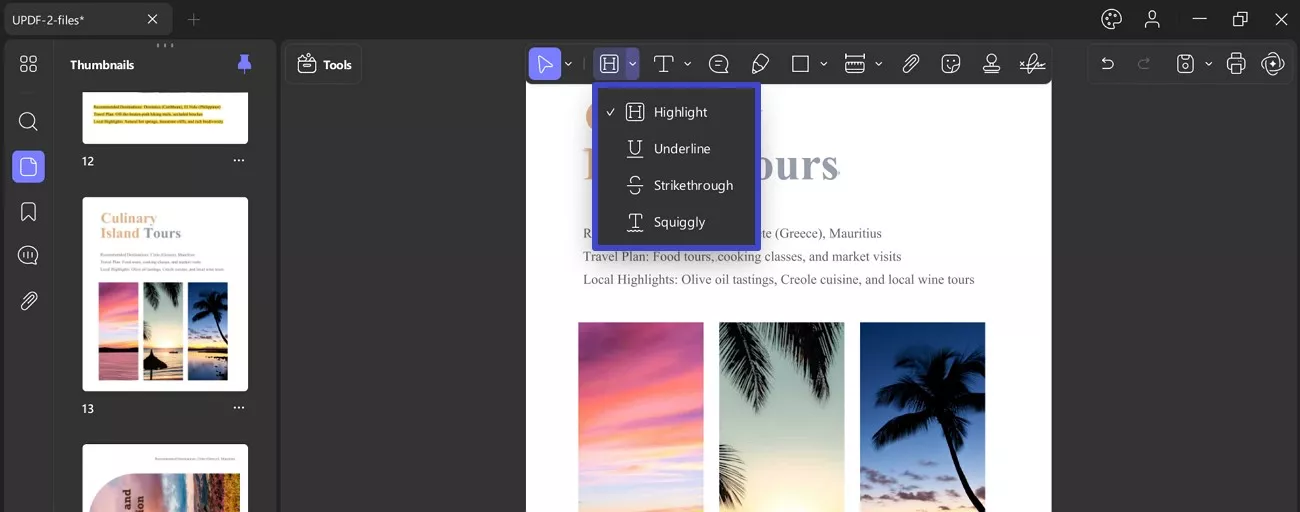
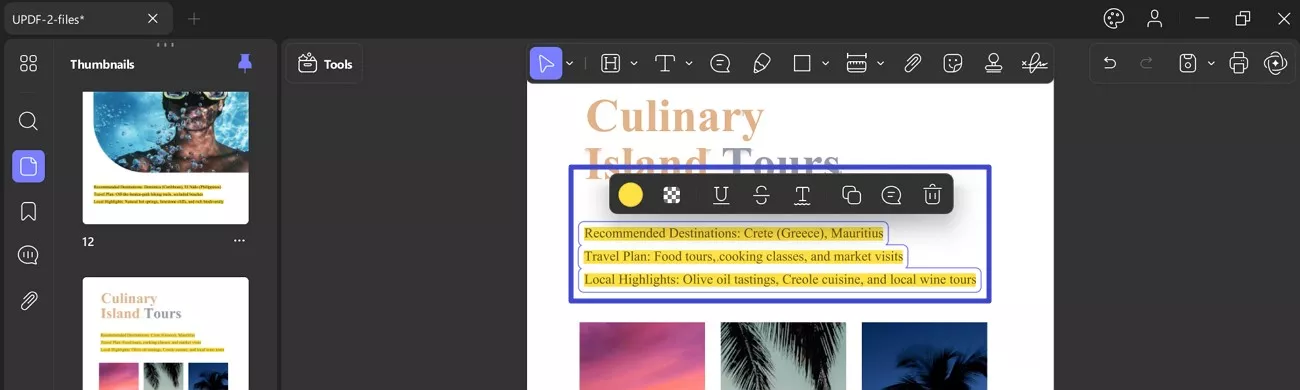
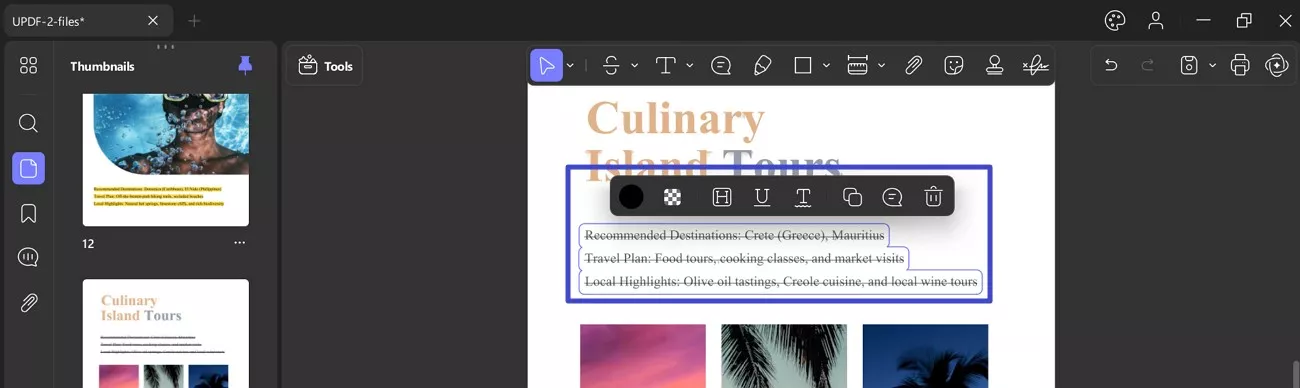
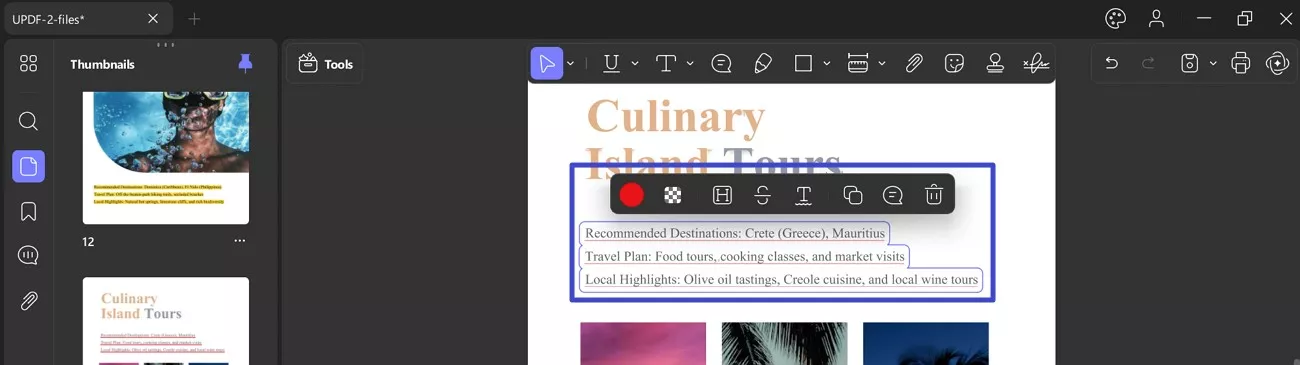
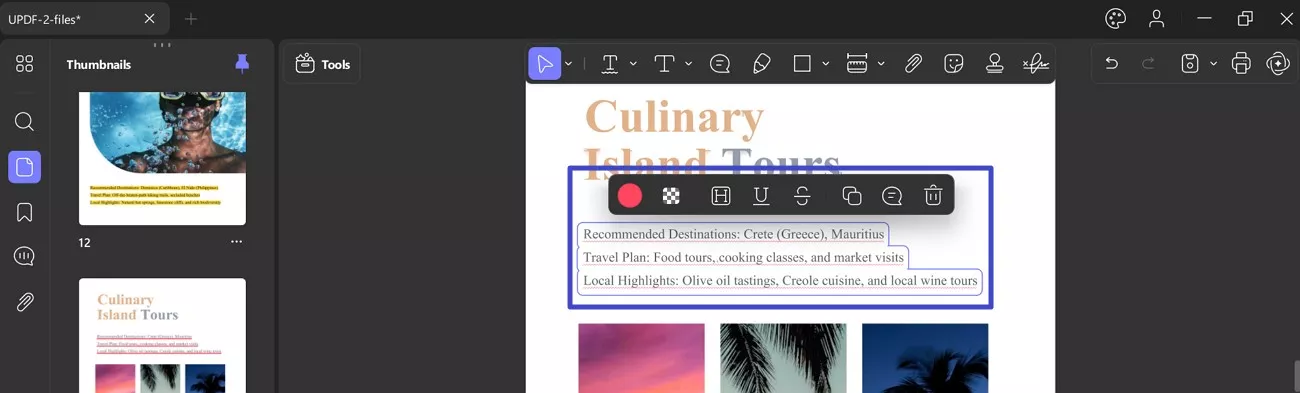
3. Text Markups
Text Markups is available in the annotation bar and helps you to add the following types of markups:
- Highlight
- Strikethrough
- Underline
- Squiggly
Regardless of the markup type, you can easily edit it through the floating bar that appears upon marking. Conversely, if you make a mistake, simply press Ctrl + Z to undo the annotation instantly. Now, let's discuss each of the following markup features in detail:
Highlight: To highlight, navigate to the Markup Tool and select the Highlight feature.
Strikethrough: For strikethrough, press the Markup Tool again and select the Strikethrough option from the menu. This feature helps others know that the text has been deleted.
Underline: To underline an important text, simply click on the Underline option from the Markup Tool in the annotation bar.
Squiggly: proceed to the Markup Tool icon in the annotation barand select the Squiggly option.
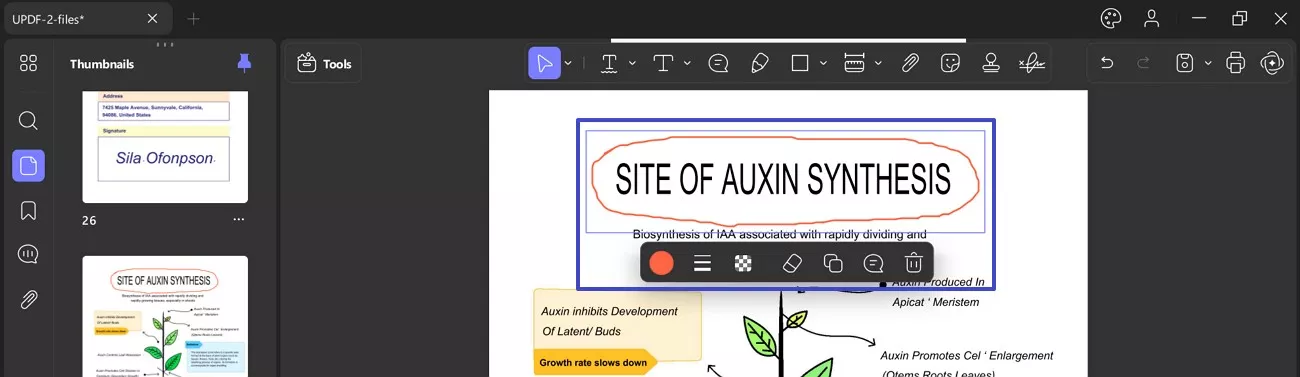
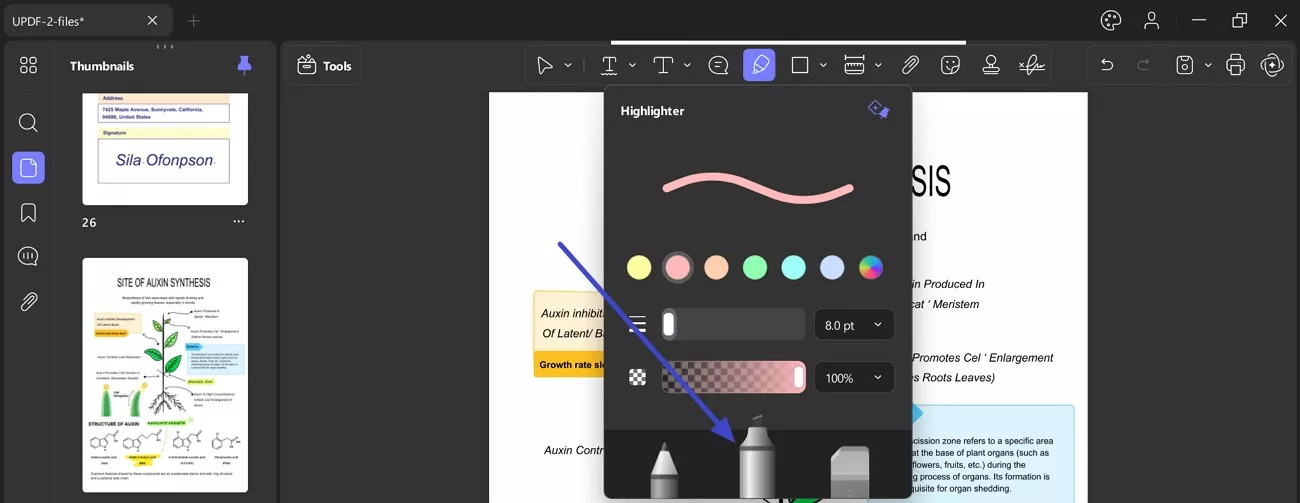
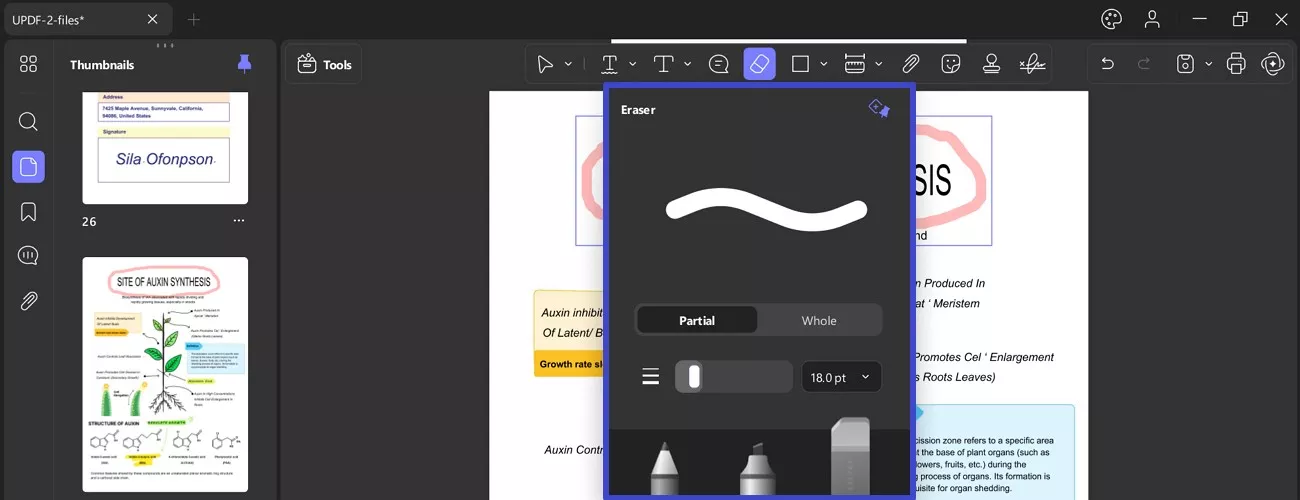
4. Pencil and Eraser Tool
If you are looking forward to drawing on a PDF document free hand, you can use the pencil and eraser tool provided by UPDF.
- Select the "Pencil" tool on the top menu that will open some personalization options for you before you draw it on the PDF.
- In the Pencil menu, you can choose the color, adjust the thickness (with a slider or pt. range list), and alter its opacity (through a slider and % menu).
- You can also access the Highlighter (comparatively thicker than pencil) and Eraser tool to add or remove markups.
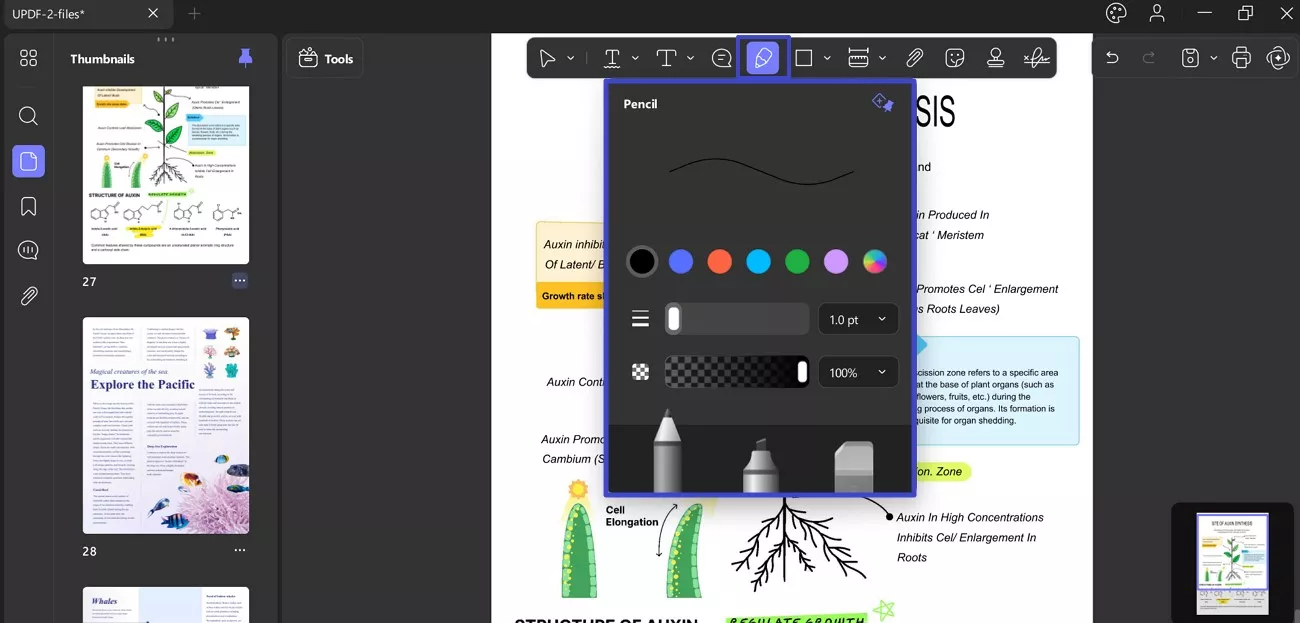
Upon marking through a Pencil, it reveals a floating menu which provides options like Color, Thickness, Eraser, and Delete.
Highlighter: It can be selected from the pencil menu when you access the Pencil icon from the annotation toolkit.
Eraser: You can erase any markup added through a pencil or a highlighter. However, the Pencil tool itself provides an Eraser, which further reveals a menu for precise removal. In the menu, you can see 2 options: Partial (erasing manually through cursor) and Whole (removing entire markup at once).
In the same menu, adjust the thickness of eraser through a slider and an extended menu for pt. Following this, you can easily remove the marked-up items from your PDFs.
5. Add Shapes
UPDF supports adding various shapes or lines to your document with a Shapes icon in the annotation toolbar. Extending the menu for shapes reveals possibilities like Rectangle, Oval, Polygon, Line, Arrow, and Connected Lines. Once your PDF is added, navigate to the Shapes icon and select the drawing tools from the drop-down menu.
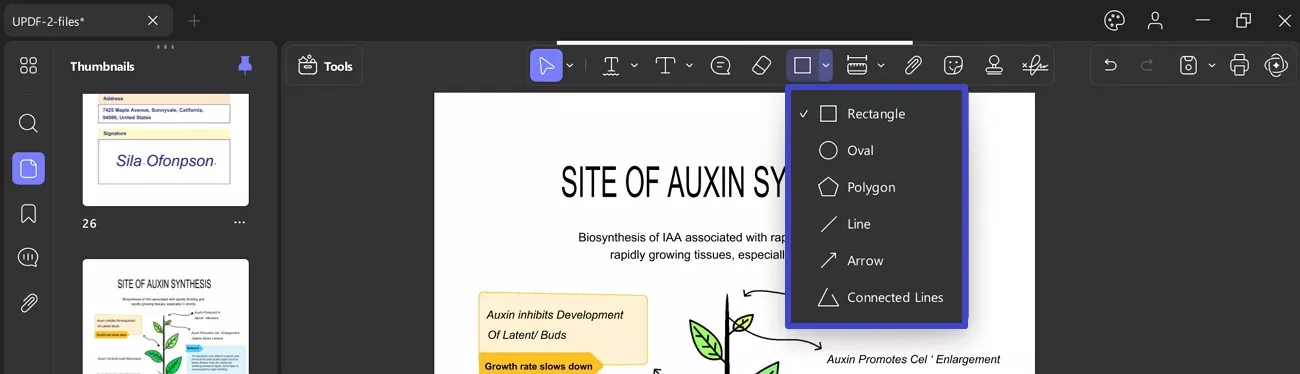
- Rectangle: To add a rectangle to your document, click the rectangle shape, and use the click-and-drag action to draw it on your document.
- Oval: Click the oval icon and click and drag on your document. You can adjust the shape of the oval anytime by selecting it.
- Polygon: Like other shapes, navigate to the Shapes icon and choose the Polygon shape.
- Line: Choose the Line option from the Shapes icon and draw a line.
- Arrow: To add an arrow markup, you need to click the arrow icon.
- Connected Lines: You can add connected lines to your PDF, with similar modifying options from the floating bar.
6. The Measure Tool
UPDF also supports measuring PDFs, with the help of tools like Distance, Perimeter, and Area Tools. With this information, you can better analyze your PDF's nature, editing it precisely when adding shapes and stickers or creating it from scratch. You can simply allot a specific area to each potential PDF parameter to simplify your editing.
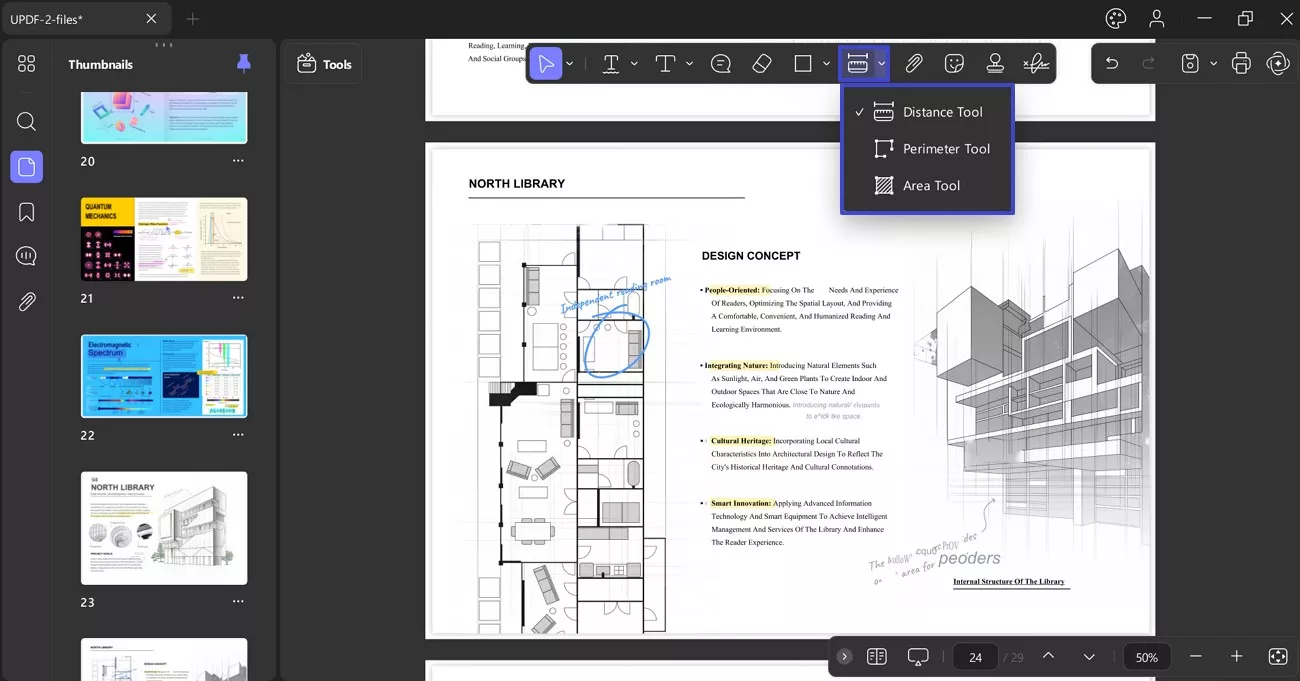
Here is how you can measure PDF with UPDF:
Navigate to the Measure Tool from the annotation bar at top and hover on this icon to reveal the following options:
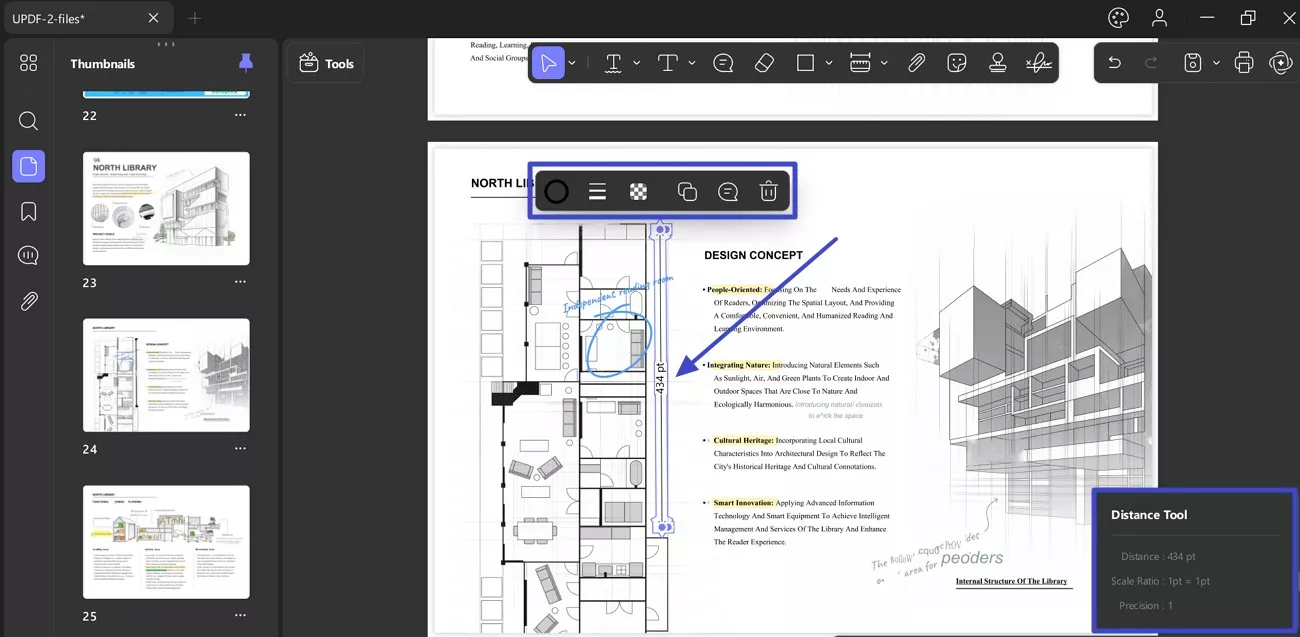
Distance Tool: It reveals information, like the Distance of the specified region, Angle X and Y axis details, Scale Ratio, and Precision of the offered details. To access this feature, you need to follow the given tutorial:
- Once done, the measured distance will be revealed on your screen, displaying Distance, Scale Ratio, and Precision.
- From the Annotation bar, extend the menu for Measuring Tool and choose Distance Tool from the options.
- Now, use your cursor and start measuring the distance along the line.
Perimeter Tool: This displays information about the Perimeter, Scale Ratio, and Precision for the measured area.

Area Tool: It offers details regarding the Area, Scale Ratio, and Precision for the marked areas in the PDF.
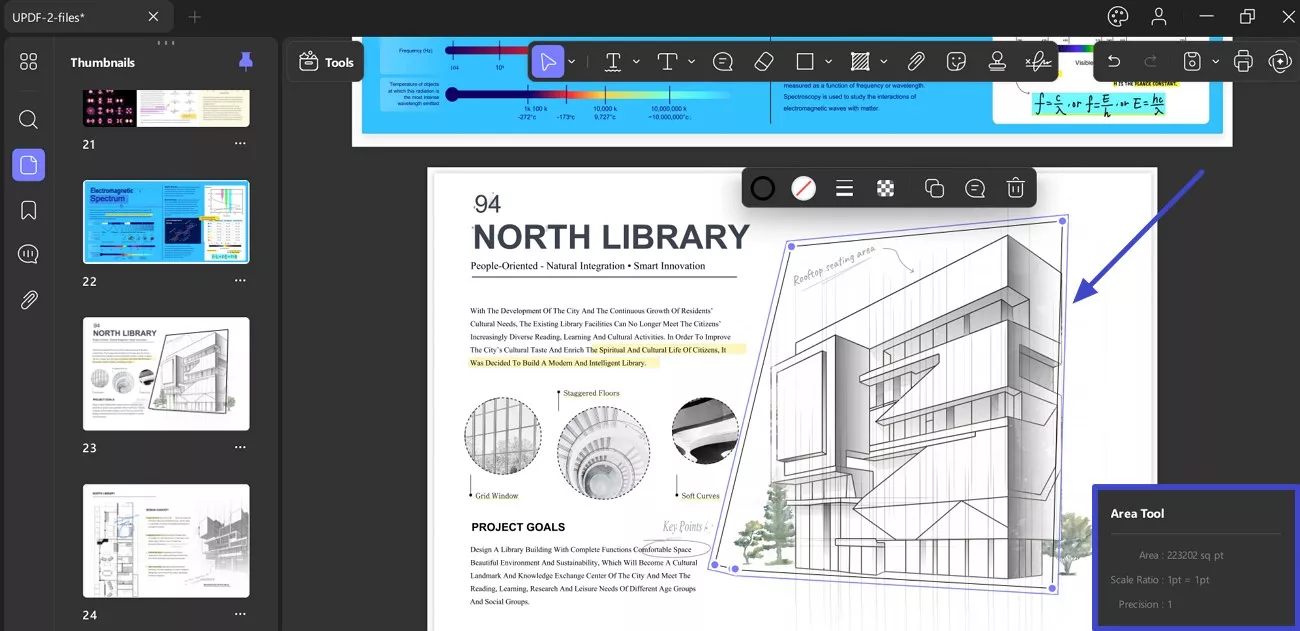
Once you have selected your desired option, you must create a line specifying the region where you want to take measurements.
Once you have set the line, double-click, and the desired info will appear. You can customize its appearance, including color and ratio, to enhance clarity in the document. In addition, you can also delete, copy, and paste the line.
7. Add Attachment
The attachment tool in UPDF allows you to add file attachment to your imported PDF as a reference to your reader. The process is quite simple; please follow these steps to add an attachment to your document.
- Open any PDF document file from your device and head to the Attachment tool appearing at top annotation bar. Following this, you can change the outlook of your attachment button in the document with the Colors and Opacity option from the menu. Besides this, it provides further attachment icons, namely, Paperclip, Graph, Pin, and Tag.
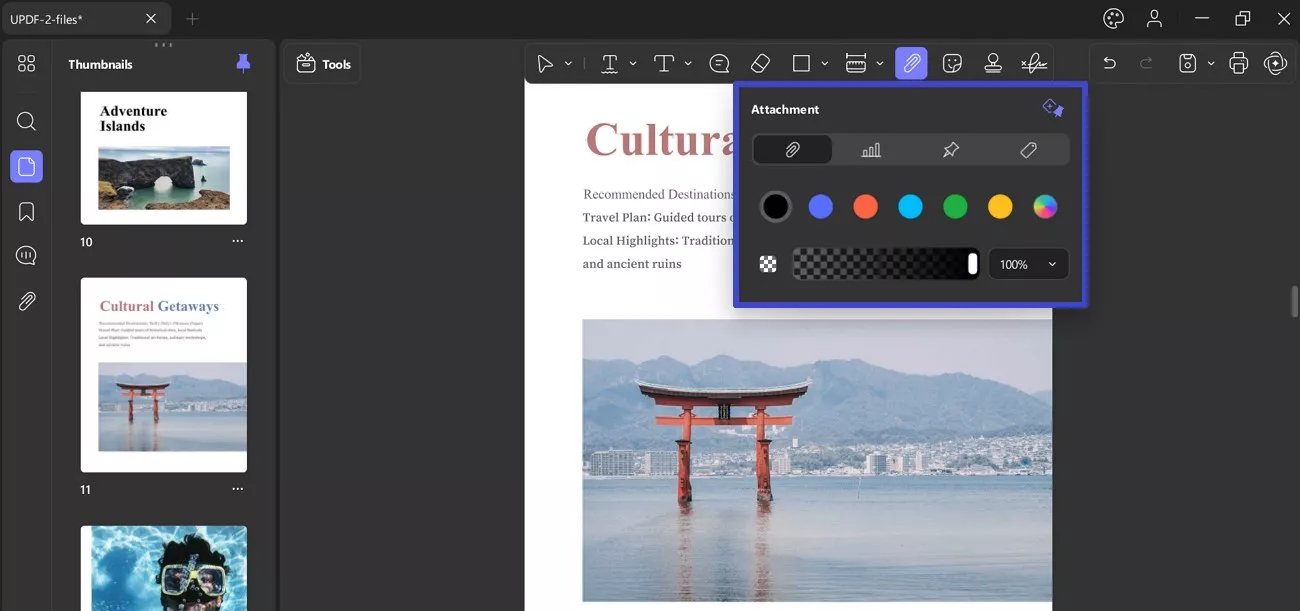
- After clicking the Attachment icon (Paperclip, graph, pin, or tag), click anywhere on the document. This will open the File Manager Browser popup window, allowing you to select a particular document from your device’s memory.
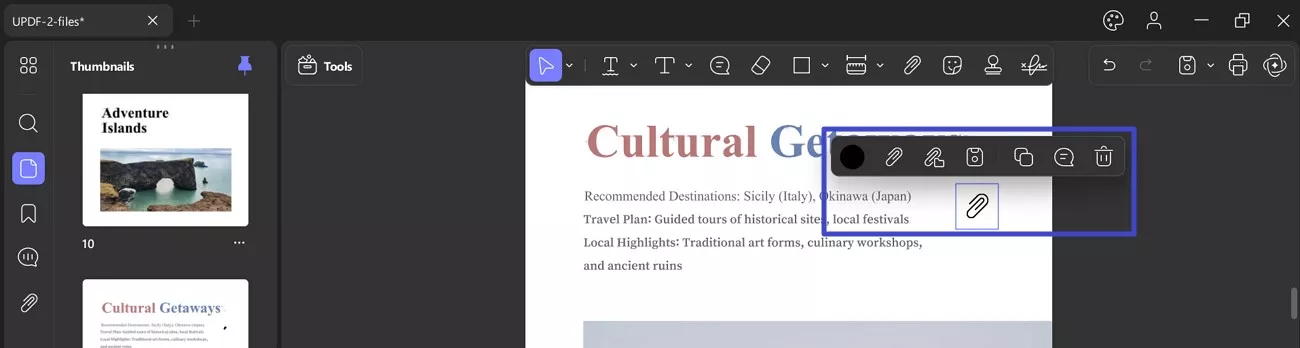
- Once attachment is placed, you can further open, save, change its color, choose attachment icon, copy or delete, and add a Note.
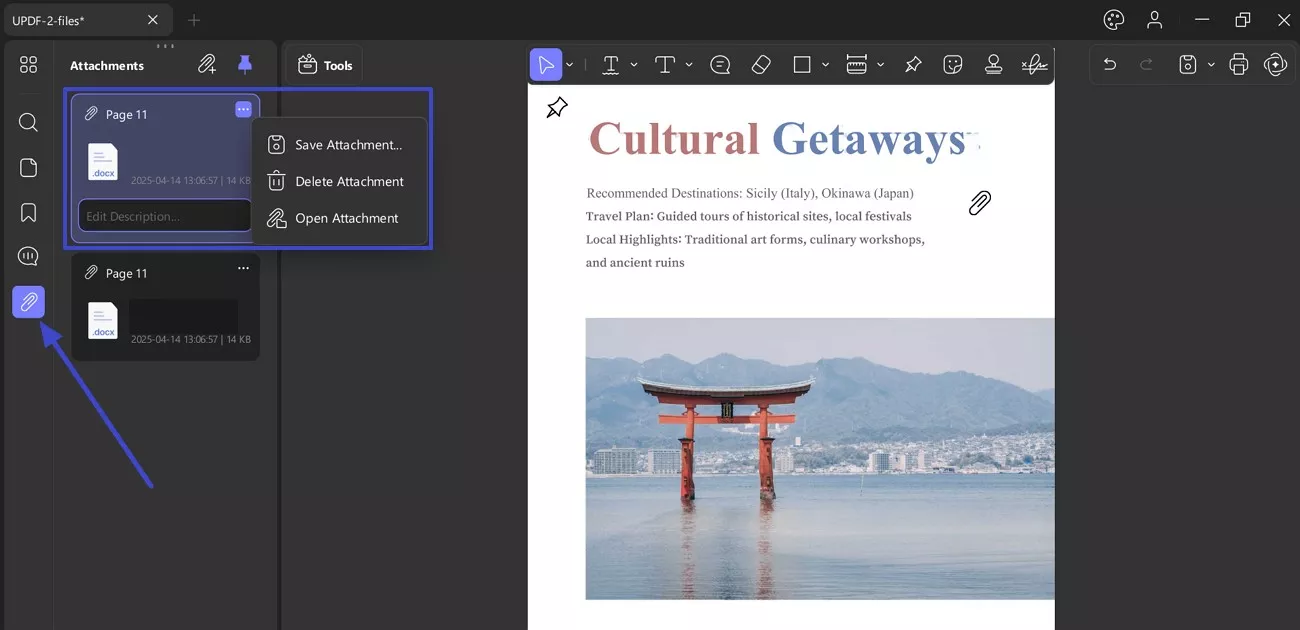
- The "Attachments" icon on the left side panel show all the attachments you have in the PDF file and which page they stay. You can select an attachment to Edit Description for that attachment.
- Access the Three-Dots icon to save, delete, and open the attachment.
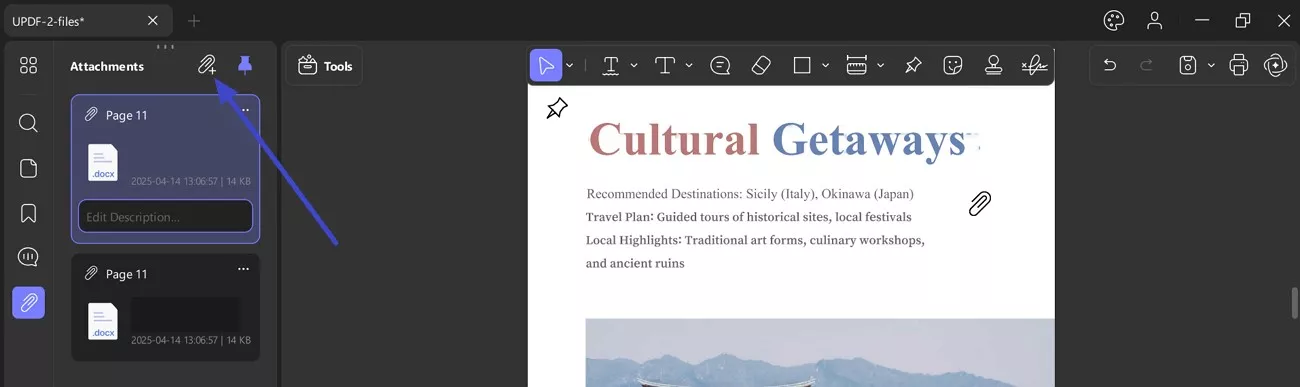
- Moreover, you can also add the attachment directly here by clicking on the "+" icon and add the description for each attachment.
Catatan: Penting untuk dicatat bahwa jika Anda memiliki PDF yang dilampirkan di sini, pengguna dapat membuka dokumen PDF apa pun dalam program UPDF. File atau dokumen terlampir lainnya akan membukanya dalam program default-nya.
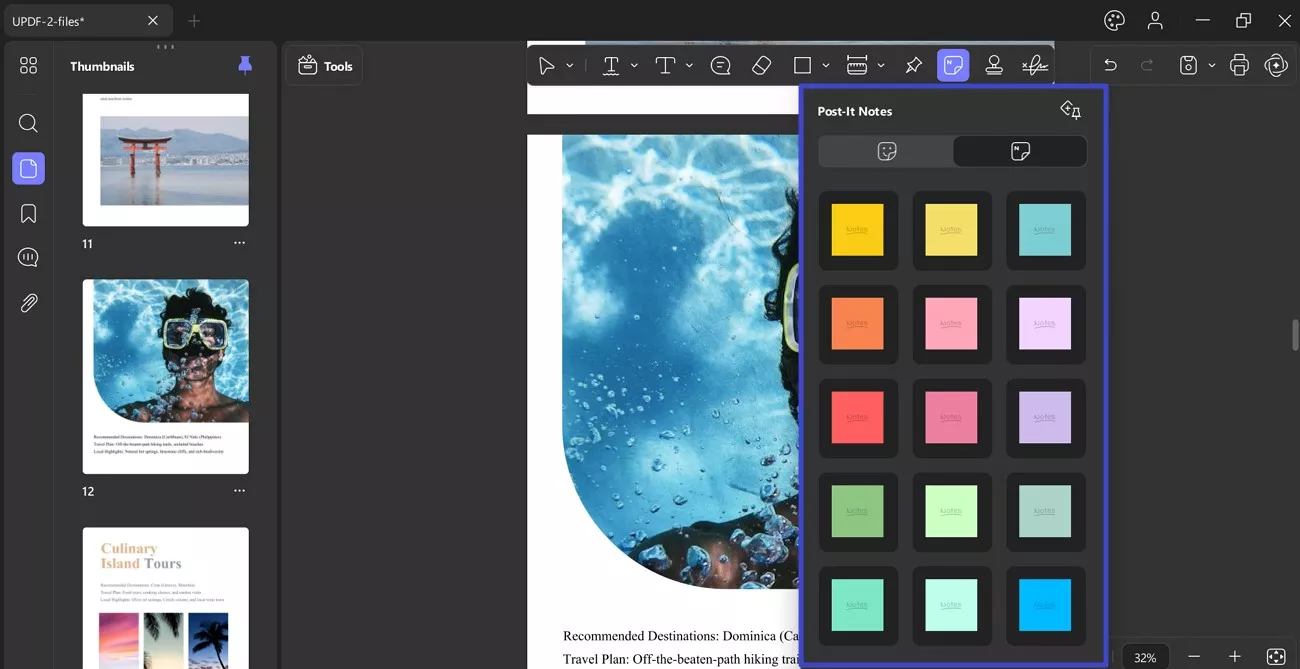
8. Tambahkan Stiker
Di bilah anotasi, di samping alat lampiran, Anda akan melihat ikon Stiker . Saat Anda mengaksesnya, menu tarik-turun panjang akan terbuka, yang menyediakan 2 opsi: Stiker dan Catatan Tempel .
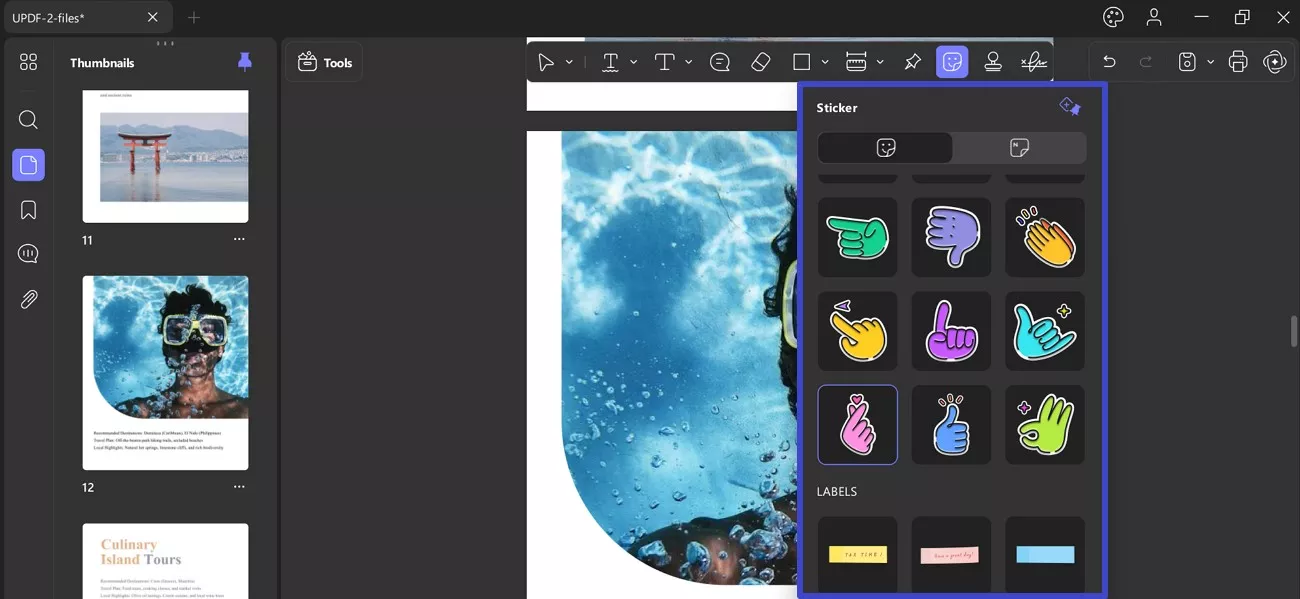
Stiker: Dengan menu yang terbuka, Anda dapat mengakses banyak pilihan stiker seperti label, markup, dan huruf.
Post-It-Notes: Memungkinkan Anda memilih warna postingan dan menempelkannya sebagai stiker di PDF.
9. Masukkan Perangko
Arahkan ke ikon "Stempel" dari atas untuk membuka menu drop-down. UPDF mendukung 2 metode untuk membuat stempel:
- Perangko
- Kebiasaan
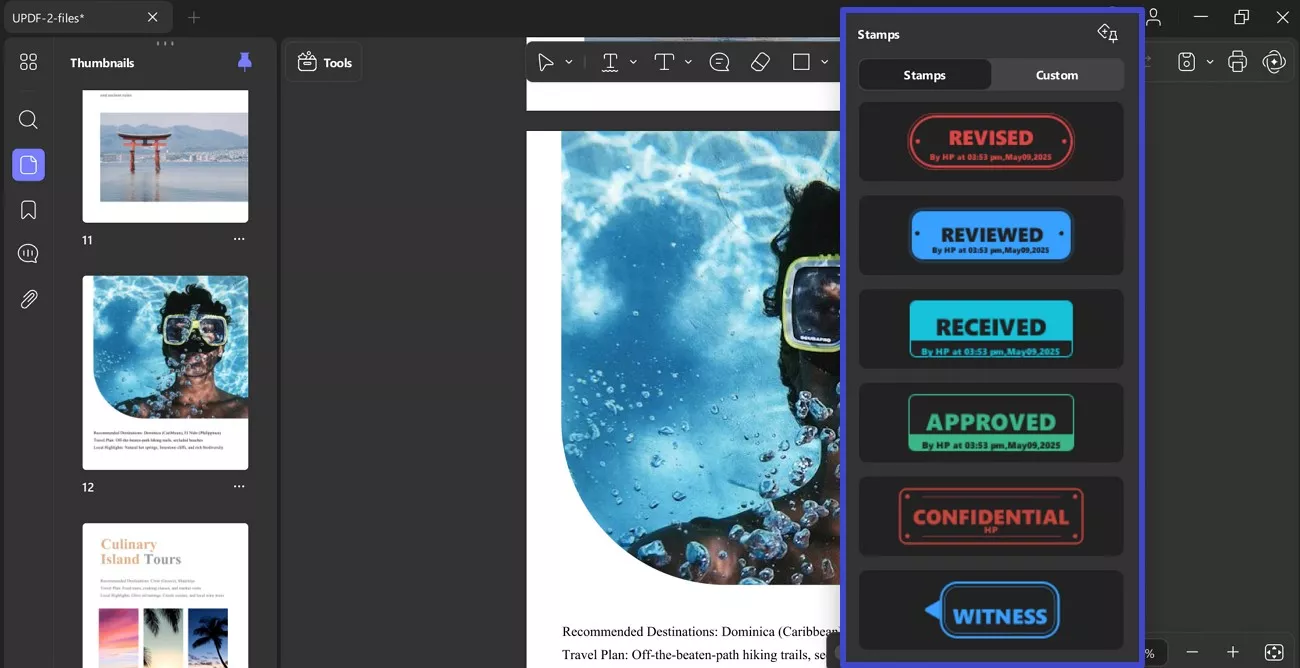
Prangko yang Dibuat Sebelumnya: Anda dapat memilih prangko tertentu dari bagian "Prangko". Setelah memilih prangko, klik di mana saja pada PDF untuk menambahkan prangko.
Prangko Kustom: Di Prangko Kustom , Anda dapat melihat 2 opsi: Impor dan Buat .
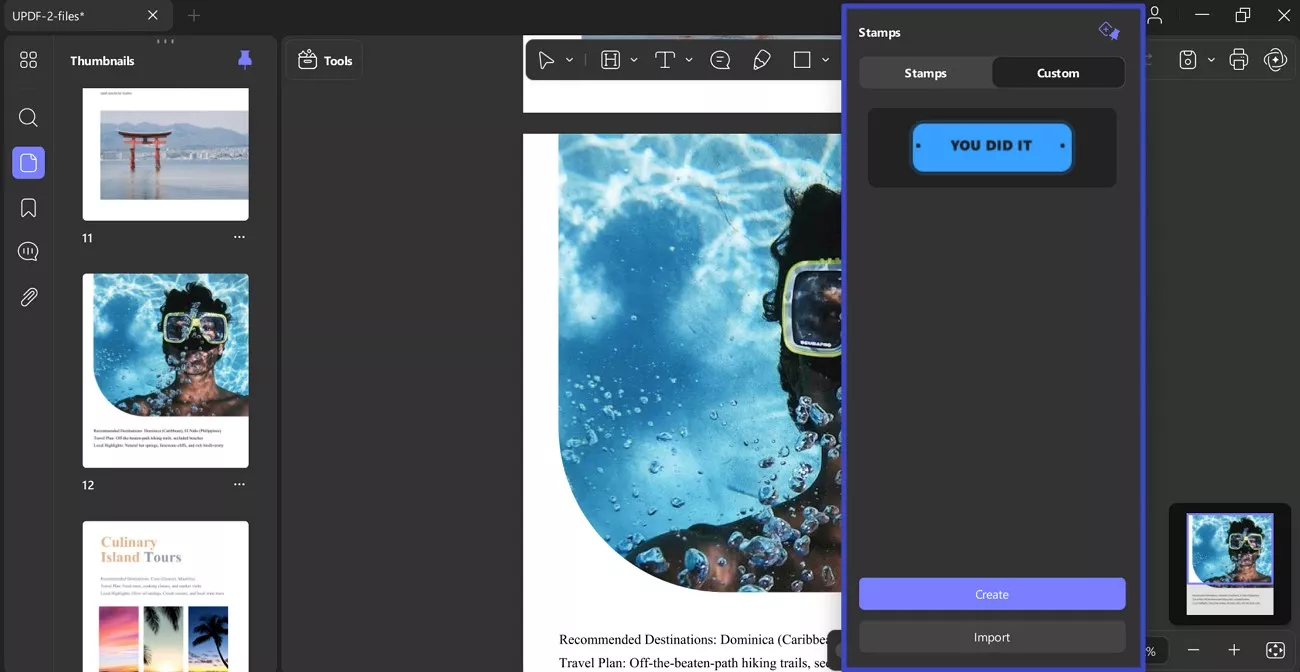
Buat: Fitur Buat prangko memungkinkan Anda memilih bentuk untuk prangko Anda.
- Setelah ini, Anda dapat menambahkan contoh teks di ruang teks yang diberikan untuk prangko Anda.
- Ia menyediakan opsi seperti ikon Kalender (untuk tanggal dan hari), ikon Jam (untuk menambahkan waktu), dan ikon Warna untuk mengubah warna.
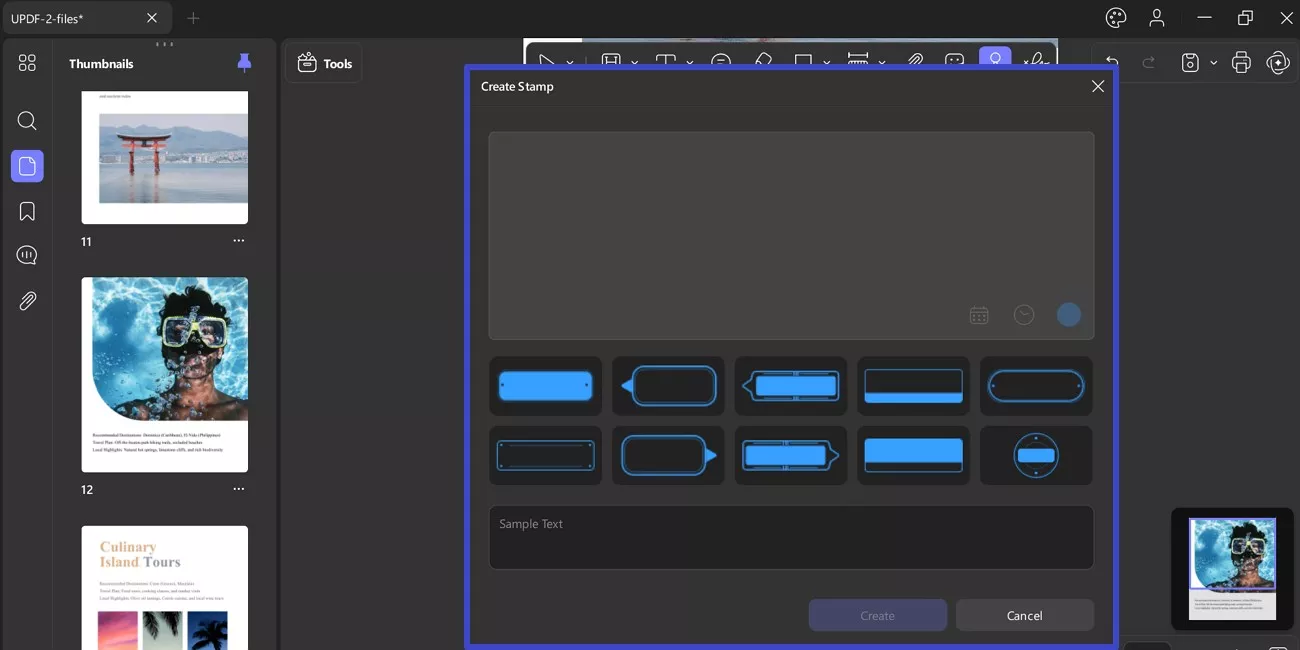
Impor: Anda juga dapat mengimpor prangko ke PDF Anda dengan mengakses bagian "Kustom" di fitur "Prangko". Klik " Impor " untuk menelusuri prangko yang sesuai dan menambahkannya ke PDF Anda dengan sukses.
Catatan: Anda dapat mengimpor atau membuat hingga 40 prangko.
10. Properti Komentar
Anda juga dapat mengatur properti saat memberi komentar pada berkas PDF Anda. Anda juga dapat mengubah warna teks, warna tepi, dan atribut fon. Anda dapat mengubah properti dengan mengklik kanan pada anotasi atau memilih Properti dari menu konteks.
11. Batalkan/Hapus Anotasi
Setelah anotasi diterapkan ke dokumen Anda, Anda dapat membatalkan/menghapusnya. Untuk membatalkan perubahan apa pun, gunakan pintasan keyboard CTRL + Z untuk membatalkan anotasi.
Anda dapat menghapusnya dengan bantuan tetikus. Arahkan ke ikon Batalkan di sudut kanan atas dan batalkan tindakan terakhir yang dilakukan pada dokumen Anda untuk anotasi.