Sign PDF Documents on Windows
Signatures are a great way to display affirmation on a specific document. While this particular element is considered a necessity in task execution, UPDF has made it easy to sign documents without flying to different places. This guide provides an overview of how to add the perfect signatures on documents using UPDF.
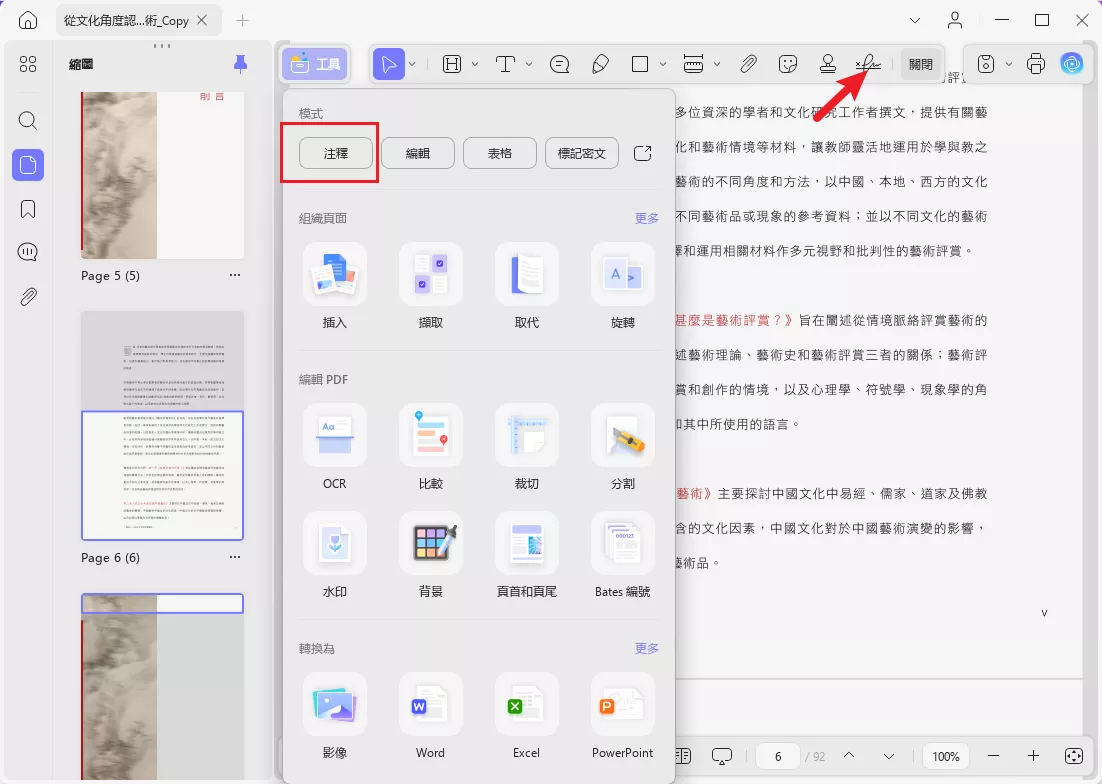
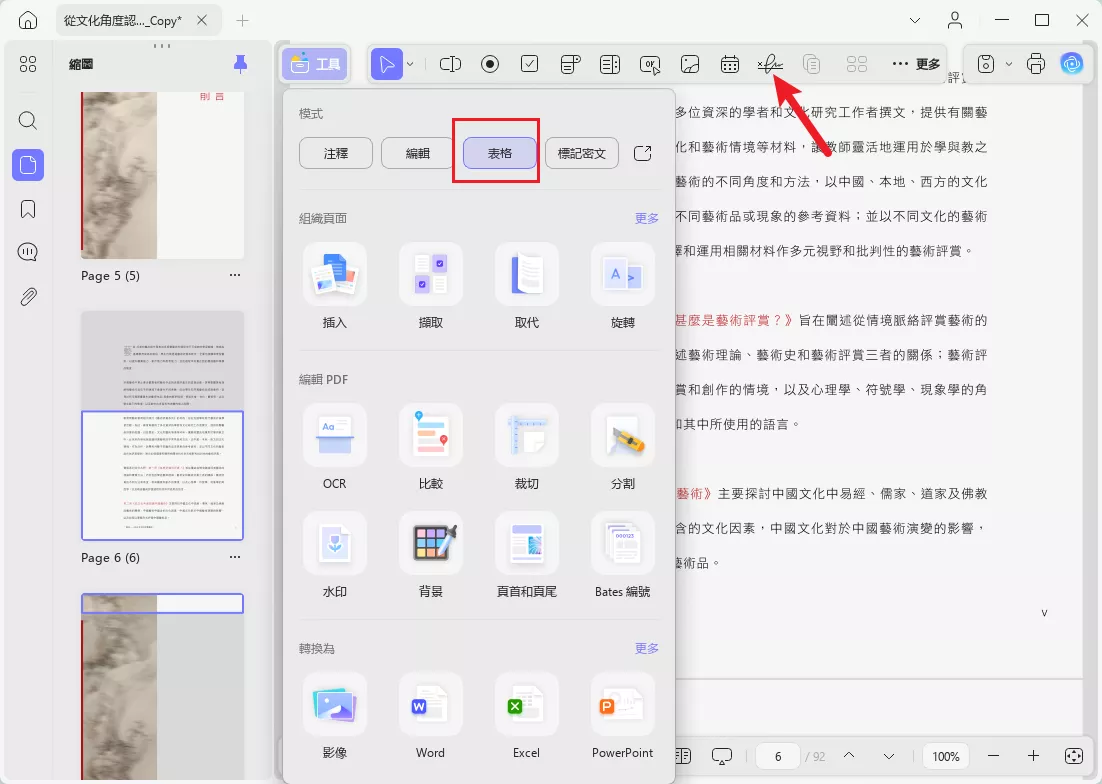
Important Note: UPDF supports both digital signatures and electronic signatures. Users can add any type of signature by switching to the corresponding mode: 'Comment' and 'Prepare Form'.
Click the below button to download UPDF and sign PDF with it by following the below guides now.
Windows • macOS • iOS • Android 100% secure
In the following section, we'll guide you through how to sign PDFs with UPDF. Alternatively, you can watch the video below.
Bonus Tip
1. How to Add an Electronic Signature
Access the "Comments" icon from the left toolbar and then proceed to the "Signature" tab from the top menu.
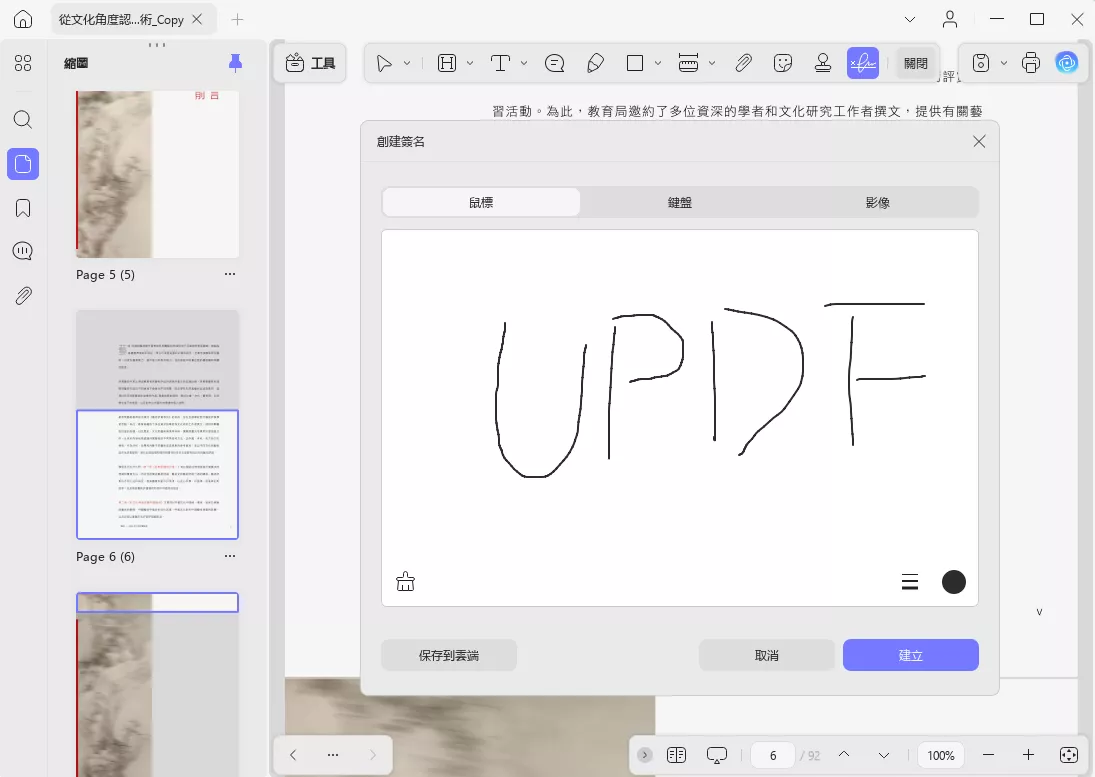
As a menu opens, click "Create" to open a new window. You can select whether to create a signature from the "Keyboard", "Mouse", or "Image".
Method 1. Create a Signature from Mouse
If you wish to create the signature from the "Mouse," draw the signature on the canvas.
You can adjust the thickness and color of the signature using the options in the bottom-right corner of the window. To remove the signature, simply select the 'Clear' button. Additionally, you can save the created signature to UPDF Cloud, allowing you to reuse it across other platforms like Android, iOS, or Mac.
On satisfaction, click "Create" to add the signature to the list. Select it from the basic signature menu and add it to the signature field in the PDF.
After creating and adding a signature, you can easily drag and drop it to the desired location in the PDF. You can also click the border to zoom in or out. Additionally, UPDF provides options to copy, delete, add notes, and view properties.
Method 2. Create a Signature from the Keyboard
If you select "Keyboard" for creating the signature, you can easily type in your name and set the color from the option available on the top right. Tap "Create" once you are creating the signature.
Similar to the first method, creating signatures with the keyboard also lets you clear the signature or change its color. You can also save it to UPDF Cloud for cross-platform access.
Method 3. Create a Signature from an Image
Another method for creating a signature for your PDF is by using an image. This allows you to handwrite your signature on paper and then use it in your digital files. Make sure to sign on white paper for the best results.
To add your signature, simply click the image icon and select your signature image from local storage.
2. How to Add a Digital Signature
In some cases, such as filling out professional PDF forms, you may want to add a digital signature to authenticate the document. In UPDF, creating, adding, and editing a digital signature is relatively easy. Let's discuss how you can add digital signatures to your documents.
Option 1. Create and Add a Digital Signature
There are two options offered by UPDF for adding a digital signature to your PDF. In this discussion, we will explore the first option: manually creating and adding a signature to your PDF.
Step 1. Adding the Signature Box
- In the PDF document you opened in UPDF, go to the left menu and select the Prepare Form option, the fourth icon from the top.
- From the top bar menu, select the Digital Signature Menu and click it to open a select-and-drop action.
- Now, draw a box wherever you want. You can drag and place it at any location.
- Double-click on it, and you can customize the properties of it.
- General Settings: You can customize the signature name, add a tooltip, lock or unlock the signature field, adjust its visibility, make it read-only, or enable the "Required" option to highlight the signature field.
- Style Settings: You can personalize the border, fill, and text colors, change the font and font size, and manually set the dimensions of the signature field.
- Action Settings: UPDF also allows you to add actions associated with the signature.
- Once you've finished the customization and successfully added the digital signature field, you can save the document, allow others to fill out the form, and leave a digital signature at the end.
Step 2. Creating Digital Signature
You can add any created or saved signature to any document.
- Go to the Reader mode and click on the signature box.
- You can either create or import your digital signature.
- To create your digital signature, hit the Create button.
- Enter the details in the figure below in the following menu and hit OK to continue.
- Once your digital ID is created, you must insert at least a six-character password to protect your ID.
- Now, hit the Sign button to add a digital signature to your PDF file.
- UPDF will ask you to select the storage destination for your digitally signed file. Do so, and you are done!
- You can click on the signature to view its properties and the certificate.
Option 2. Import and Add a Digital Signature
An alternative way is to import the signature by clicking the import button instead of the Create.
- You can import an existing digital ID by browsing your device.
- Follow up by entering the Digital ID password, as you can't access a digital ID if you don't know its password.
- After that, hit Save.
- Click on the signature, select your imported digital ID from the drop-down menu, and click Sign.
UPDF provides so cool features. Do not hesitate, to upgrade to the pro version at a big discount now.