UPDF لـWindows
 UPDF لـMac
 UPDF لـiPhone/iPad
 UPDF لـAndroid
  Nomostar
 UPDF AI عبر الإنترنت
 UPDF Sign
 IvyCraft
 تحرير PDF
 تعليق على PDF
 إنشاء PDF
 نموذج PDF
 تحرير الروابط
 تحويل PDF
 OCR
OCR PDF إلى Word
 PDF إلى صورة
 PDF إلى Excel
 تنظيم PDF
 دمج PDF
 تقسيم PDF
 قص PDF
 تدوير PDF
 حماية PDF
 توقيع PDF
 تنقيح PDF
 تطهير PDF
 إزالة الأمان
 قراءة PDF
 UPDF Cloud
 ضغط PDF
 طباعة PDF
 معالجة الدُفعات
 حول UPDF AI
 حلول UPDF AI
 دليل مستخدم AI
 الأسئلة الشائعة حول UPDF AI
 تلخيص PDF
 ترجمة PDF
 الدردشة مع PDF
 الدردشة مع الصورة
 تحويل PDF إلى خريطة ذهنية
 الدردشة مع AI
 شرح PDF
 أدوات PDF بالـ AI
 أدوات صور AI
 أدوات دردشة AI
 أدوات كتابة AI
 أدوات دراسة AI
 أدوات عمل AI
 أدوات AI أخرى
 توليد الإشارات المرجعية AI
 تلخيص الإشارات المرجعية AI
 توليد العلامة المائية AI
 توليد الخلفيات AI
 توليد الملصقات AI
 توليد الأختام AI
 مجموعة الكتابة AI
 UPDF Copilot
 إدارة الصفحات AI
 البحث الدلالي AI
 PDF إلى Word
 PDF إلى Excel
 PDF إلى PowerPoint
 دليل المستخدم
 حيل UPDF
 الأسئلة الشائعة
 مراجعات UPDF
 مركز التنزيل
 مدونة
مدونة غرفة الأخبار
 المواصفات التقنية
 التحديثات
 UPDF مقابل Adobe Acrobat
 UPDF مقابل Foxit
 UPDF مقابل PDF Expert
أجهزة Apple تشكل نظامًا مغلقًا وآمنًا وسريعًا، ويمكن ربط العديد من الملفات في العمل والحياة بسلاسة بين العديد من الأجهزة. ومع ذلك، سيجد الأشخاص الذين ليسوا على دراية ببيئة Apple صعوبة في استخدامها. نحن جميعًا بحاجة إلى نقل الملفات من MacBook إلى iPhone أو iPad لأسباب مختلفة. سيشارك هذا المقال طرقًا مختلفة حول كيفية نقل الملفات من Mac إلى iPhone. يمكنك استخدام أي طريقة لنقل الملفات من Mac إلى iPhone أو iPad.
كيفية نقل الملفات من Mac إلى iPhone بدون استخدام iTunes
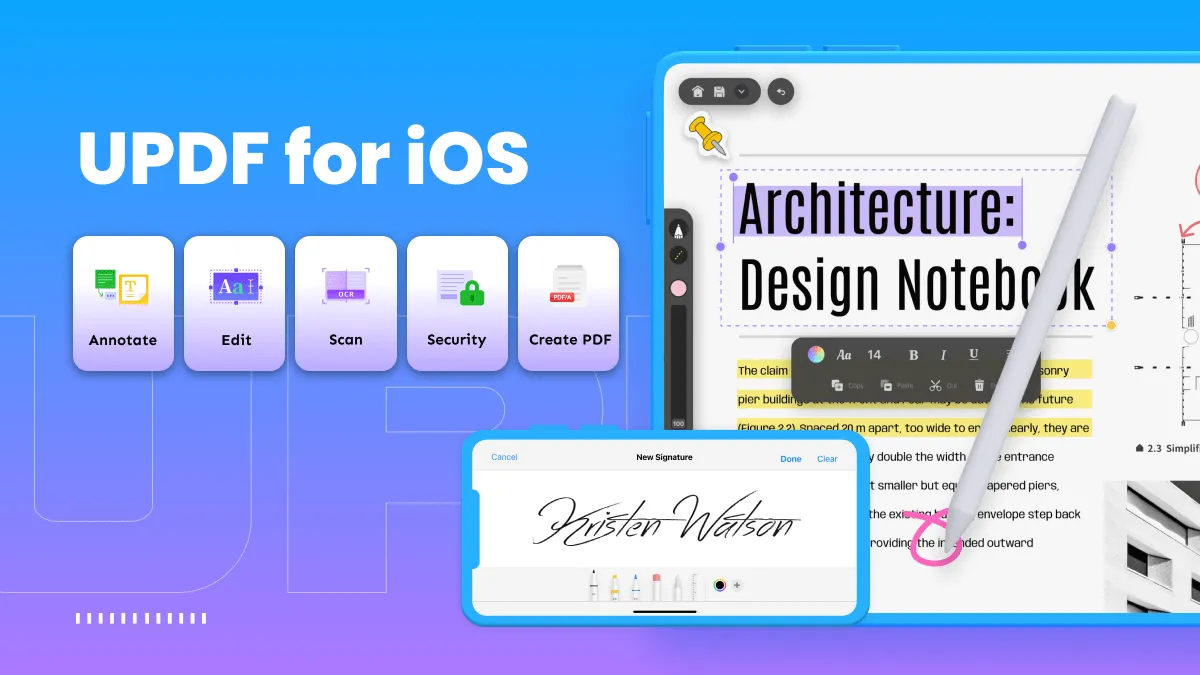
UPDF for iOS هو تطبيق إدارة ملفات متكامل يمكن أن يساعدك في إدارة ملفات مختلفة بشكل أكثر فعالية على الأجهزة المحمولة. يمكن نقل الملفات وعرضها ونسخها وتنظيمها ومشاركتها وحمايتها. إنه سريع وسهل الاستخدام، ويتصل بجهاز الكمبيوتر الخاص بك بشكل لاسلكي عبر شبكة WiFi لنقل الملفات عبر منصات متعددة بسرعة.
يتضمن UPDF مجموعة واسعة من الوظائف، مثل دعم التمرير بإصبعين، مشاركة السحابة، تعليقات PDF والصور، المسح إلى PDF، مساحة آمنة، وما إلى ذلك. يجعل UPDF إدارة الملفات والمجلدات على الأجهزة المحمولة أسهل وأكثر كفاءة من أي وقت مضى. انضم إلى ثورة PDF مع UPDF. قم بالتنزيل الآن وابدأ في الاستمتاع بالبساطة!
Windows • macOS • iOS • Android آمن بنسبة 100%
خطوات نقل الملفات من Mac إلى iPhone
مع UPDF، يمكنك بسهولة استيراد الملفات من Mac إلى iPhone 16 دون استخدام أي كابل. كل ما عليك فعله هو الاتصال بجهاز Mac و iPhone 16 بنفس شبكة Wi-Fi. فيما يلي الخطوات لذلك:
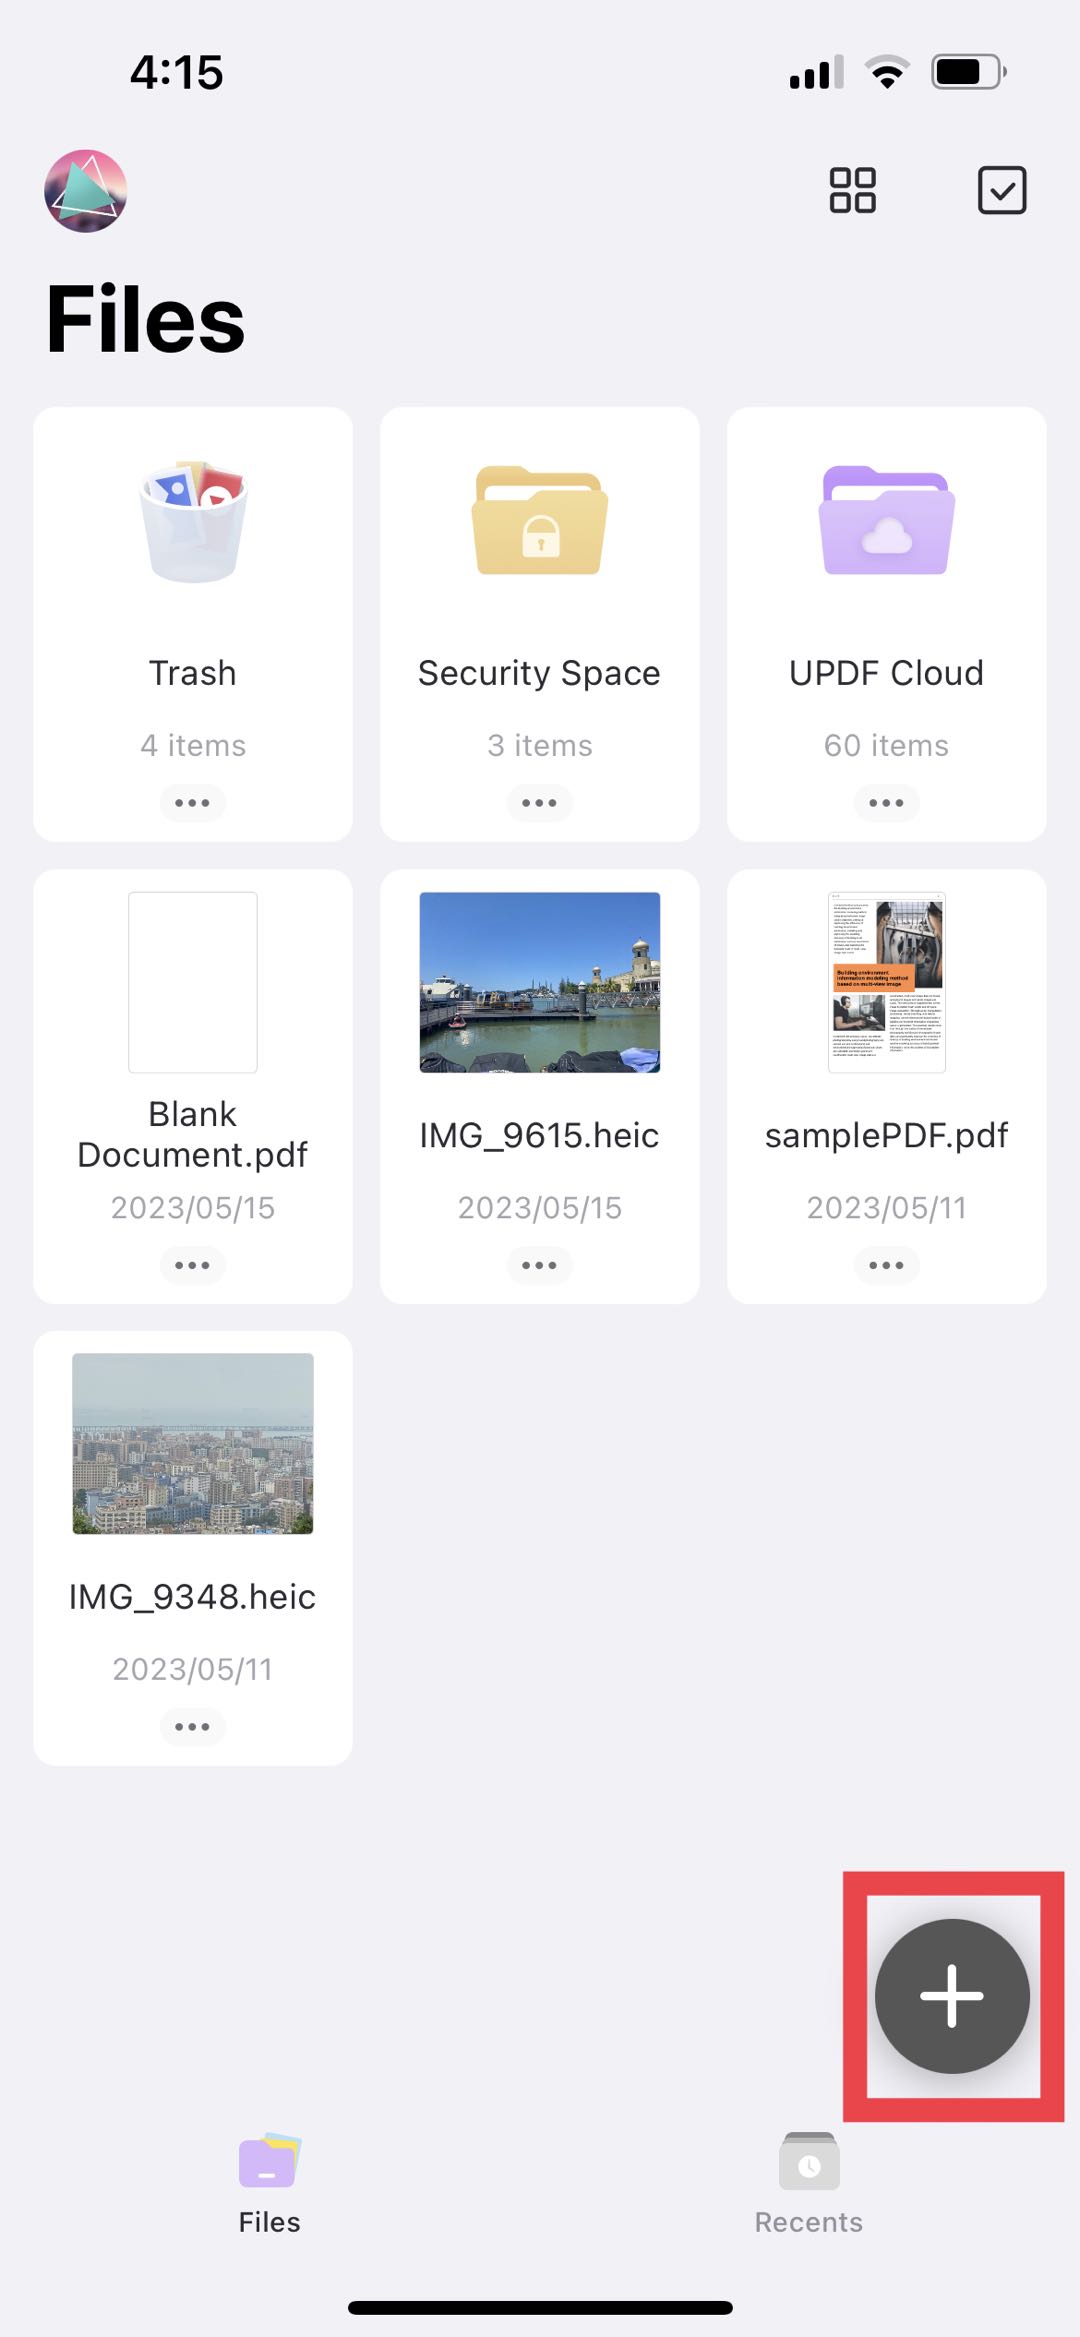
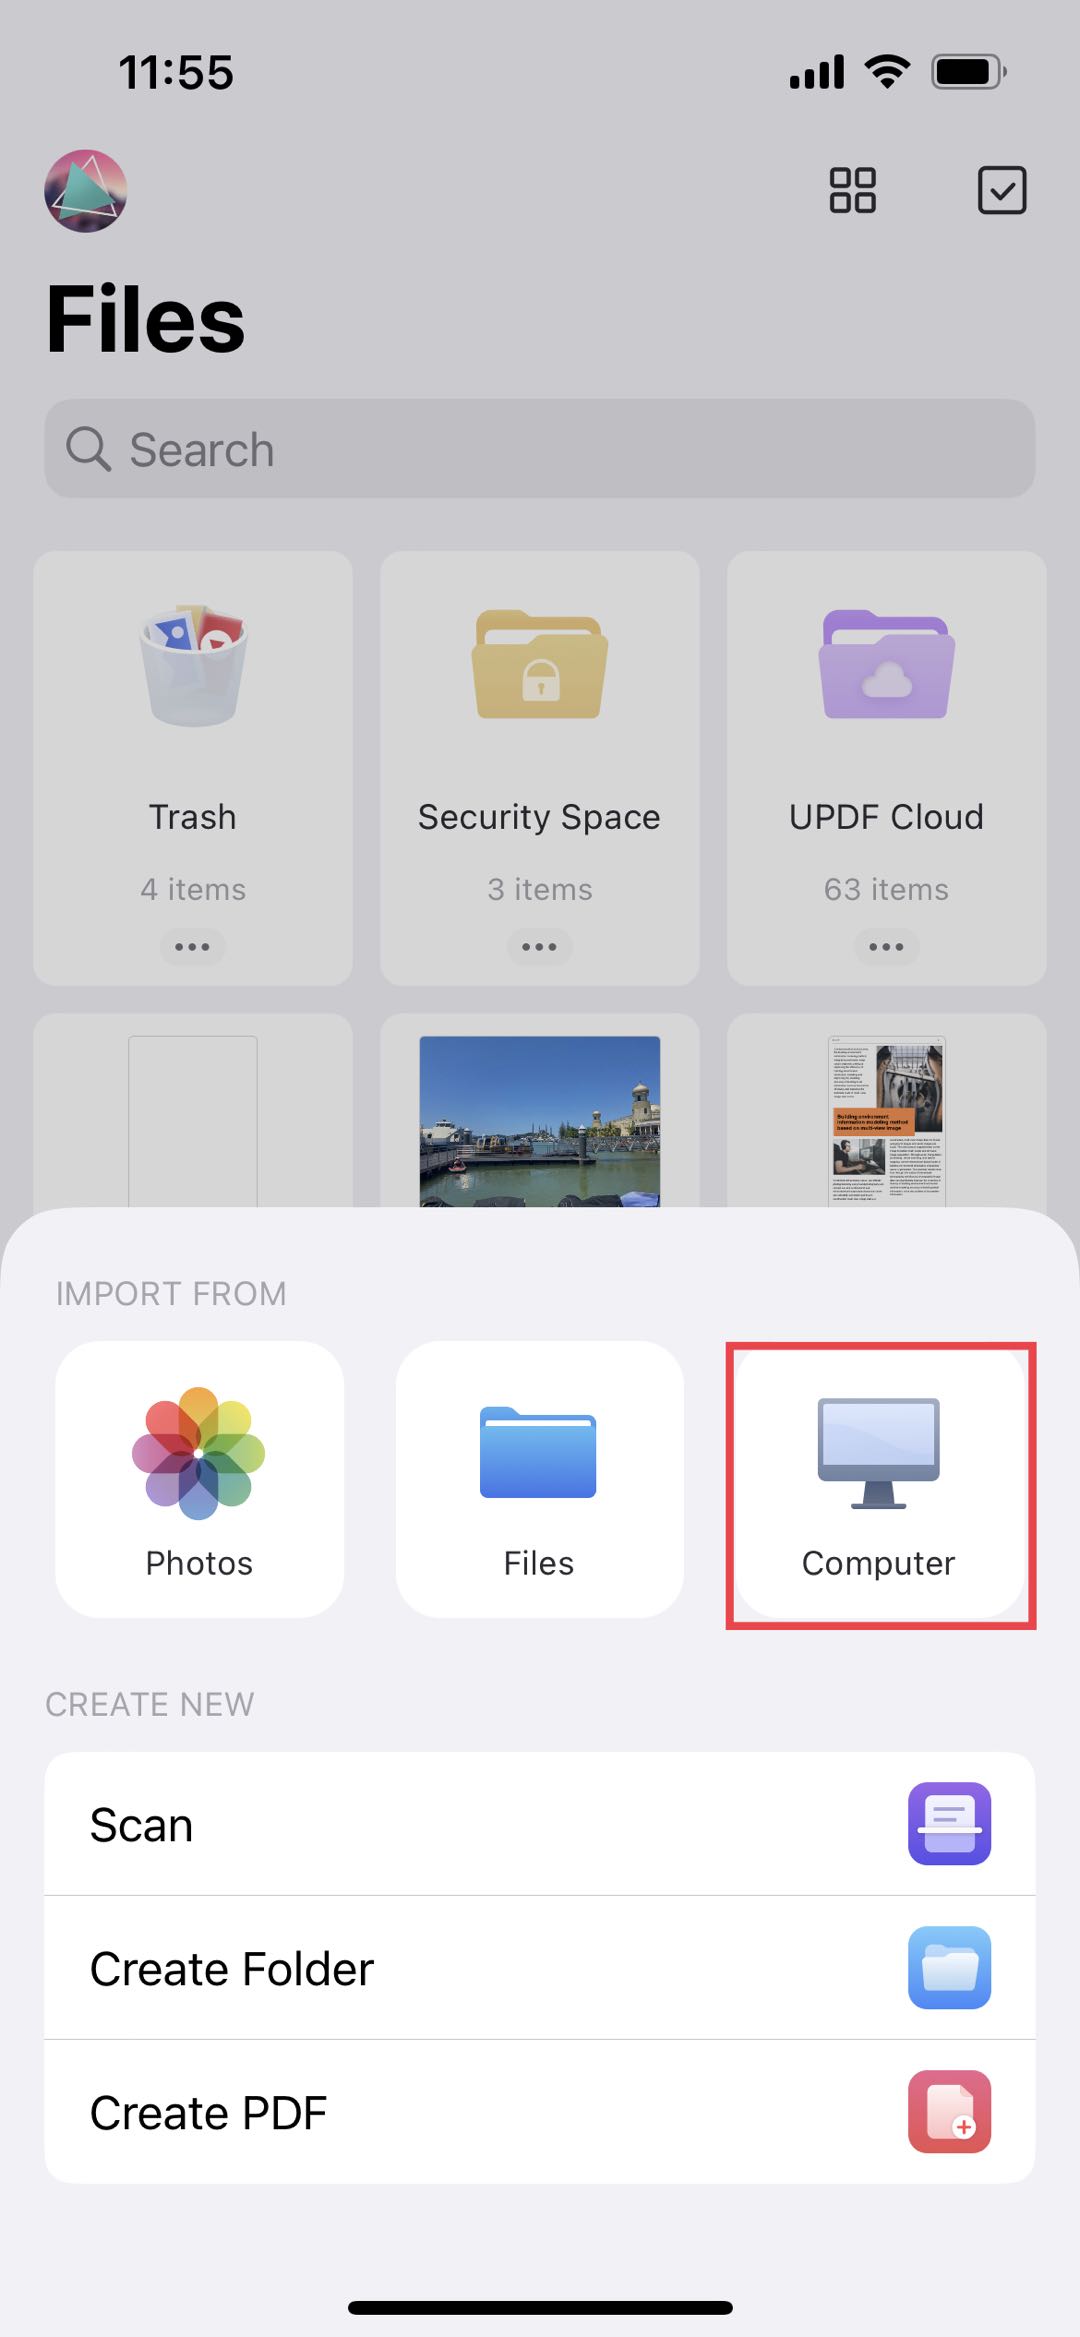
الخطوة 1: قم بتنزيل UPDF عن طريق النقر على زر "تنزيل مجاني" أدناه. افتح UPDF ومن ثم يمكنك رؤية أسفل الزاوية اليمنى للتطبيق، انقر على رمز "+".
Windows • macOS • iOS • Android آمن بنسبة 100%
الخطوة 2: كمصدر، حدد جهاز "الكمبيوتر".
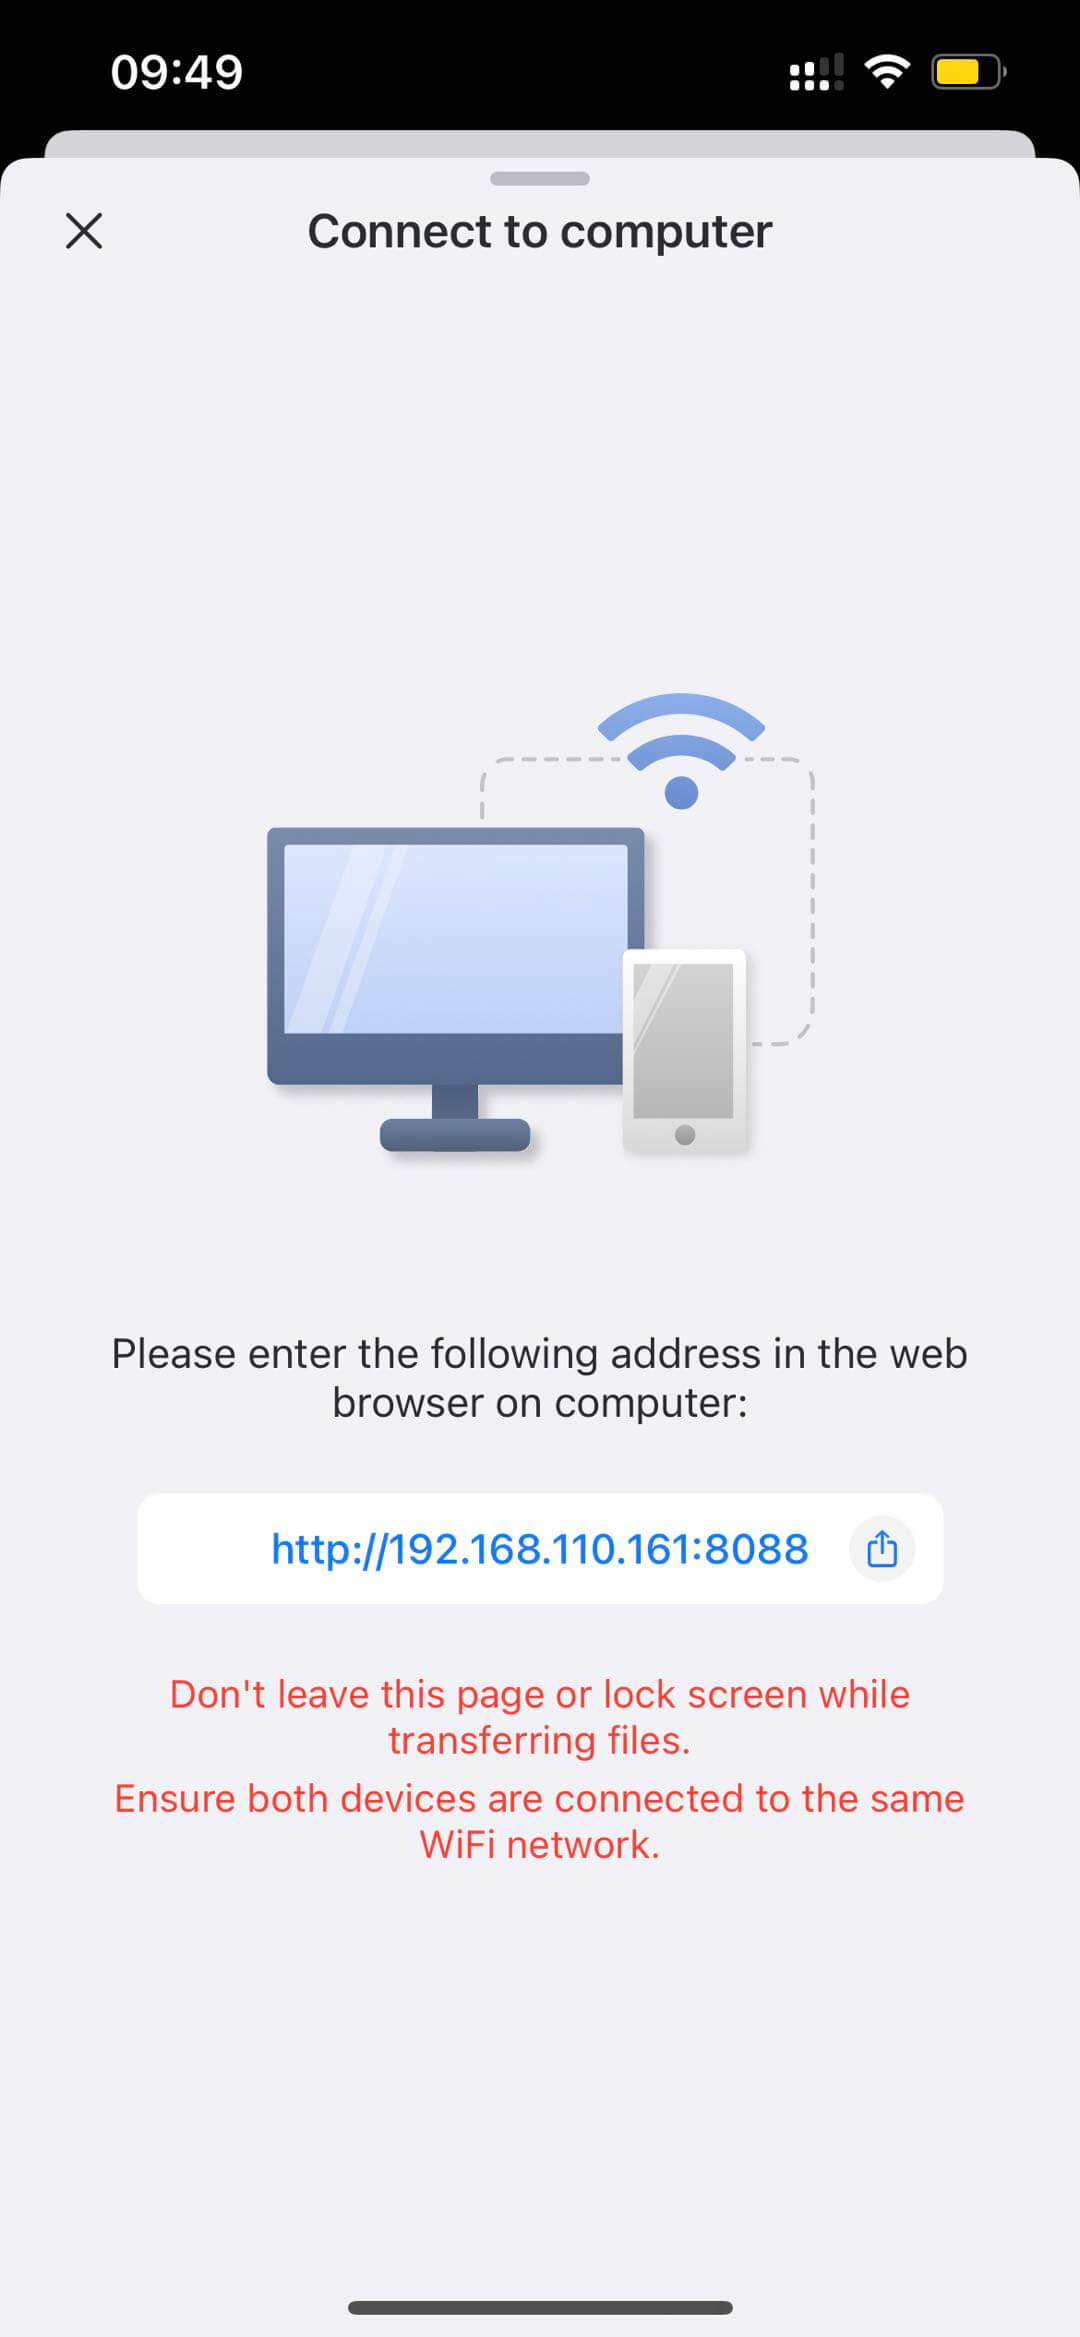
الخطوة 3: على شاشة جهاز iOS الخاص بك، سترى عنوان URL؛ قم بنسخه ولصقه في شريط العناوين لعلامة تبويب متصفح جديدة على جهاز الكمبيوتر الخاص بك، ثم اضغط على "إدخال" (Enter).
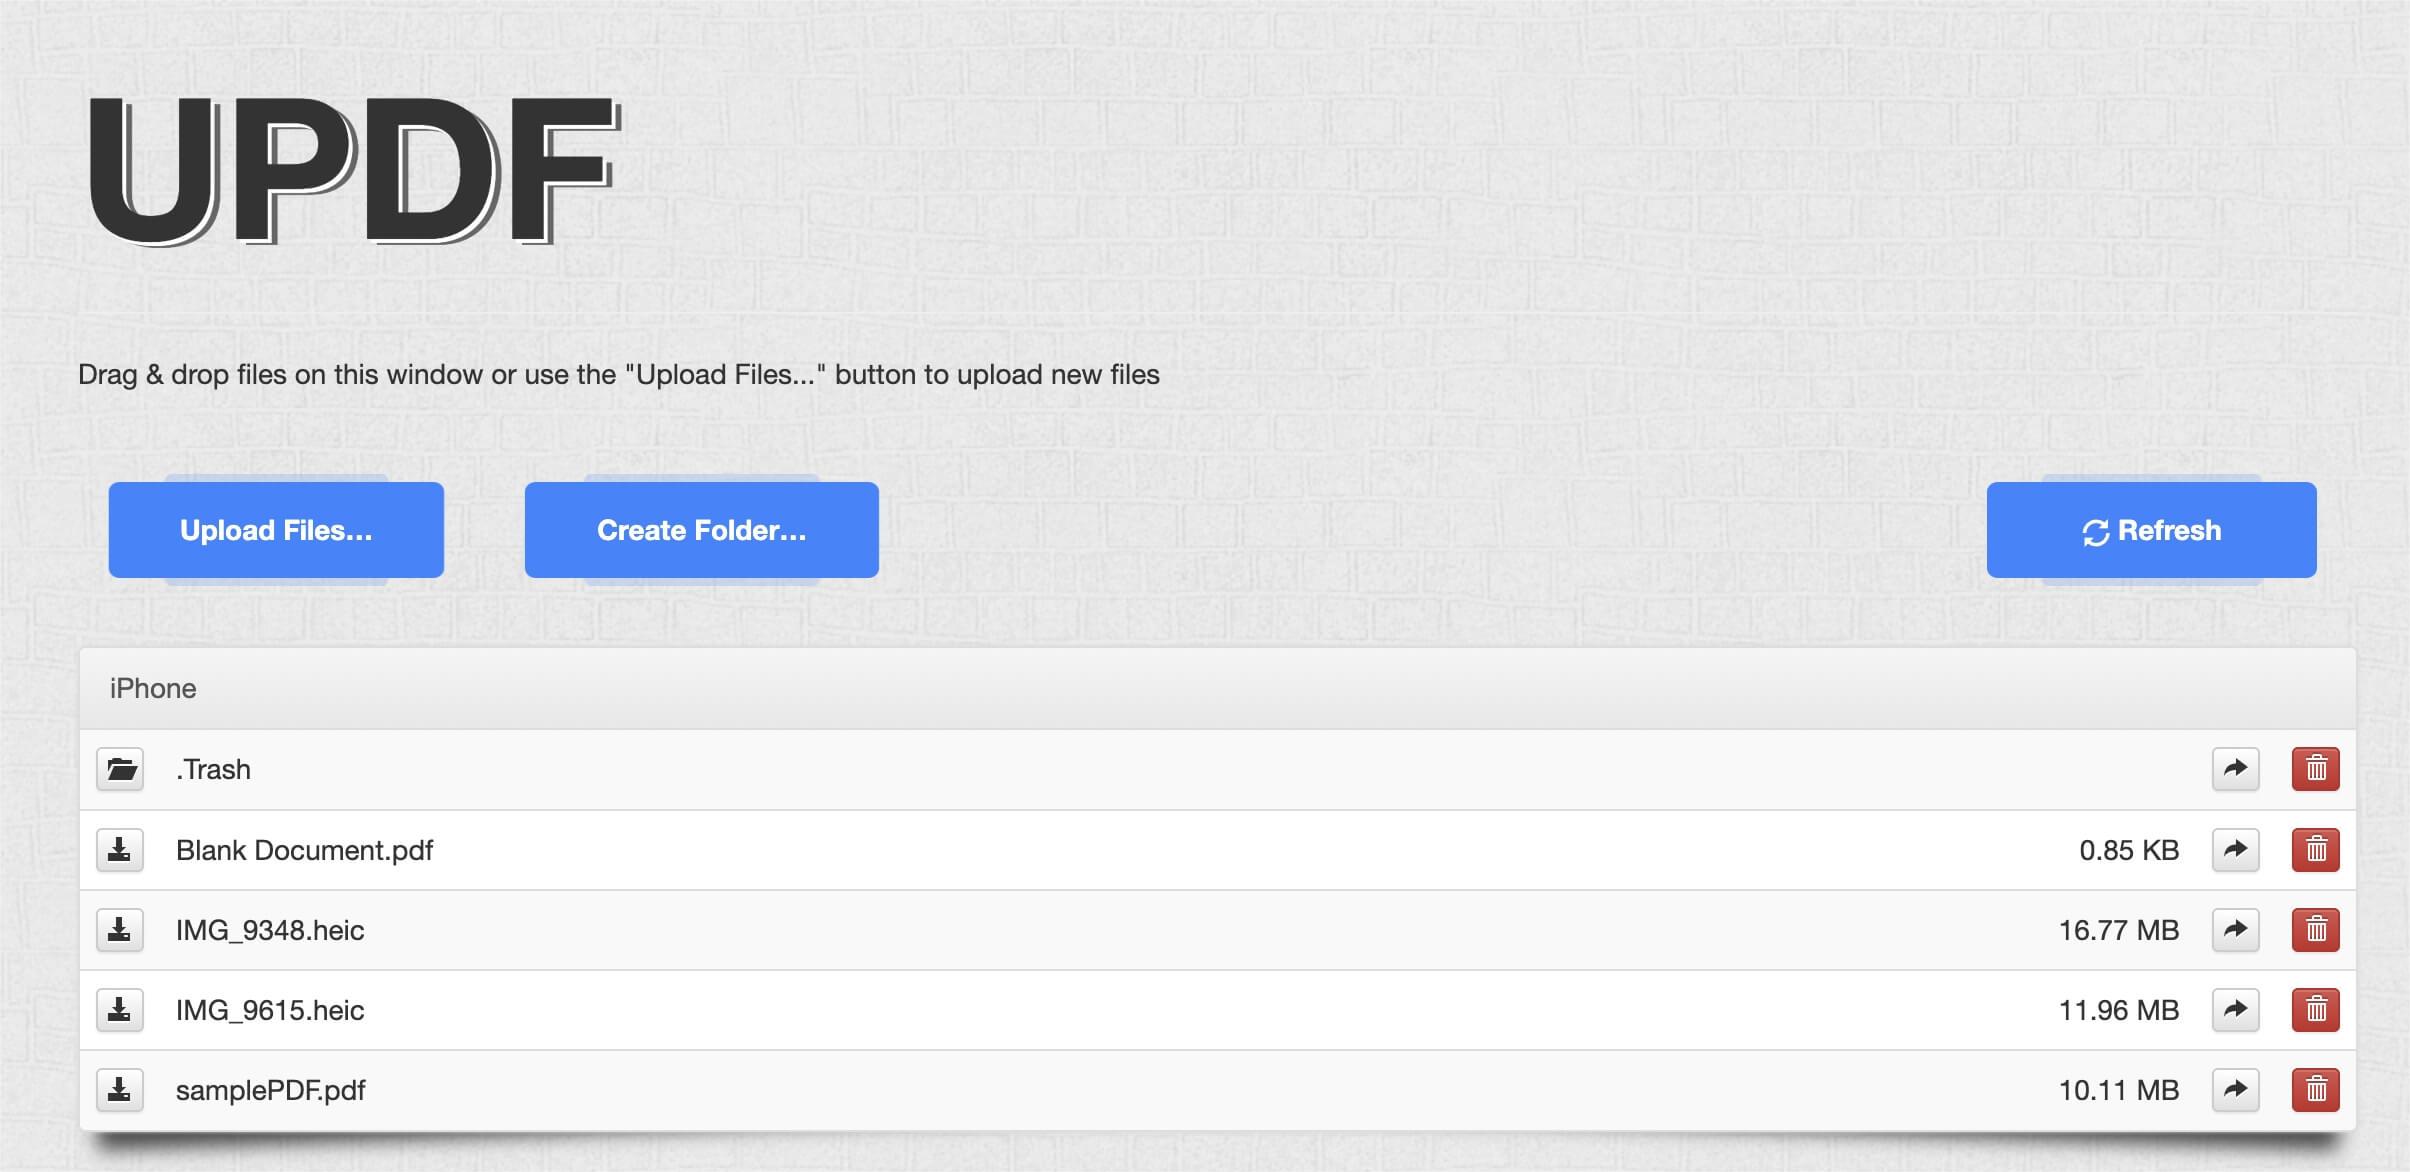
الخطوة 4: يمكنك الآن رؤية مجلدات UPDF الخاصة بك في نافذة المتصفح، ويمكنك استيراد الملفات من ذاكرة الكمبيوتر المحلية باستخدام زر "تحميل الملفات...". بهذه الطريقة، يمكنك رفع الملفات من Mac إلى iPhone 16. بمجرد رفع الملفات من جهاز Mac، سترى الملف على iPhone 16 الخاص بك. مذهل، أليس كذلك؟
UPDF هو تطبيق إدارة ملفات رائع لأجهزة الآيباد والآيفون. يحتوي التطبيق على واجهة رائعة وينظم ملفاتك تلقائيًا حسب التاريخ والنوع، ويعرض حتى الملفات الأخيرة التي استخدمتها على التطبيق. كما أن UPDF مفيد أيضًا لنقل الملفات من جهاز Mac إلى iPhone أو iPad. من خلال هذا التطبيق، يمكنك الاستمتاع بخيارات مختلفة. فيما يلي بعض ميزات UPDF لنظام iOS:
ميزات UPDF:
- دعم قائمة وإدارة الملفات بالصورة المصغرة؛
- دعم فرز الملفات حسب اسم الملف والتاريخ وحجم الملف؛
- دعم إعادة تسمية الملفات والمجلدات؛
- دعم نسخ الملفات وإنشاء نسخ من الملفات والمجلدات؛
- دعم إزالة الملفات والمجلدات إلى سلة المهملات؛
- دعم نقل الملفات من Mac إلى iPhone 16؛
- دعم إرسال الملفات والمجلدات كمرفقات بريد إلكتروني؛
- دعم الملفات والمجلدات المضغوطة؛
- دعم التعليق وتحرير ملفات PDF؛
- دعم مشاركة الملفات مع السحابة.
هل أنت مستعد للوقوع في حب تطبيق PDF؟ UPDF هنا ليفوز بقلبك. قم بالتحميل الآن واحصل على إصدار Pro من UPDF واستمتع بعالم ميزات PDF المتميزة.
Windows • macOS • iOS • Android آمن بنسبة 100%
كيفية نقل الملفات من Mac إلى iPhone باستخدام USB
إذا كان لديك محرك أقراص USB لـ iPhone 16 وتبحث عن نقل الملفات من Mac إلى iPhone أو iPad، يمكنك القيام بذلك مباشرة دون كابل USB. ستحتاج إلى تنزيل وتثبيت تطبيق نقل البيانات على جهاز iOS أو iPadOS لاستيراد الملفات من USB إلى iPhone 16 الخاص بك. يعتمد التطبيق الذي تحتاجه على علامة التجارية لمحرك الأقراص الفلاش.
لنقل الملفات من Mac إلى iPhone أو iPad باستخدام USB:
- الخطوة 1: قم بتوصيل USB بجهاز Mac الخاص بك.
- الخطوة 2: قم بنسخ ولصق الصور ومقاطع الفيديو من Mac إلى USB.
- الخطوة 3: قم بتنزيل وتثبيت تطبيق نقل البيانات على iPhone أو iPad الخاص بك.
- الخطوة 4: قم بتوصيل USB بجهازك iDevice عبر محول Type C.
- الخطوة 5: عند رؤية خيارات نقل البيانات، اختر نسخ الملفات من USB.
- الخطوة 6: حدد العناصر التي ترغب في نقلها واتبع التعليمات على الشاشة لإكمال العملية.
كيفية نقل الملفات من Mac إلى iPhone باستخدام iTunes
جعلت Apple iTunes أداة مشاركة الملفات وإدارة الأجهزة القياسية لـ iPhone 16 على Mac وWindows. تدعم بعض التطبيقات المشاركة المباشرة للملفات داخل التطبيق من خلال iTunes. لذا، باستخدام كابل USB إلى Lightning، يمكنك بسهولة نقل الملفات بين iPhone 16 وMac باستخدام iTunes.
على الرغم من ذلك، لا يسمح iTunes بالوصول إلى دليل تطبيق الملفات بأكمله. يمكنك ببساطة الحصول على الملفات من تطبيق مدعوم بـ iTunes من iPhone 16 باستخدام Mac باستخدام كابل USB. ولكن إليك كيفية نقل الملفات بين iPhone 16 وMac عبر الكابل.
- قم بتوصيل iPhone 16 بجهاز Mac الخاص بك عبر كابل USB.
- إذا كنت تستخدم إصدارًا أقدم من macOS، ستجد أن iTunes يفتح تلقائيًا على Mac الخاص بك.
- إذا كان لديك macOS Monterey أو أحدث، فافتح نافذة Finder.
- ابحث عن جهازك من اللوحة الجانبية اليسرى وانقر عليه.
- يمكنك الحصول على الموسيقى ومقاطع الفيديو والأفلام والكتب الصوتية والكتب والملفات والمزيد مباشرة من النافذة.
- انتقل إلى علامة "الملفات
- يمكنك العثور على نظام الملفات للتطبيقات المدعومة.
- بشكل مثير للاهتمام، إذا كنت ترغب في نقل أي ملفات من Mac إلى تطبيق الملفات في iPhone، يمكنك نسخها مباشرة إلى نظام الملفات الخاص بأي تطبيق.
- يمكن العثور على الملفات المنسوخة في الدليل المقابل في تطبيق الملفات على iPhone 16.
هذه هي كيفية استخدام iTunes لنقل الملفات من iPhone 16 إلى Mac عبر كابل USB. ولكن يتطلب منك دائمًا أن تكون iPhone 16 وMac متصلة دائمًا عبر كابل USB لنقل الملفات وإدارة الجهاز.
الاستنتاج
يحدث نقل الملفات من Mac إلى iPhone/iPad يوميًا. لذا من الضروري معرفة كيفية القيام بالعملية. عندما ترغب في نقل الملفات أو البيانات من Mac إلى iPhone أو iPad، يمكنك العثور على حلول متعددة من المقالة. ما عليك سوى مقارنة الطرق المختلفة للحصول على الحل المطلوب وفقًا لذلك. بالنسبة للمزيد من الأسئلة حول الموضوع، يمكنك مشاركة مزيد من المعلومات في المقالة والعثور على أفضل حل هو UPDF. إنها ليست فقط سرعة نقل الملفات، بل أيضًا واجهة المستخدم التي تتيح لك التعامل معها بسرعة. UPDF تقدم الآن خصمًا كبيرًا لشكر دعم المستخدم. لا تفوت الفرصة! قم بتنزيل UPDF وتحقق من المراجعة الموضوعية لـ UPDF الآن.
Windows • macOS • iOS • Android آمن بنسبة 100%